


 Like
Like Share
Share
 Report
Introduction:
Tags are small pieces of Information that we can display on the POS.
This information may be a field from a table or just some text.
If we are using a field from some table, it is necessary that, the table can be referenced using only the fields available in the current “POS Transaction” record.
There are multiple types of Tags available like:
- System :- These tags display system information.
- Transaction :- These Tags display information regarding the current Transaction.
- Session:- These Tags display information regarding the current Session.
References:
https://help.lscentral.lsretail.com/Content/LS%20Retail/POS/Data/Tags.htm
Prerequisite:
Microsoft Dynamics 365 Business Central
LS Central
Demonstration:
In most cases, we are going to use “Transaction” type Tags so let take an example.
In this example, we are going to create a Tag which will display the manager of the Store.
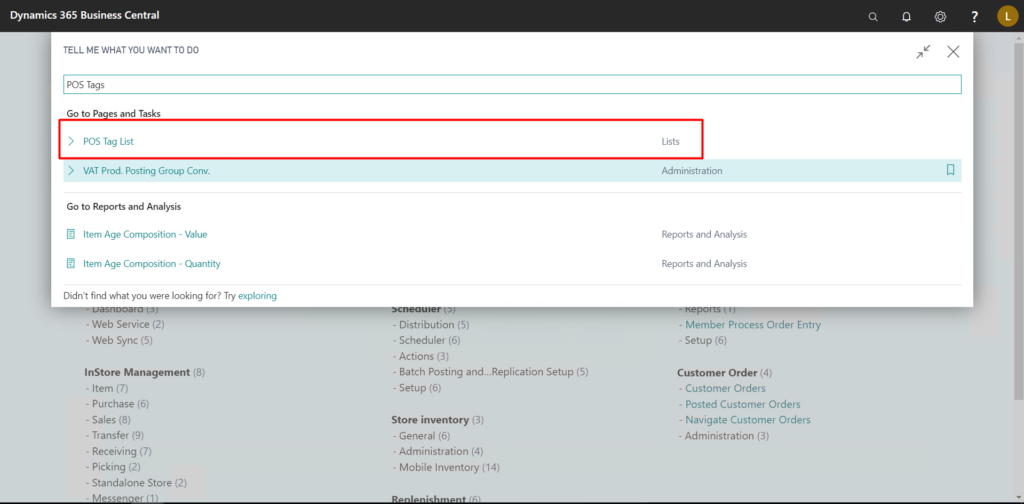
To create a Tag:
- Search for POS Tag in BC
- Create a new POS Tag, by convention the naming is <#TagName> so we are going to follow the same.
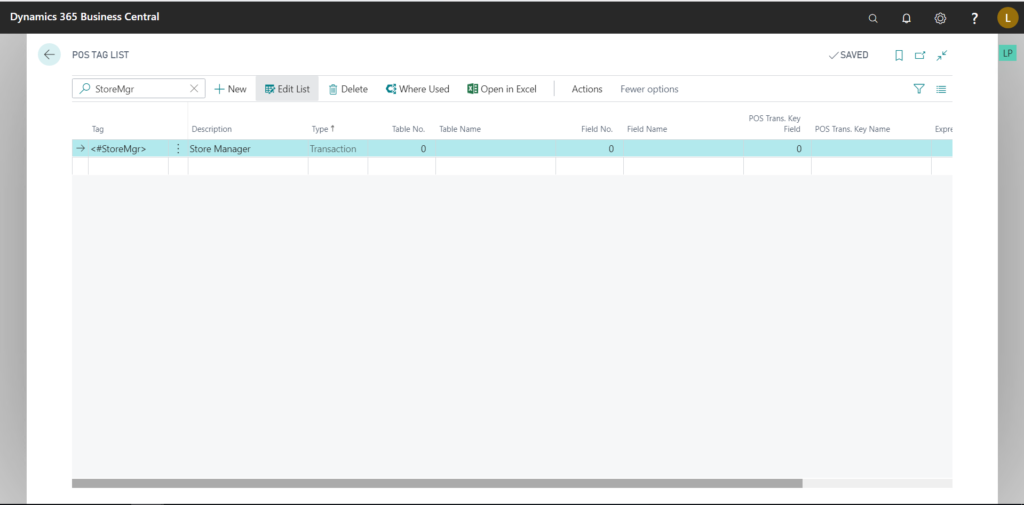
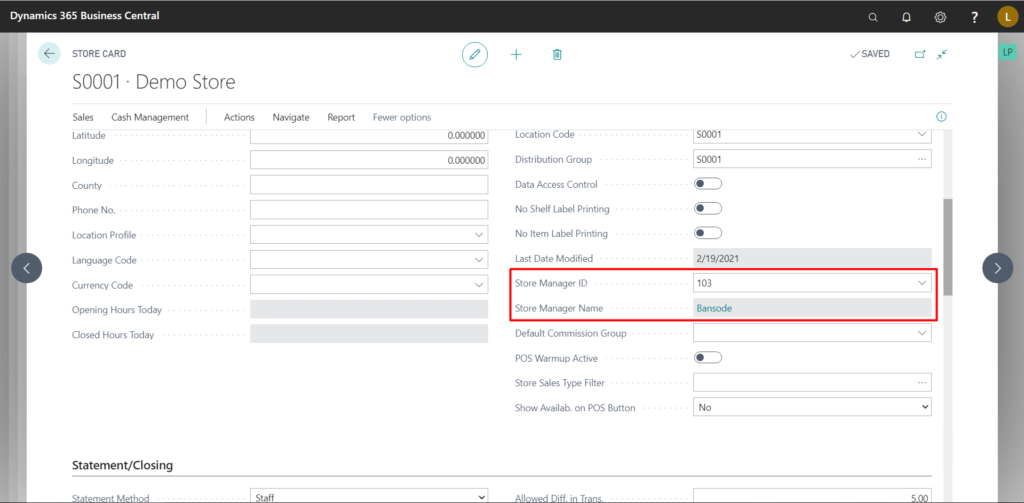
- Since the data we need is from the “Store” table we set the “Store” table’s ID in the “Table No.” field and as we need the “Manager Name” from the “Store” record, we set the “Field No.” accordingly.
- In the “POS Trans. Key Field” we specify which field will be used to reference the table mentioned in the “Table No.” field which, in our case, is Store. This list of fields is from the “POS Transaction” table.
In the “Expression” we can specify how the data should be presented, %1 is substituted for the data.
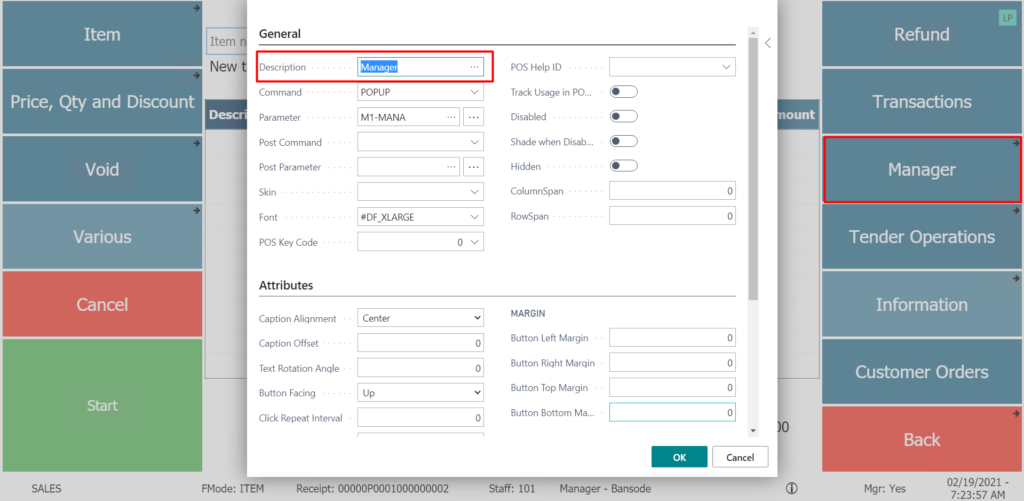
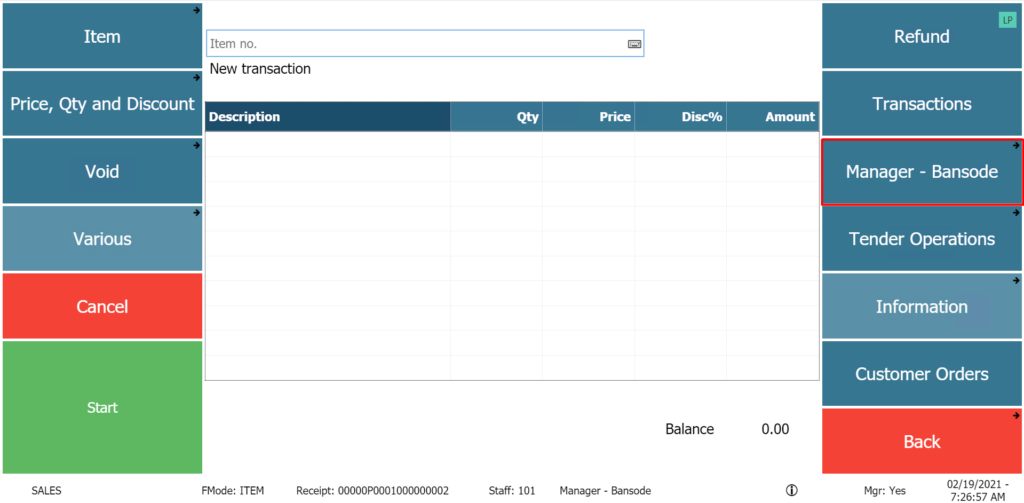
- On the POS, we can use this Tag in the “Description” field of any and all Menu Lines, for example, we can use this as the name of a button, thus the button will change depending on which Store it is being used on.
In this example, I am going to set it on “Manager” button on POS.
Right Click on the “Manager” button and click on “Button Properties.“
- Click on the three dots and choose the “Tag” that we just created and click on OK.
- Click on OK again so that the “Button Properties” page closes.
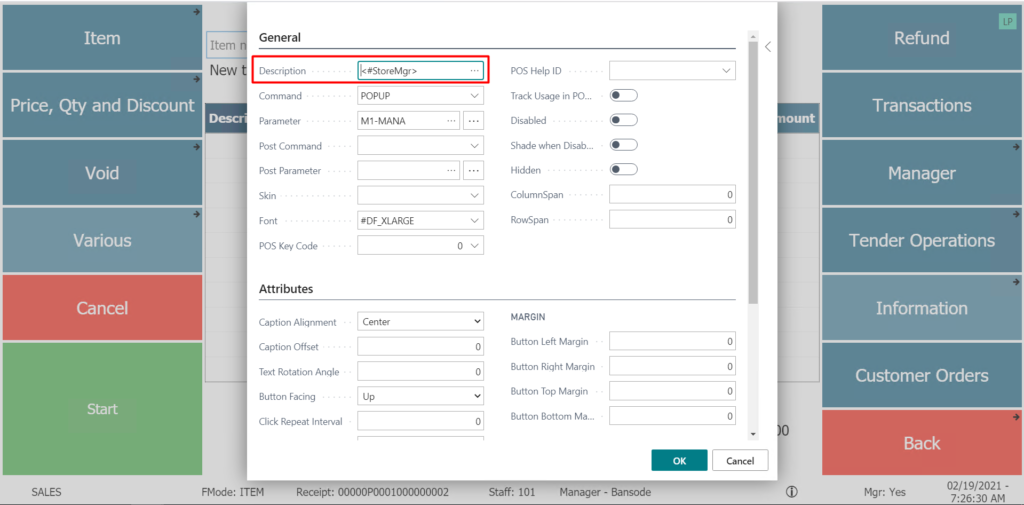
- The button now shows the “Manager Name” field of the Store, in the expression that we provided.
Conclusion:
Thus, we saw how to configure and use “Tags” in POS, in LS Central.
Thanks for reading!
The post Using POS Tags in LS Central appeared first on Cloudfronts - Microsoft Dynamics 365 | Power BI | Azure.
*This post is locked for comments