


 Like
Like Share
Share
 Report
Introduction:
This blog articles explains the ability to add custom fields is available in platform update 13 and later.
Creating Custom Fields:
Process for creating a custom field and placing that field on a form:
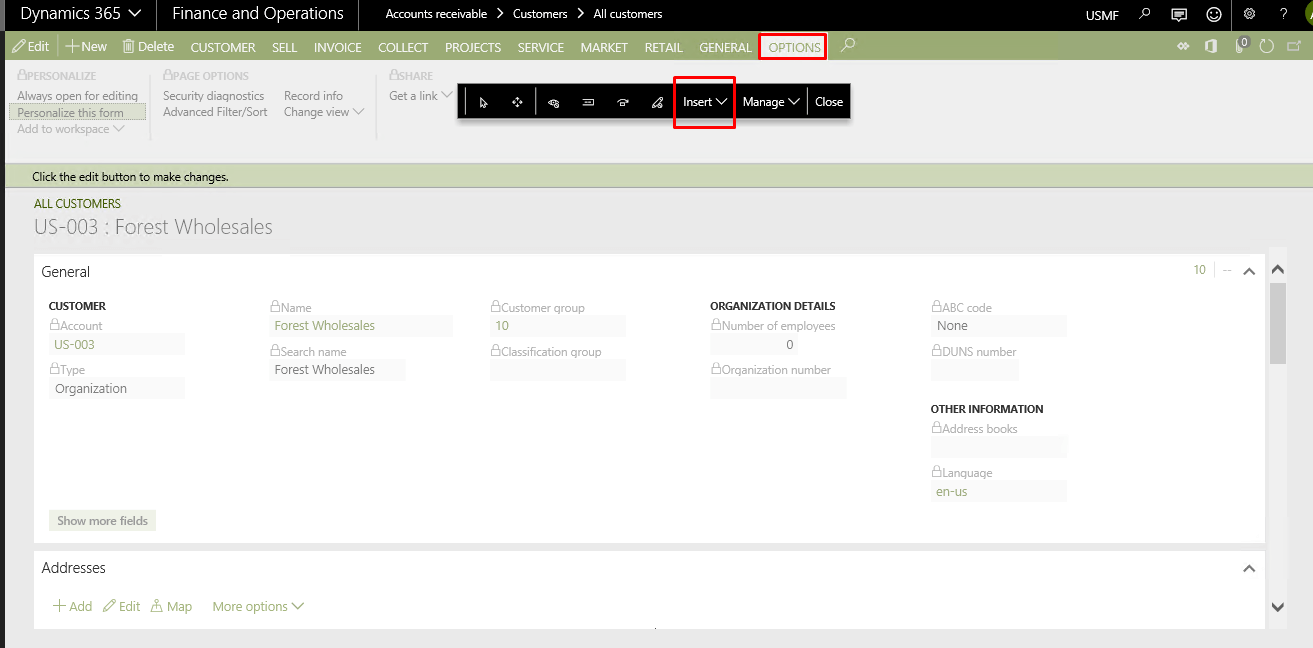
- Navigate to the form where the new field is needed.
- Click on Options and then Personalize this form
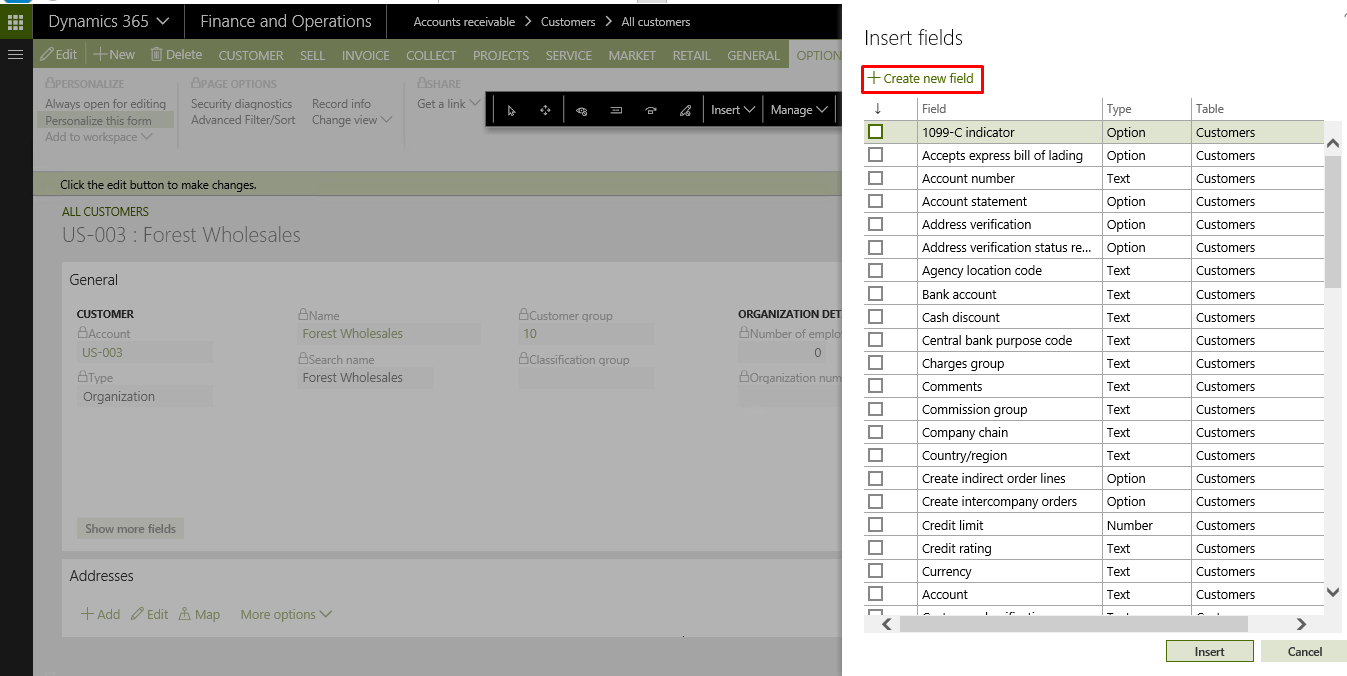
- Click Insert and then Field
- Select the region of the form where you want to expose the new field. After selection, the Insert fields dialog box will display a list of existing fields that can be inserted into the selected region of the form.
- Click the Create new field button above the list to initiate the process of creating a custom field. This will open the Create new field dialog box.
- Enter all the relevant details for the new field
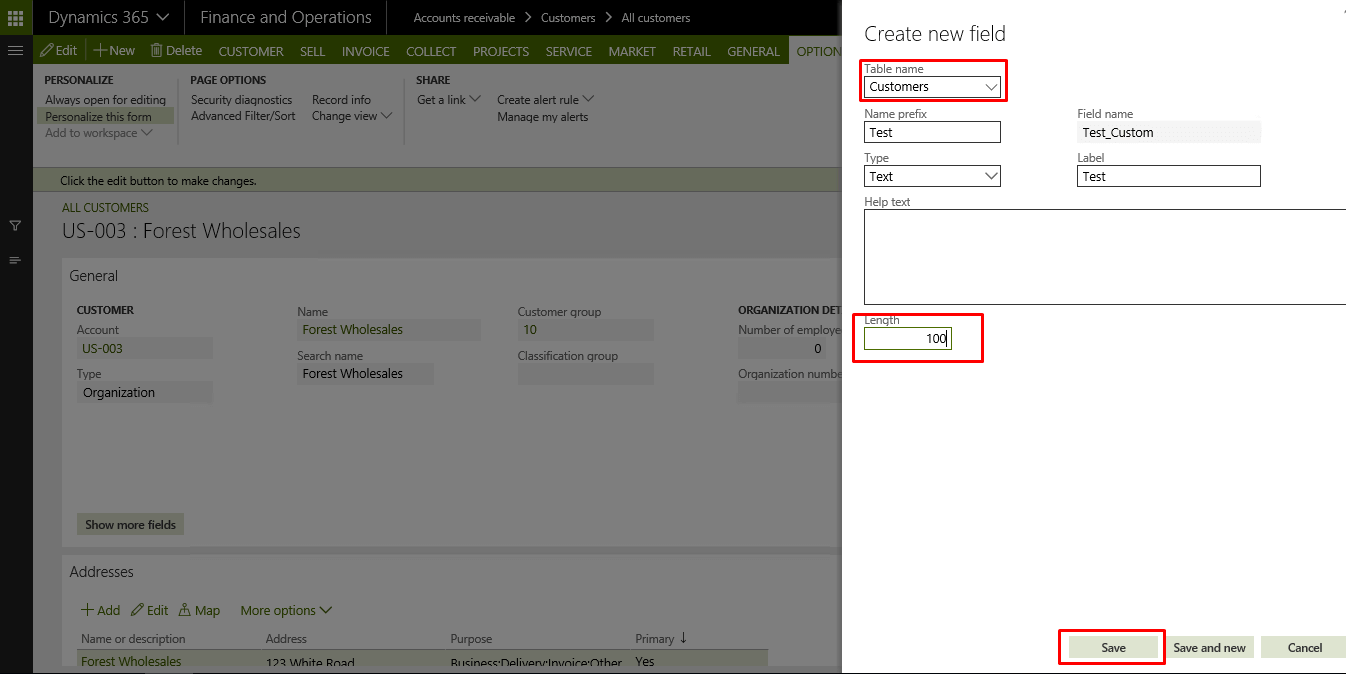
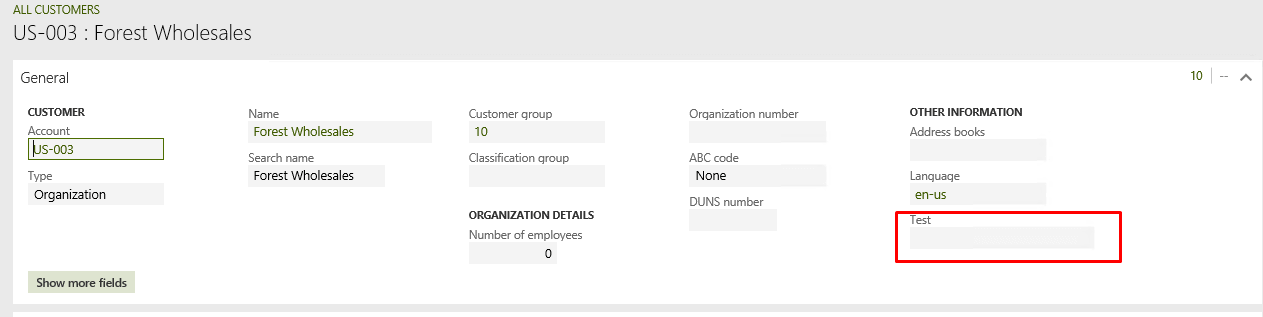
- Click save and insert the new field
- Note that there is currently a limit of 20 custom fields per table.
The post Creating Custom Fields appeared first on CloudFronts - Microsoft Dynamics 365 | Power BI | Azure.
*This post is locked for comments