


 11,325
 Like
Like Share
Share
 Report
The Portal Connector makes it easy to quickly setup a portal that interacts with CRM.
Here let us look at a simple example of setting up Lead form in Insert Mode, which creates lead record in CRM.
Open the Dashboard
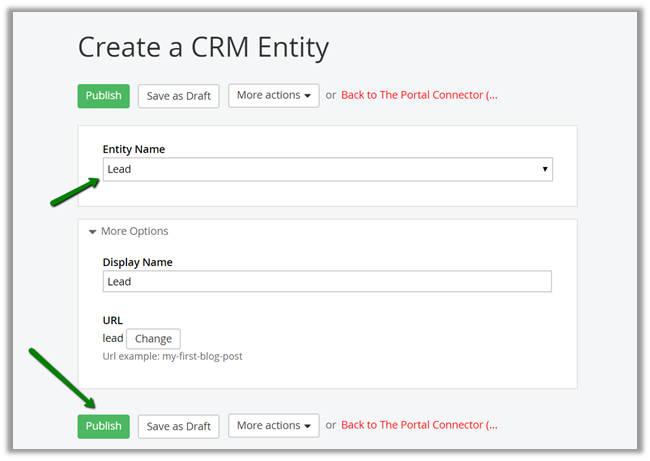
Go to CRM Entities and click on Create a CRM Entity.

Here we are creating Lead entity.
Once our lead is setup, we’d create the form.
Go to Contents – Forms.

Click on Create a form.

Inside form, first go to Layout and select TPC Form Layout.

Then go to Content tab, and add Form Configuration

Click on Edit inside Form Configuration and specify the Lead entity we just created.

Drag and add two text fields, one we will configure against first name and other with last name.


Do the same for Last Name text box and publish the form.

Next we need to create a Page wherein we’d display this form. Go to Pages and click on Create a page.

We have created a page named Lead.

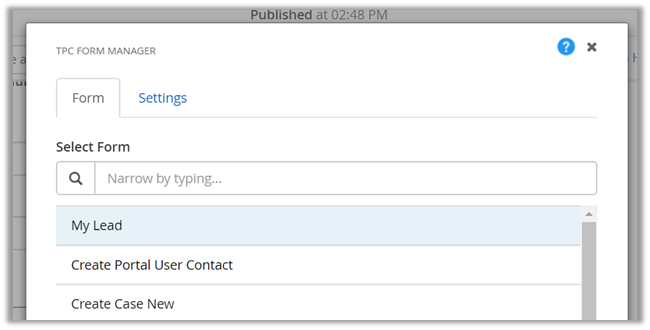
Drag TPC Form Manager in the page content.

Configure it and specify our newly created My Lead form.
Select Insert Only check box.

Publish the page and test it. Specify the values and click on Submit.

We’d get the following message.

The lead record created in CRM.

Hope it helps..
Filed under: CRM, CRM 2016, CRM 2016 Update 1, Dynamics 365, Microsoft Dynamics 365, Microsoft Dynamics CRM, The Portal Connector, TPC Tagged: CRM, Dynamics 365, Microsoft Dynamics CRM, The Portal Connector, TPC


*This post is locked for comments