


 236
236 Like
Like Share
Share
 Report
Using Git as a repository/source control with Visual Studio 2019
Let us go through the steps to set up a Git Repository in Visual Studio 2019.
Open Visual Studio 2019
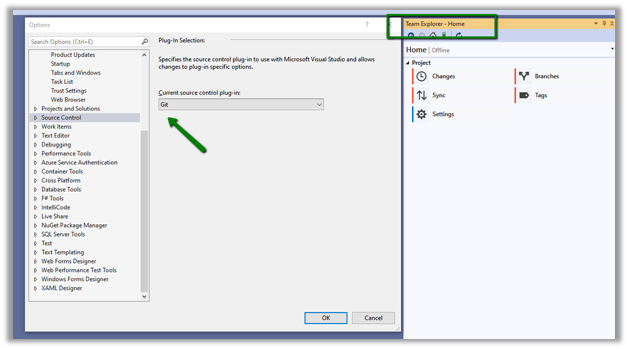
Go to Tools à Option and Set Git as source control plugin (if not set)
To create a new Repository, select Home àProjects and New Repository.

Provide the path and click on Create.

Click on the repository created to open it in the Team Explorer.


Click on Changes, which shows the files added as part of the creation of the Git Repository.
Click on Commit Staged to add the files to the local repository.

To sync it to the remote repository, we can click on Sync.

Now to add the solution to the Git Repository, back in the Home page of team explorer, click on New for the Solutions.

Follow through the Wizard. Here we have added a new solution of type Console Application to it.

Again, go…
View original post 196 more words
*This post is locked for comments