


Transfer Order in AX 2012
Views (26252)
 TheAXEffect
 575
575
 Like
Like Share
Share
 Report
What is Transfer order?
It is the process of transferring the items from one warehouse (From warehouse) to another warehouse (To warehouse).
It is used in AX to track/manage the items those are in Transit.
Note:-
Transit is the period between the item leaves the "From warehouse", till it reaches to the "To warehouse"Items are unavailable to use when they are in transit and can be allocated to transit warehouse automatically during the process.
Transfer order cycle
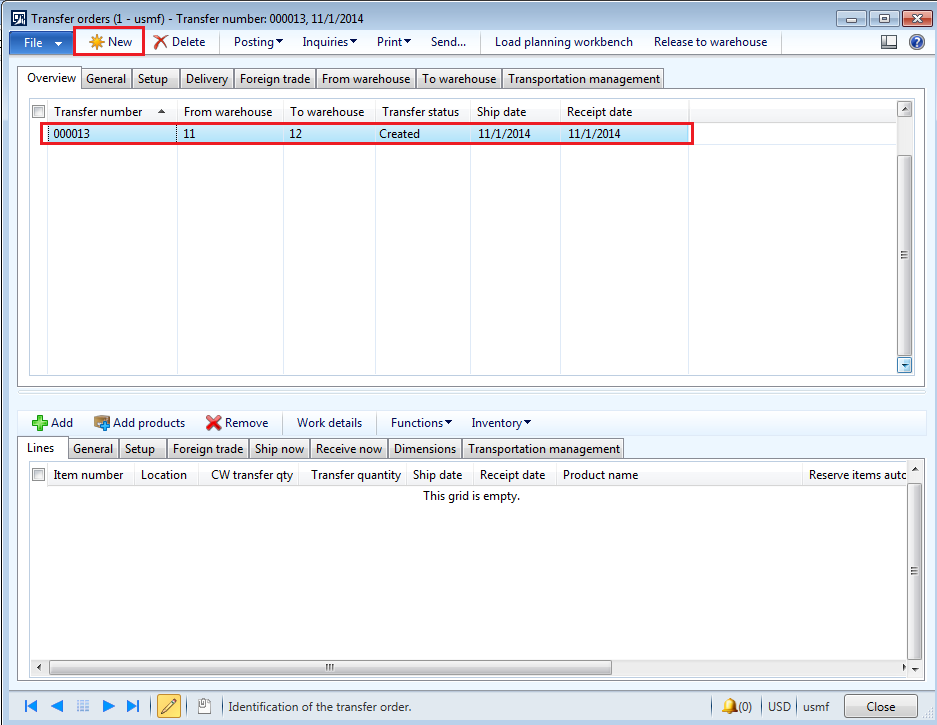
Following steps are involved in running the transfer order cycle in AX 2012:1. Go to Inventory and warehouse management--> Periodic -->Transfer orders.
2. Click on New to create new transfer order.
Transfer order header
a. Transfer order number (If the number sequence is not setup as "Continuous")
b. From warehouse (Originating warehouse) ,
c. To warehouse (Target warehouse) and
d. Requested ship date and Requested receipt date (If you want to change the date which is calculated through delivery date control).
Transfer order line
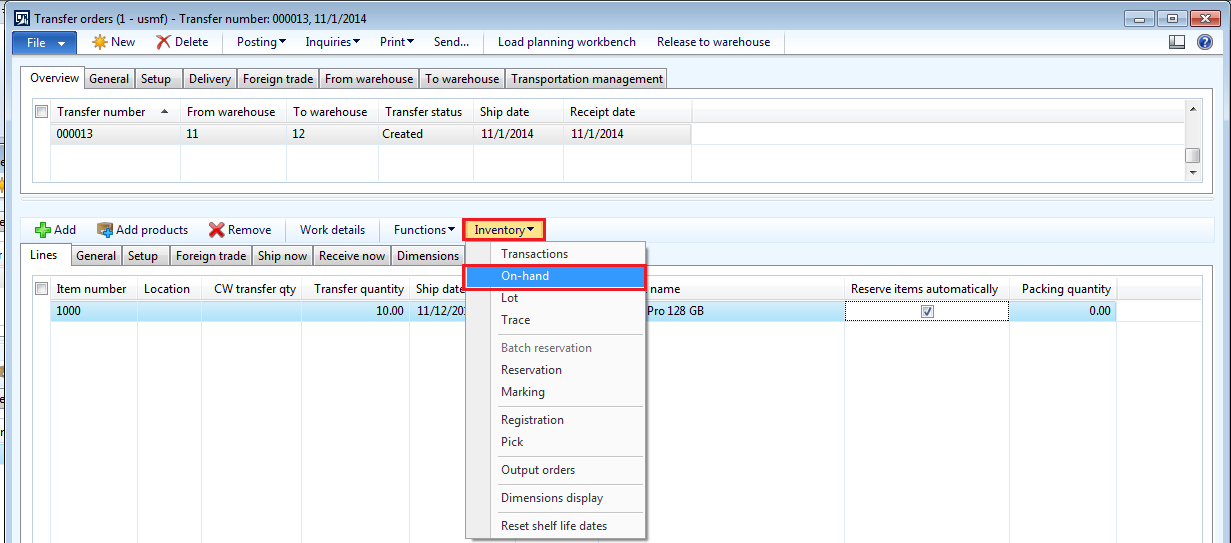
5. In the lower pane, add: Item numbers, Transfer quantities.
6. We can change the requested ship date and requested receipt date per item at the line level if we want the items to deliver at different dates.
7. We can also tick the Reserve items automatically checkbox at the line level, to reserve the items for transfer at the originating warehouse.

Note:-
Do not tick the Reserve items automatically checkbox if the actual transfer is going to happen after a long time so that the same items can be use for some other orders.
8. Click on inventory --> On hand to check the quantity available in the originating warehouse (From warehouse) before the picking process starts.
9. Enter the Ship now quantity for each line item in the order. It is use as a instruction about the quantity to the picking process.
It can be:
a. Full quantity: If picking is going to happen for entire quantity at once.
b. Partial quantity: In case the target warehouse doesn't require all the quantity at once or the originating warehouse does not have the available quantity to fulfill all the current demand.
(Check overdelivery and under delivery for more information)
10. Go to Transfer order line -->Select the item--> Go to Ship now tab--> Enter the quantity in Ship now field.
A. Picking list
11. Click on Posting --> picking list (It will create an output order/ inventory order for the warehouse as an instruction to pick the items for transfer).

12. Tick the Edit lines checkbox.
13. Click ok.
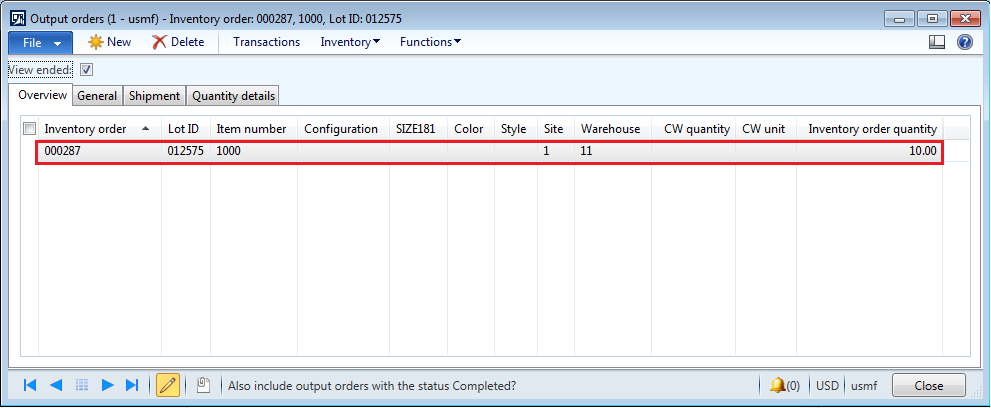
14.. For each line item, an output order will get created. It consists of details to the warehouse for picking the items.
15. To check the output order details, Go to Transfer order lines --> Select the item -->Click on Inventory--> Click on Output orders.
B. Picking list registration
It consists of two things:
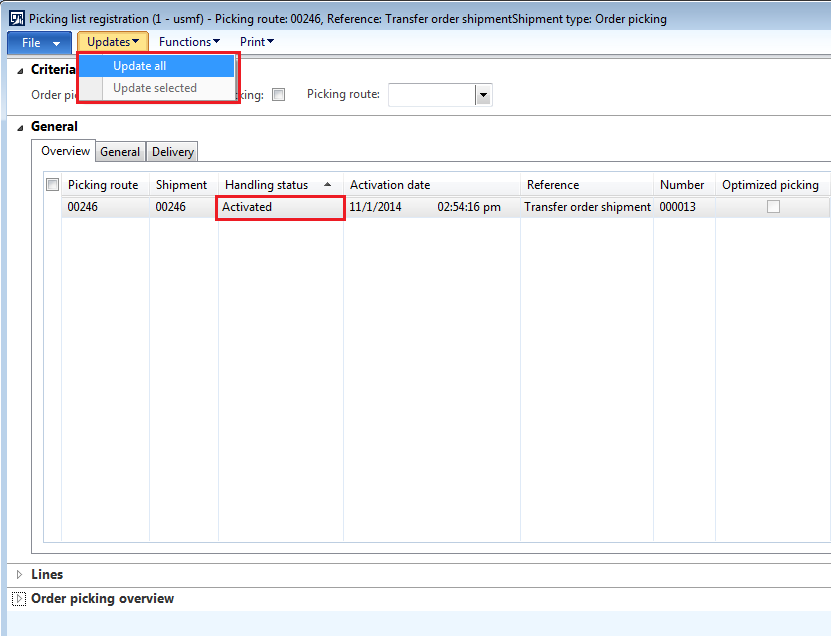
A. If the Picking route status in inventory and warehouse management parameter is "Completed" then the "Handling status" in picking list registration will automatically goes in completed state.B. If the Picking route status in inventory and warehouse management parameter is "Activated", then picking process need to be activated and completed manually.
16. Click on Posting --> picking list registration.
17. Click on Updates --> Update all / Update selected.
a. Update all: In order to complete all the picking at once and updating the same in the system.
b. Update selected: For completing the selected picking out of total and updating the same in the system.
Note:-
In the Transfer order, up to this step the Transfer status will be in "Created" state only.
C. Ship transfer order
Once the items are picked and are ready for transfer, we need to ship the items to target warehouse. After posting the ship transfer order, system will assign the items to transit warehouse and will not be available for use till it reaches to its target location.
18. Go to Transfer order lines --> Select the item --> Go to Ship now tab --> Enter the quantity in Ship now field.
Note:-
Quantity can be Full quantity or Partial quantity depending on the quantity require/available to transfer to target warehouse.
19. Go to Posting --> Click on Ship transfer order.

20. Tick the Edit lines checkbox.
21. Click OK.
22. Go on Inventory-->Click on Transactions (You can see that the items will automatically allocate to transit warehouse for transfer).

23. Once the transfer order is shipped, the Transfer status changes to "Shipped".
D. Receive
It is the last step of transfer order where Items will get received by Target warehouse.
24. Go to Transfer order lines --> Select the item --> go to Receive now tab --> Enter the quantity in the Receive now field.
25. It is the quantity which is going to receive by target warehouse from the transit warehouse. In general, shipped quantity will be same as received quantity except in some cases where items will get damaged due to mishandling or by any unforeseen circumstances.
26. Go to Posting --> Click on Receive.

27. Tick the Edit lines checkbox.
28. We can also specify the scrap quantity if any, in Receive form. (Items need to scrap as it is damage during the transfer due to mishandling or by any unforeseen circumstances).
29. Click ok.
30. After this, quantity will get received in "Target warehouse".
31. Go to transfer order lines--> Select the item --> Click on inventory --> Click on Transactions to check the inventory effects.

32. Once the transfer order is received, the Transfer status changes to "Received".
In this way, the transfer order cycle will get completed.
Hope!! Everyone will get clear understanding of Transfer order process.Please post if any queries and do let me know if any suggestions for improvement.
See you soon with the new topic...
----------------------------------------------------------------------------------------------------------
Abhijeet Hele | Dynamics AX Enthusiast | My blog |
The information provided on this site represents my own opinion/view and does not represent the opinion/view of my employer or Microsoft.

*This post is locked for comments