


 4,009
4,009 Like
Like Share
Share
 Report
Introduction:
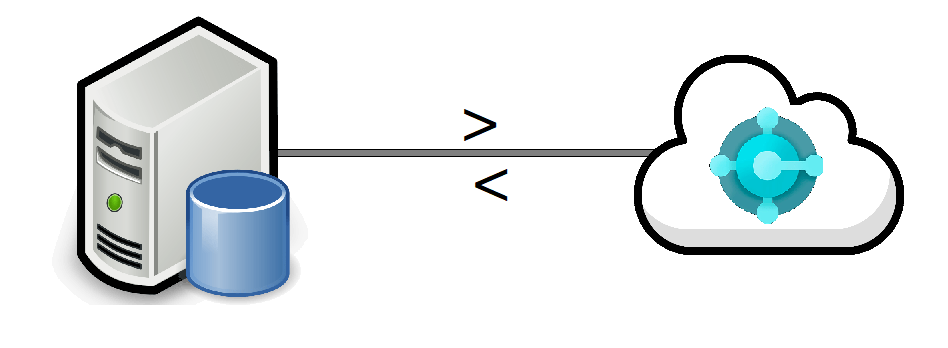
After the Business Central On-Premise is ready with the Customization and Data, it's time to migrate the Business Central On-Premise Environment to Business Central Online(Cloud).
The end goal in mind is to migrate to Business Central Online(Cloud)
The end goal in mind is to migrate to Business Central Online(Cloud)
Pre-requisites:
- Microsoft Dynamics Business Central(On-Prem & Online)- SSMS
- Microsoft Azure Data Factory Runtime
- Basic understanding of SQL Server and Azure Data Factory
Books & References:
https://docs.microsoft.com/en-us/dynamics365/business-central/dev-itpro/administration/migrate-dataDemonstration:
1. Setup SQL Server Authentication:Setup the SQL Server Authentication to SQL Server Authentication as follows.
Enable Windows and SQL Server Authentication Mode
Right Click on SQL Server Instance > Properties > Security > Server Authentication as SQL Server and Windows Authentication mode
Right Click on SQL Server Instance > Properties > Security > Server Authentication as SQL Server and Windows Authentication mode
 |
| SQL Server Authentication Set to Windows and SQL Server |
Goto Security > Logins > <Username> > Right click Properties > Status. Set the Login to Enabled.

Restart the SQL Server by right-clicking on SQL Server Instance > Restart

Restart the SQL Server by right-clicking on SQL Server Instance > Restart
2. Setup SQL DB Compatibility Setup:
Go to Database properties > Options > Compatibility Level > Check the compatibility level.
The compatibility level should be 130 and above.

If the compatibility level is less than 130 then you can set it to 130 by calling the following SQL Query.
The compatibility level should be 130 and above.
If the compatibility level is less than 130 then you can set it to 130 by calling the following SQL Query.
ALTER DATABASE database_nameSET COMPATIBILITY_LEVEL = 130
3. Setup Business Central Cloud Data Migration:
- Login into Business Central Online Environment where you want to migrate all the data.
- Go to Assisted Setup > Migrate Business Data > Set up a cloud Migration >
- Go to Assisted Setup > Migrate Business Data > Set up a cloud Migration >
 |
| Assisted Setup |
 |
| Cloud Migration Setup Wizard - Accept Agreement and hit Next |
 |
| Cloud Migration Setup - Product Selection (Select Business Central earlier versions) |
 |
| Select Product Types based upon your Business Central On-Premise version |
Fill in the SQL Connection String, keep Integration Runtime Name as <BLANK>
Server=myServerName\myInstanceName;Database=myDataBase;User Id=myUsername;Password=myPassword;
Server=myServerName\myInstanceName;Database=myDataBase;User Id=myUsername;Password=myPassword;
 |
| Select SQL Connection String |
 |
| Download and Setup Self-hosted Integration Runtime |
I downloaded the latest Microsoft Integration Runtime and run the Installer.
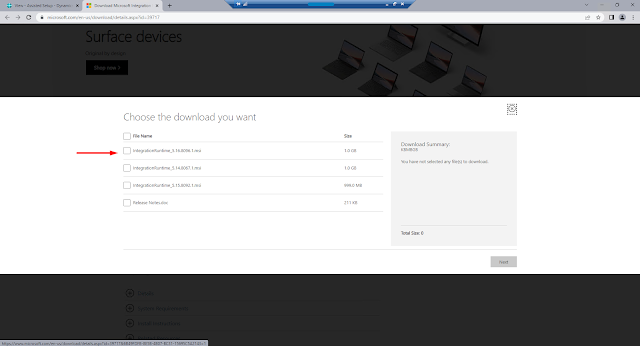 |
| Download Microsoft Integration Runtime |
Install and Setup Microsoft Integration Runtime Setup
 |
| Microsoft Integration Runtime - Installer Wizard |
 |
| Microsoft Integration Runtime - Accept EULA |
 |
| Microsoft Integration Runtime - Select Destination Folder |
 |
| Microsoft Integration Runtime - Install |
 |
| Microsoft Integration Runtime - Finish |
 |
| Microsoft Integration Runtime - Setup Authentication key and Register |
 |
| Microsoft Integration Runtime - Integration Runtime (Self - Hosted) Nodes |
 |
| Microsoft Integration Runtime - Configuration Manager |
The Microsoft Integration Runtime Configuration Manager is a place to get the status of your Integration Runtime. You can also run diagnostics from the same.
 |
| Microsoft Integration Runtime - Runtime Status |
 |
| Microsoft Integration Runtime - Diagnostics Tool |
Note: The SQL Connection String in Microsoft Integration Runtime is setup in JSON hence an additional '\' escape character is needed in Integration Runtime. However, Business Central accepts SQL Connection String.
After the Microsoft Integration is Setup, you can go to Business Central and add your SQL Server Connection String and Integration Runtime Environment and hit next.
Depending upon the size of the DB the session goes on 'Working on it...'. Hence do not close this session else you will have to redo the setup once again.
For me the DB size was 40GB, the session was inprogress for 3.5hours.
Depending upon the size of the DB the session goes on 'Working on it...'. Hence do not close this session else you will have to redo the setup once again.
For me the DB size was 40GB, the session was inprogress for 3.5hours.
 |
| Cloud Migration Setup - Processing. |
After this, the next step is to select companies to synchronize.

Select the companies that you want to migrate and finish the Cloud Migration Setup.

 |
| Cloud Migration Setup is completed. |
Now you can open the Cloud Migration Management Page. You will see that a queue is created and scheduled.
Hence, after the upgrade is successfully completed, you will see the following details.
 |
| Cloud Migration Management |
Hence, after the upgrade is successfully completed, you will see the following details.
 |
| Cloud Migration Management - Data Migration Completed |
For any details regarding the procedure refer here.
Conclusion:
Cloud Data Migration is one of the most time-consuming tasks in terms of Data Replication and Data Upgrade.
It took 5 hours to migrate around 25 tables for a Database size of 40GB.
Do read through the details provided on the procedure.
Hope this helps :)
It took 5 hours to migrate around 25 tables for a Database size of 40GB.
Do read through the details provided on the procedure.
Hope this helps :)
*This post is locked for comments