


 22,784
 Like
Like Share
Share
 Report
 I’m sure that setting a default printer in Microsoft Windows used to be quite simple. However, I was having problems with Windows never defaulting to the same printer and the one it suggested was never the one I wanted. I did some poking around and it actually took me a few minutes to work it out.
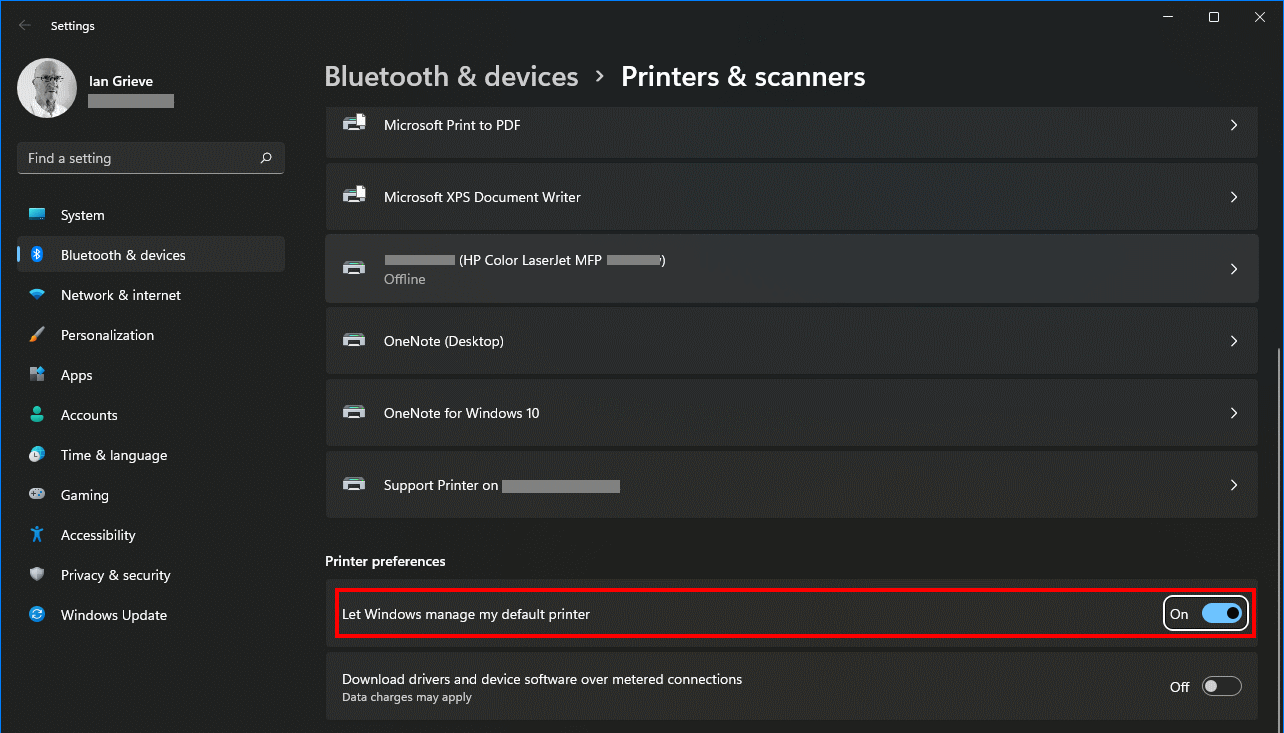
This was on a Windows 11 machine, but it ay have been the same on Windows 10 without my having noticed. To set a default printer, open the Printers & scanners Control Panel applet.
You will need to set the Let Windows manage by default printer option to off, which then makes the default printer setting available:
Click a printer and then then click the Manage button to open the Printer settings; click the Set as default button (if you don’t see this button then you have not disabled the Let Windows manage by default printer option):

With the printer set as default, any application which uses standard printing functionality will default to the selected printer.
Read original post How to Set a Default Printer in Windows 11 at azurecurve|Ramblings of an IT Professional
*This post is locked for comments