


 646
646 Like
Like Share
Share
 Report
The new tax calculation service for Dynamics 365 Finance and Operations (D365F&O) is slowly maturing, so it is time to take a look at how it works.
Before you can start using the tax calculation service there is quite a lot of technical configurations to be done in this iteration of the solution. This article describes in detail what must be done, and it is important to follow all steps to the letter – otherwise you will have issues down the line.
Detailed information on how to set up and use the tax calculation service can be found here.
Creating a New Tax Feature
As you will have noticed when going through the above configuration, the service is managed in the Regulatory Configuration Service (RCS). If everything has gone according to plan, there should now be a tile named Globalization features in the RCS dashboard. If not, something has gone wrong…
To set up tax configuration, you must click on this tile and then on the Tax calculation tile in the next screen as shown below.
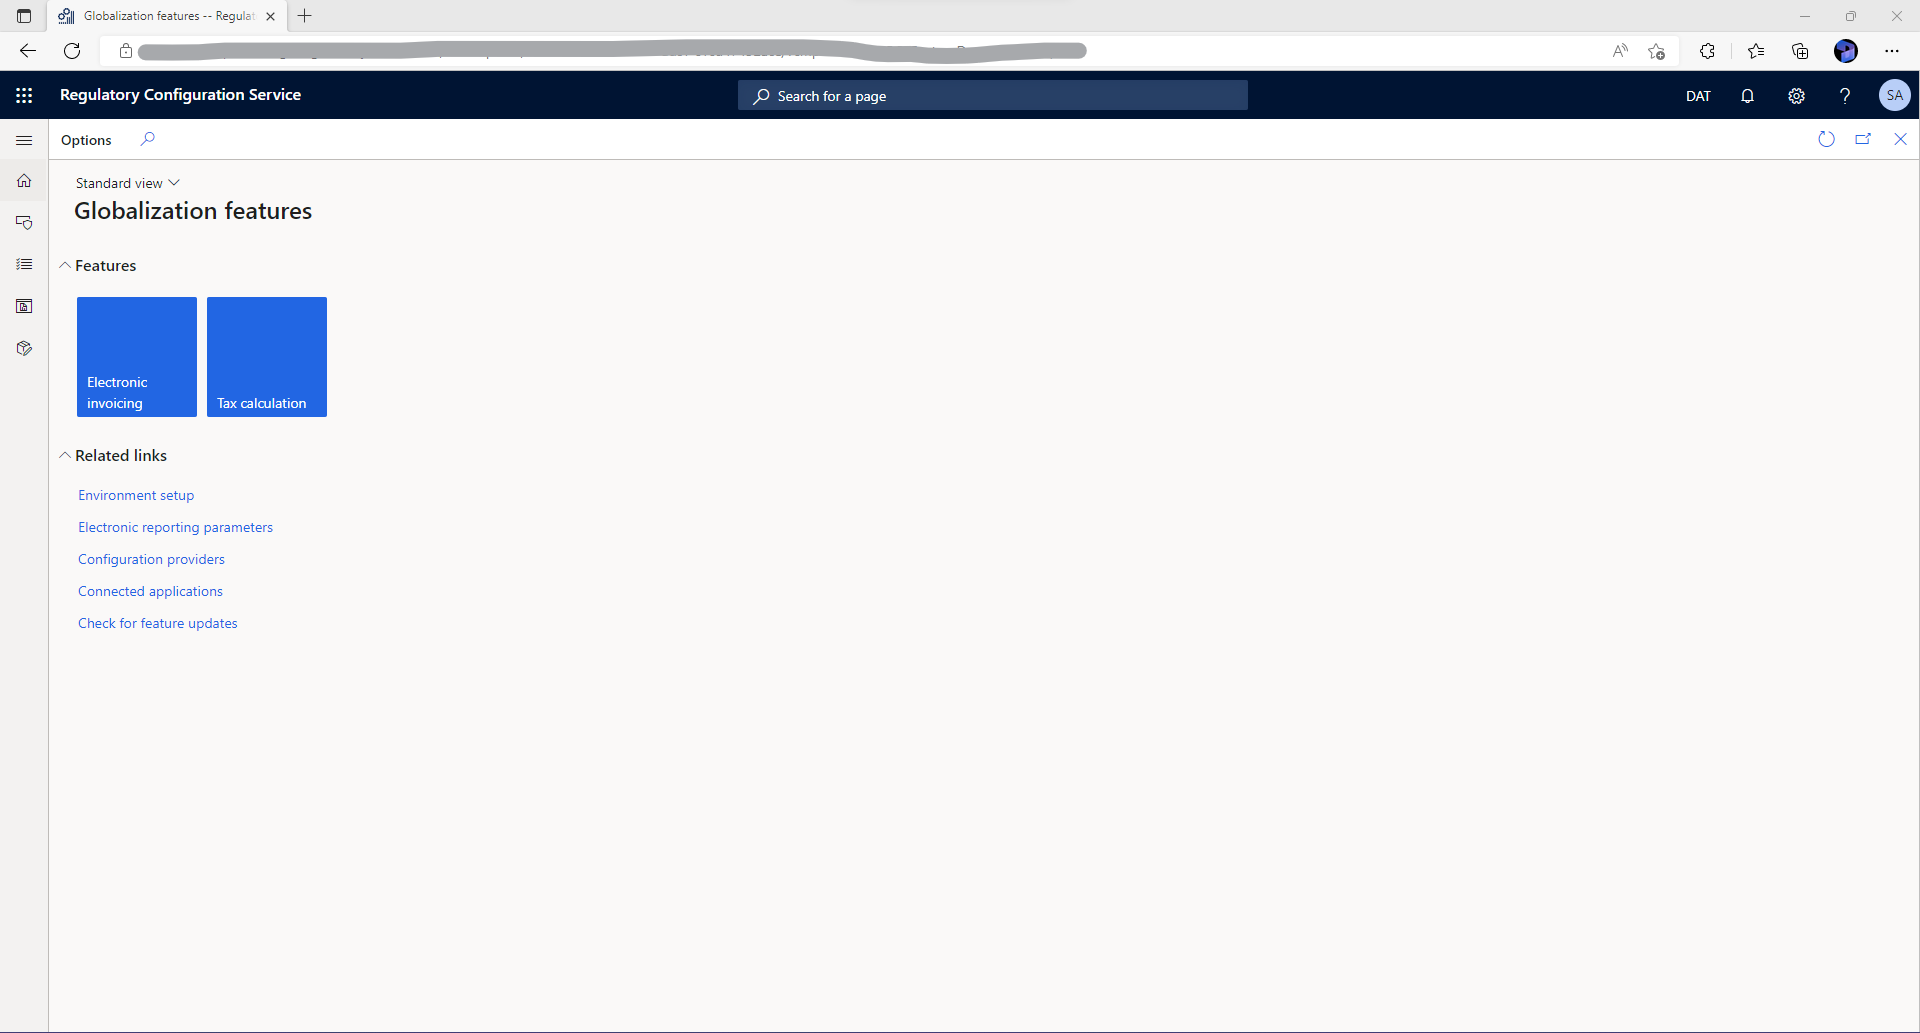
This opens up the landing page for tax calculation feature configuration.

In our example, we would like to create a new tax feature that holds tax configuration for the “DEMF” legal entity. A new tax feature is created by clicking on the Add button and you can either create a feature from scratch or base it on an existing feature.

When I click on Create feature the system creates a new draft version on the right-hand side. All the changes I make are in draft until I decide to publish the model.
After I click on the Edit button in the version view, I need to select the configuration version I base my feature on. The configuration version is the electronic reporting model you imported during basic configuration.
If the drop-down is empty you need to go back to basic configuration.

Next, you must select the applicable legal entities for this feature. This is a multi-select option but, in my example, I will only configure tax for the “DEMF” legal entity.
We now come to the actual setting up of tax rates. In the following screenshot I have created a new tax code name “DE-STD” to hold the normal German VAT rate (19%).

Once I save the record, additional fields open up with additional details. As the following screenshot shows, I use the Add button to add a new rate of 19%.

Next, I set up a tax group named “DE-STD” but in this example, I have used the Manage Columns button to add the Delivery terms field to the line.
This is a good example of we can use other data fields on the source document to determine tax.
In this case, tax is calculated, if the order header delivery terms are “EXW”.

Lastly, I create a new tax item group, as shown below, to complete the set up.

Publish tax Feature
Our basic set up is now complete and it is time to publish it.

To change the status of a tax feature, you must click on the Change status on the version. First you must complete the feature and then publish it.
Configuring the Legal Entity

For the tax calculation service to work in D365F&O, we must first make some configuration under Tax / Tax configuration / Tax calculation parameters.
First, we must enable the integration by ticking the Enable tax calculation service.
Secondly, we must link the feature we created earlier to this legal entity. This is done by selecting the “DEMF” feature in the Feature setup name field.
Lastly, as the below snip shows, we must decide which business processes the tax calculation applies to. If a business process is not selected, the calculation will fall back on the inbuilt logic.

Once you select the “DEMF” feature in the Feature setup name field, a dialogue pops up allowing you to enter missing information for settlement period and ledger posting group. This is information which is not recorded in the tax calculation configuration.
Once you have entered the required information, data is synchronised, and a synchronisation log is created in a spreadsheet as shown below.

Now, when I go to Tax / Indirect taxes / Sales tax / Sales tax codes, the “DE-STD” tax code has now been created in D365F&O.
Putting it All Together
We are now going to create a sales order and have the tax calculation service calculate tax. In the “DEMF” legal entity I create a new sales order to the customer “DE-011 Northwind Traders”.
As you can see from the below screenshot, the delivery terms are “CIF”.

This is important because, if you remember, we set up our tax determination rule to use “EXW” delivery terms in the beginning.
I now add a sales order line for the product “D0004 Kenya beans…” and the sales tax group and item tax group are set for “DE-STD”, which are the codes I created earlier, as shown below.

However, when I click on Financials / Sales tax on the line ribbon, the tax calculation is empty as the screenshot shows.

This is because the tax calculation rule, we created earlier, was determining tax based on the delivery terms on header level – not on the line level.
Therefore, I change delivery terms on the header from “CIF” to “EXW”.
When I go back and look at the tax calculation on the sales order line, there is now 19% tax calculated on the line level, as expected, as the below screenshot shows.

This is essentially how the tax calculation service works. In future posts, I will take a look at other features such as using multiple tax registration numbers in a single legal entity.
*This post is locked for comments