A Guide To Real-time Marketing Segments
 Megan V. Walker
When new features come out in D365 Marketing I love to check them out and learn as much as I can about them. When the Real-time Marketing segment builder was released I wasn’t the biggest fan, it felt like TOO much change. However, I am big enough to admit when I am wrong, and I have come to love and embrace the process of creating the segments now! So, although this has been around for a bit, I thought I would share my approach to using it, and point out some of the features that might not be immediately obvious. Hope this helps!
Create Segment From Query
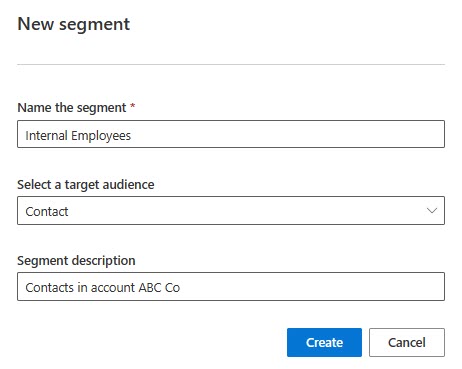
From the Real-time marketing area, in the Segments area, click on New Segment from the top menu. Immediately you will see a different approach to getting started with the new record. Give your segment a name, then pick the target audience. It’s either Contact or…. Lead!!! (more on that in a bit).
Now, the next bit is your segment description. You will be forgiven for thinking this will just be to tell others what the purpose of the segment is, BUT it does actually have more benefit than that. Use it to type in something descriptive and then click Create.
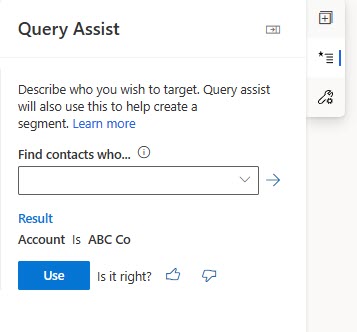
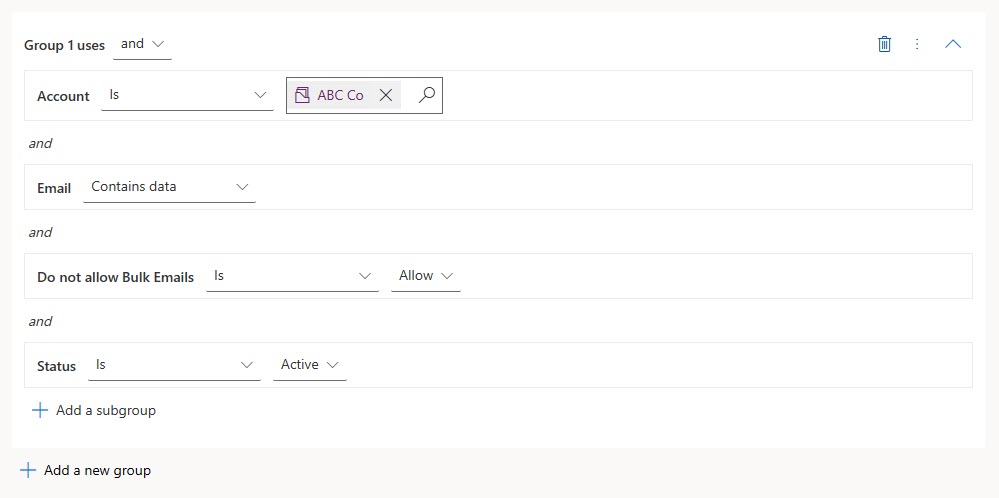
The segment description is actually using something call natural language AI to try and figure out what you might want to search for. You can see that it has given me a result to show Account is ABC Co based on what I added to the description. I can click on Use (and also give it a thumbs up!).
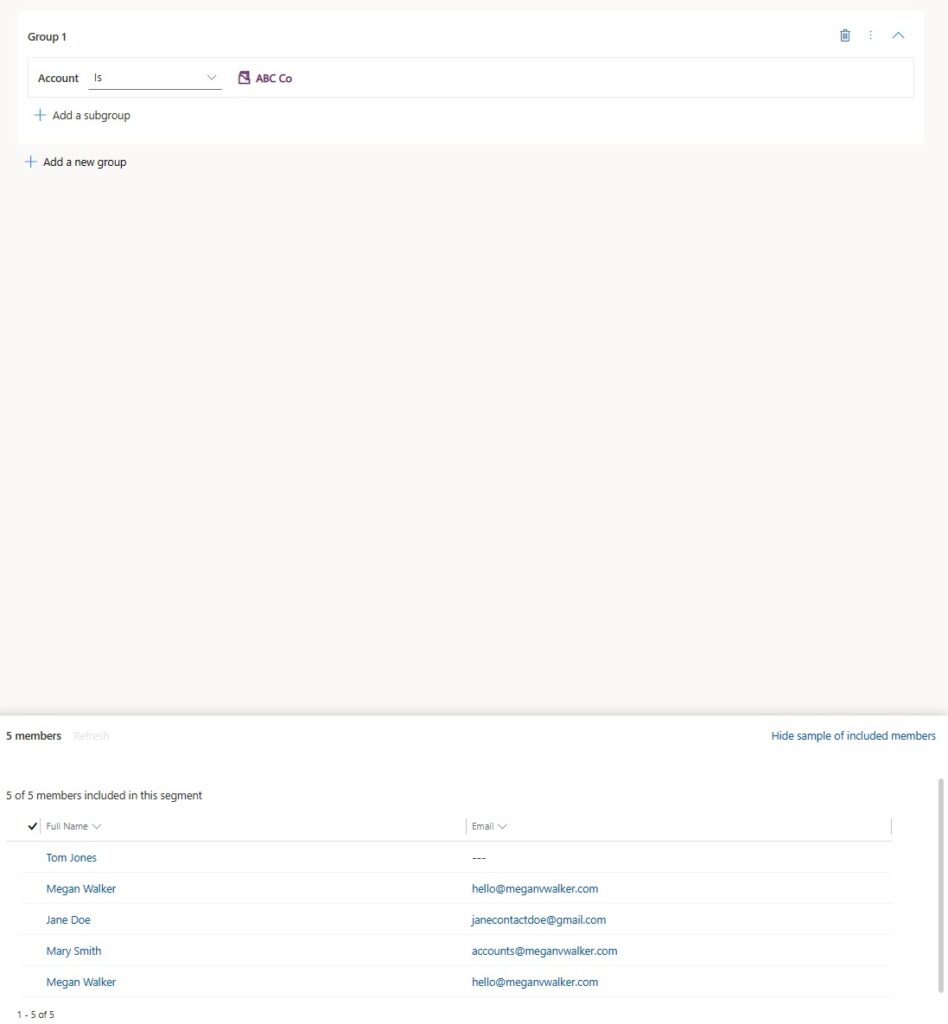
This will then add the definition criteria to the segment canvas. I didn’t have to do a thing.  There will be a link at the bottom that I can refresh to see an estimated number of members for the segment and a link to view a sample of the included members. This will only show records you have access to, and will only show up to 100. It’s a preview at this point not all of the actual records that meet the criteria.
Although using this method might be useful, it will not always give you the most accurate results. For example, you can see above I have one record without an email address. There is also one record that is actually an inactive record, so I would really want to add in extra criteria to make sure those records are excluded.
Create Segment From Attributes
This next approach is likely the one you would use the most, and that’s to ignore the query assist option for now, and click on the top icon on the right and get started adding attributes directly from the Contact (or Lead) record. If I want to recreate the segment from the last example, I can start off and search for the Account field. You can see it shows there are three attributes found that meet that, and I can just click on the Account option.
This adds the Account field in to a group on the segment canvas. Then I can use it to state Account Is, and then find the name of the Account record to use as the filter.
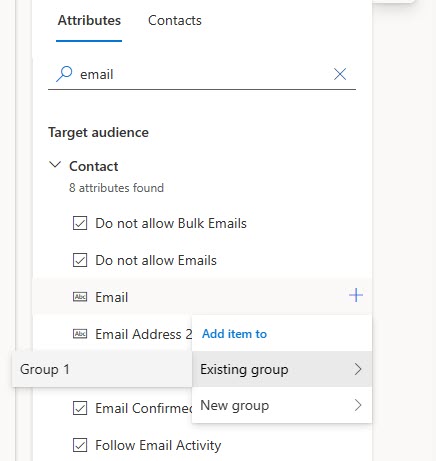
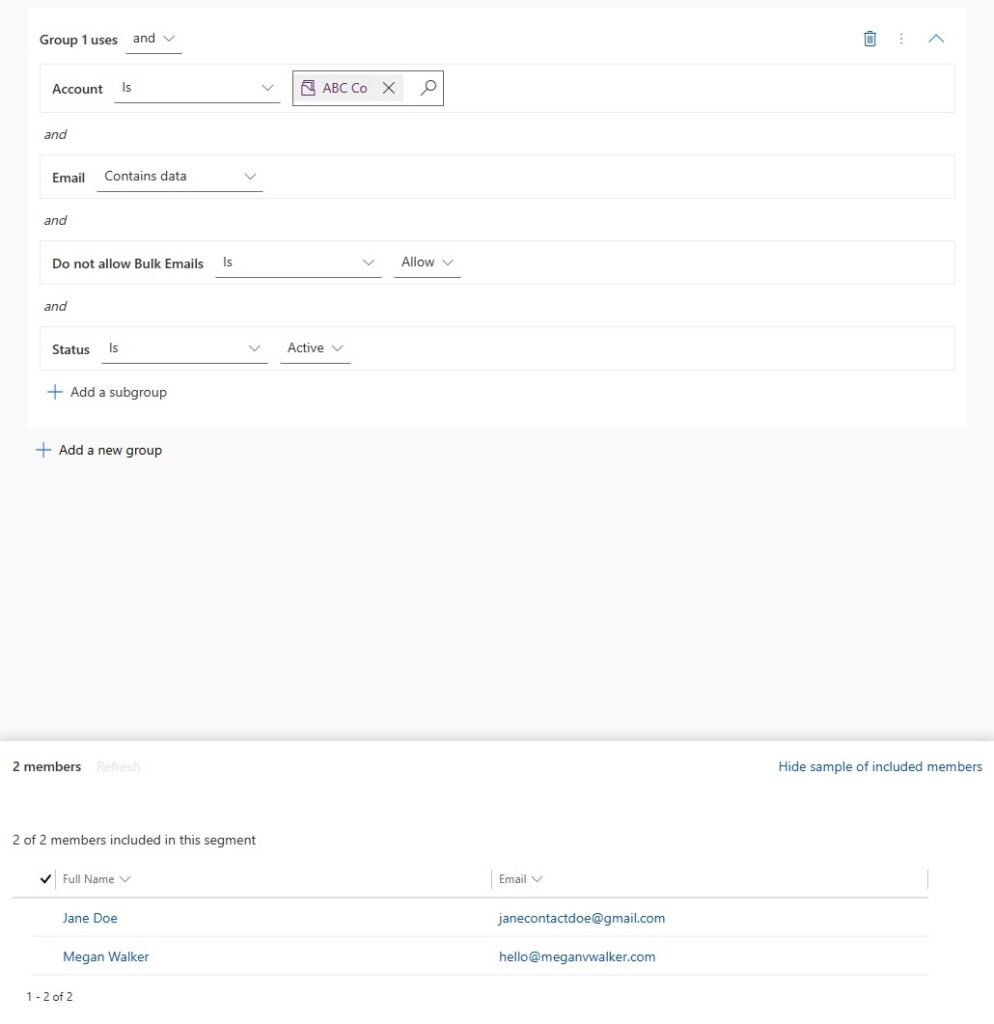
Next I want to add in some additional attributes to filter further. I want to make sure the Email address contains data, the Bulk Email field is set to Allow and the Status is Active. Using the search box again, look for each of the fields in turn, then click the plus button next to them. Pick to add them to an existing group which will be Group 1 (the one that includes the Account attribute that was added).
The segment definition then looks like this where we are making sure any Contacts pulled back in to the segment match all four attributes set.
Now we can see that instead of the 5 members brought back in the first segment made by the query assist, we’ve narrowed it down to 2 that ACTUALLY should be included in the segment.
Create Segment To Target Leads
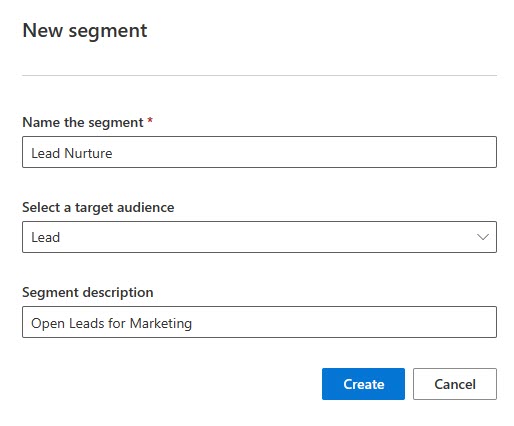
Now let’s look at creating a segment to target Leads. Although with Outbound Journeys your only option is to send Contacts through them, with Real-time you can send either Contacts OR Leads through a Journey. When creating a new segment we just make sure to pick Leads from the audience drop down menu.
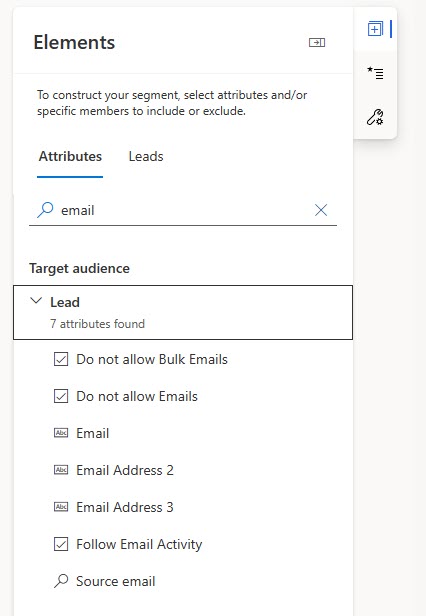
Now the Target audience section is for the Lead table, and we can search for attributes in exactly the same way. So I can add Email, Bulk Emails and Status to the main Group.
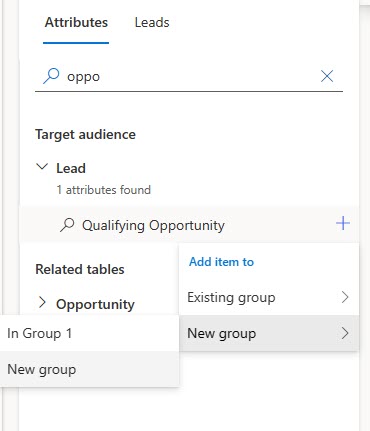
Then I can search for the Qualifying Opportunity field and choose to add it to a New group.
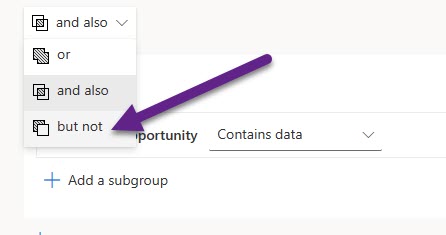
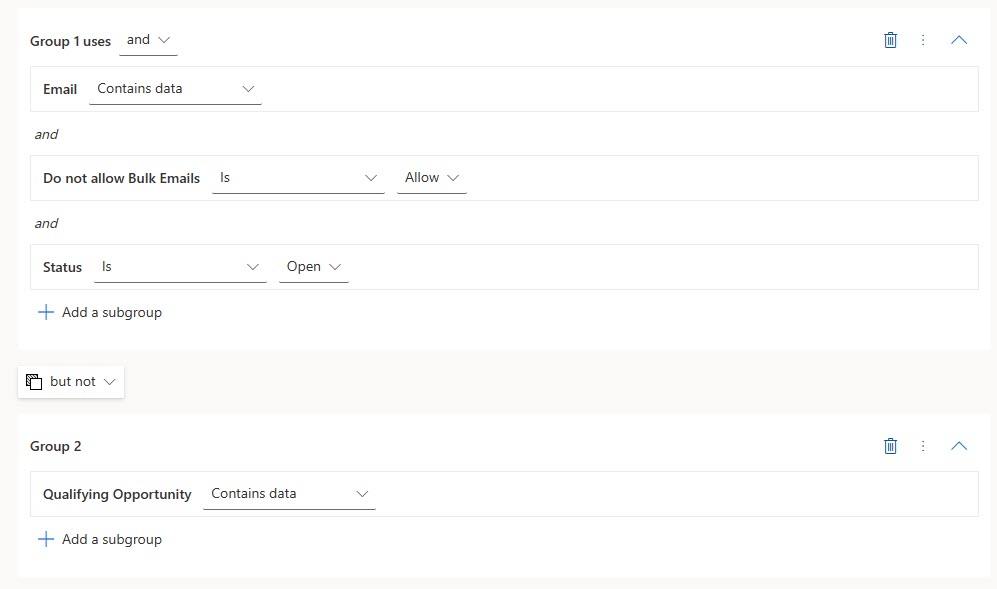
This creates Group 1 and Group 2 which includes a connector between the two. This can be set as one of the following – or, and also, but not. I’m going to change this to but not.
So now we are looking for all Leads that have an email address, have Bulk Email set to Allow, are Open but not Leads that also have data in the Qualifying Opportunity field. There are different ways you could approach this, but this way it’s very clear that everything in the top section MUST BE MET but not any records that meet the criteria in the bottom section. This is just an example and not the exact way you must do this. 
Create Segment Including Or Excluding Members
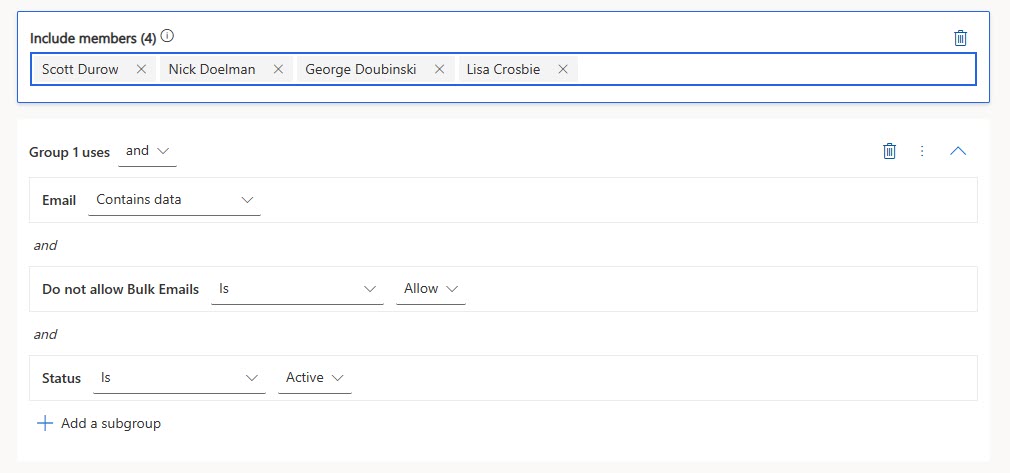
You also have the option to create a segment and define specific people you want to include or exclude from the segment. Consider a static segment/marketing list where you pick and choose people currently, this is the same kind of approach.
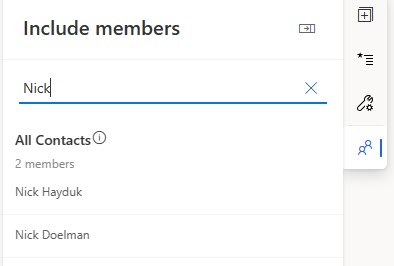
You can then search for people by name, or use the advanced functionality to search and use a view.
Clicking on the people adds them to the lit of members to either include or exclude. Combining this with other criteria means the segment will include all those selected individually AND anyone that meets the criteria specified. If excluded members are set, they will always remain excluded even if they meet the selected definition in the segment canvas.
Create Segments With Related Tables
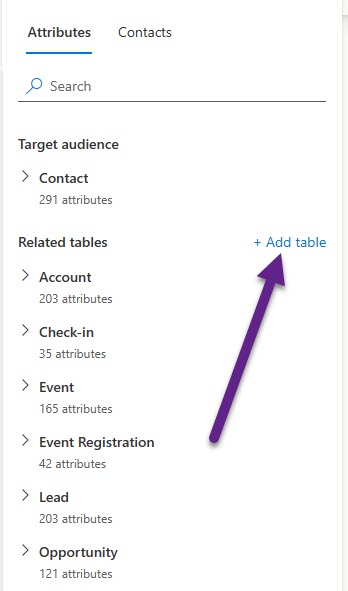
Now we can look at using related tables when building a segment. Once you’ve picked the audience target and are reviewing the attributes, you’ll notice the related tables section. There may already be a few listed for you. The great news is, we can easily add in tables to use in the segment to find the right people, and do it without having to go in to any settings area. Simply click on Add table from the top of the related tables section.
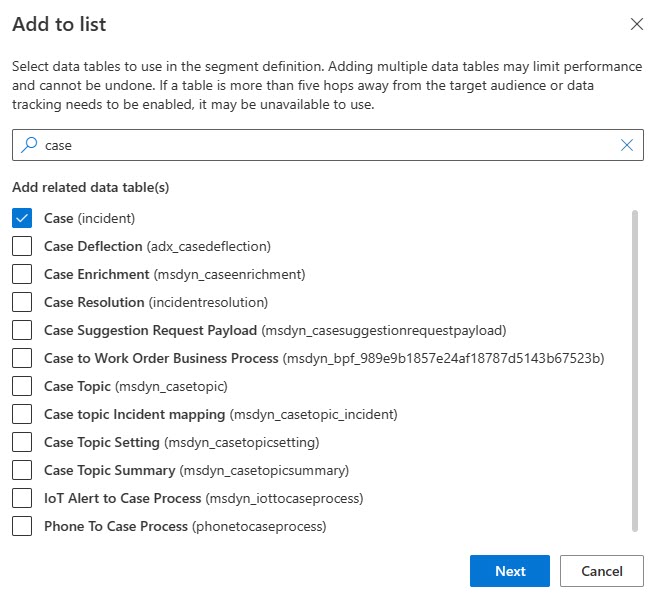
Then you can search for the table you need. I will add the case (incident) table and tick the box next to it. DO NOT be tempted to add all or a ton of tables… or you will really make things unmanageable and unusable for yourself. Once you’ve added the tables you cannot remove them later. Click the Next button.
Then it will show you which tables you are adding, and then click the Add button.
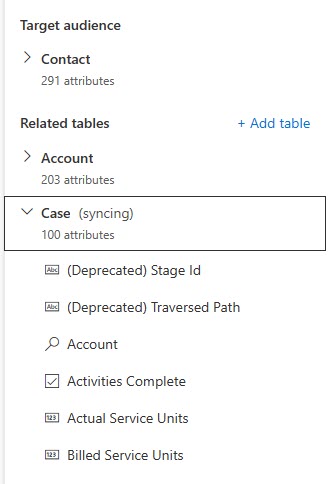
The table will immediately show in your list of Related tables (your list, not for all users which is something to keep in mind). You can see that the table is syncing. You can still begin adding attributes from the table in to your segment definition but you might not be able to see the sample of members for a while until the sync is complete.
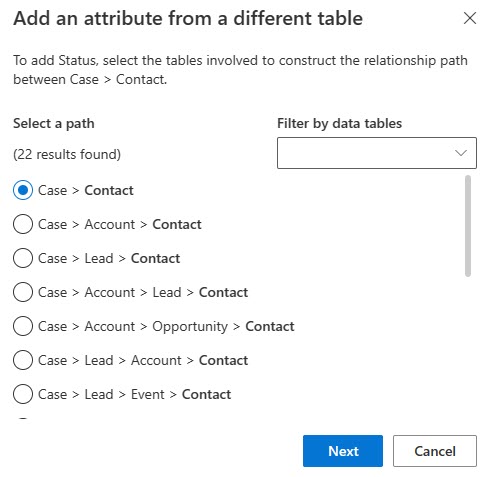
After searching for an attribute and choosing to add it to the segment, you will be prompted to pick the path which is the relationship between the new table and the audience member. In this situation I want to go direct from the Case to the Contact field. Take the most direct path you can if it’s there as most times it’s likely to be the correct one.
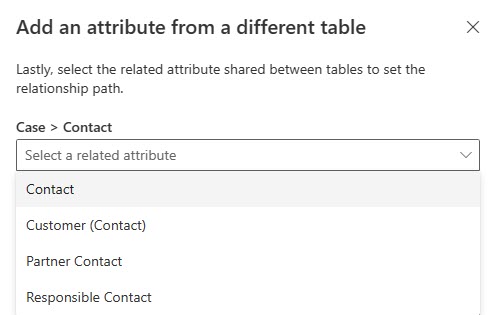
What you might find is that there are several fields that are look ups to the Contact table, so you may need to set the relationship further. For Case, you can use the Contact field, the Customer field, Partner Contact and I also have Responsible Contact. So make sure you know which is the right one for your own requirements.
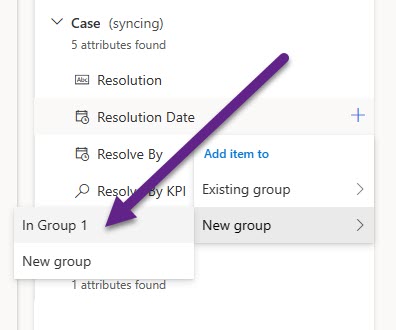
Then we can start adding the attributes. In addition to adding attributes to Groups, we can also add them to new groups within an existing group.
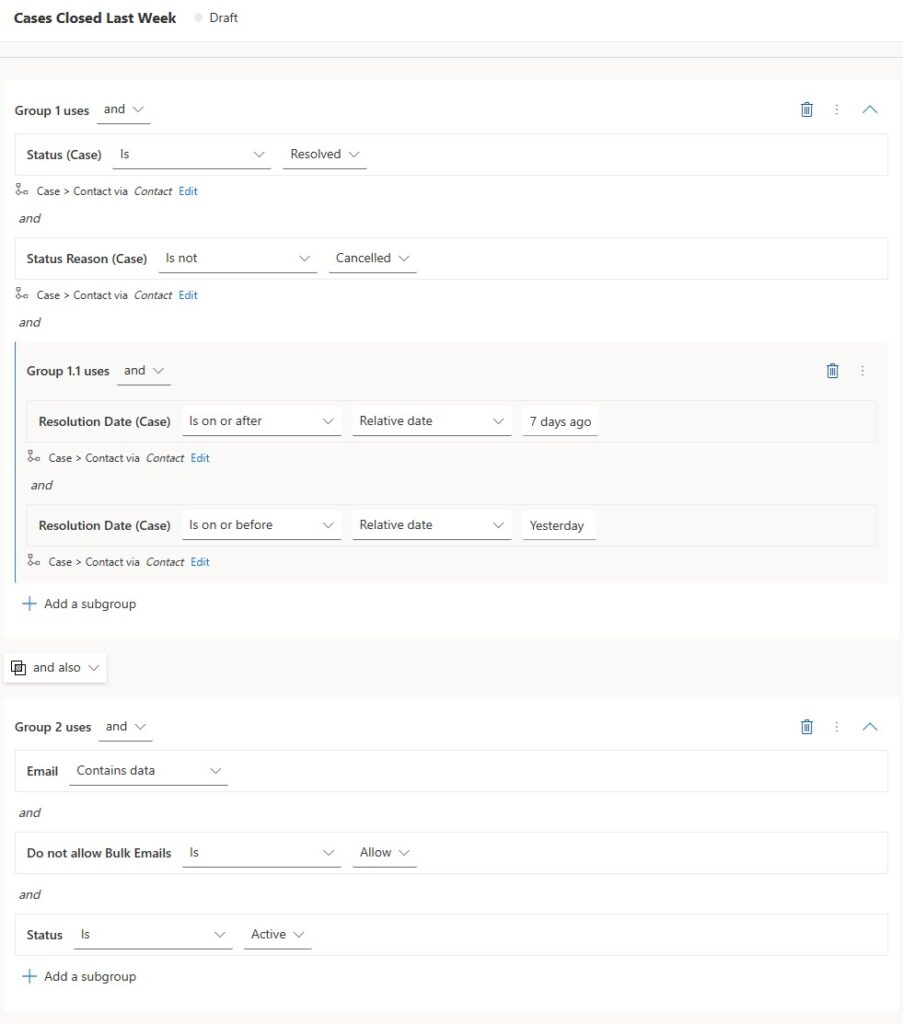
So here we have a field added to a new Group in Group 1. This makes it Group 1.1. This puts a grey background around it to show it’s a sub group within a group. Any subgroup within that subgroup would have a white background, then grey and so on… but I would suggest not having a mountain of subgroups as it would make it very complicated and likely to not give you the most accurate results.
In this example, I am also using a date field where I can use a relative date to see if the resolution date is within the past 7 days,
Adding in the same attribute in the sub group means a second clause can be added with on or before yesterday.
This gives us all Contacts that have an email address, bulk email is allow, status is active and were linked to at least one case that was closed within the past 7 days but the case wasn’t cancelled.
Segment Related Features
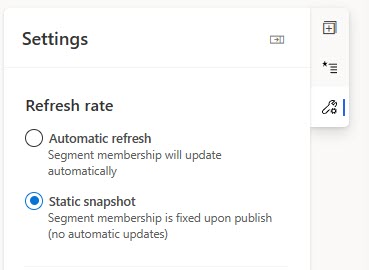
A few other things to look out for of interest. When creating a segment and looking for members, you can change the refresh rate. By default, segments will refresh automatically and be kept up to date dynamically. This means as things change in your database, Contacts and Leads will fall in and out of segments based on the values on their record and any related tables. However, you might build a segment using criteria but want it to only include people at this point in time. You can change the refresh rate to Static snapshot from the settings menu. This will mean no new members will ever be added to the segment in the future, and no updates will happen.
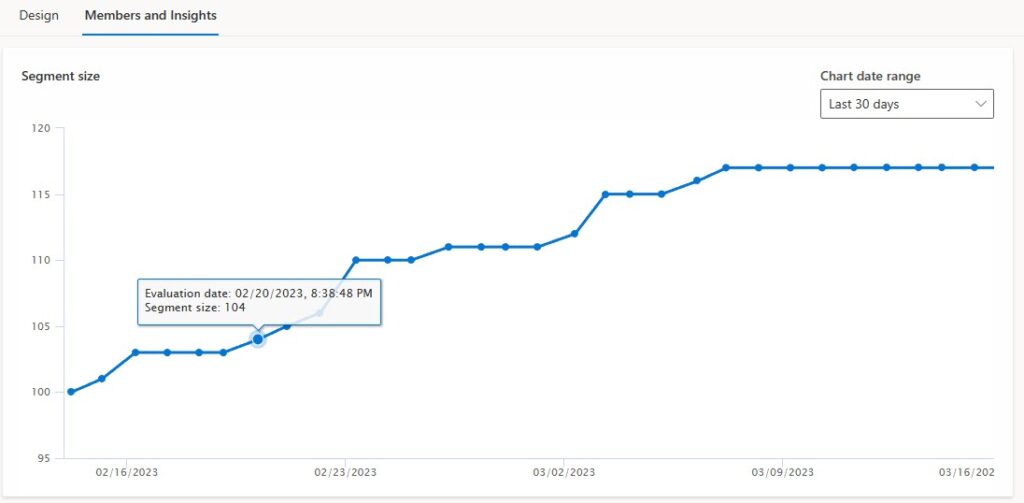
This feature I love, and that is the segment size graph and the ability to see how it has changed over time either growing or decreasing in size. You can hover your mouse over the data points on the line graph and see what the segment size was at certain dates within the past 7 days, 30 days or 6 months.
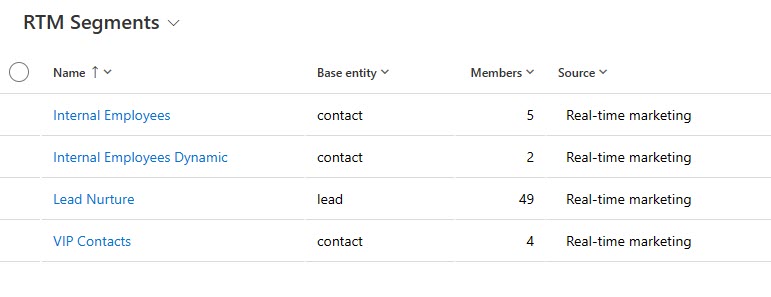
Also, make sure you include create yourself a new view for your Real-time Marketing segments using the Source field as your filter to just show those with the source of Real-time marketing. You can also add in the attribute of Base entity to see if your segment is targeting contacts or leads as the audience.
Using Segments In Journeys
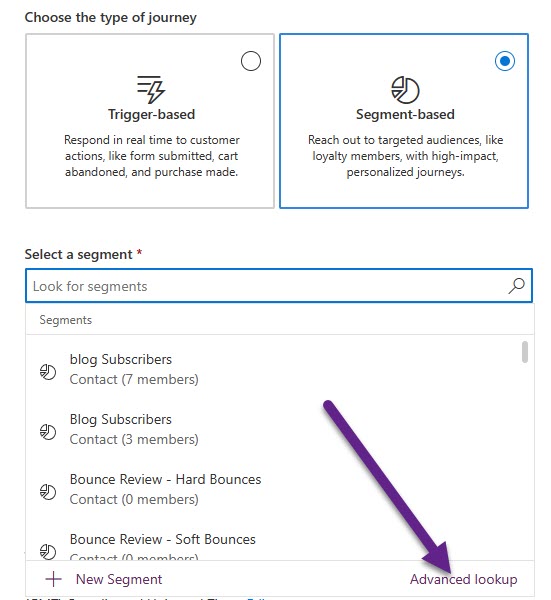
Finally, when it’s time to create your new Journeys, keep in mind that you can still use all of your Outbound segments in a Real-time marketing journey which is great (but not the other way around). This means when searching for your segment, you might need to look a bit harder to find the right one. You can press enter while in the segments lookup field and then click on Advanced lookup.
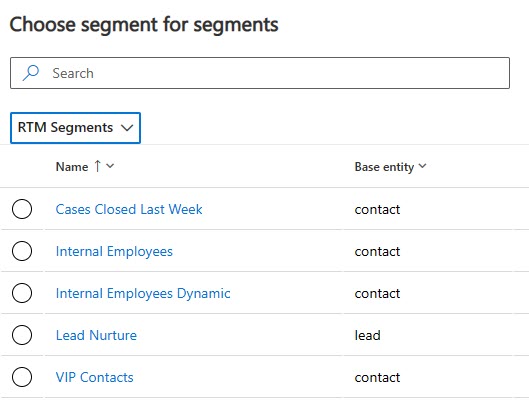
From here, you can change the view being used to show your segments and then change it to the lovely new view (system or custom) you created. Now I can immediately find the right one!
Have you started using the Real-time Marketing Segments? Do you find it easy to find what you are looking for? Share in the comments below so others can learn from your experience too!
This was originally posted here.
Comments
-
A Guide To Real-time Marketing SegmentsNow there are so many marketing strategies and tools that it is quite difficult to navigate and choose what will be relevant specifically for your business. The best solution is to find specialists, and I can recommend Instagram Marketing Agency. Instagram is a really good platform for running advertising campaigns.
-
A Guide To Real-time Marketing SegmentsHello,Why is there a limit of 100 members when creating a segment Including Or Excluding Members?Thank you,Krissi


 Like
Like Report






*This post is locked for comments