


 2,263
2,263 Like
Like Share
Share
 Report
Some weeks ago, I had a challenge. I develop my own app to be published on the AppSource. As I always talk about “add some smartness into your apps”, it was strange not to include “some smartness” into my app. Right?
But the smartness is not always a synonym of machine learning. And not everything could (and need to be) done with ML. If you want to get and show some insights from your data, and you know how to get them – you are free to follow the classic dev approach.
Millions of people prefer Excel to get insights from data. Excel is very powerful in data transformations, filtering, sorting etc. At the same time, that's the pain points in AL. Of course, you can make a pivot table from your data in AL, but I guess you would agree with me, that would be complicated in development and time-consuming in processing. Is there any dev approach with the same power and simplicity as Excel?
I invented my own approach :)
Yes, Python. It’s a programming language used by data scientists all over the world. Powerful, quick, simple and very extendible. And it’s very good in data manipulations.
Let me show you a quick example. Let’s say you have sales transactions with 38k entries (rows). And you want to get the TOP 10 items sold in the TOP 10 bestselling days.
To get this you should follow this data manipulation flow
Assume how difficult that would be to build in AL, and how slow it will be to execute.
Let’s have a look at a Python approach.
It’s 4 lines of code! Impressed? Look at the speed
0,2 seconds to proceed with all 38K rows of data transformations! That’s what is really impressive!
Why not combine AL with Python?
Sounds crazy? Not very. At the end of the 2018 year, MS announced Python Azure Functions.
Which mean we can run the code above on Azure and publish it directly from vs code.
Our top-level infrastructure will be
Let’s have a look at the steps.
Step 1. Create a workspace with AL project
I created a workspace with AL project, which can download sample sales transactions data into my custom table.
Step 2. Create Azure Function Project
The next step is to create the Python Azure function project.
I will not describe here how to proceed with that. I just followed this tutorial and it worked for me without any issues.
Ensure that you select Python as a language and HTTP trigger type. I used anonymous authentication, but that’s up to you.
This is what you should get – an Azure Function project with __init__.py file.
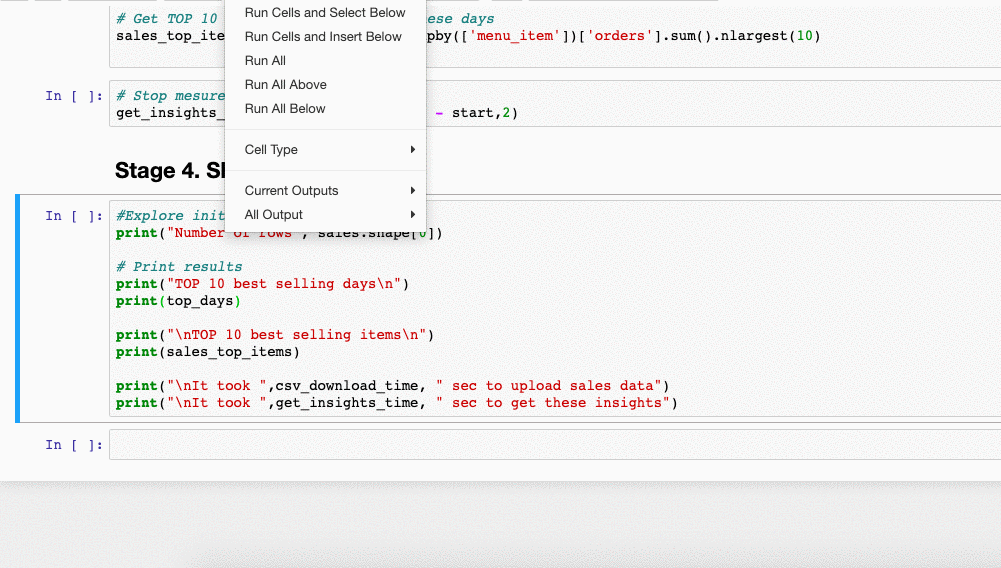
Step 3. Change Python code in the Azure Function
This was the most complicated part for me. As the service is quite new, it’s difficult to figure out what’s the structure of input and output should be.
First, we need to specify packages (read library’s or extensions) we use in our python script in the requirements.txt file. I use only pandas – which the coolest package to deal with data.
Second, change the __init__.py file
- add packages, that you use
- change AF process data input logic
- add processing function
- change AF process data output logic
Here is the resulted Python Azure Function
Step 4. Deploy Azure Function
Deploy Azure Function to your Azure Subscription. This step is also well described here.
This will create a new resource group with all the needed infrastructure. As a result of that step, we will get the Azure Function URL.
Save this URL, we will use that shortly in Business Central.
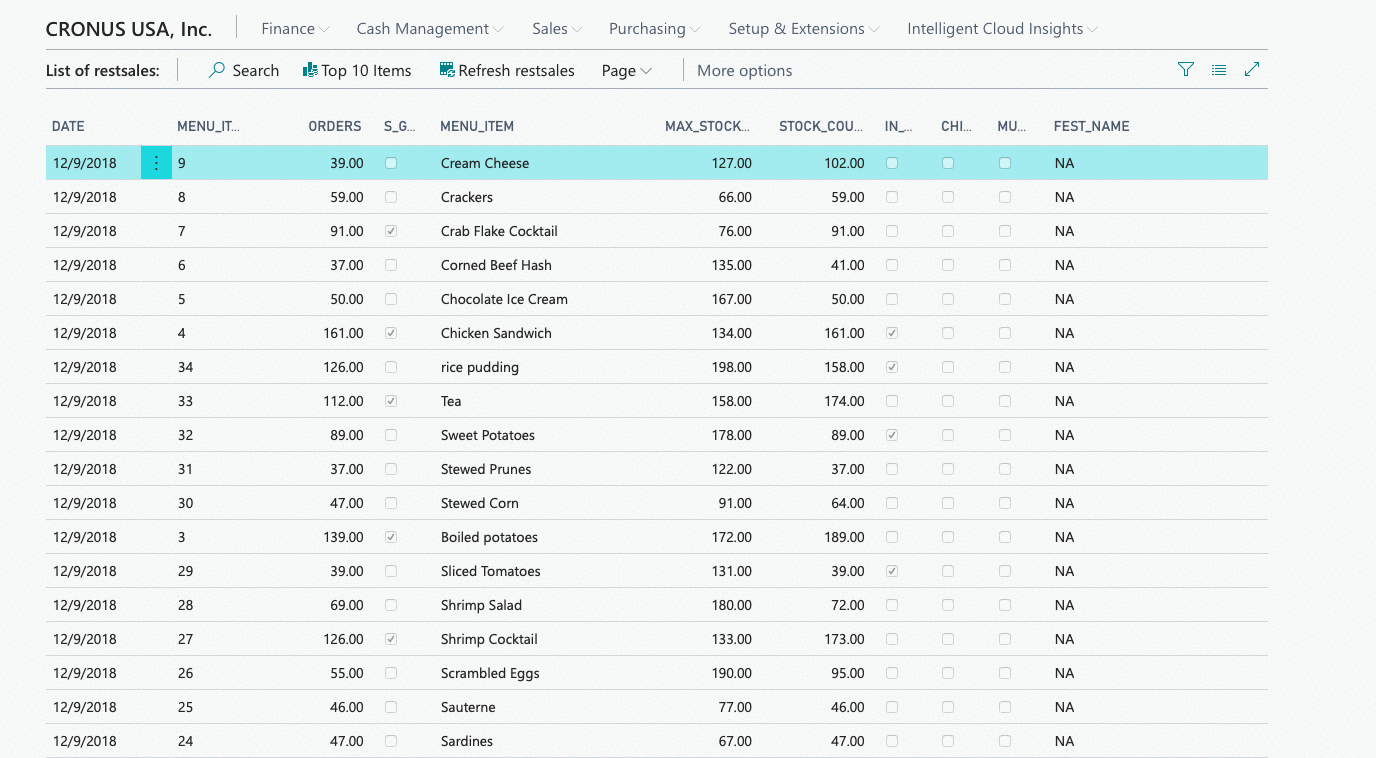
Step 5. Add an action to Get Insights
Add an action to call the azure function from the sales transactions custom page
Step 6. Convert AL Table into JSON request
I see this is the most time-consuming part of the whole story. To be able to get insights from data, we have to send data first. And to send data we need to convert it into a JSON request.
Hopefully, we have all modern tools in AL for that.
Step 7. Send JSON data to Python Azure Function
Now we have a request, we simply send that to the Azure Function URL (stored previously).
Step 8. Get JSON result, save to AL table and show inside Business Central
We’ve got (hopefully :) insights in a JSON format. All we need – is to save it to AL table and show inside a page.
Let’s test!
Works! And it’s still super quick. Enjoy!
The code is available here https://github.com/dkatson/BC-AL-and-Python-AF-Integration
Update
And now with video instruction!
*This post is locked for comments