How to consolidate the financial statements of two or more separate companies into a consolidated financial statement in Microsoft Dynamics NAV 2017: Microsoft Dynamics NAV 2017 features
Consolidation in Microsoft Dynamics NAV 2017
Hello, everyone. My name is Christos Pittis, and I am a Microsoft Dynamics NAV Consultant. In this episode, I am going to show you how to consolidate the financial statements of two or more separate companies, subsidiaries, business units into a consolidated financial statement in Microsoft Dynamics NAV 2017.
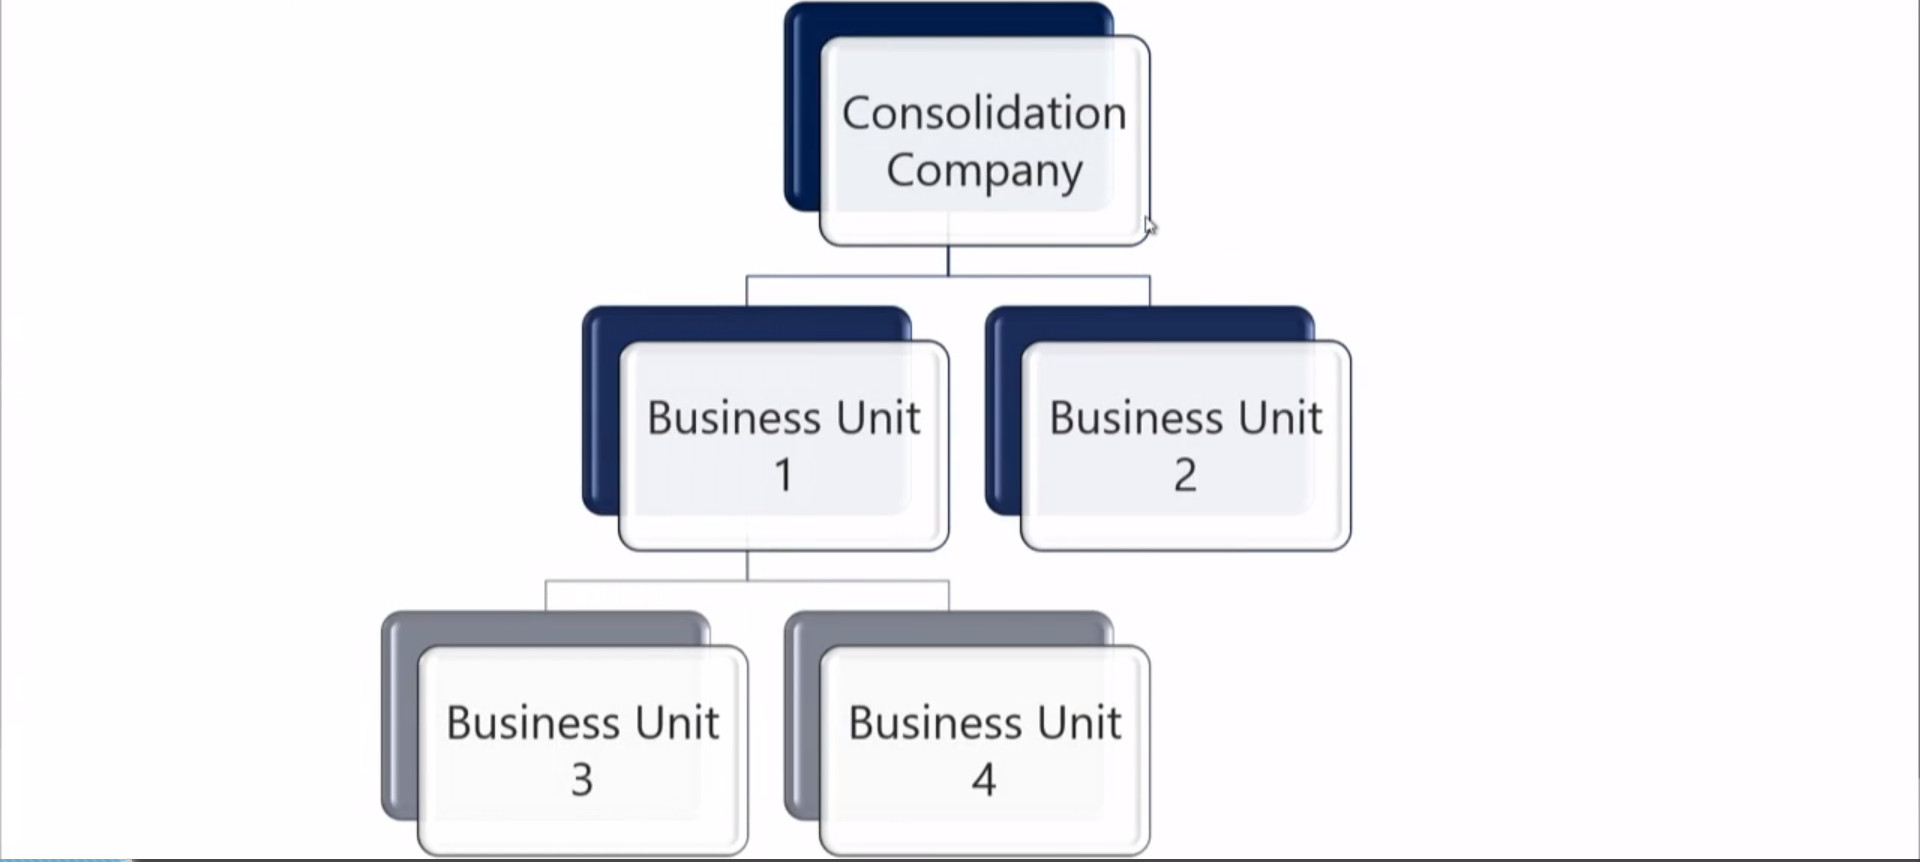
In the context of financial accounting, consolidation refers to the aggregation of financial statements of a group company as consolidated financial statements.
Each company involved in a consolidation is called a business unit. The combined company is called the consolidated company, and that's usually a company set up only for consolidation purposes.
You can import data into the consolidated company from the following sources:
1. From other companies in the same database,
2. From other Microsoft Dynamics NAV databases,
3. From files
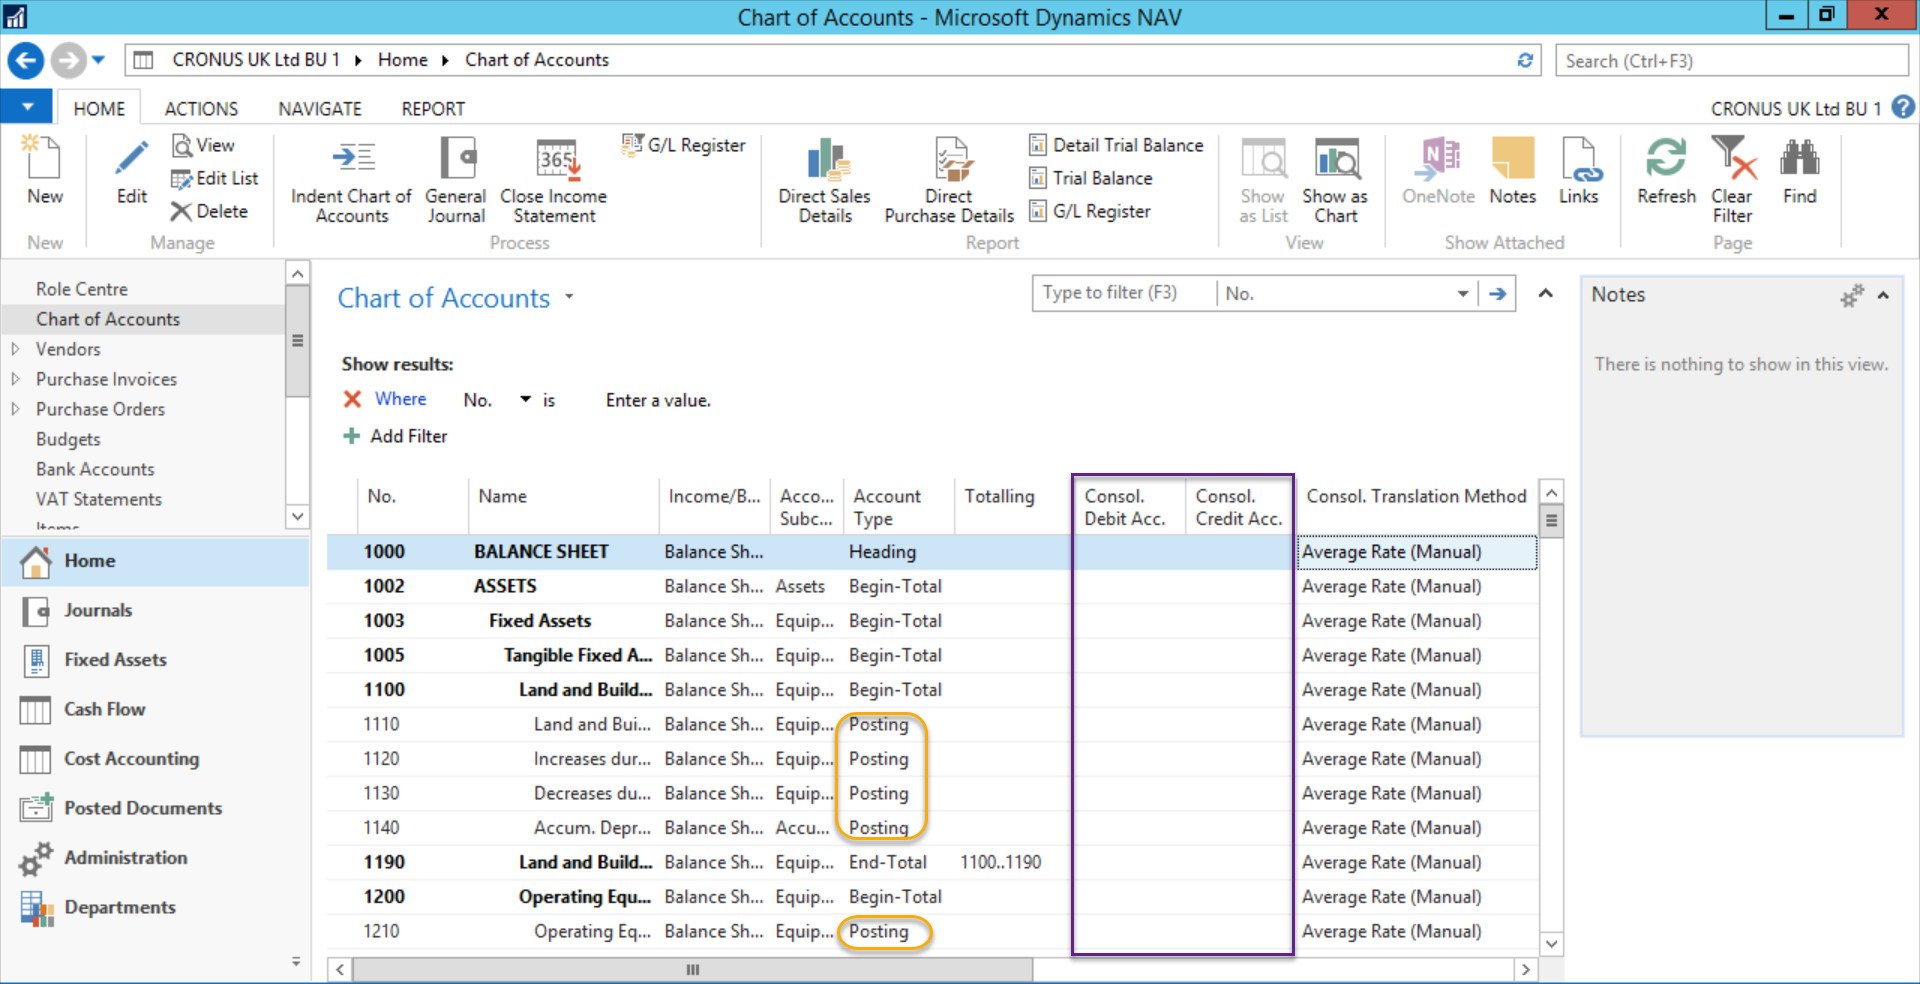
Open your Microsoft Dynamics NAV 2017 windows client, open company CRONUS UK Ltd BU 1, and visit the Chart of Accounts page.
Map all the G/L accounts to the G/L account that we are using in the consolidation company
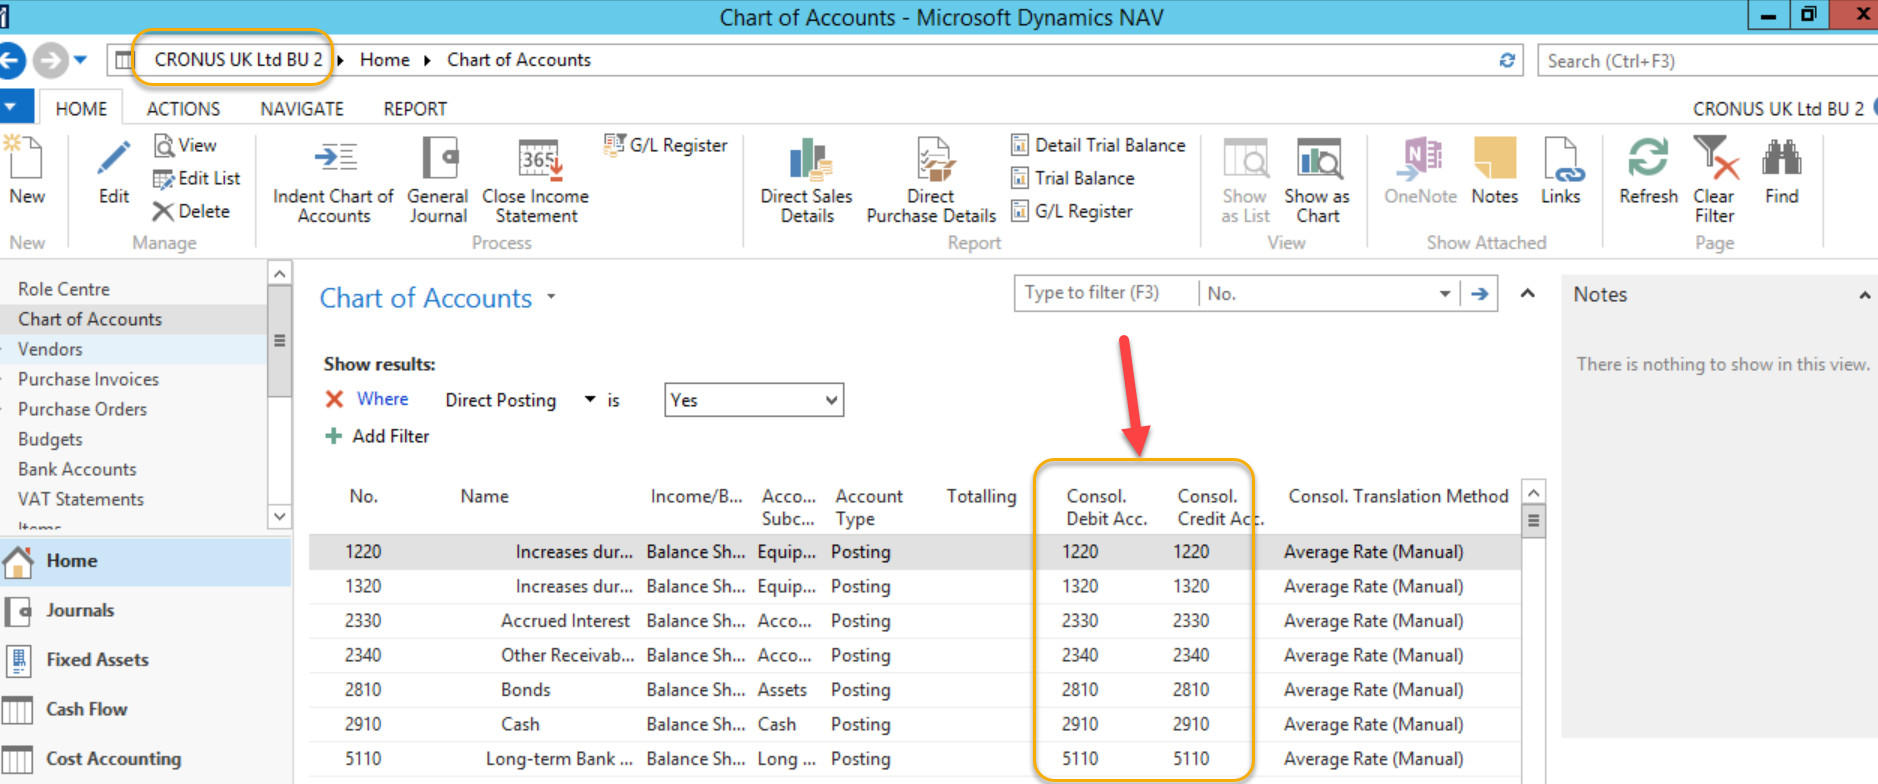
You need to specify the consolidation debit and credit account in the subsidiary companies:
CRONUS UK Ltd BU 1
CRONUS UK Ltd BU 2
The reason being is that you need to map all the G/L accounts to the G/L account that we are using in the consolidation company.
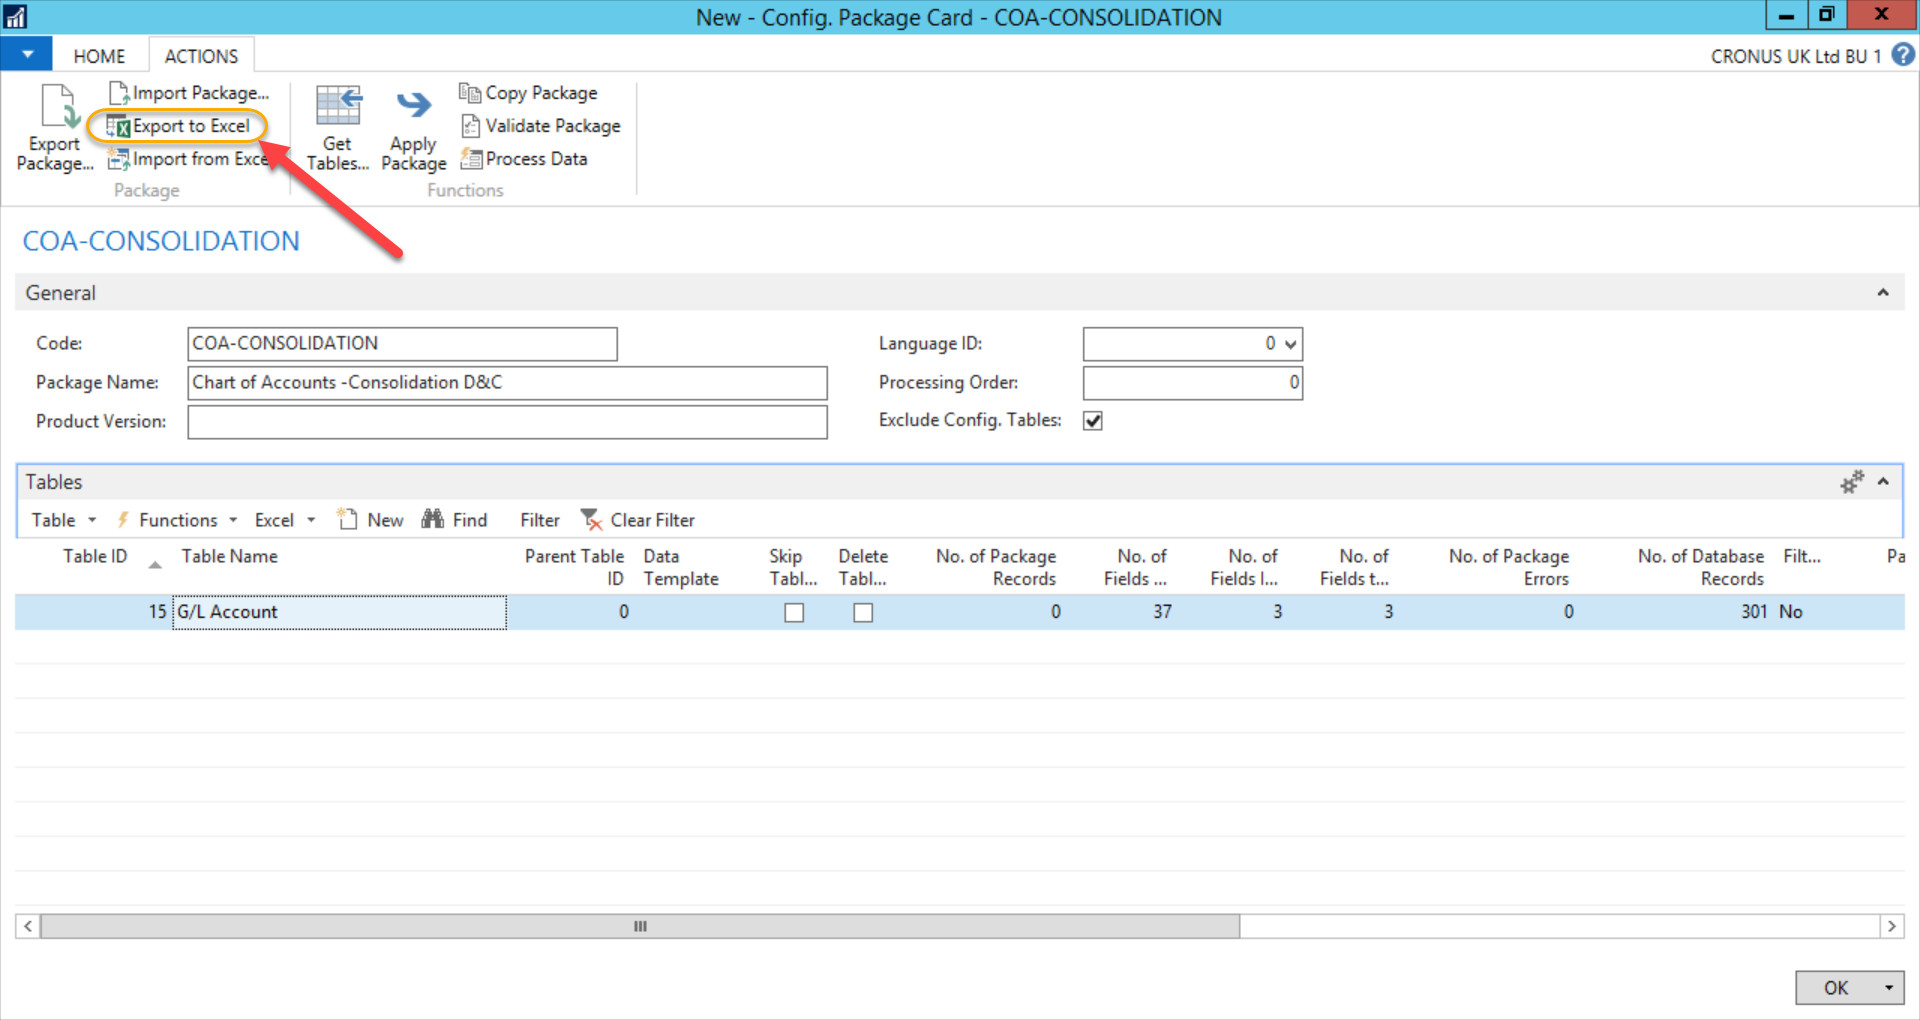
Rather than doing in on one by one basis which is time-consuming, you may want to use a configuration package. Export G/L Accounts (table 15) in excel and update the following accounts:
1. Consol. Debit Acc.
2. Consol. Credit Acc.
3. Consol. Translation Method***
*** In this example all companies are in the same currency, so I am skipping this field.
Configuration package
Excel file
Save the excel file, import back into CRONUS UK Ltd BU 1 and CRONUS UK Ltd BU 2, and apply.
CRONUS UK Ltd BU 2
CRONUS UK Ltd BU 1
As you can see, we could consolidate companies using different:
1. Chart of Accounts
2. Local Currency
3. Fiscal Year
4. Dimensions (see below)
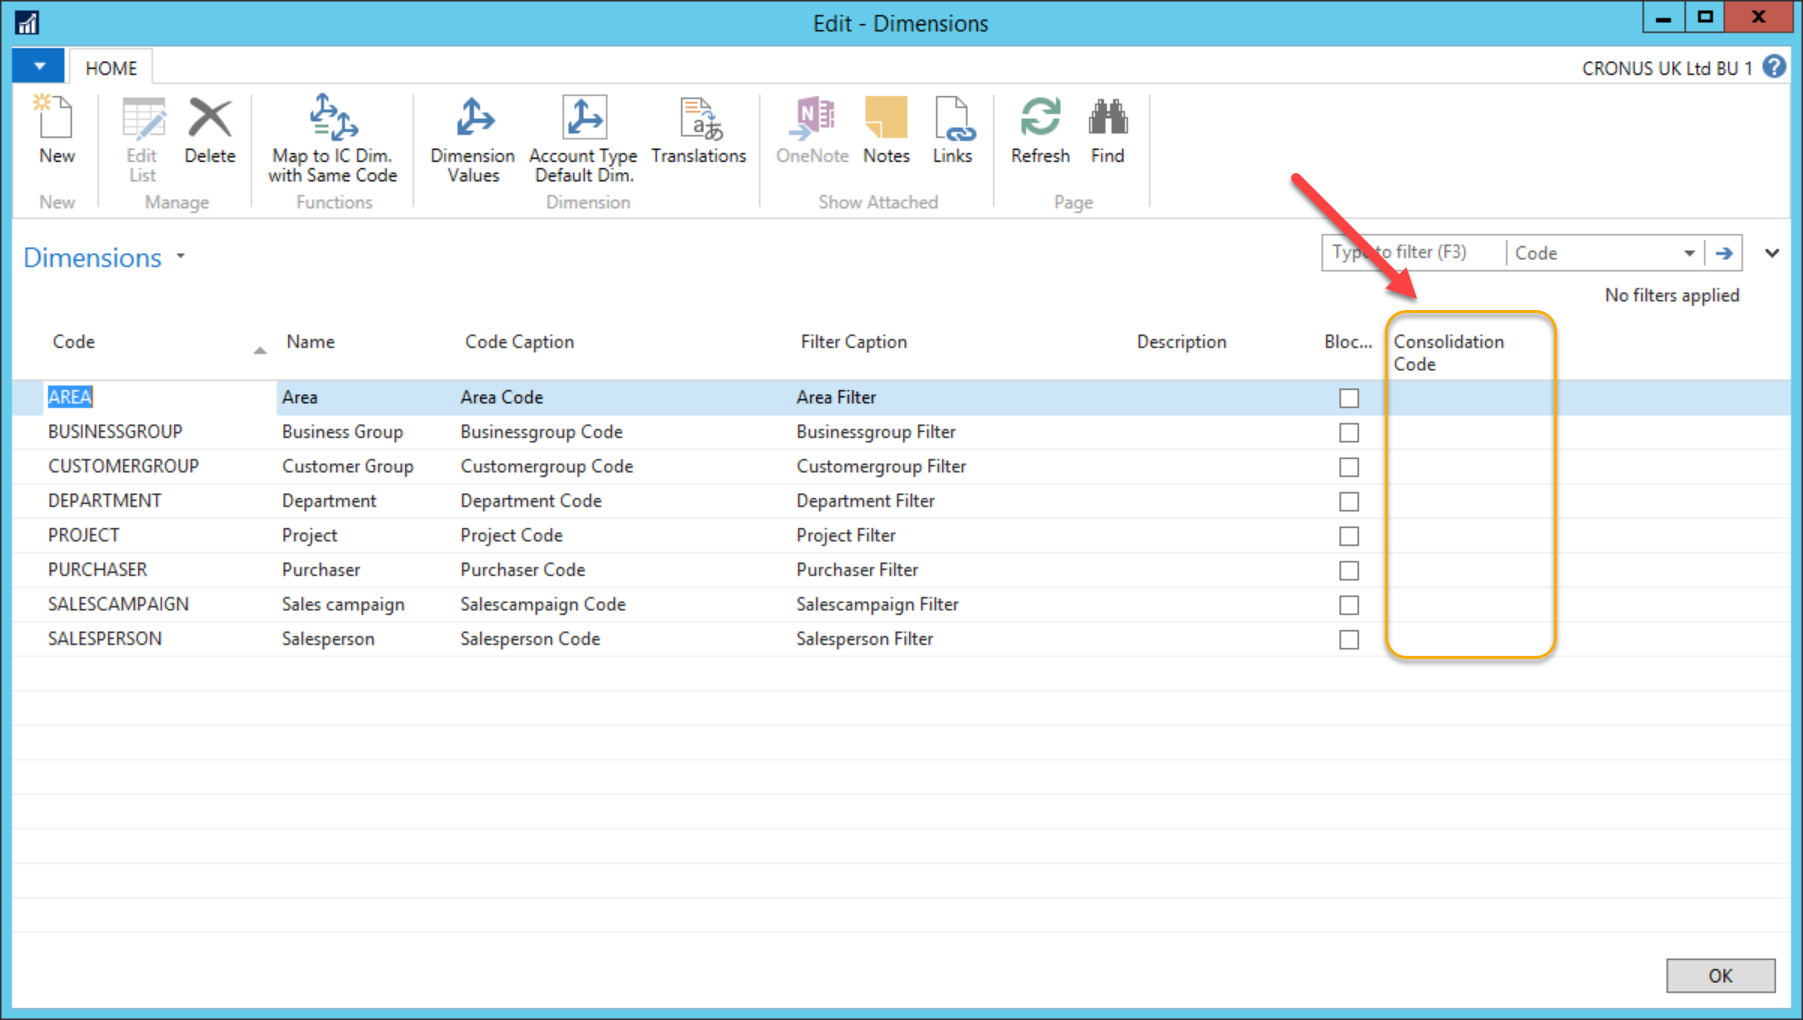
Map all the Dimensions to the Dimensions that we are using in the consolidation company
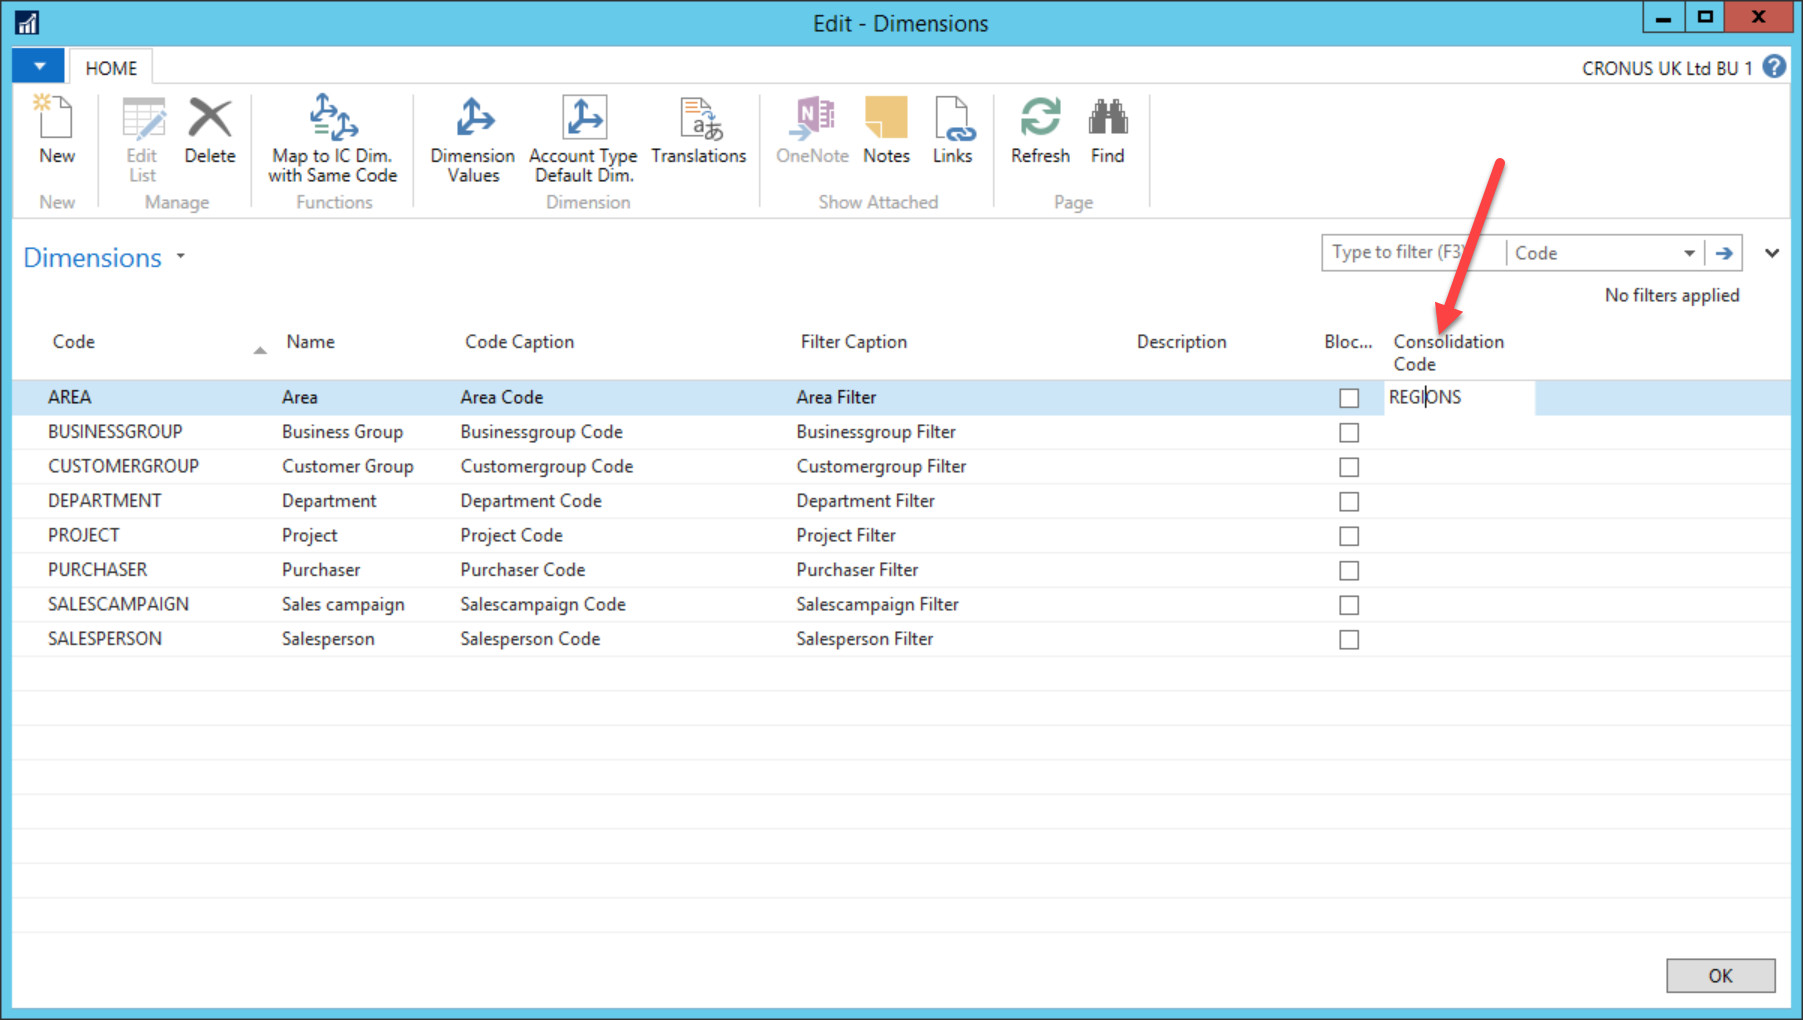
If the consolidation company (in this example, CRONUS UK Ltd Consolidated) is using the same dimension codes, then you can leave the Consolidated Code field blank. If the Consolidated Company uses different naming, then you can type the name.
Example: AREA > REGIONS
In this example, I will leave it blank.
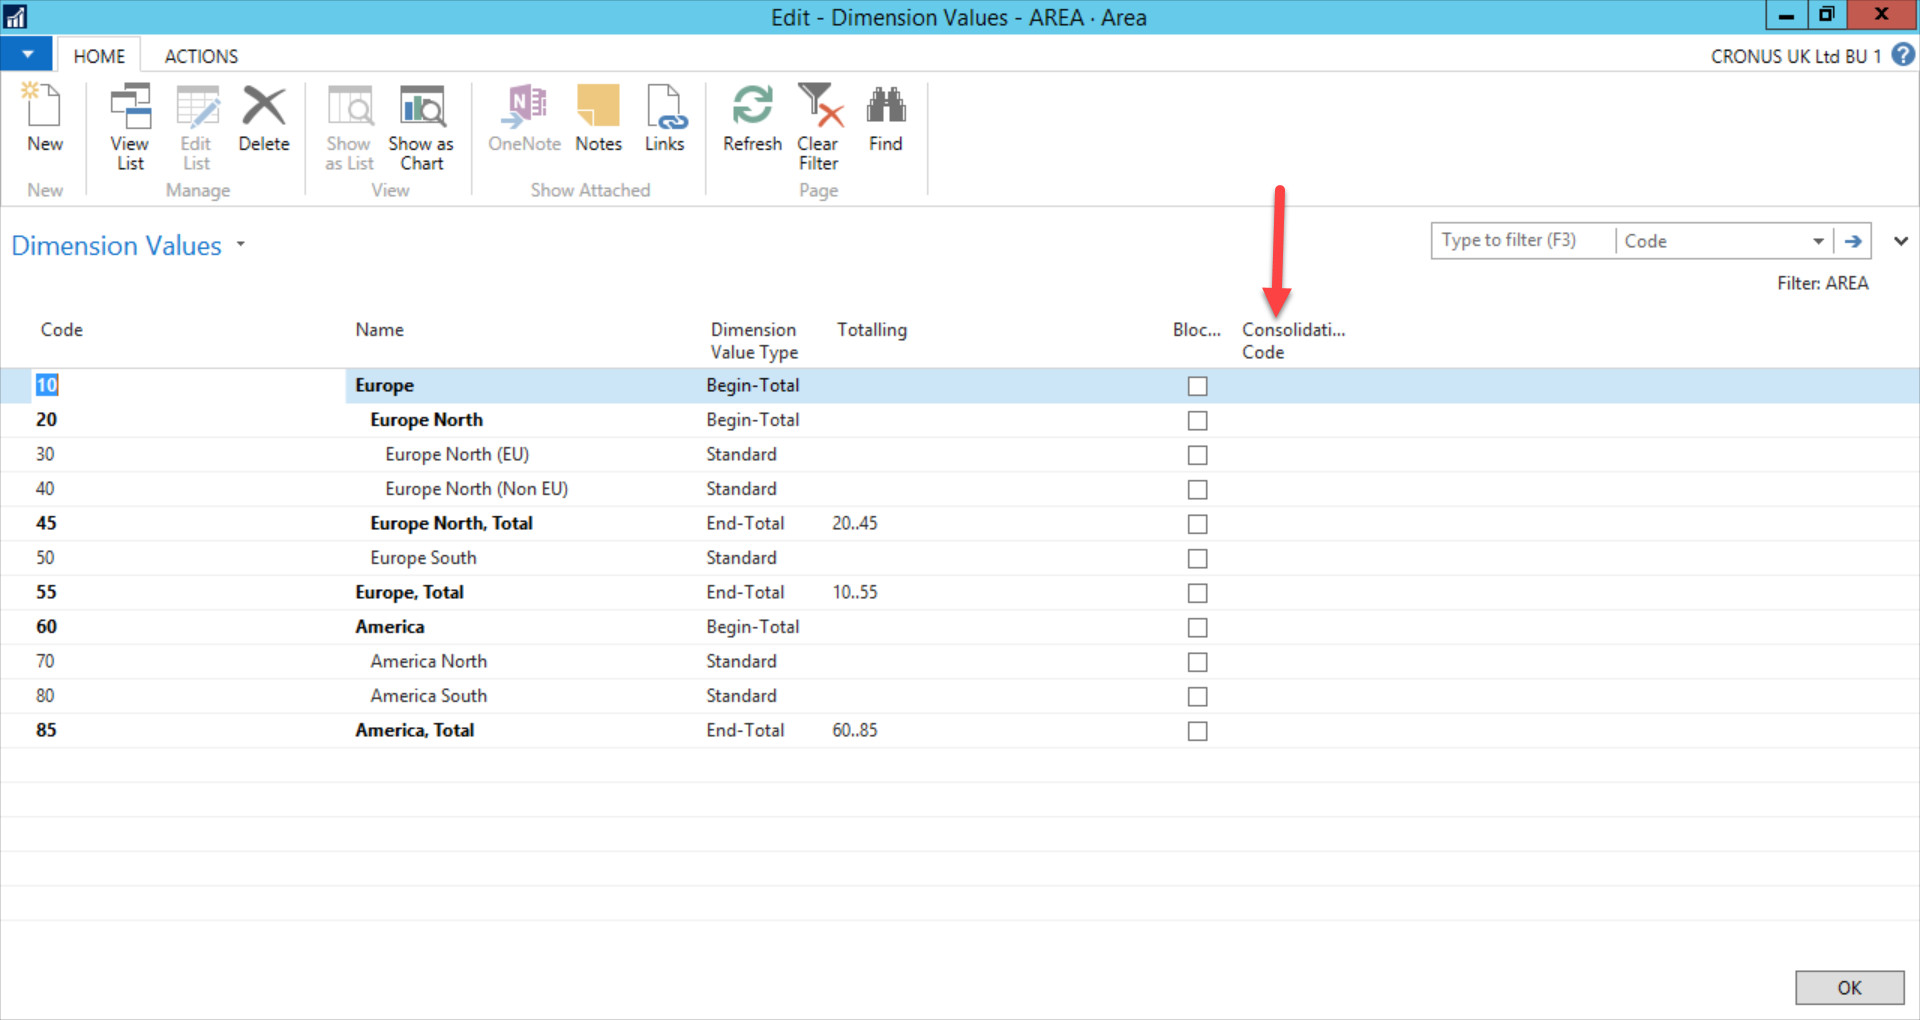
The same logic applies for Dimension Values
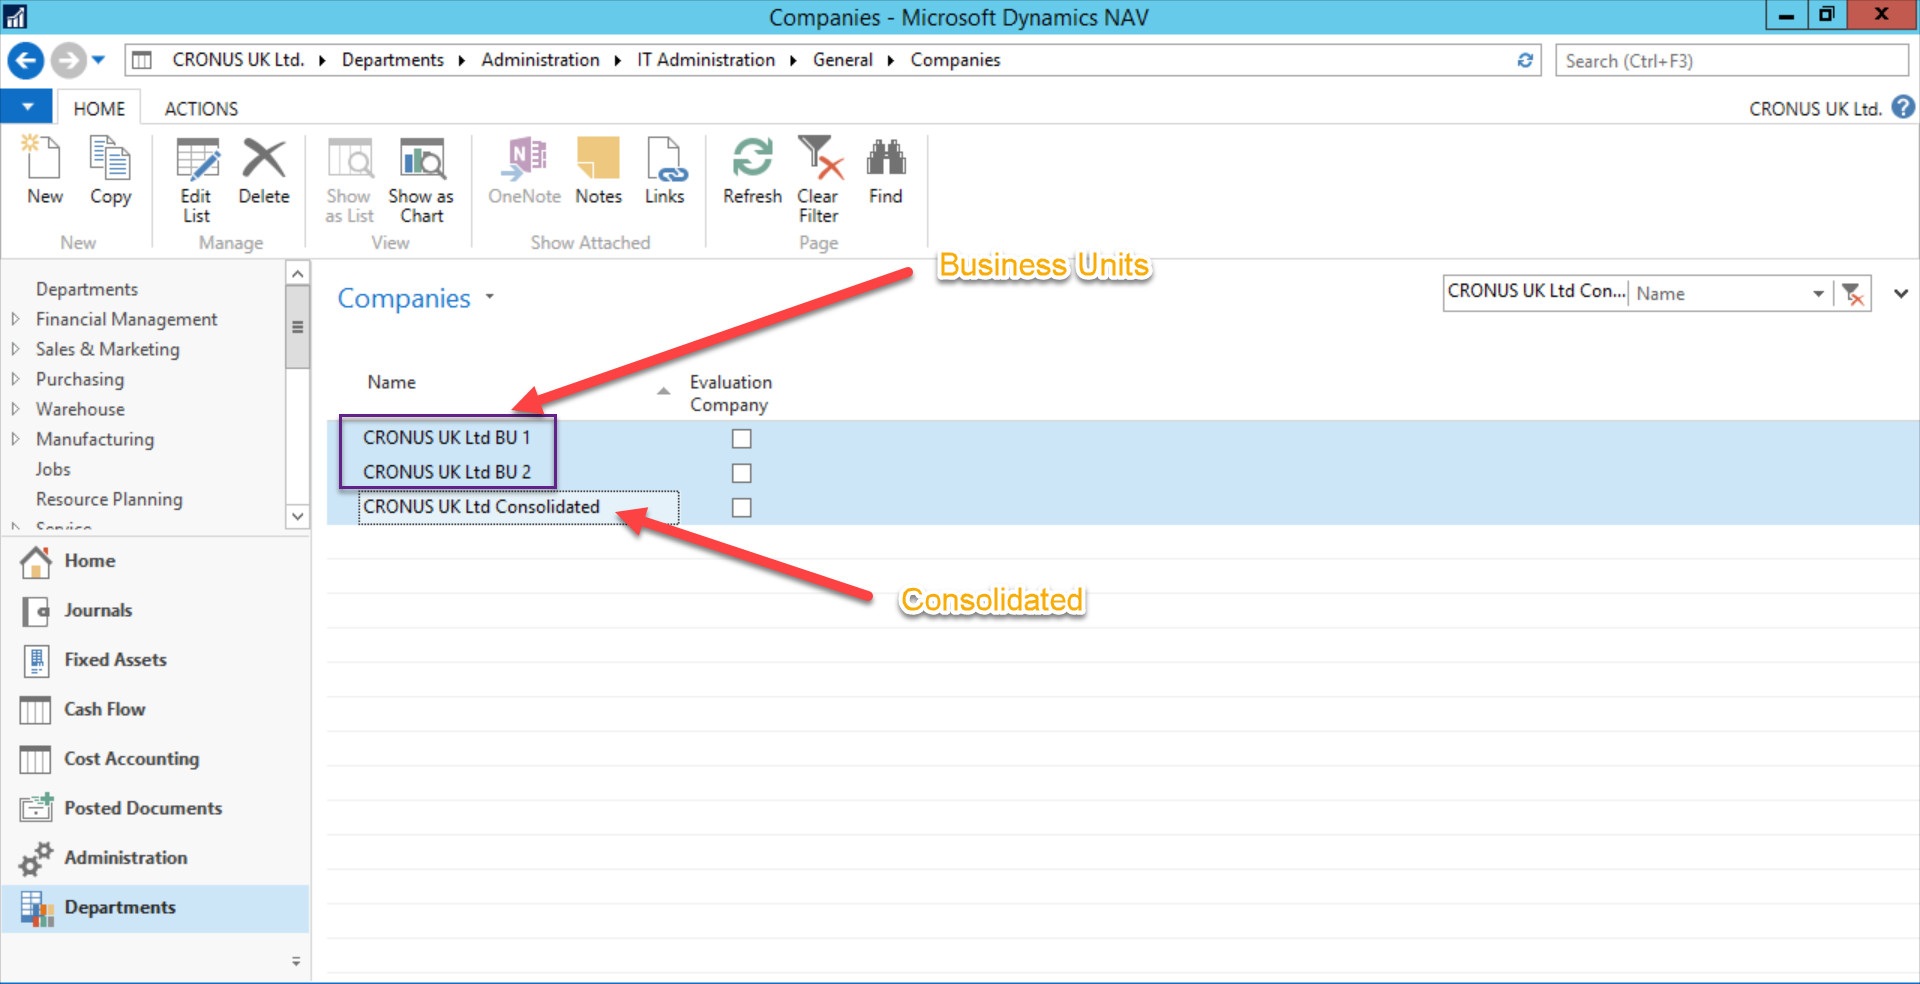
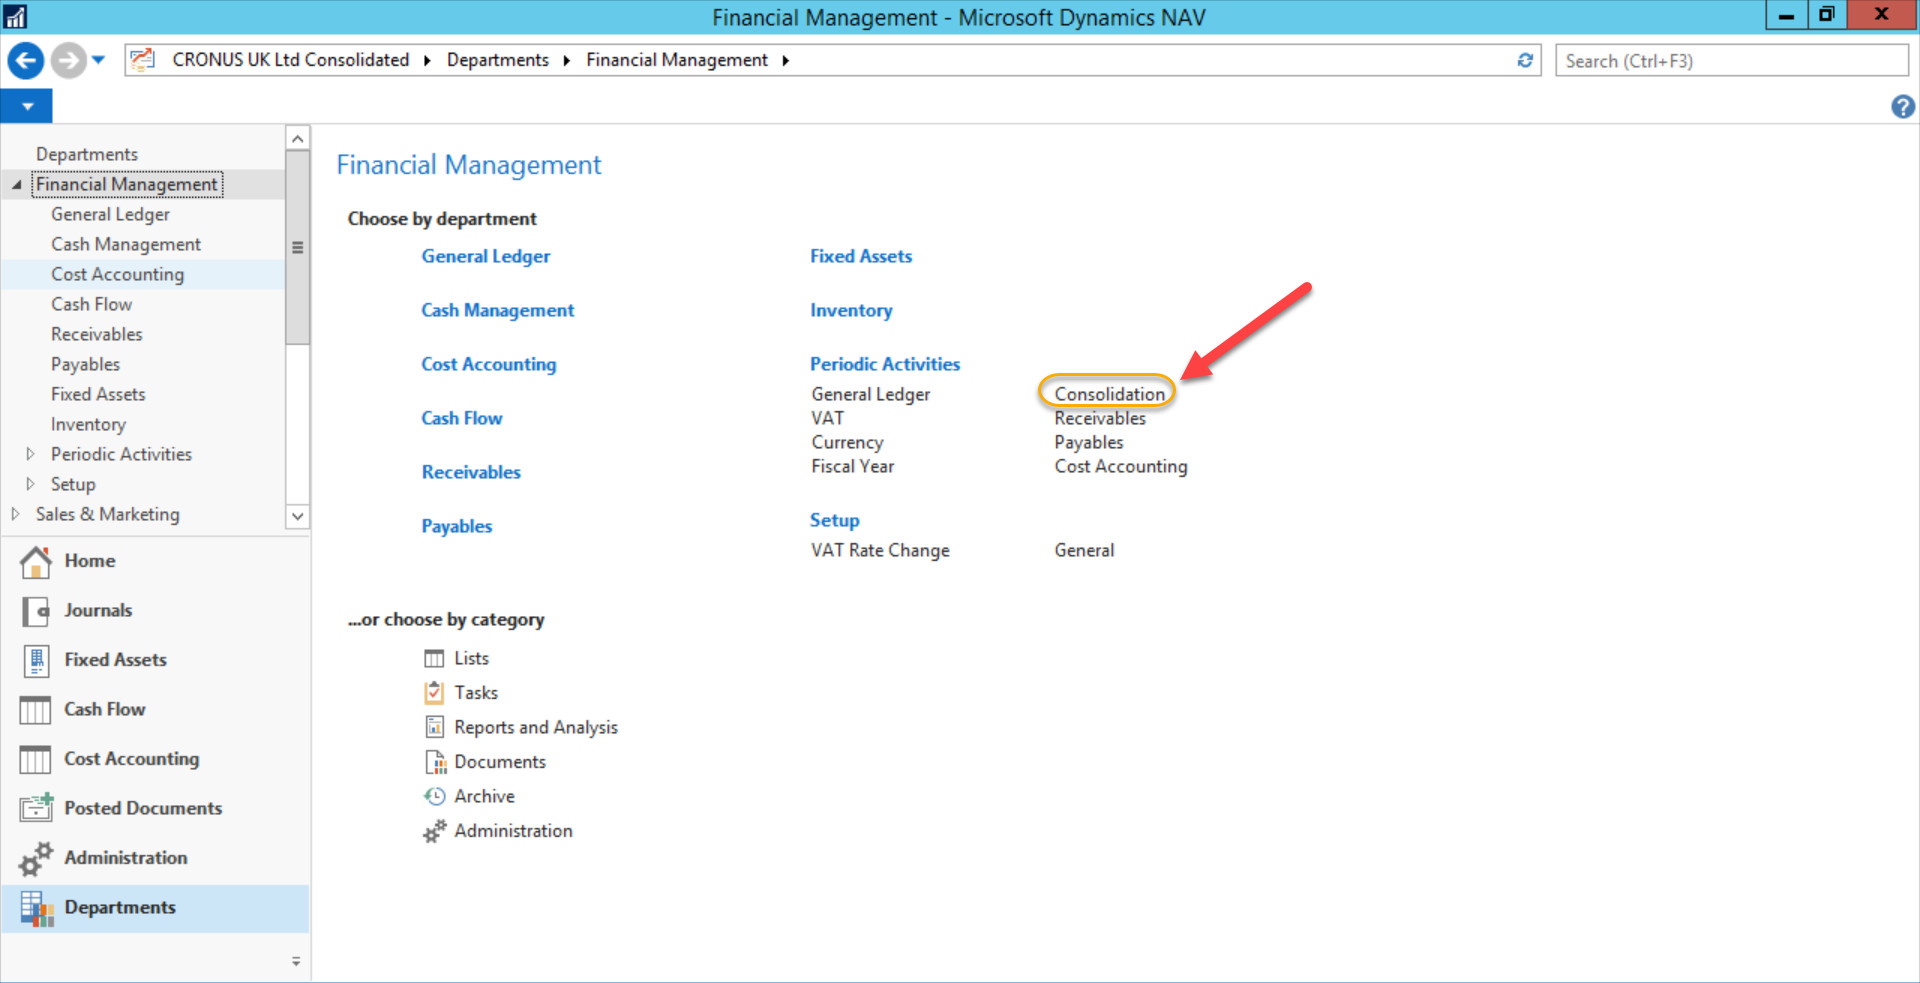
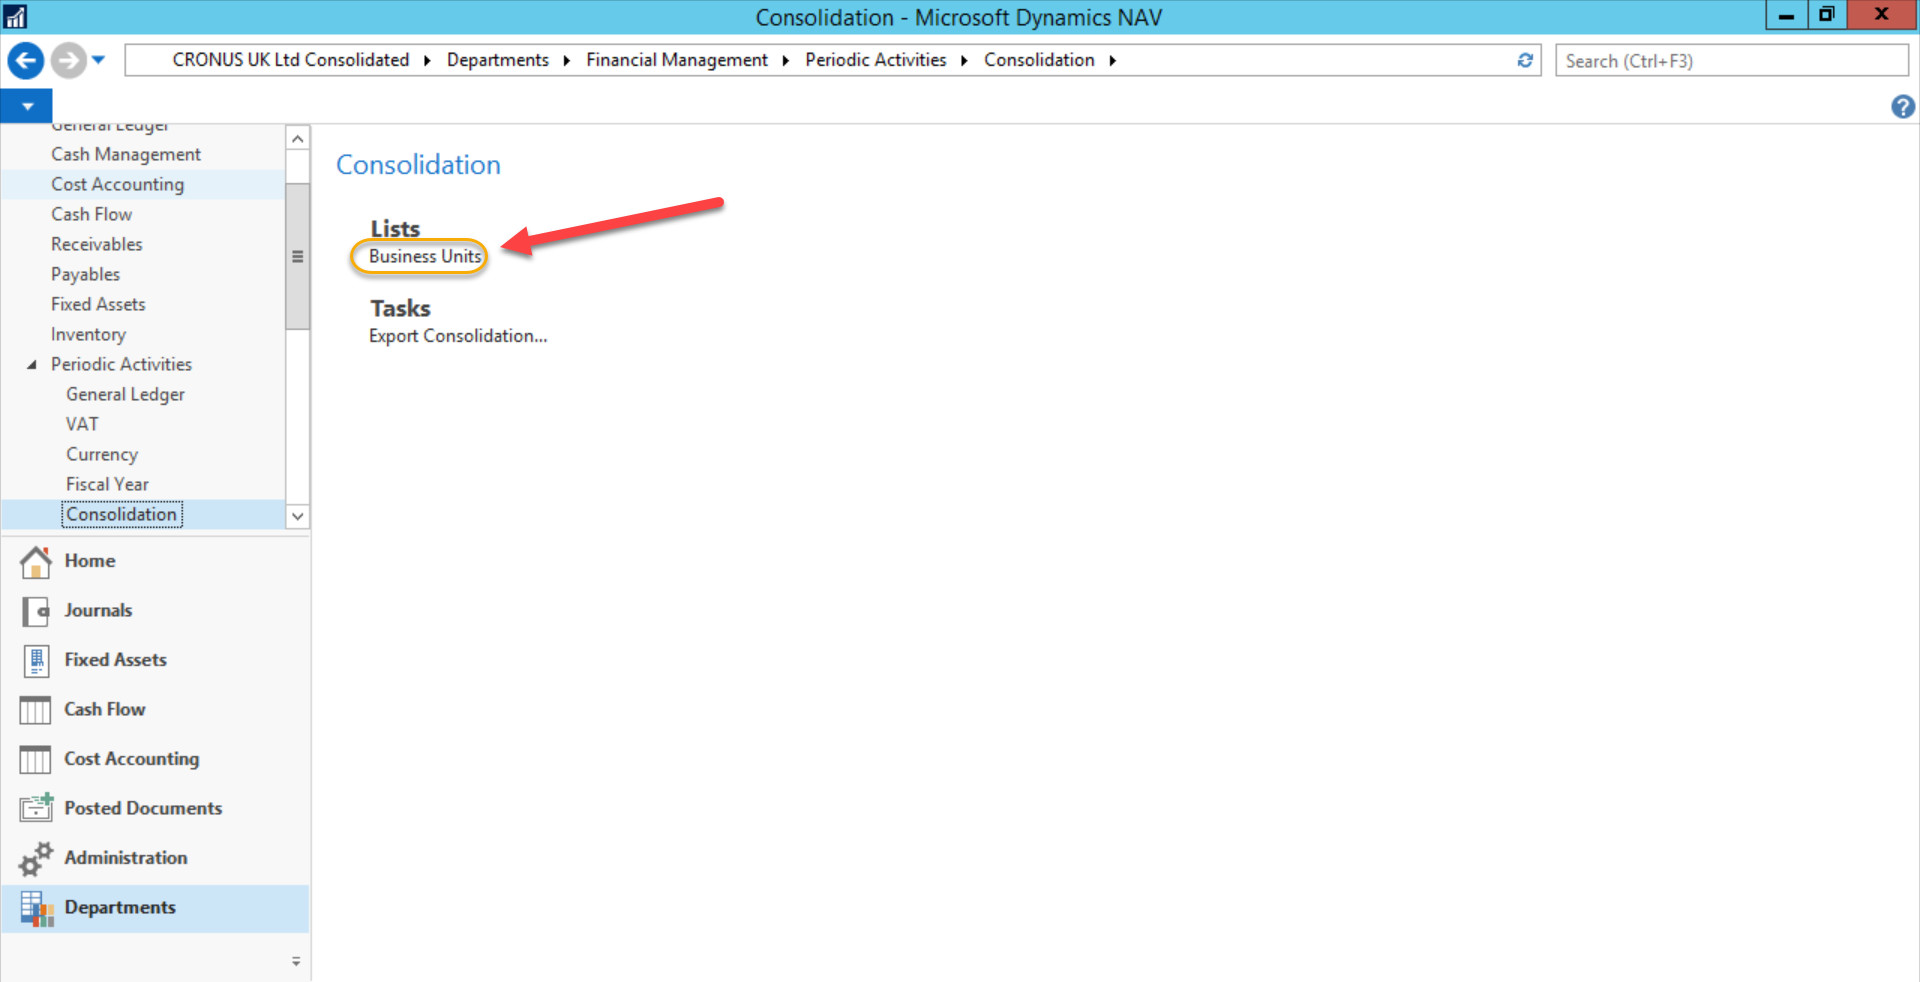
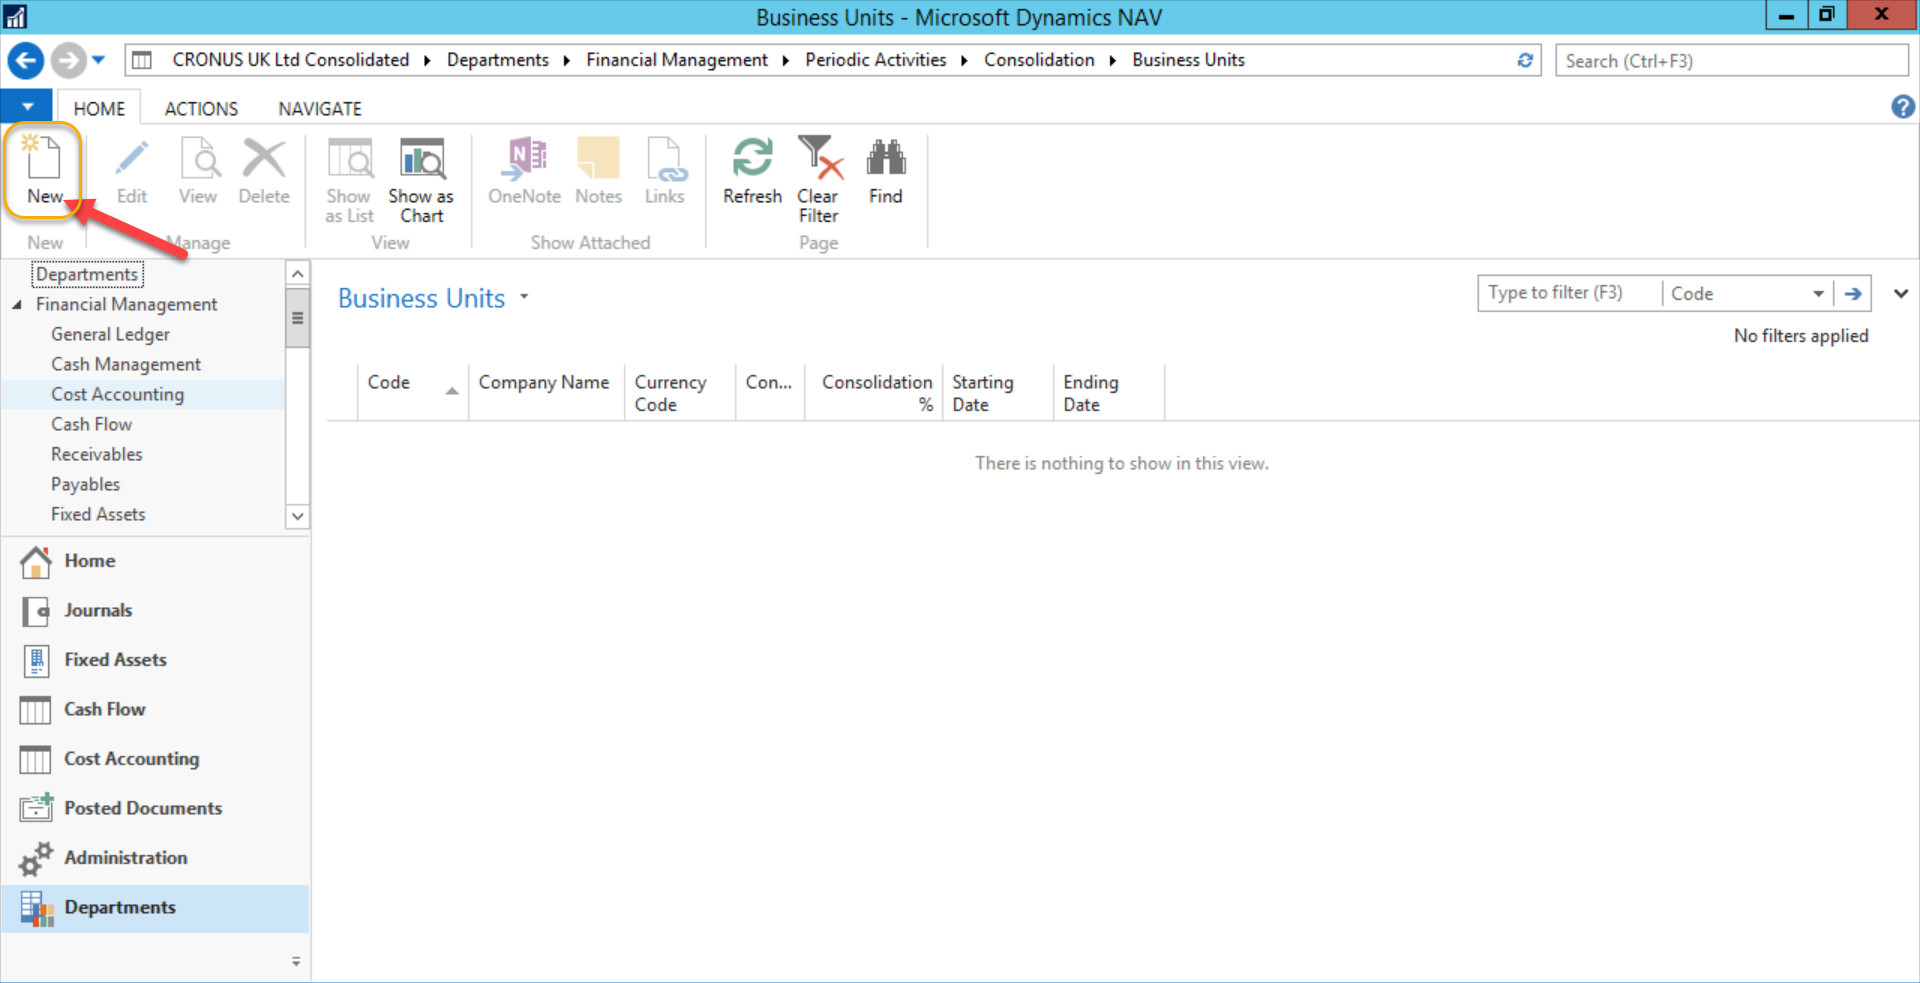
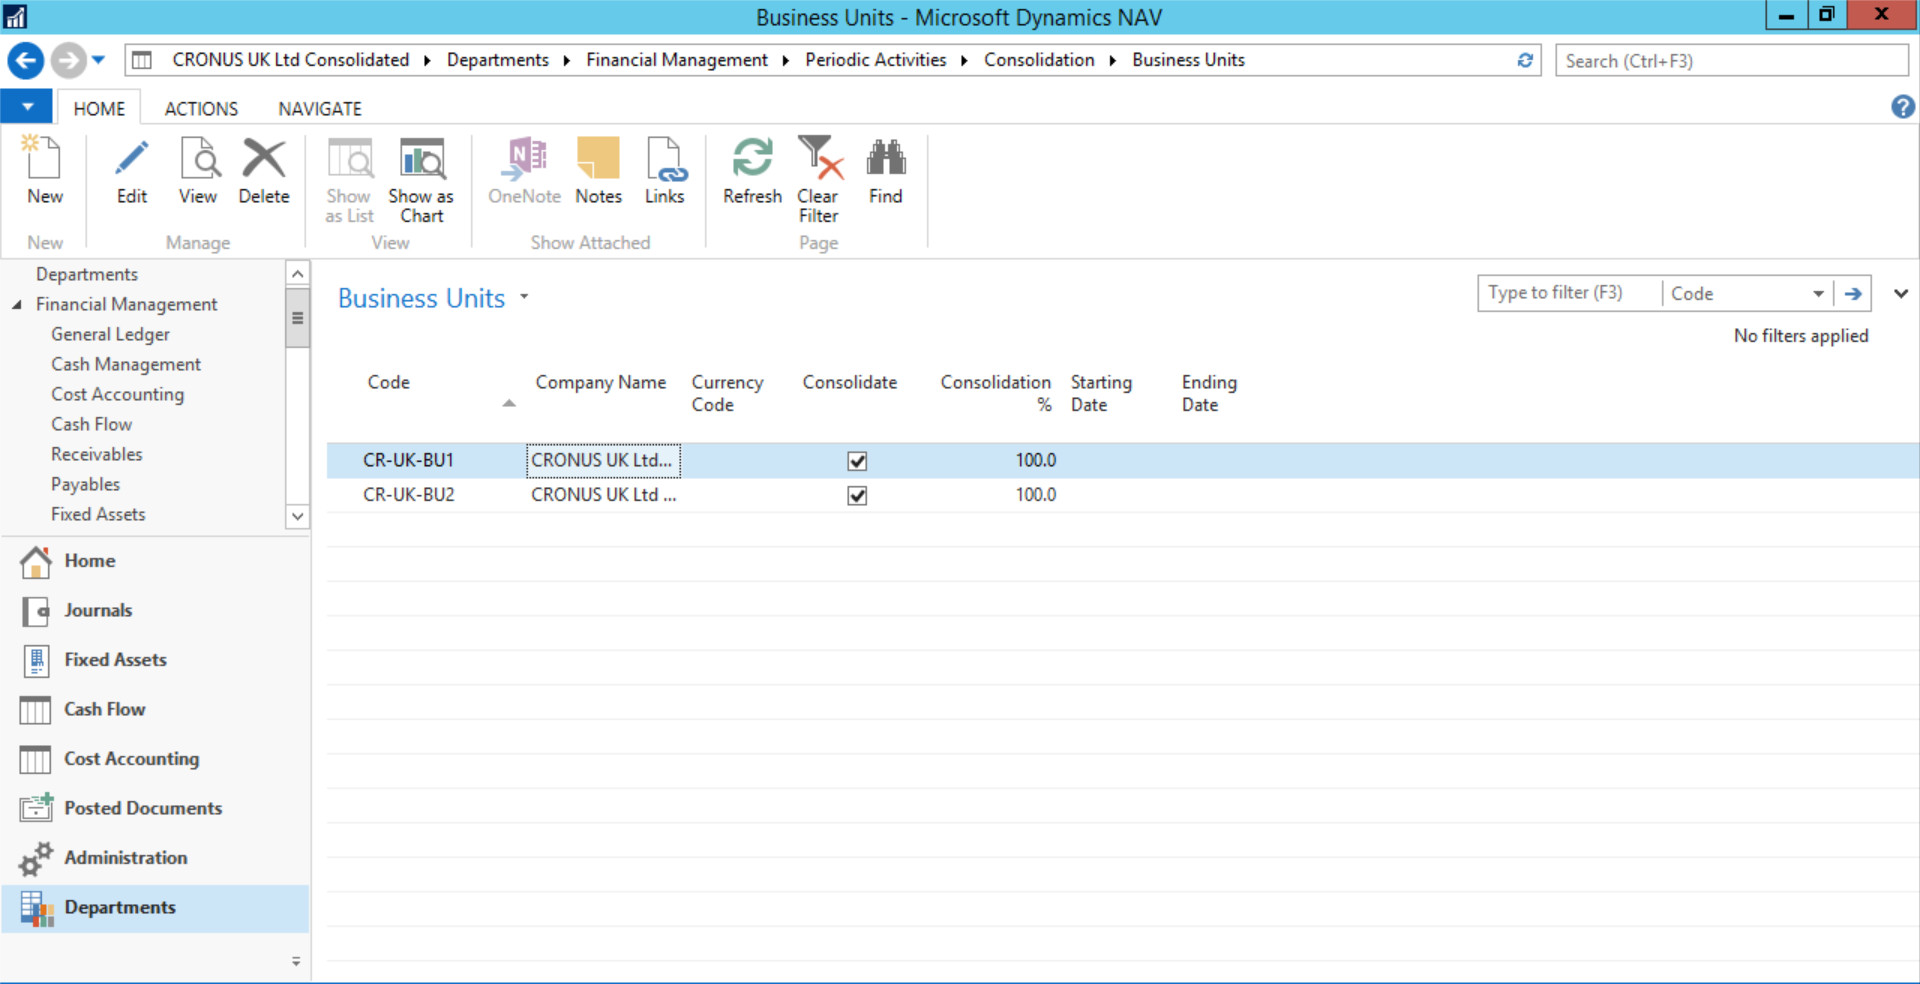
Now let’s setup Business Units and as you remember, companies to be consolidated are called Business Units.
In this example:
Business Units = CRONUS UK Ltd BU 1 and CRONUS UK Ltd BU 2
You need to create Business Units in the Consolidated Company.
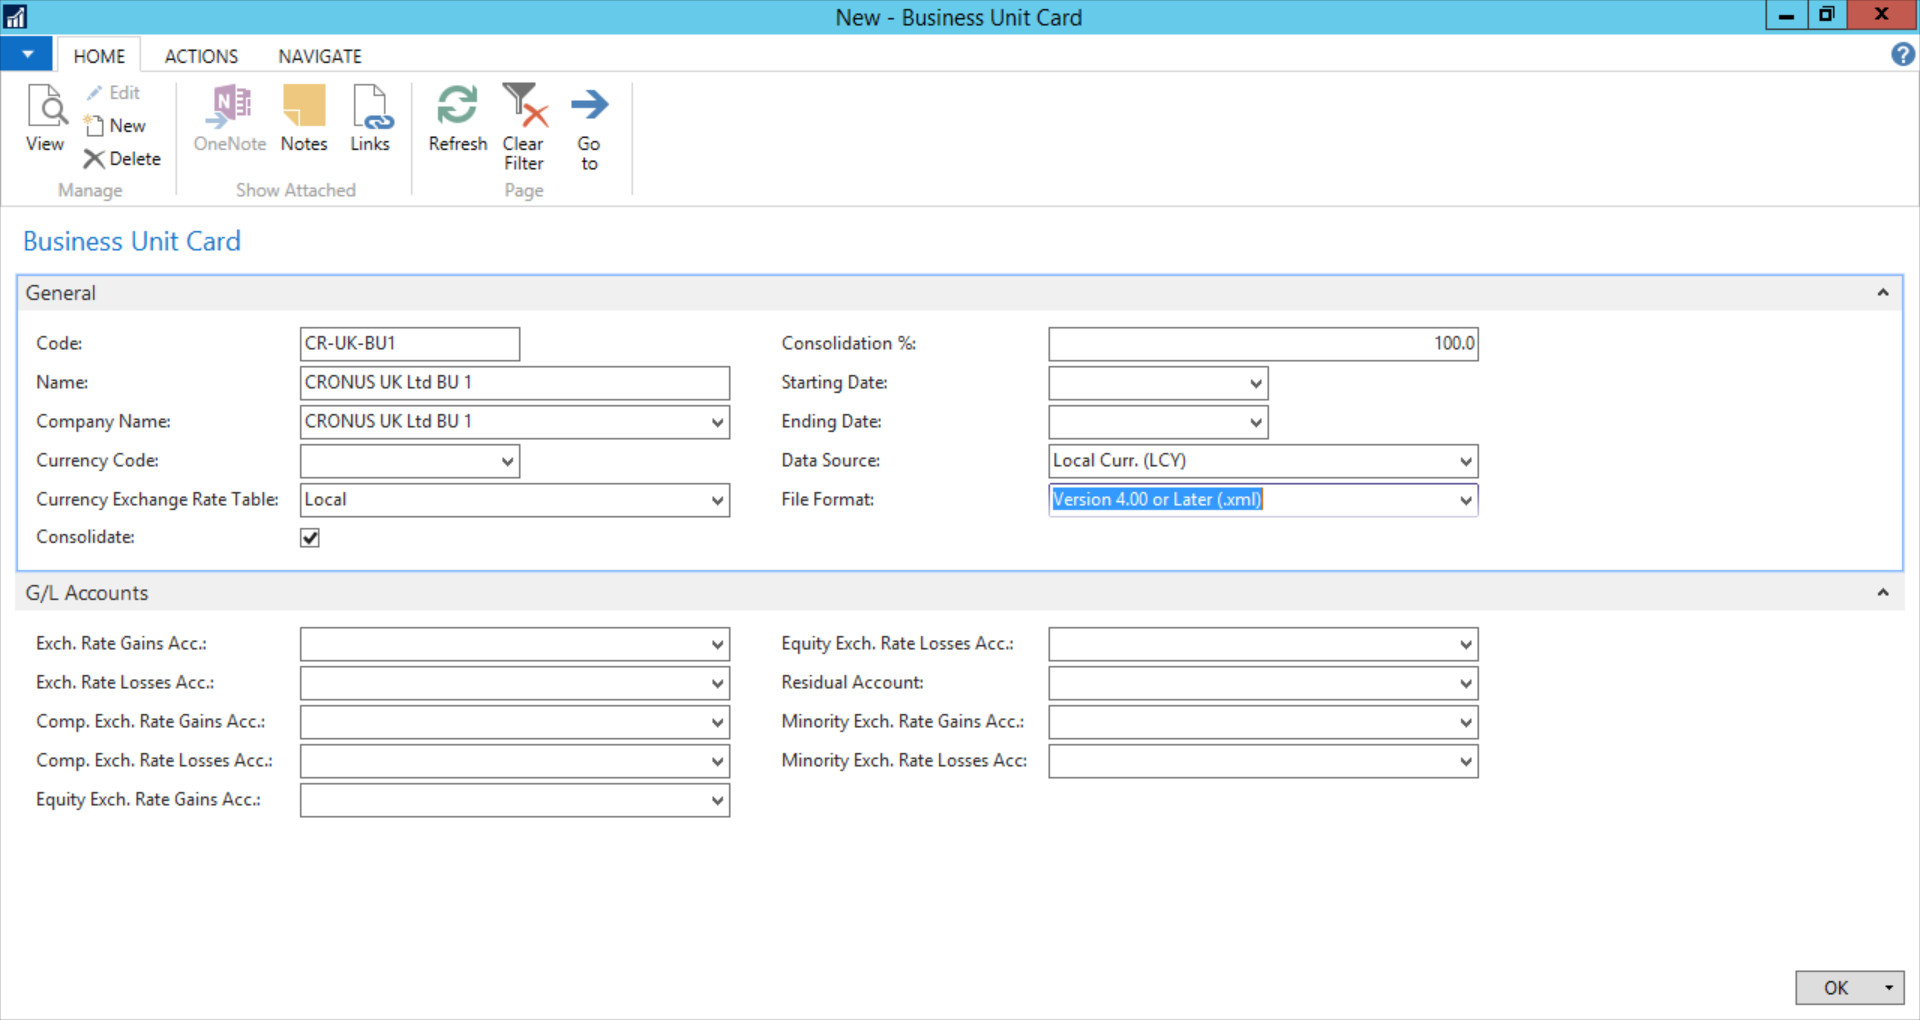
Action: Create two business units in CRONUS UK Ltd Consolidated
Business Unit = CRONUS UK Ltd BU 1
Business Unit = CRONUS UK Ltd BU 2
In this example, business units are about to be consolidated 100%, and that fact is specified on the Consolidation % field.
Click OK.
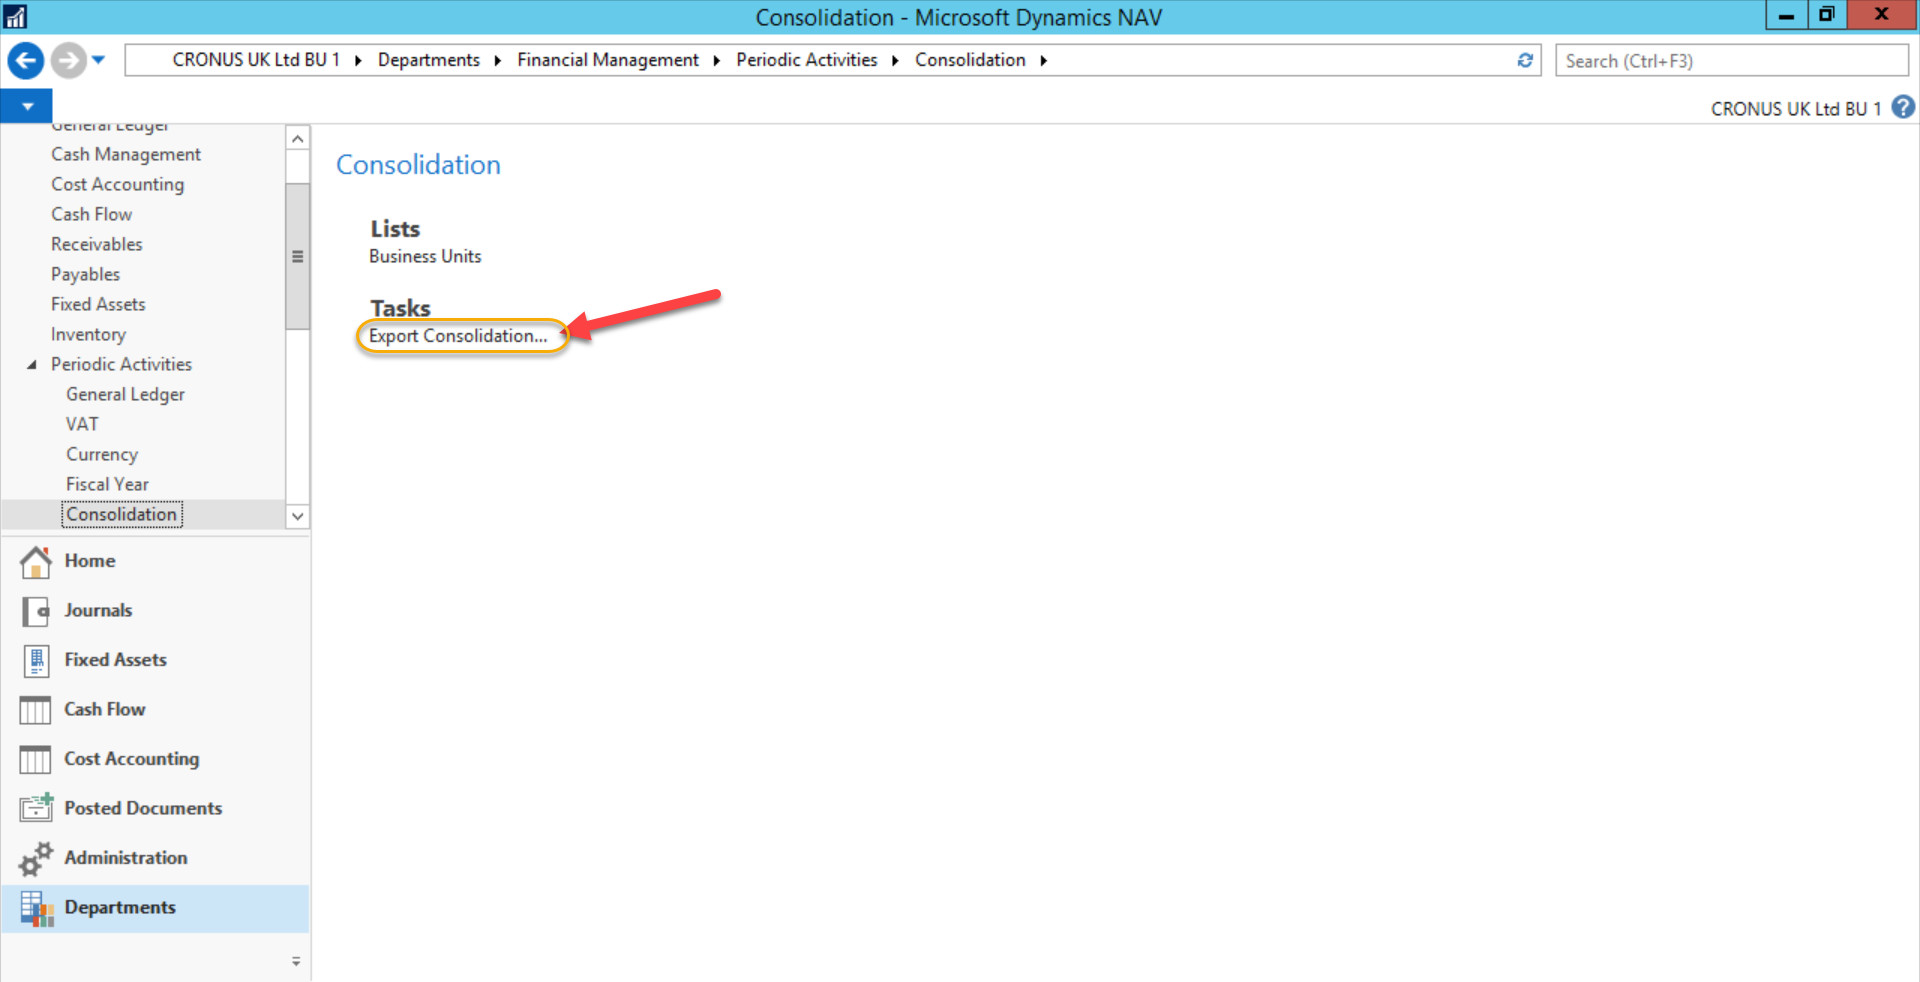
Export Data for Consolidation
The Export Data for Consolidation action is something that you only have to do when you're running consolidation between companies that are not using the same NAV database. In this example, this action is not necessary, and I am just showing it - you might face a similar scenario.
What is exported?
1. Account No.
2. Posting Date
3. Amount
4. Dimension Code
5. Dimension Value
The export action is performed from Business Units.
Click OK.
Test Data for Consolidation
Before if you import the consolidation data in the consolidated company (in the scenario you are running consolidation between companies that are not using the same NAV database), is a good idea to test the data at first.
I remind you that this action is not required in my example.
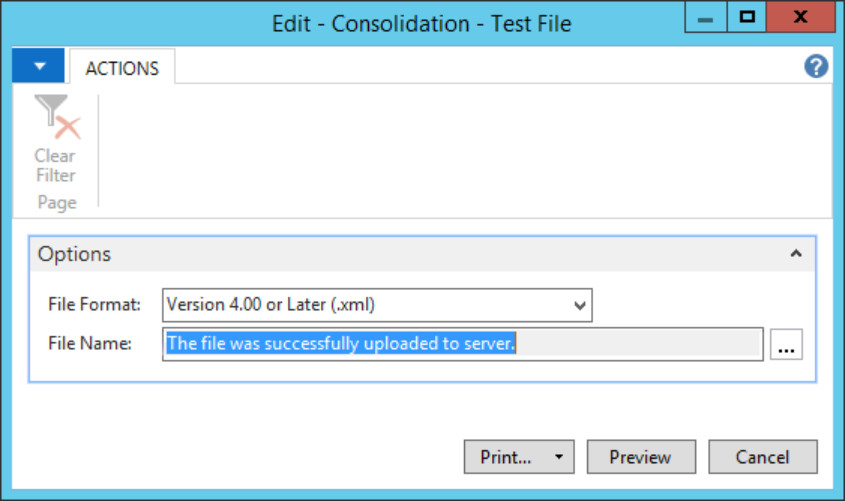
Switch back to the Consolidated Company and go to the Business Units page. Then click on the Test File button which is located in the Actions tab.
Select the file
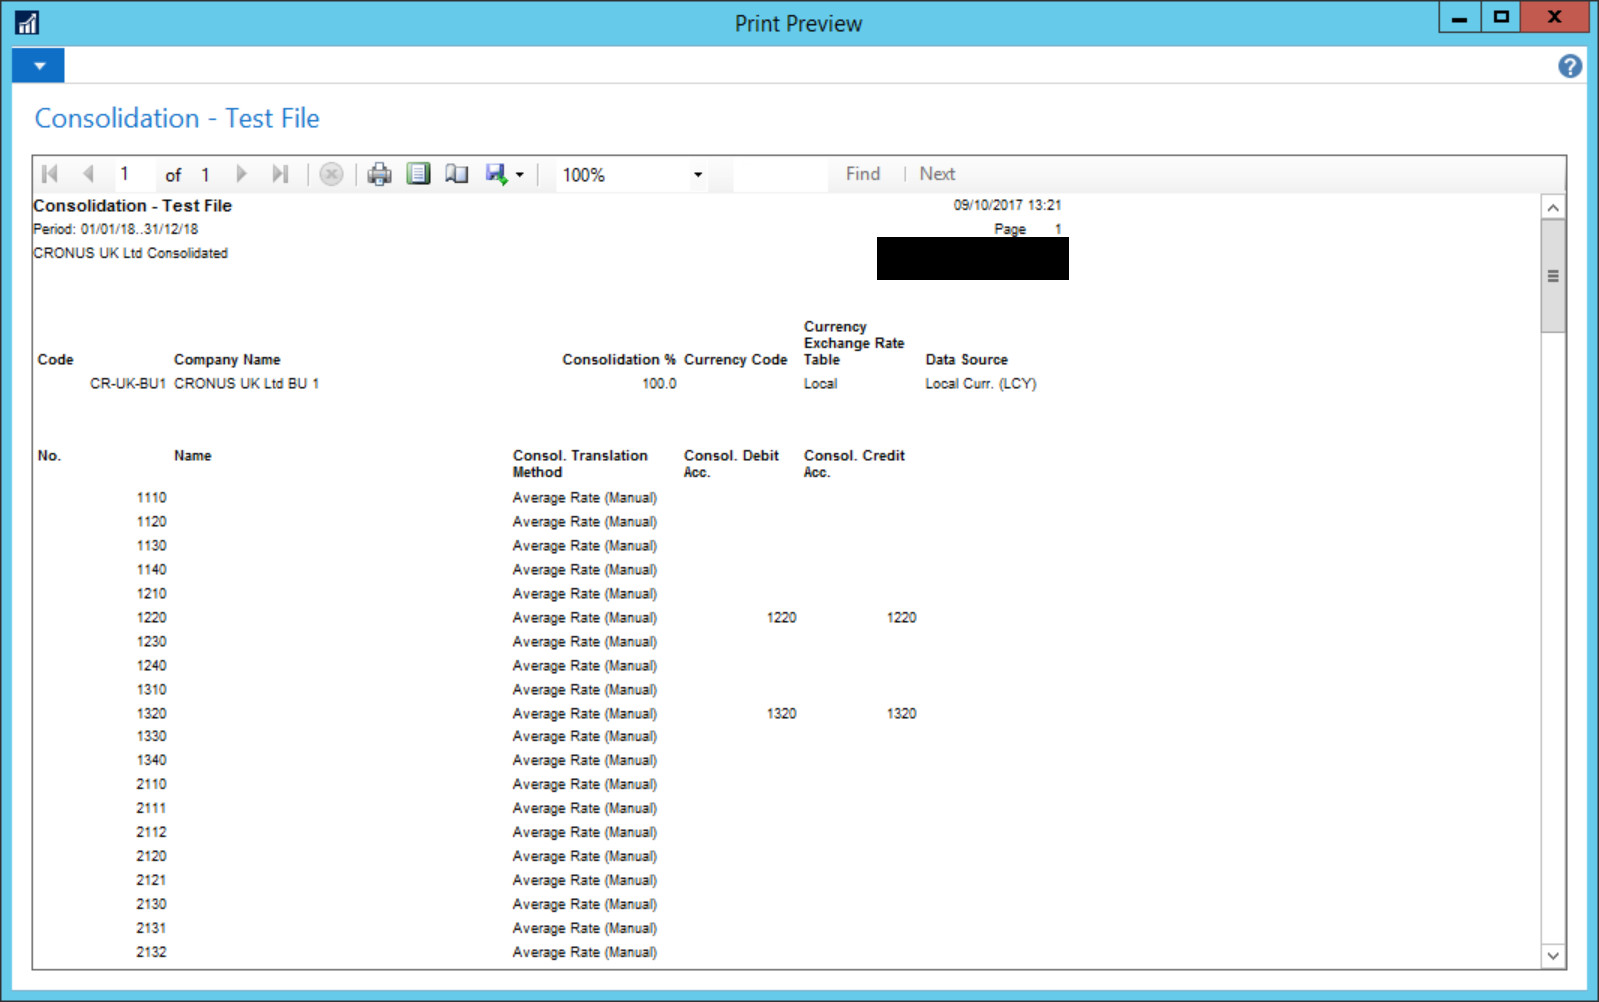
Click Preview.
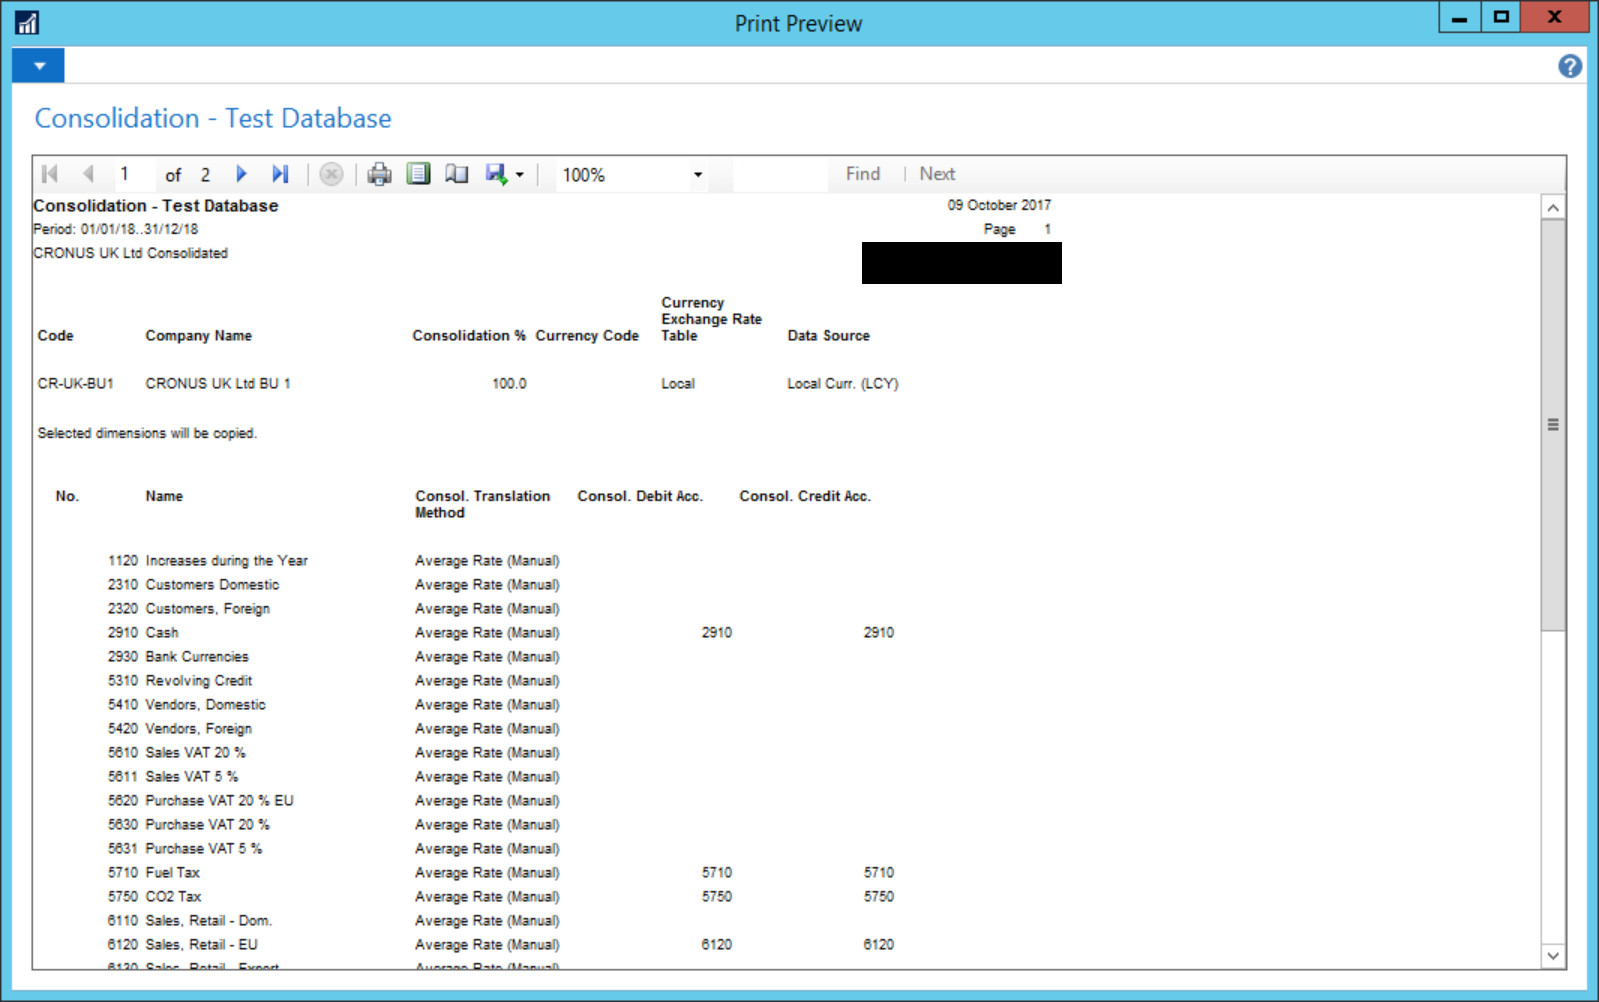
The report is checking for errors in mappings (G/L Accounts and Dimensions) so if you don’t see any errors coming through, then all good!
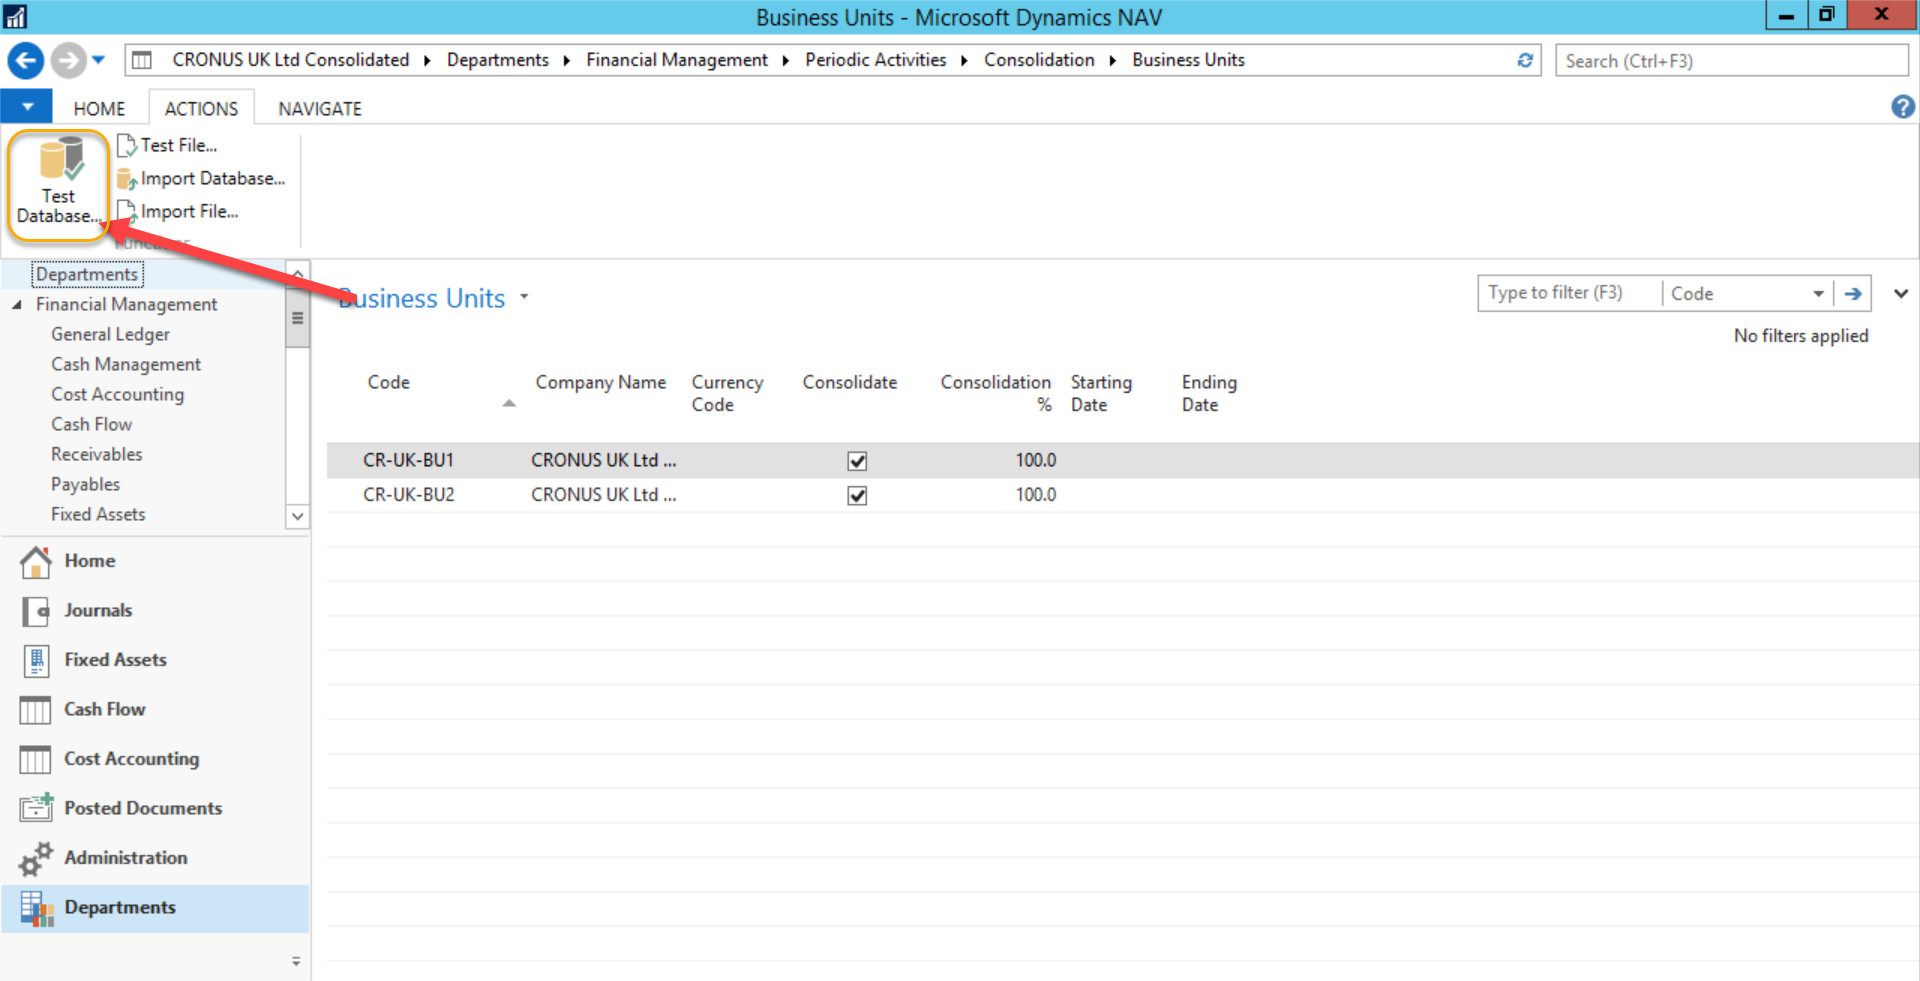
Test Database
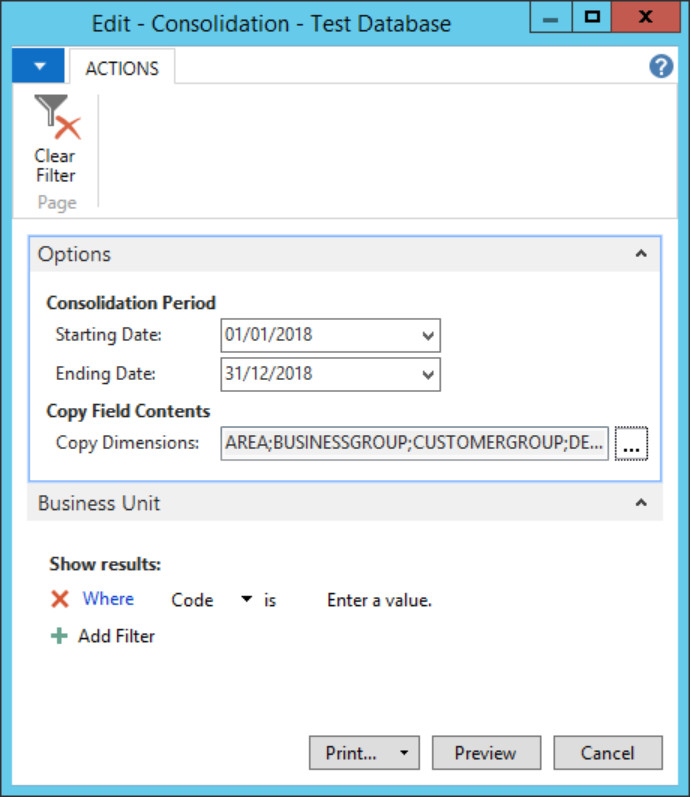
If I run Test Database, the system will check the same.
Click Preview.
The report is checking for errors in mappings (G/L Accounts and Dimensions) so if you don’t see any errors coming through, then all good!
Process the Consolidation
We perform this action in the Consolidated Company.
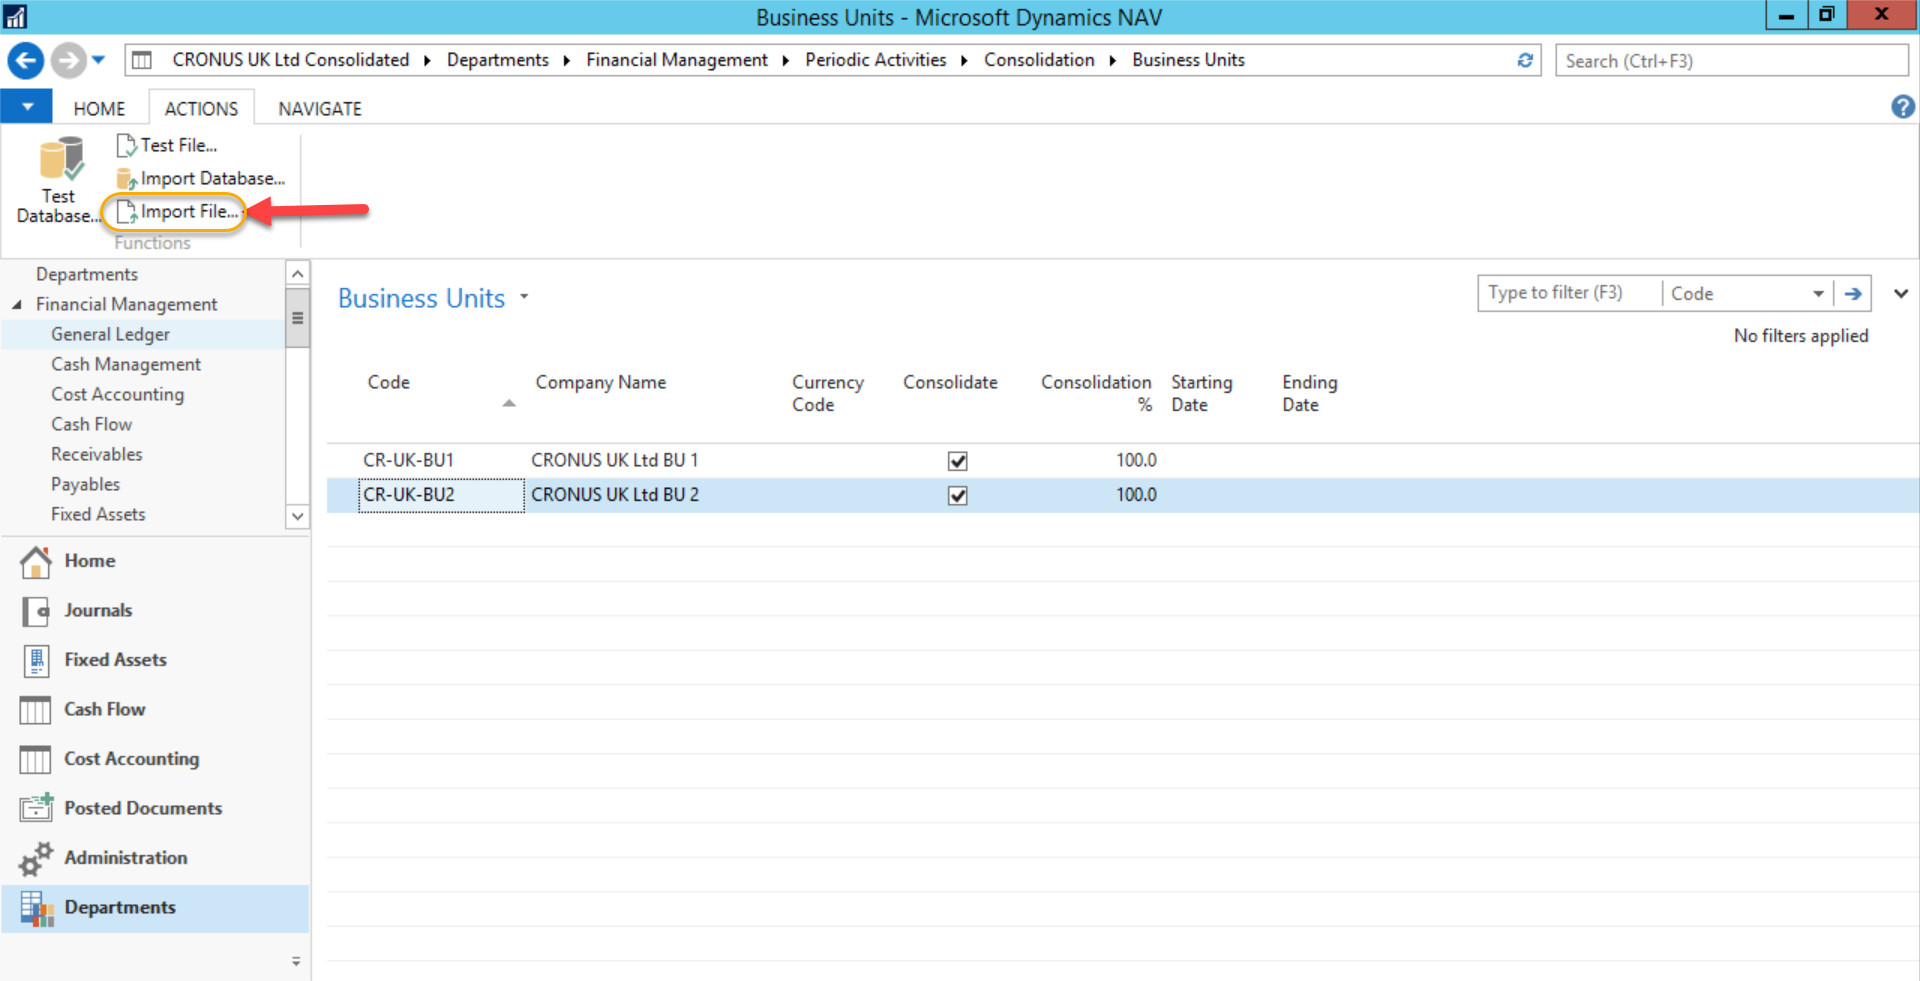
If you are consolidating from different databases, then you need to Import the files.
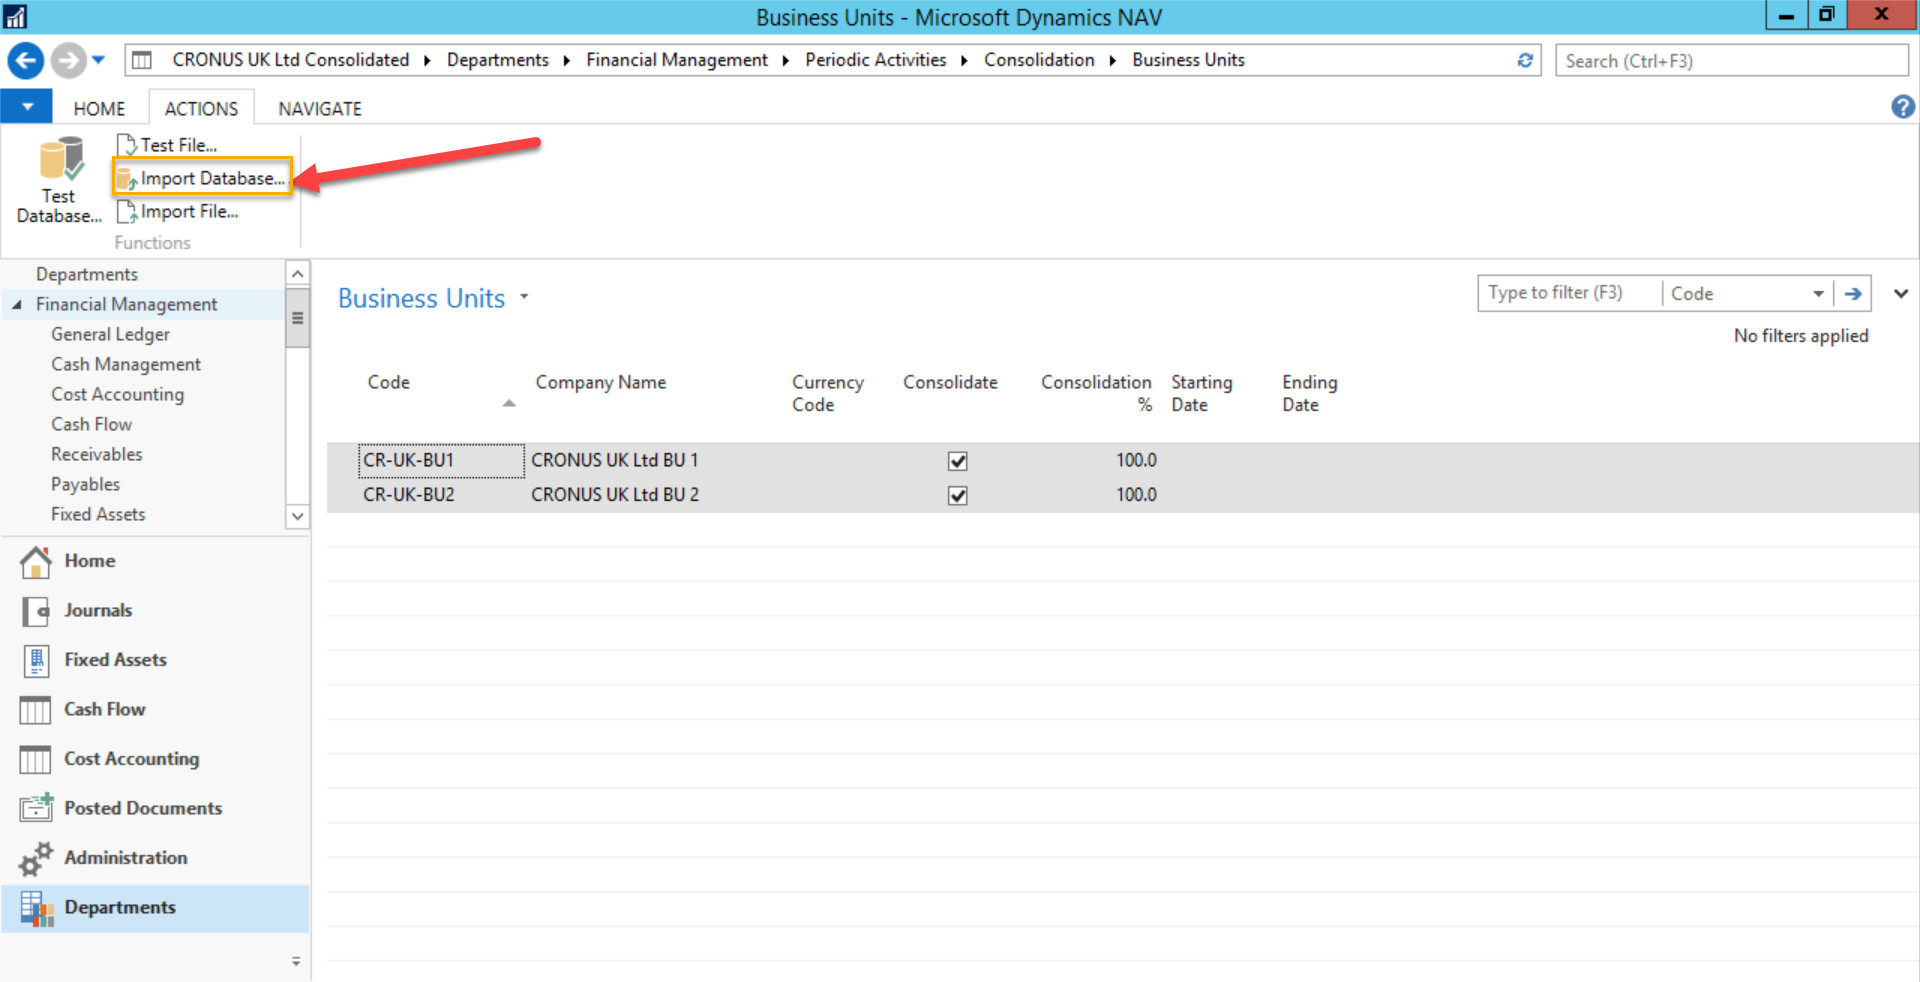
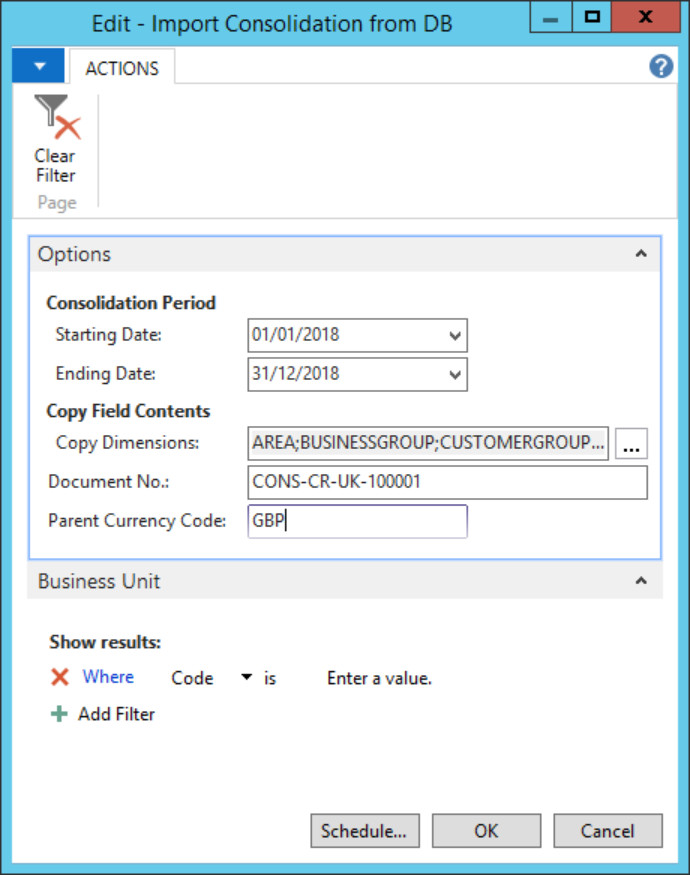
In this example, I am consolidating in the same database, so I click on the Import Database button.
Click OK.
Check the G/L Registers page, and you will be able to see two registers.
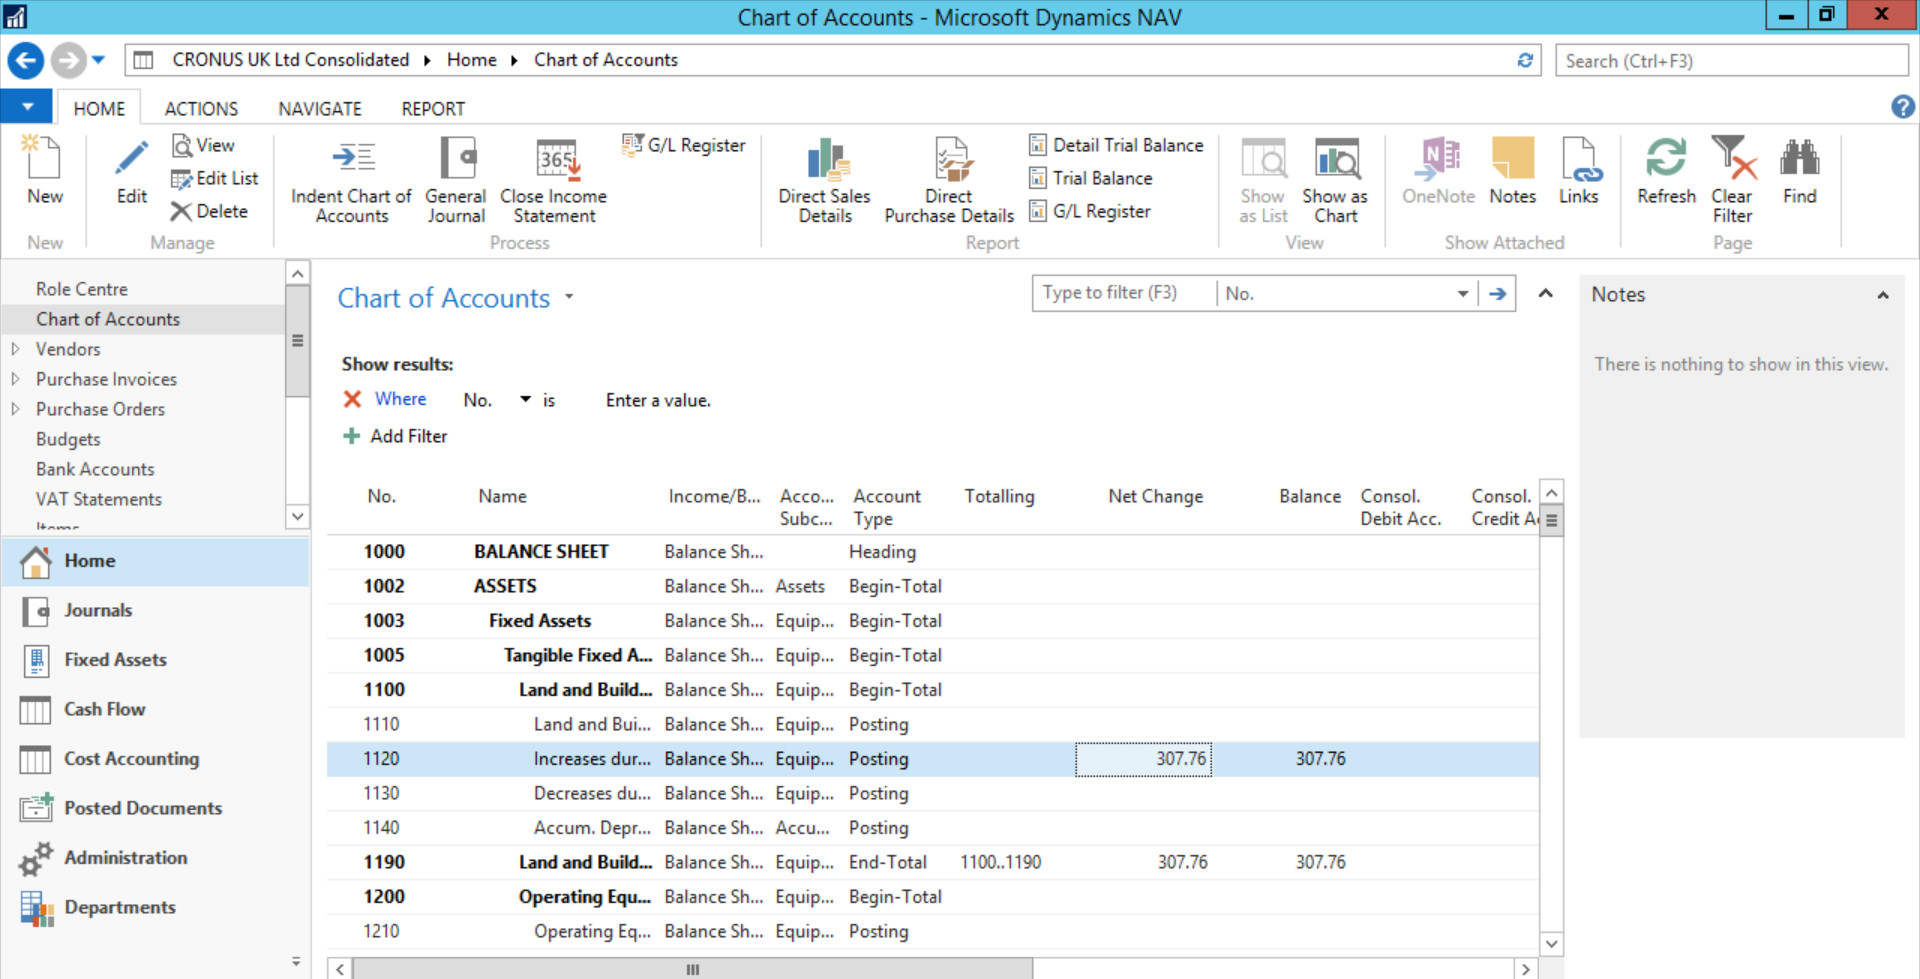
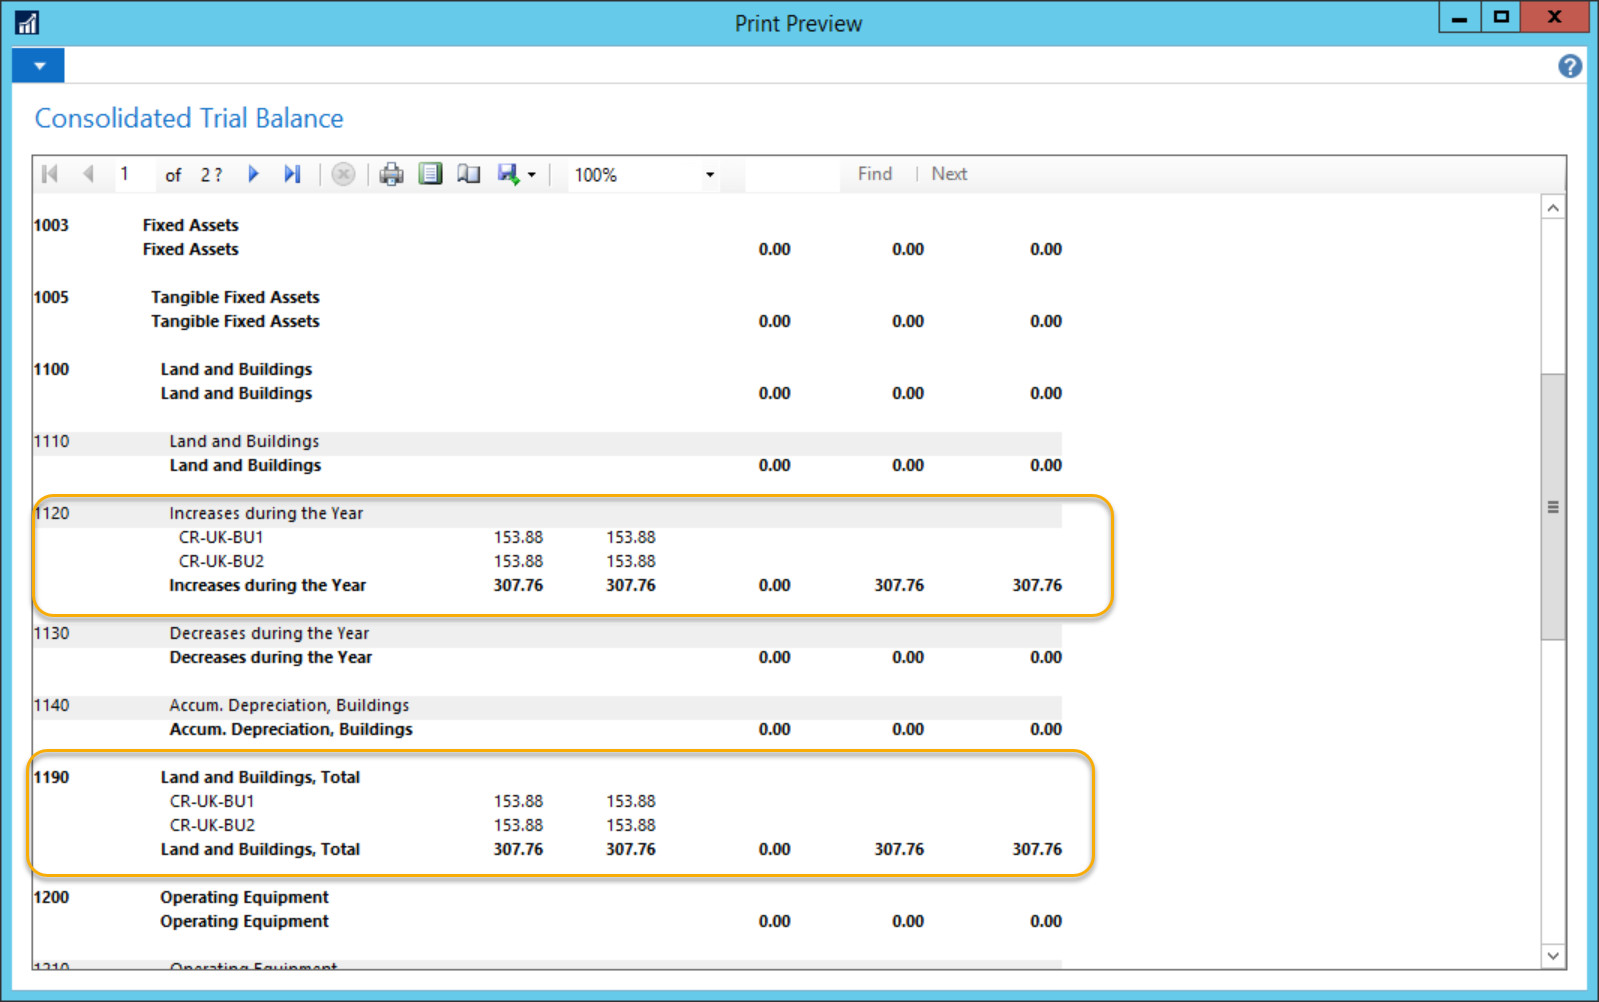
Check the Chart of Accounts; you will be able to see aggregated amounts from business units.
Process Consolidation Eliminations
This task is a process that has to be performed when there are Intercompany transactions to be eliminated.
Example: Different business units are selling and purchasing to and from each other.
Steps:
1. Calculate the eliminations
2. Enter the elimination amounts in a General Journal
3. Run the G/L Consolidation Elimination report to review the pending elimination entries
4. Post the General Journal
5. Run the G/L Consolidation Elimination report to review the posted results
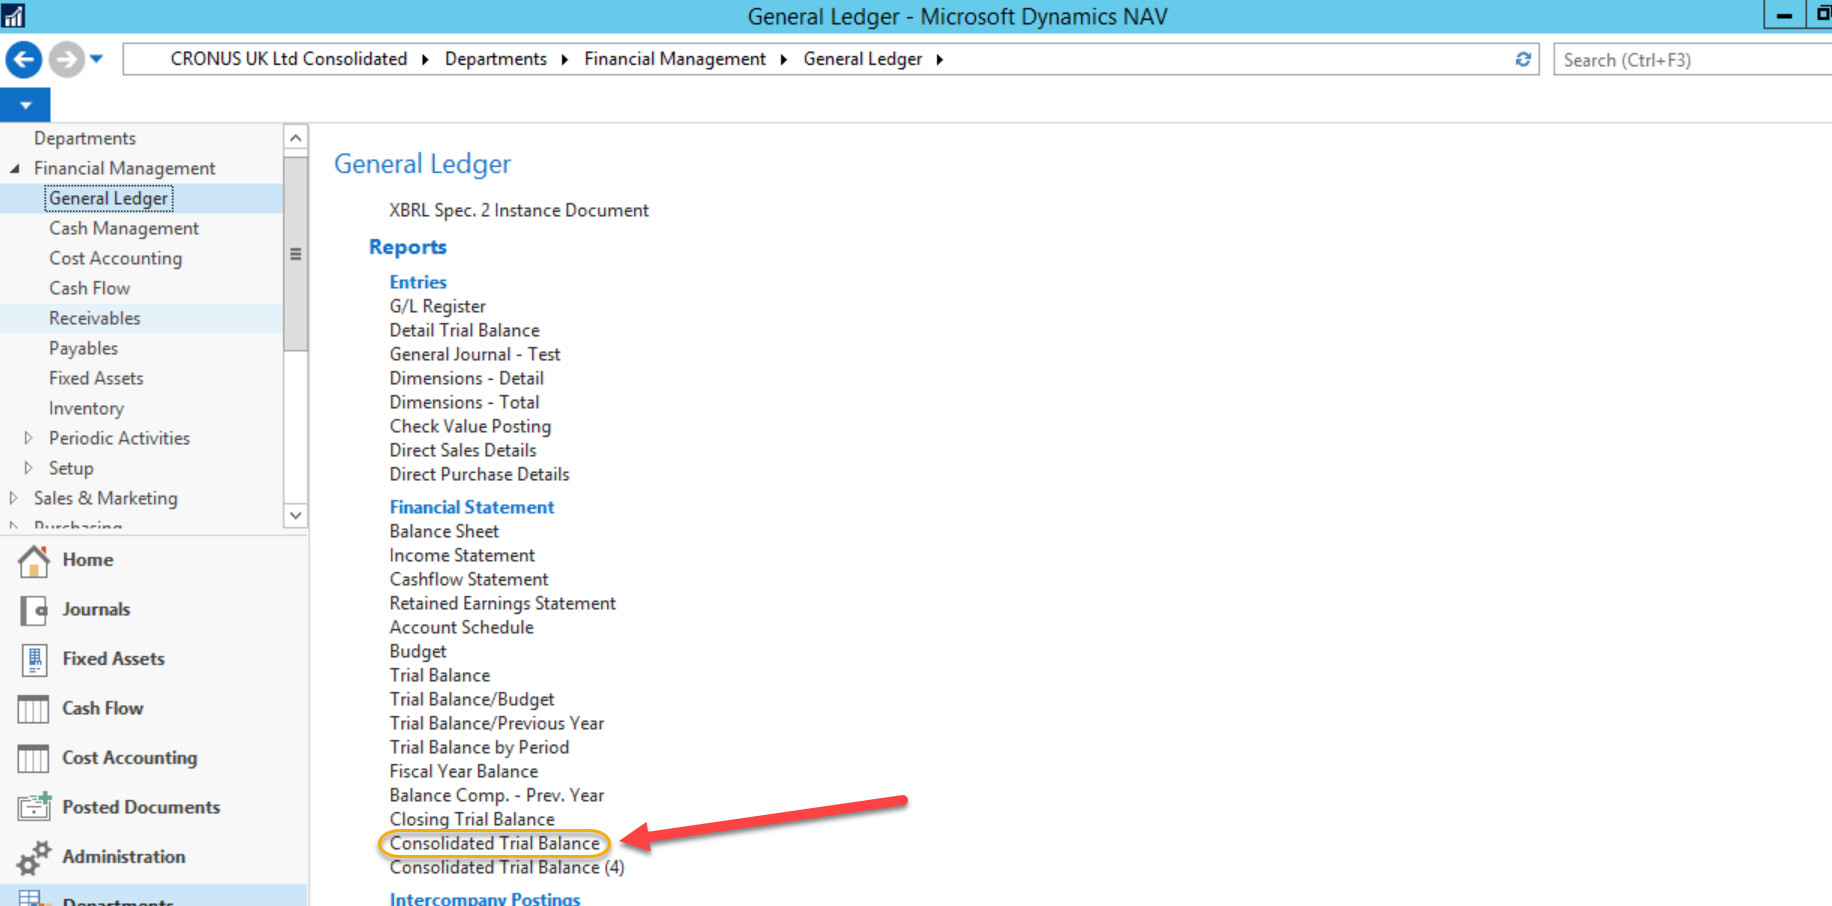
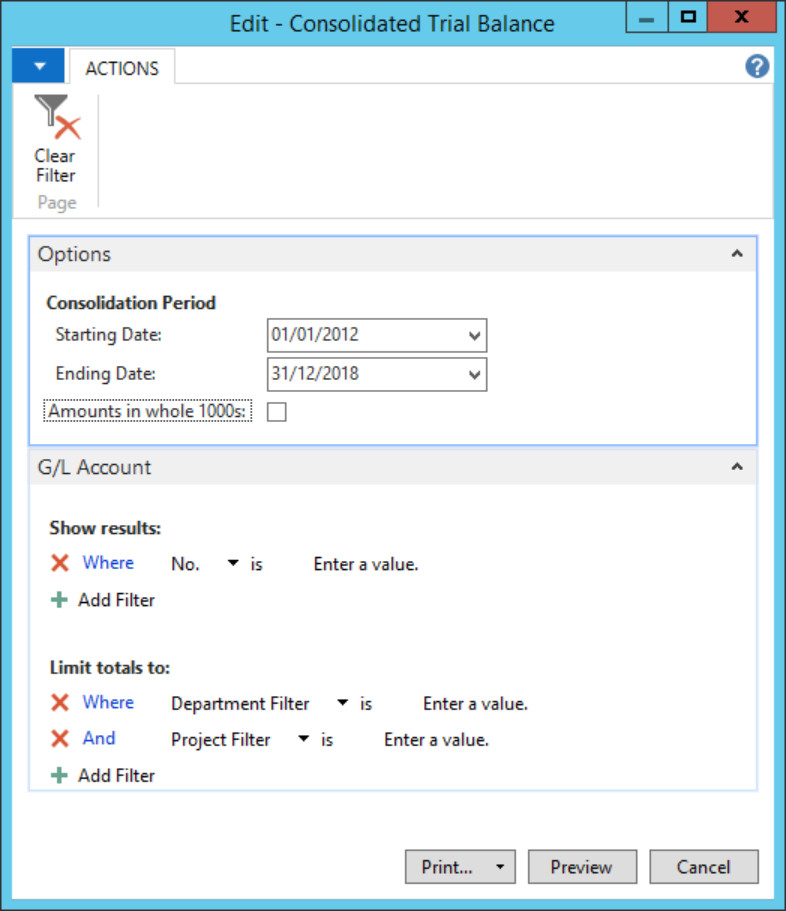
Consolidated Trial Balance
Click Preview
Thanks for reading this blog post and watching my YouTube video. You can connect with me on LinkedIn https://uk.linkedin.com/in/christospittis or 365 talent portal https://www.365talentportal.com/
Christos Pittis
Microsoft Dynamics NAV/Dynamics 365 Business Central Consultant


 Like
Like Report







*This post is locked for comments