


 3,569
3,569 Like
Like Share
Share
 Report
Working with Email Templates is very common and saves a lot of time especially if you have similar emails to send from CRM.
The email templates are by default provided for some built-in entities that are listed when you create the template; however, when working with custom entities, it is not straight-forward and you have to do some additional work to make it done.

To show you how to add custom entity fields in Email template content, I will create a new custom entity named Project and I will use some fields in order to build the email content.
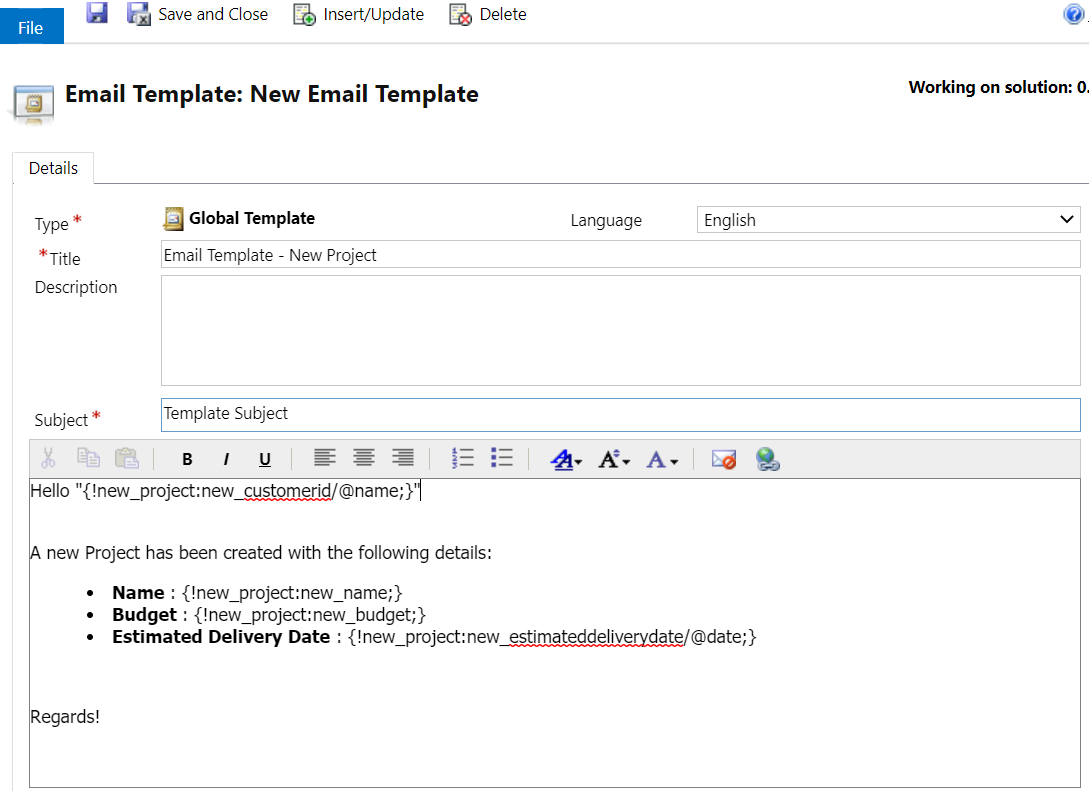
1. In CRM Settings > Templates > Email Templates, create a new template and choose Global for Template Type
2. In the Template screen, enter the Title of the template and the Subject of the email that will be sent
3. To build the email content, I need the Customer name (lookup), Project name (text), Budget (currency), and Estimated Delivery Date (date time)
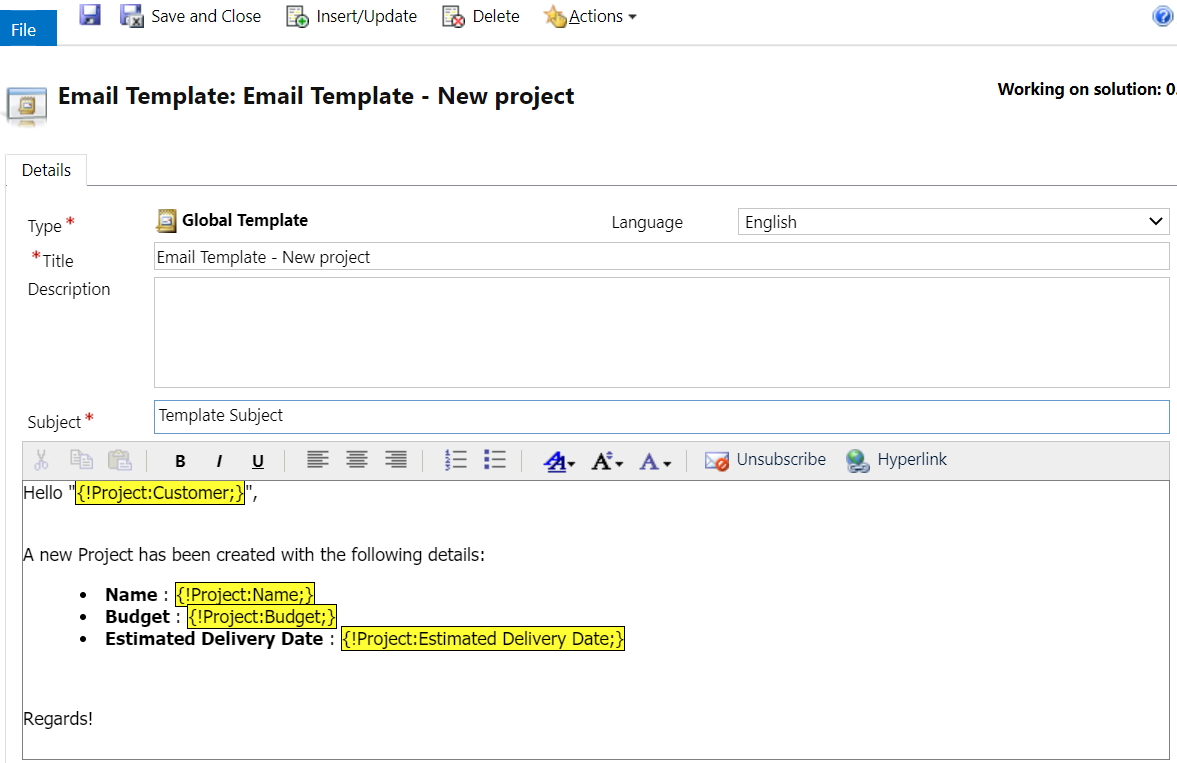
To do so, you have to use the following format in order to resolve the values of the needed fields: {!EntityLogicalName:FieldLogicalName;}
For my example:
- Customer Name (lookup): {!new_project:new_customerid/@name;}
- Project name (text): {!new_project:new_name;}
- Budget (currency): {!new_project:new_budget;}


*This post is locked for comments