


 1,856
1,856 Like
Like Share
Share
 Report
If you aren’t already aware, you can import a list of Contacts to Dynamics 365 Customer Voice containing their name and email address, and then send them an email with a link to take a survey. You can then use the name as a variable in the survey or email template, but that’s it…. or is it? An awesome bit of functionality that’s been introduced is the ability to now include values for each variable in your import file, and even better, you can also add a Contacts ID from Dataverse (the Common Data Service) if you want to make sure the invite and then the related response get linked to the correct Contact. Previously this was only possible if you used Microsoft Power Automate…. so to me, this is pretty huge! Let’s take a look at how to achieve this!
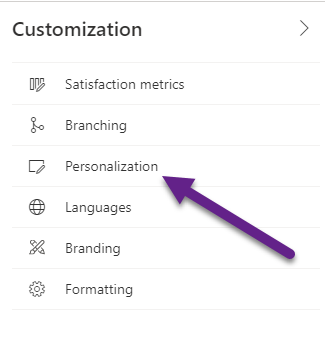
First, go to your survey, and while on the Design tab, click on the Customisation menu. Select Personalisation.
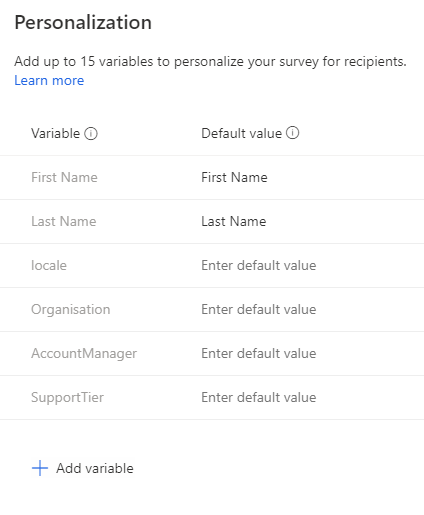
You can add up to 15 variables (although really 13 as the First Name and Last Name cannot be removed) to a survey. This gives the ability to pass through unique values to a survey so that each person gets a personalised invitation and information displayed on the survey. In the example below, I’ve added Organisation, Account Manager and Support Tier as variables. The locale variable is there by default but can be removed. This can be used to set the language of the survey displayed to the respondent. You can find out more information about that in this blog post. For now, you are just adding the name of the variable.
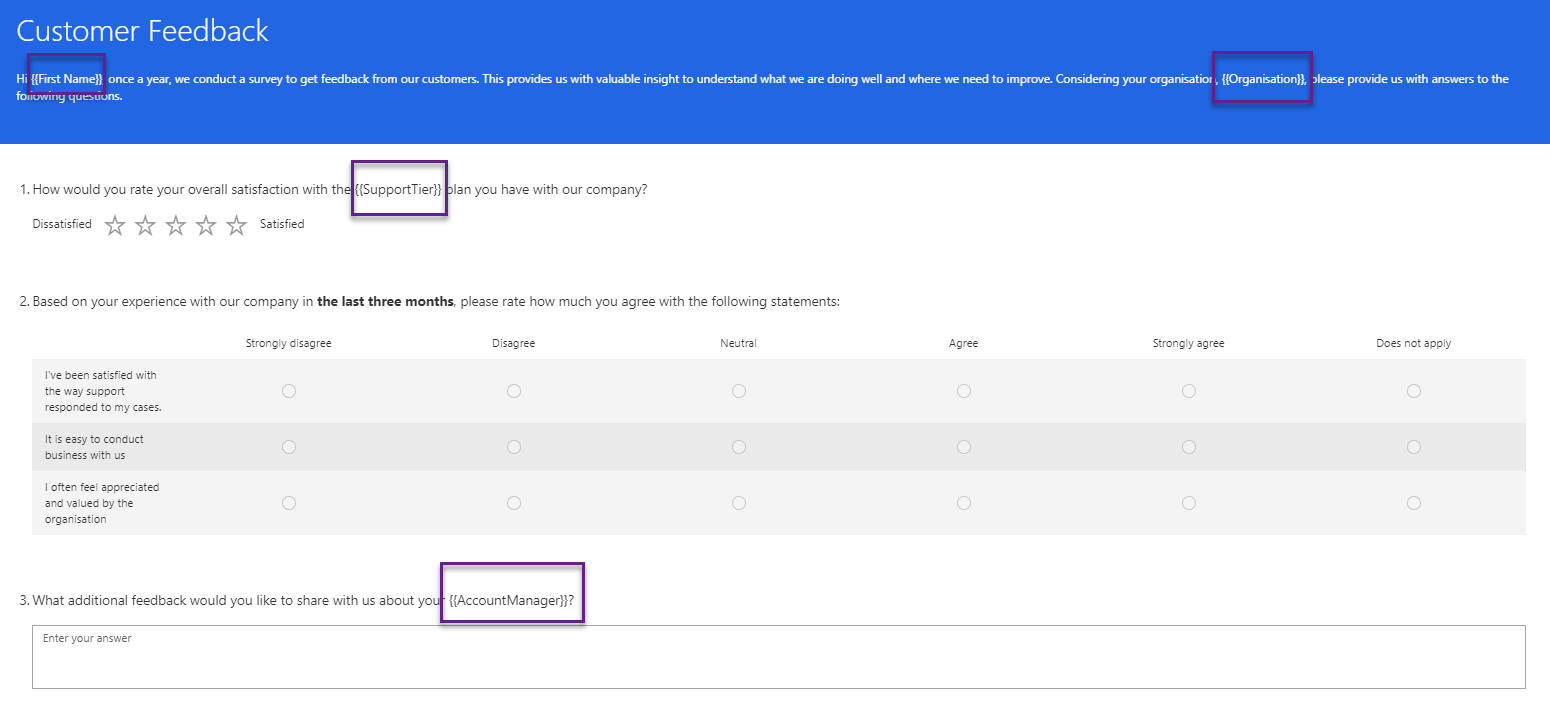
Once you’ve added your variables, you can then insert them in to the email template and the survey as you see fit. You can click on the image below to enlarge it, but I have added the First Name and Organisation variables in to the description at the top of the survey. I’ve added Support Tier to question one, and Account Manager to question three.
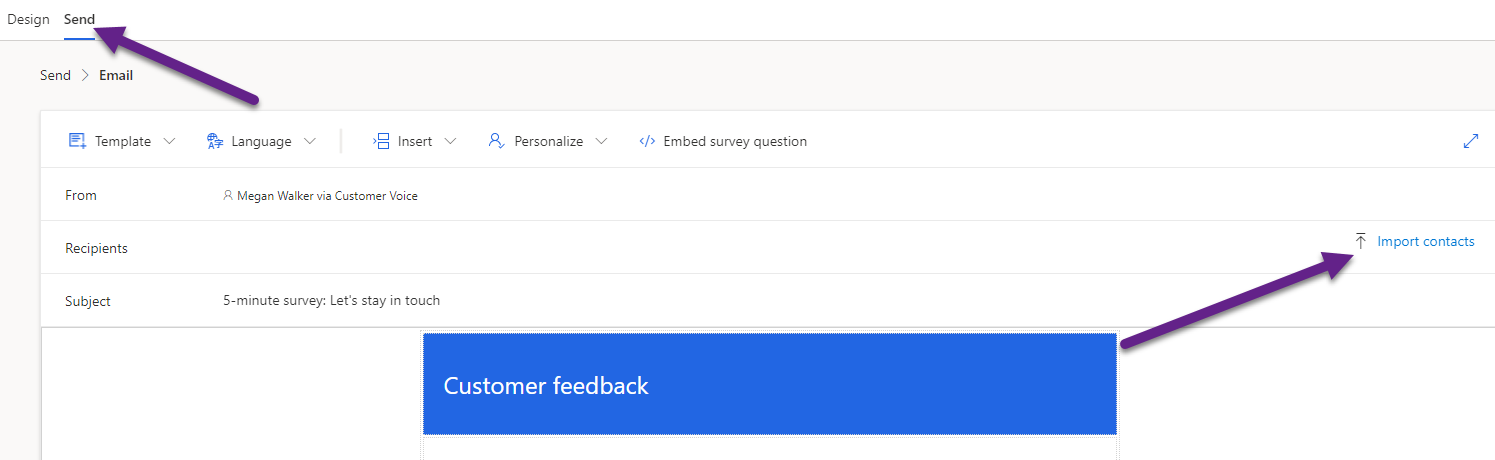
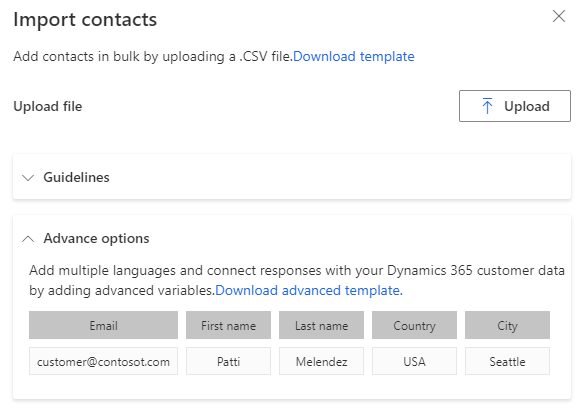
Now we are ready to send it. Clicking on the Send tab at the top, we can then select Email. From this screen, we then click on Import contacts.
Clicking on the Advanced options section, we can see that we can download a template and use it to add in our variables, and even set the language if required.
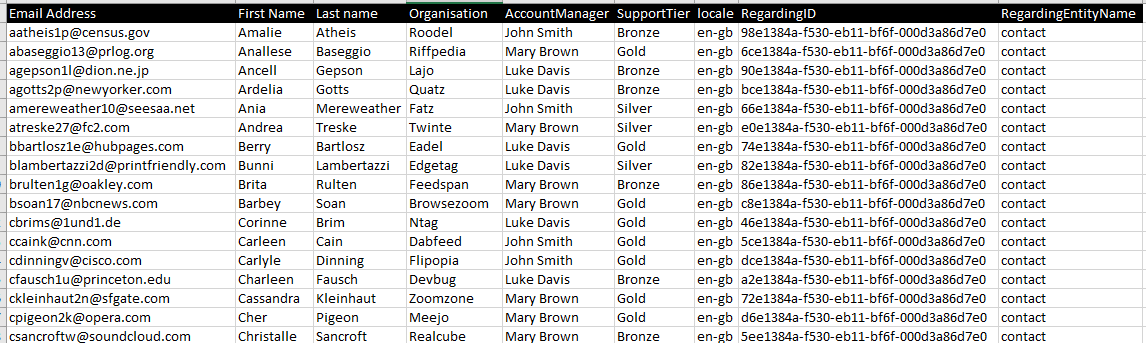
After clicking on the download option, you get a spreadsheet with a column heading for each of the variables in your survey. Email address is also included, along with a Regarding ID and Regarding Entity Name column.

All the data for the customer/respondents should then be added. You do not need to include anything in the Regarding ID or Entity name columns. This is used to link the survey invitation and then the related response to a record in your Dataverse environment. If you are not sure how to get the GUID, speak to your System Administrator. They should be able to help. In short, you can create a view using the Advanced Find, then download the records to Excel. The columns will start at Column D. Unhide the first 3 columns, and Column A will contain the GUID. The entity name should be set as contact.
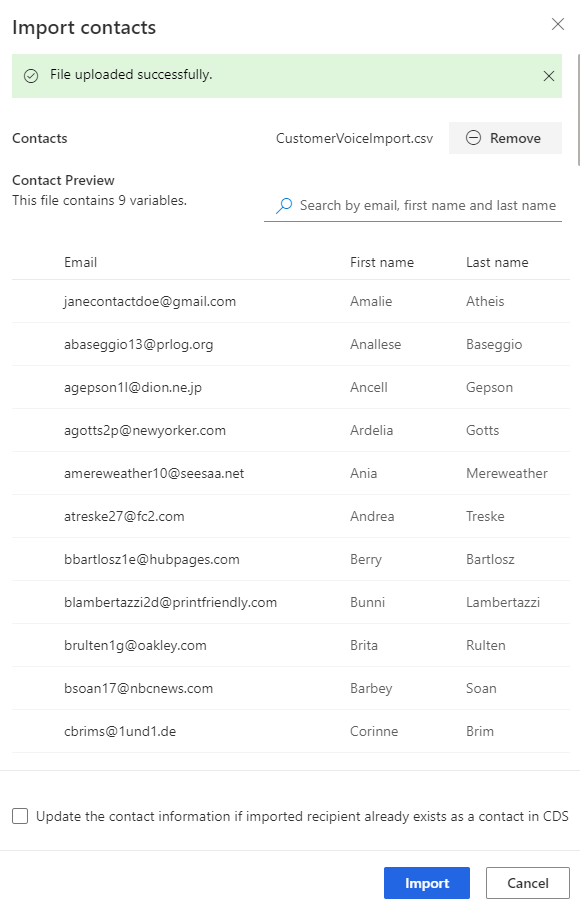
Once you have the file ready, you can go back to the Import Contacts area and upload your file. Once you have, you should see a confirmation message that it’s uploaded successfully. You’ll then see the number of variables that the file contained, and a list of all the records showing their email and First and Last Names. At the bottom, there is a box you can select if you want to update the Contact information if the Contacts already exist in Dataverse (CDS).
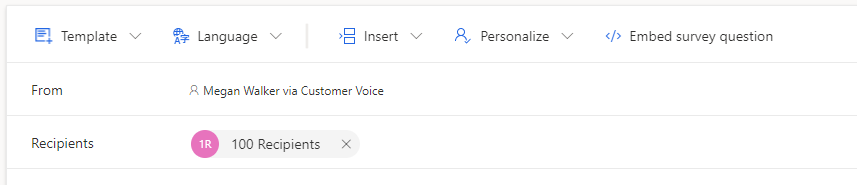
After clicking the blue Import button above, you will see the number of recipients that the email will be sent to. Send the email and you are done!
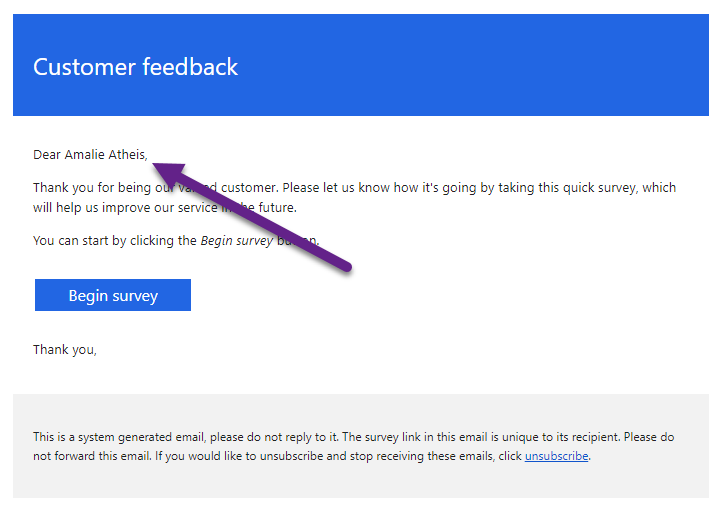
When the email is received by someone, any of the variables you added to the email template will be seen.
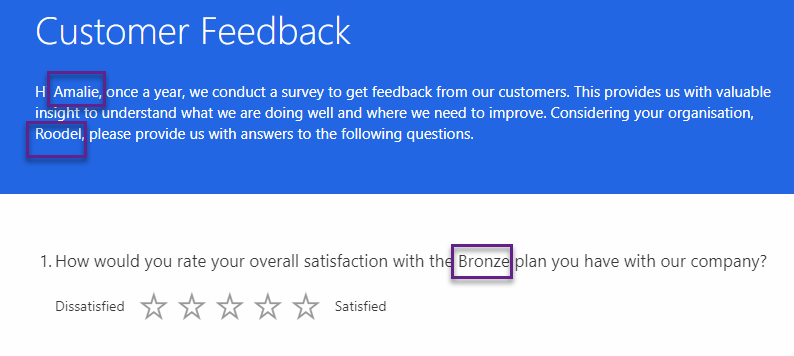
Once they click on the link to the survey, they will see all of the variables you added are populated with the actual values you imported. So this shows the First Name and Organisation populated in the description, and the Support Plan populated in the first question.
Here we can see the Account Managers name populated in the third question.

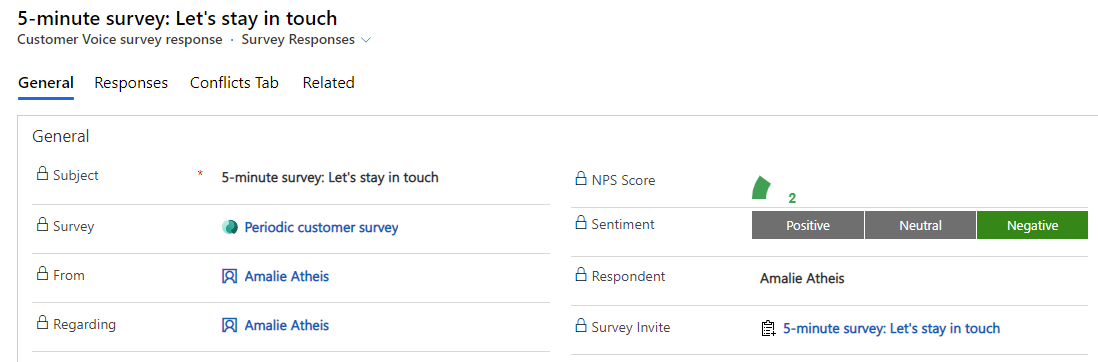
If you choose to add in the regarding ID and entity type, this will make sure the survey invite and survey response are linked to the correct Contact record in Dataverse.

And we can also then click on the activity to view the details from the survey response too.
You can watch a video on this here.
*This post is locked for comments