


 1,331
1,331 Like
Like Share
Share
 Report
Hi Folks,
Today in this blog post, I would like to share how we can quickly set up Postman Environment to test out the Dataverse API’s right away. It’s very easy and doesn’t need any Client Id, Client Secret registration in Azure AD for Authorization if you follow these steps as the provided Client id works for all Dataverse environments, so let me take you through.
You just need to have a Dataverse environment that you can connect to and Postman desktop App in your machine(Preferably windows)
- Lauch the Postman desktop application
- Create the environment by click

3. Enter a name for your environment, for example, Blog Environment as below

4. Get the Web API end point URL for your environment with few simple steps as below…by going to Developer resources in make.powerapps.com

Then copy the Web API endpoint URL as below…

Next step is to add following key value pairs in Postman for connecting to Dynamics..please make sure you use the same clientid(51f81489-12ee-4a9e-aaae-a2591f45987d), it is the same to connect to any Dataverse environment.

Your updated configuration should look something as below in the Postman.

Click on save to save your newly created environment as highlighted below..

Now all you need is to generate access token in order to authenticate with your Dataverse environment to connect using OAuth 2.0
Follow the simple steps below..
Click on newly created environment, click on + symbol besides it as highlighted below

The following pane appears. Select the Authorization tab.

Set the Type to OAuth 2.0 and set Add authorization data to to Request Headers, if you scroll down a bit, you will be able to see Configure New Token option as below, else you wouldn’t.
In the Configure New Token pane, set the following values:
| Name | Value | Action |
|---|---|---|
| Grant Type | implicit | Choose implicit from the drop-down |
| Callback URL | {{callback}} | Copy the value |
| Auth URL | {{authurl}} | Copy the value |
| Client ID | {{clientid}} | Copy the value |
The settings should appear as below

Tip: If you were using the Postman to connect to multiple dataverse instances, make sure you clear your Cookies inorder delete the cookies in Postman.
Click on Get New Access Token button, within a moment, you should see a Azure Active Directory pop up to Authenticate your login from browser.

Click Get New Access Token.Once you click Get New Access Token, an Azure Active Directory sign-in dialog box appears. Enter your username and password, and then click Sign In. Once authentication completes, the following dialogue appears and just get the token with few more steps as below.
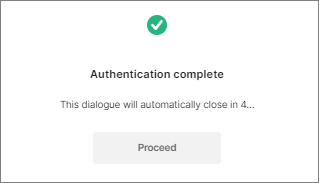
- After the authentication dialogue automatically closes in a few seconds, the Manage Access Tokens pane appears. Click Use Token.
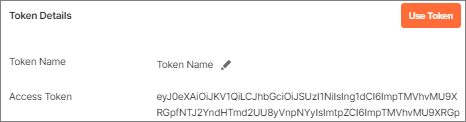
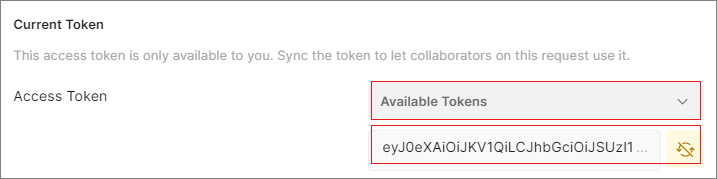
- The newly generated token will automatically appear in the text box below the Available Tokens drop-down.
The following shows how to test your connection using WhoAmI:
- Select
GETas the HTTP method and add{{webapiurl}}WhoAmIin the editing space.
- Click Send to send this request.
- If your request is successful, you will see the data returning from the
WhoAmIendpoint, like below: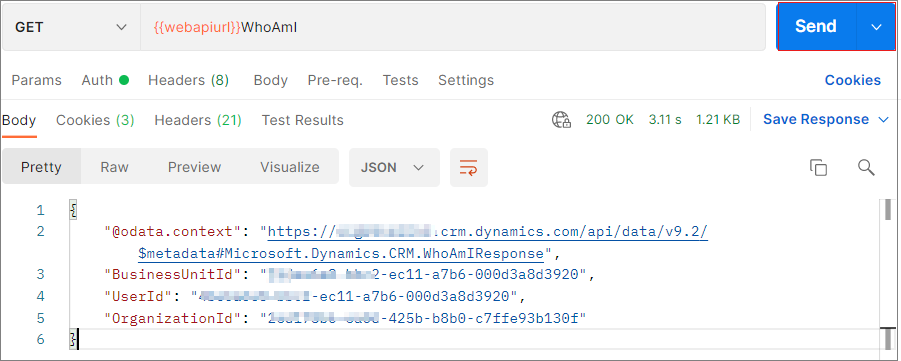
Hope you have found this post useful…when you were working with Dataverse API’s.
Cheers,
PMDY
*This post is locked for comments