Self-Hosted agent on Azure Pipelines
Summarization from Microsoft
If your pipelines are in Azure Pipelines, then you've got a convenient option to run your jobs using a Microsoft-hosted agent. With Microsoft-hosted agents, maintenance and upgrades are taken care of for you. Each time you run a pipeline, you get a fresh virtual machine for each job in the pipeline. The virtual machine is discarded after one job. Microsoft-hosted agents can run jobs directly on the VM or in a container.
Azure Pipelines provides a pre-defined agent pool named Azure Pipelines with Microsoft-hosted agents.
For many teams this is the simplest way to run your jobs. You can try it first and see if it works for your build or deployment. If not, you can use a self-hosted agent.
Self-hosted agent
An agent that you set up and manage on your own to run jobs is a self-hosted agent. You can use self-hosted agents in Azure Pipelines or Team Foundation Server (TFS). Self-hosted agents give you more control to install dependent software needed for your builds and deployments. Also, machine-level caches and configuration persist from run to run, which can boost speed.
Why the article
It works so no need to wait couple days :)
1- Personal Access Token
Authenticate with a personal access token (PAT)
- Sign in with the user account you plan to use in your Azure DevOps organization (
https://dev.azure.com/{your_organization}).
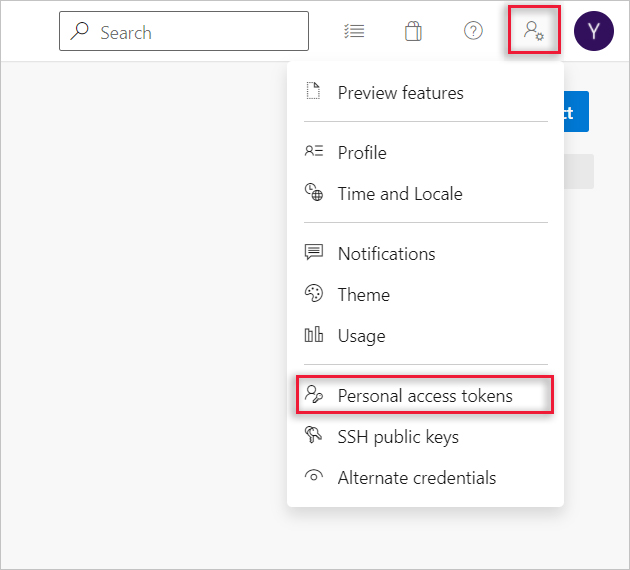
From your home page, open your user settings, and then select Personal access tokens.

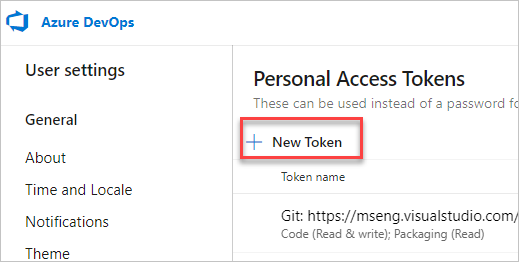
Create a personal access token.

For the scope select Agent Pools (read, manage) and make sure all the other boxes are cleared. If it's a deployment group agent, for the scope select Deployment group (read, manage) and make sure all the other boxes are cleared.
Select Show all scopes at the bottom of the Create a new personal access token window window to see the complete list of scopes.
Copy the token. You'll use this token when you configure the agent.
2- Download client tools
Check prerequisites for Windows based environment;
3- Configure & Run

- open Windows PowerShell
- type mkdir agent; cd agent
- type folowing commend to unzip agent zip and make it ready.
Note: supposing agent zip file is now under Downloads folder of Windows.
- then type .\config.cmd to start initial configuration. PwerShell scriptlet will ask URL of the agent. type https://dev.azure.com/{Organization Name}
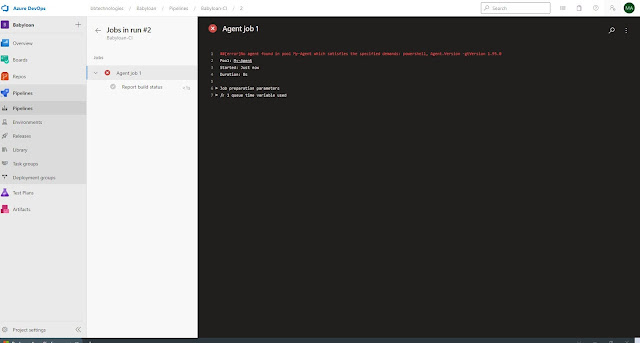
During execution, i faced error once due to internet conenctivity issue at my end. However, I finally was succeeded to complete initial configuration.
Check self-hosted configuration at DevOps side
This was originally posted here.


 Like
Like Report


*This post is locked for comments