Sending D365 Customer Voice Survey Requests Via D365 Marketing
 Megan V. Walker
You might know this about me already, I’ve written a few blogs about what was Microsoft Forms Pro, and then became Dynamics 365 Customer Voice in July 2020.  I’ve also written about D365 Marketing quite a bit too. So let’s put it all together and cover how these two play together. In this blog we’ll cover how you can use the Marketing App and a Customer Journey to send out requests for Customers to take a survey. Let’s jump in!
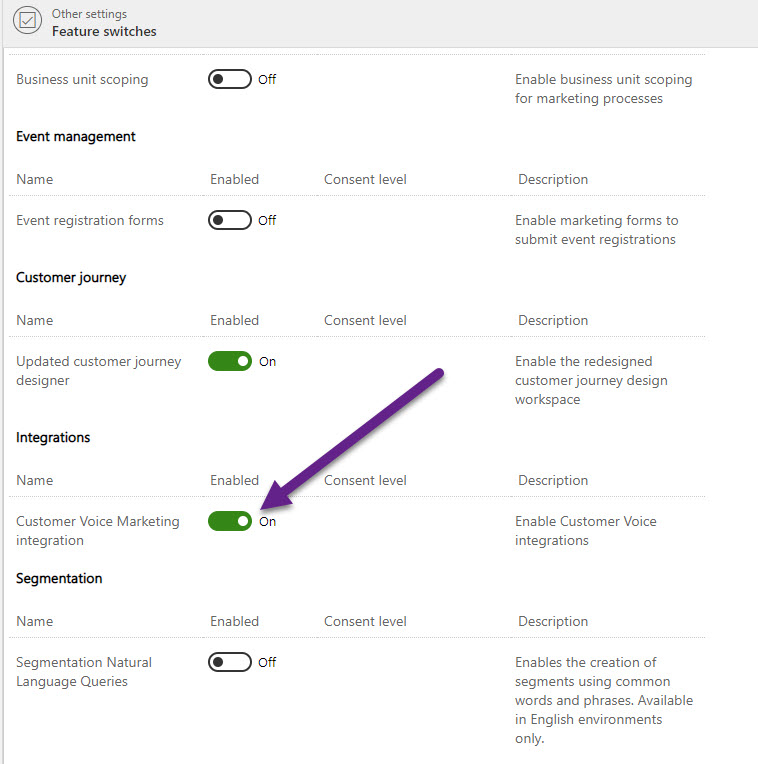
First things first. Go to the Settings area of the Marketing App, and to the Feature switches. Then make sure you turn on the Customer Voice Marketing integration.
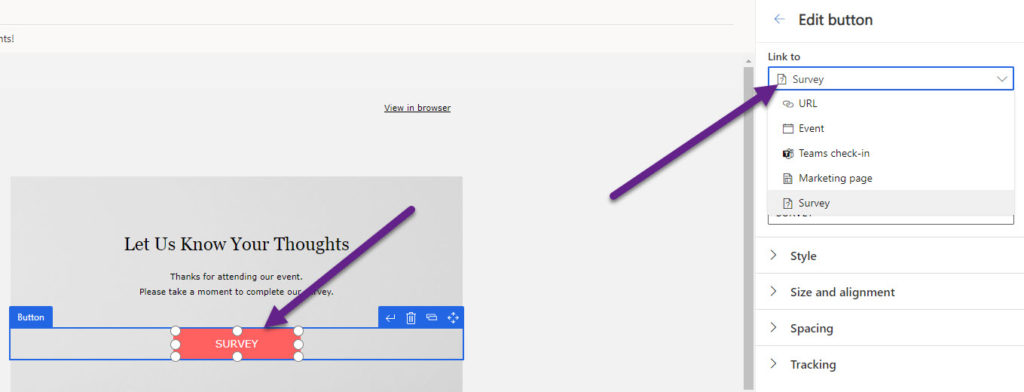
Next, you need to create a Marketing Email. Add in a button where you want the link to your survey. Once you’ve done that, you can edit the button and then choose to link it to a Survey. This is linking it to a Customer Voice survey, so you must have set up your survey there first. If you are totally new to Customer Voice, start looking through some of these posts to get started.
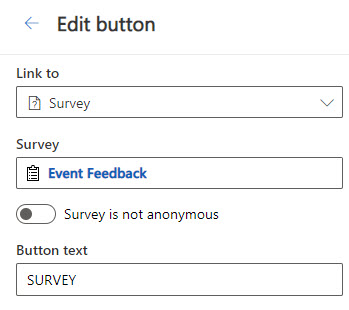
Once you’ve selected the Survey option from the list of things to link to, you can then search for your survey. The lookup field will show you all surveys you’ve created in Customer Voice. Leave it anonymous so that any survey responses get linked to the Contact who submitted them. Finish off your marketing email, then make sure you publish it by using the Go Live button.
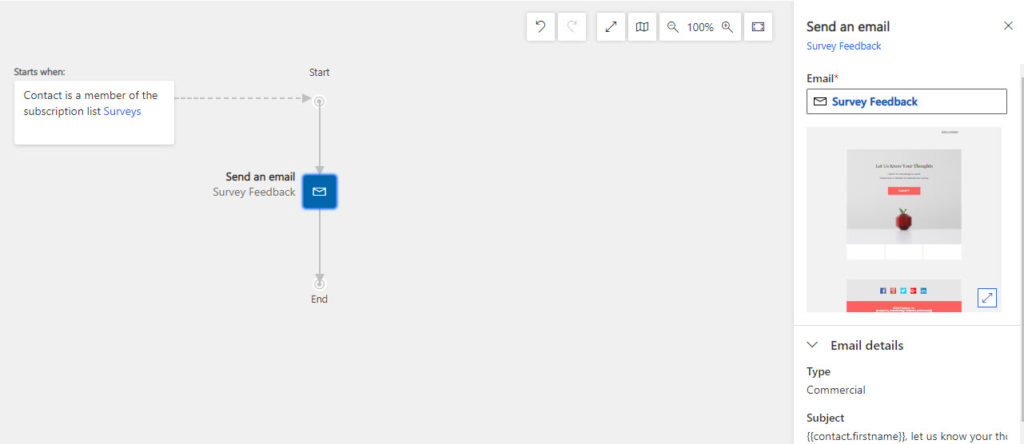
Assuming you’ve figured out your segment and published that, you are ready to put it all together. Add your segment and then your email to a Customer Journey.
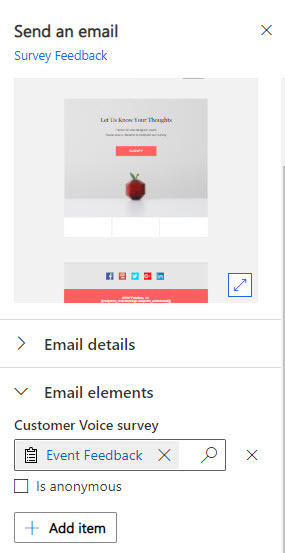
On the email, click on the Email elements, then select Customer Voice survey. You can then pick the same survey you added to your email when it was created.
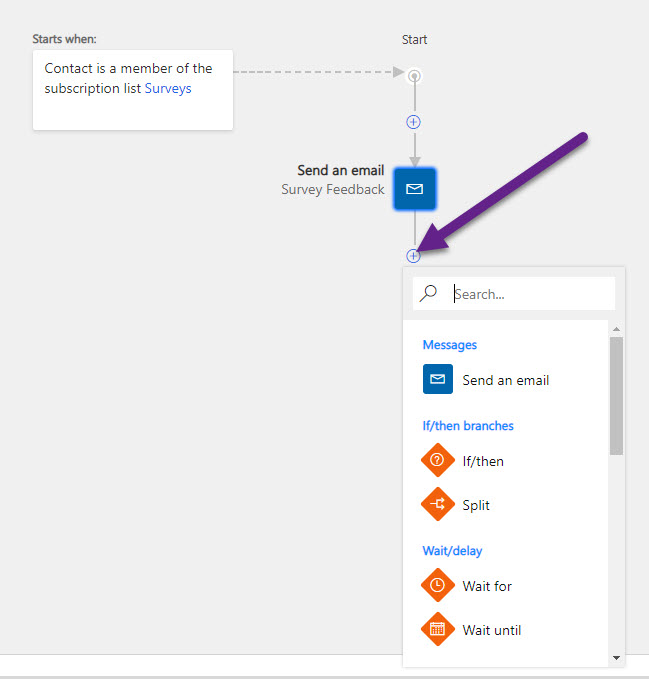
Now we can add some extra steps in the journey by clicking on the plus sign after the email step. Picking the If/then allows us to check if the survey was submitted before then deciding what to do next.
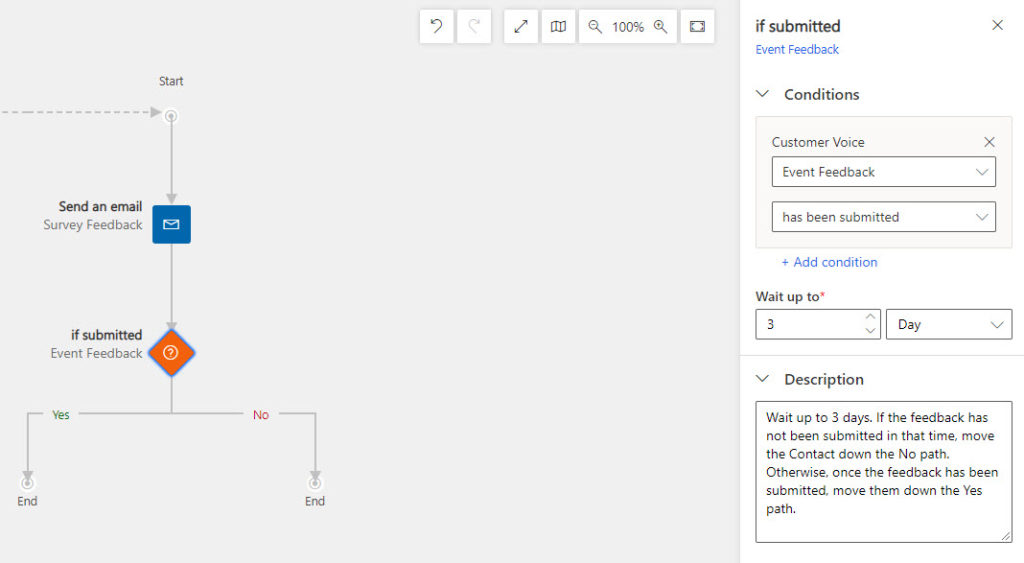
We can add a condition that we link to the survey, and check to see if it has been submitted. We can wait up to 3 days to see if that occurs.
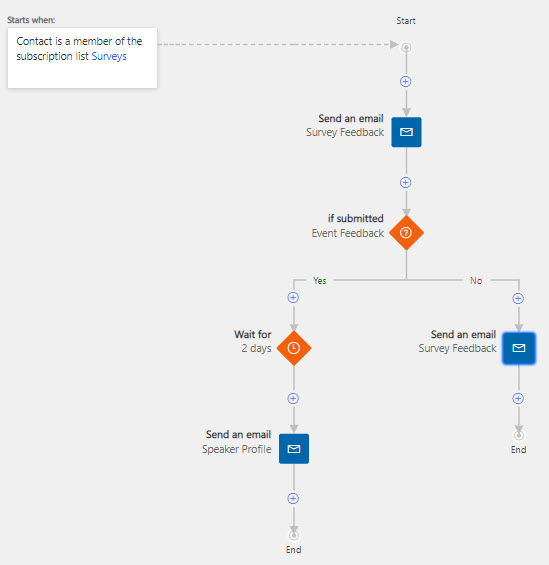
We can then add further emails or other checks as needed throughout the Customer Journey. Once ready, fill out your start and end date and time, and go live!
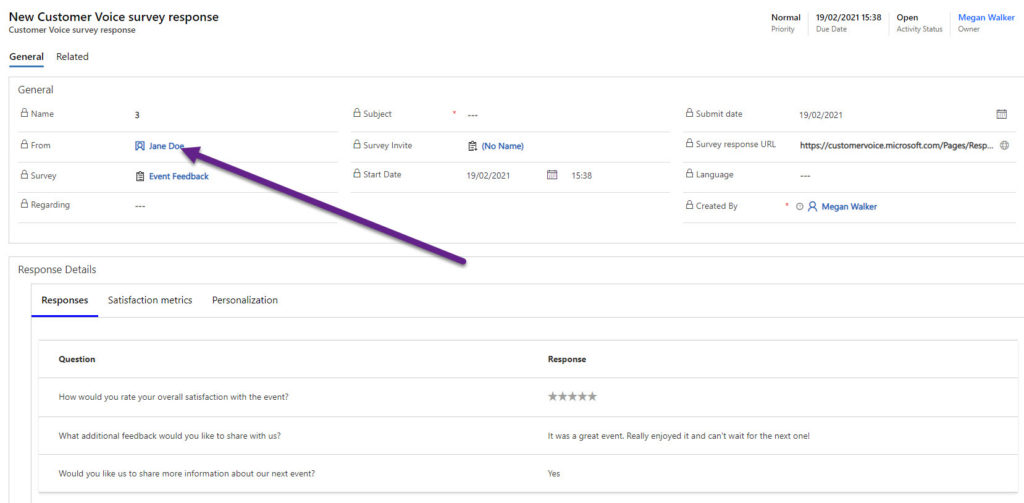
When survey responses come through, it’s the From field on each survey response that will be populated with the Contact who submitted it. The activity will be visible from the timeline on the Contact record (assuming you are showing this on your form).
This was originally posted here.


 Like
Like Report
*This post is locked for comments