Step by Step Guide to Enable Multi Language Support in Dynamics Portal
 CRMJetty
Microsoft Dynamics 365 is widely used because of its robust and effective features. Apart from almost ruling the CRM industry in the enterprise section, they are also ruling the portal industry and with every new release, they raise the standard of their product a little higher. Since every business now has a customer all over the world, it is important to make all communication channels, products, etc. support multiple languages. So, in this article, we are going to show you the steps to enable multi-language support in the default Dynamics portal.
How to enable multi-language support in Dynamics 365 Portal
Let's start with enabling the support first in a CRM application.
Step 1: Go to Settings → Administration → Languages. Select the language you want to enable and click on “Apply”.
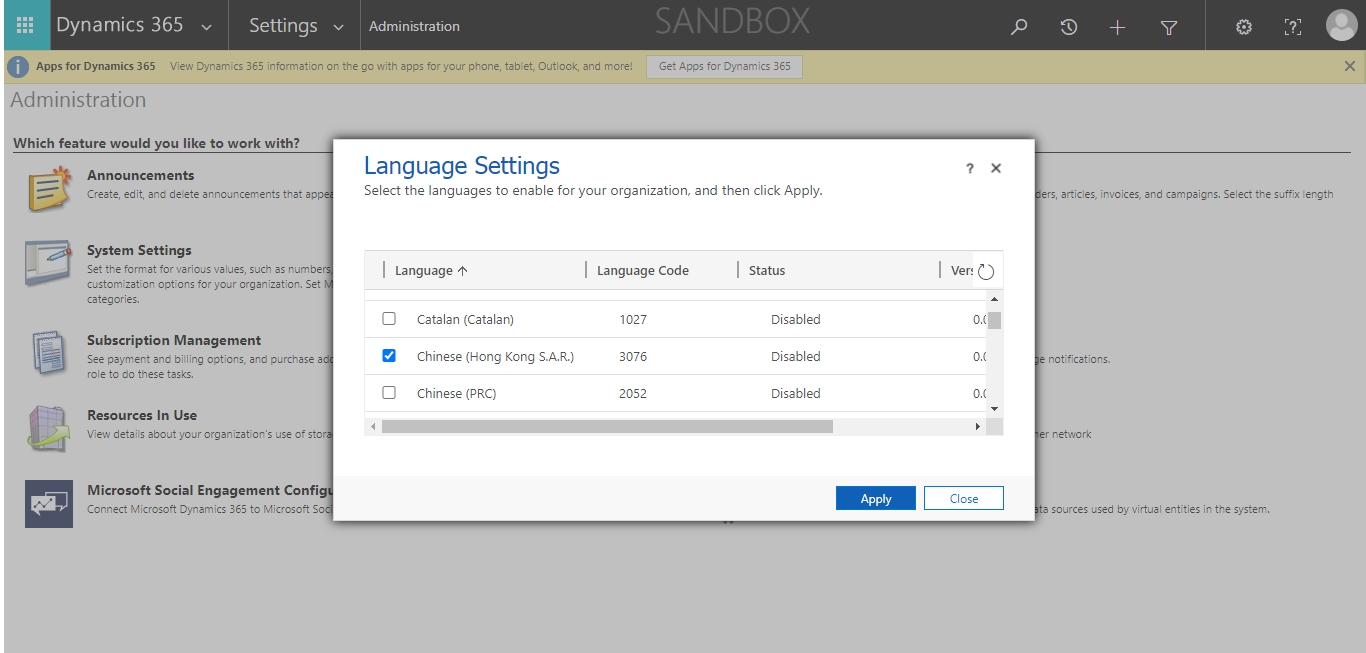
Step 2: Now, enable the language of the portal. Navigate to Portals → Website → Websites.

Step 3: Go to General tab → Supported Languages → click on “+.” Now select the language you want and save the changes.
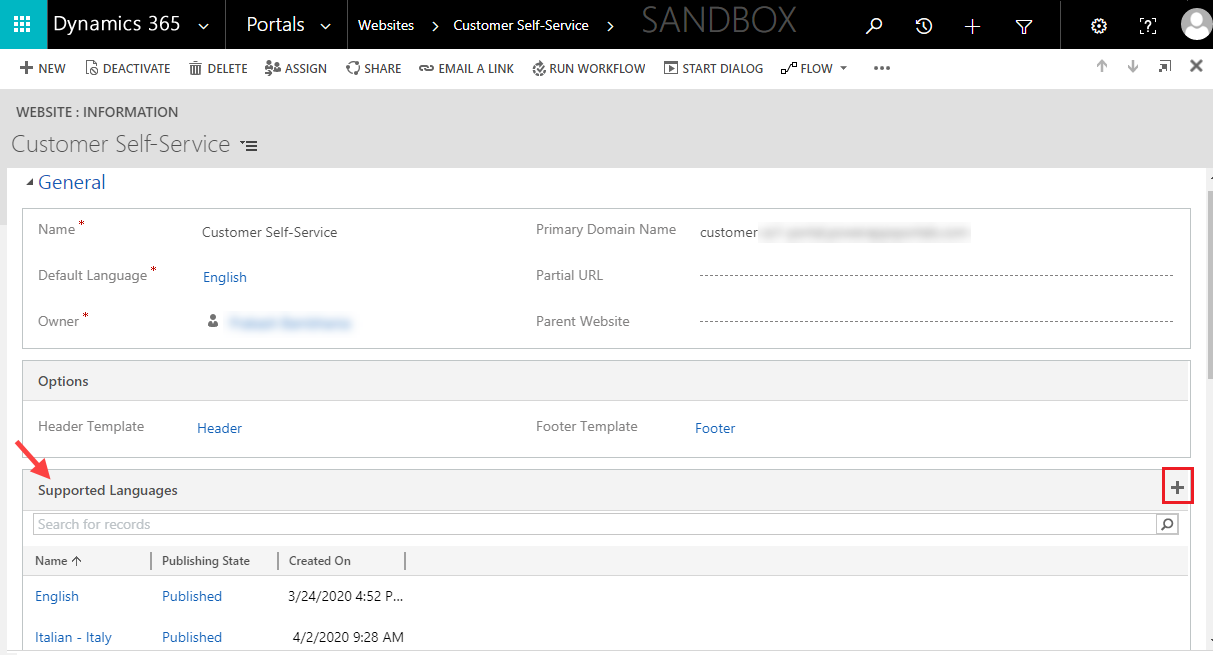
Note: There are 43 languages supported by the Dynamics 365 portal. To see the list, go to Portals → Content → Portal Languages. Choose the language of your choice and make sure that its publishing status is “Published”.
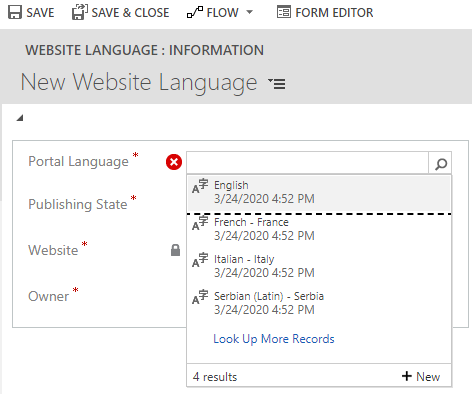
Once you add the language(s), the website will be replicated in those languages.
Now let’s update the content of the pages. Remember, each web page has a parent page.
Step 1: Go to Portals → Web Pages.
Step 2: Now create a localized webpage for each language you have activated. To do that, go to the localized content section → click on the ‘+’ button on the right side. You might need to modify some content manually.
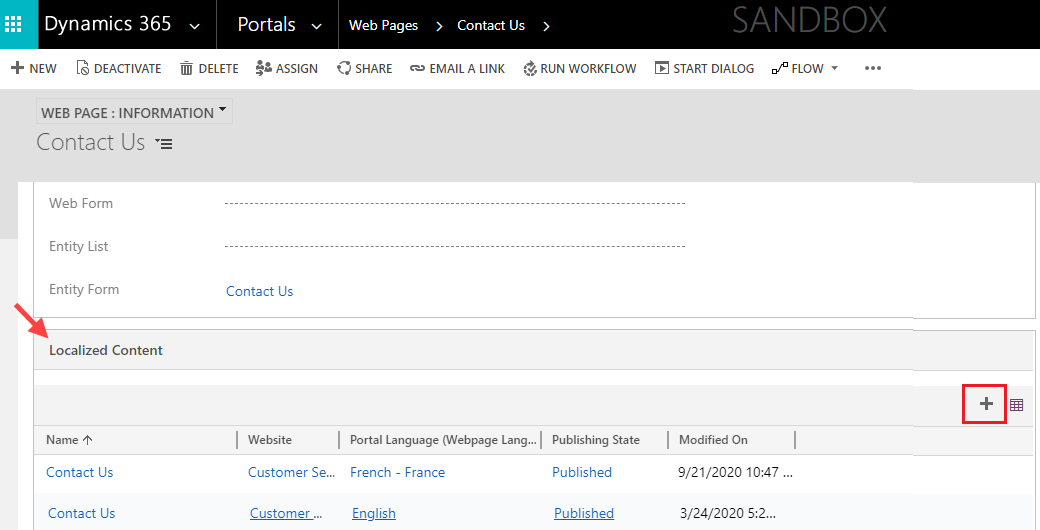
Congratulations! Your website now supports multiple languages. Your customers will be able to see the drop-down option on the website from where they can change the language.
Now, the default Dynamics portal comes with a lot of limitations or can be expensive for some organizations as well. Hence, we are also going to demonstrate how to manage multiple languages in a third-party portal as well.
One such is CRMJetty’s Dynamics 365 WordPress portal. It has similar functionalities and more.
To set up multi-language support in our WordPress portal, follow these steps.
Step 1: Go to the CRMJetty → Configure Language page and click on the configure language option.
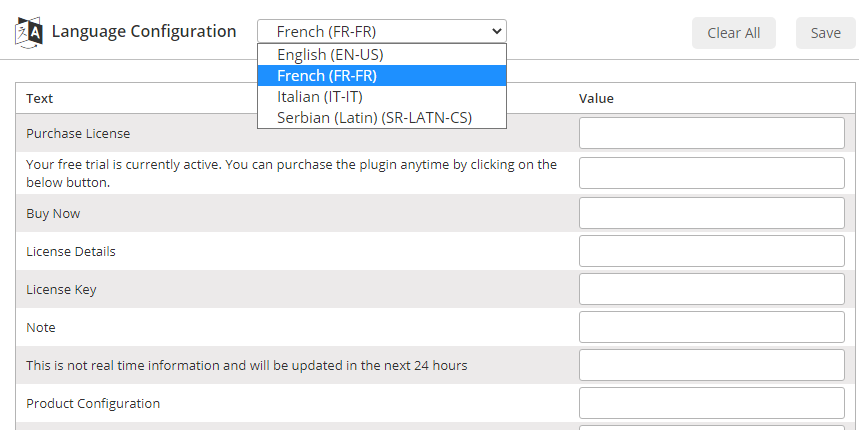
Step 2: Choose the language and then add the messages against the specified content. It will reflect on the website when your customers change the language.
Note: You can also set default language from the CRM view by navigating to CRMJetty → General Settings.
You can also set GDPR consent text in the respective languages which will be reflected on the website as well.
About Us
CRMJetty is a hub of innovative customer relationship solutions. Our tools ensure that you can render enhanced interactions at each stage of your customer lifecycle. So, if you are searching for the right portal solution for your company, then you can choose from our wide range of solutions for Salesforce, Dynamics, and more. We have served in this industry for over a decade and have built many portals like customer portal, self-service portal, non-profit portal, etc. Get in touch with us and we’ll help you kick start your journey towards communicating better.
All product and company names are trademarks, registered or copyright trademarks of their respective holders. Use of them does not imply any affiliation with or endorsement by them.


 Like
Like Report
*This post is locked for comments