


How to create new documents with Word Layout in NAV 2015
 Aleksandar Totovic
 16,765
 Like
Like Share
Share
 Report
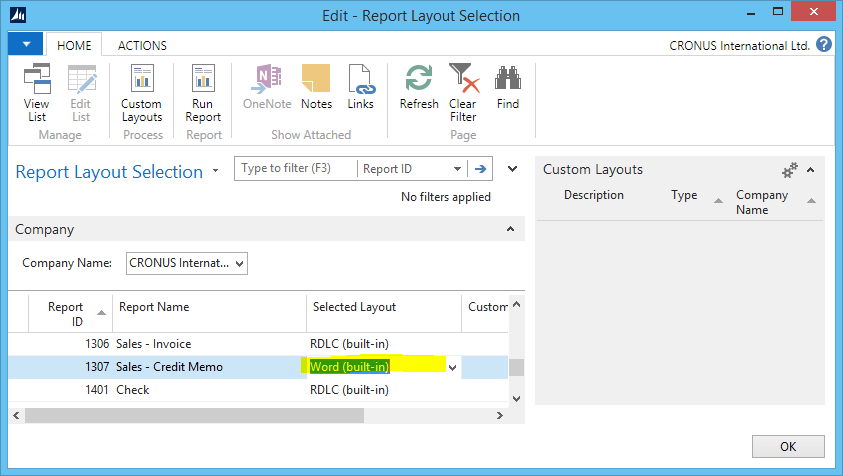
In new Microsoft Dynamics NAV 2015, we are introduced in new reporting feature – Word Layout. It means, that now we can use both of layouts, RDLC and Word. Microsoft Dynamics NAV 2015 includes 4 built-in report layouts that are used on reports by default. These are only “mini” sales reports: Sales – Quote (1304), Sales – Confirmation (1305), Sales – Invoice (1306) and Sales – Credit Memo (1307).
By default, all of these reports are configured as ‘RDLC (built-in)’, but we can change it on Report Layout Selection.
We can also customize these reports using ‘Custom Layouts’ command. But, what if we need more documents report in Word Layout, for example some of purchase documents. The biggest benefit of this feature is that you can give your customers to prepare own documents and don’t spend your time (and their money) on this job. Because of that, we need to be able to create Word Layout for new documents. In my example, I will create Purchase Receipt document report.
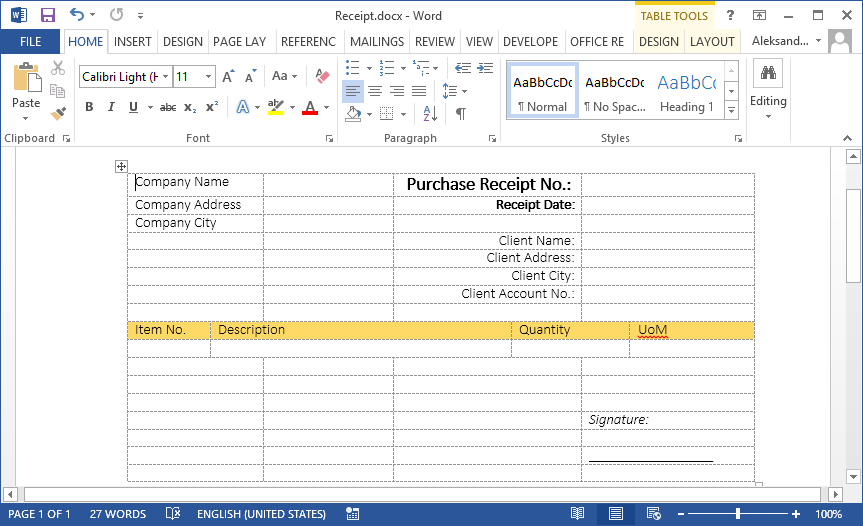
Create Word Document
First of all, you need to create Word Document. You can see one small example on following picture. You need to put all required information (only as captions) on header, but on line, you need to put caption in one line and only one line for data, because, this line will be repeatable. OK, save it.
Import and Edit Document in NAV
Open Report Layout Selection and change Selected Layout to ‘Custom Layout’. Run “New” and choose ‘Insert Word Layout’. Fill some your description and Import Layout from your already created Word document. Then, press “Edit” and prepare layout. on Developer tab, find XML Mapping Pane and find your document in Custom XML Part.
Now, you can find all fields from Dataset. Add these fields to place you want pressing right-click on some field in dataset and choose ‘Insert Content Control’ and ‘Plain Text’. For lines, first select complete row and on Line dataset field press ‘Insert Content Control’ and ‘Repeating’. After that, add fields you need. Save this document and close.

Press Yes on window and choose this Custom Layout in Report Layout Selection. You can try this report on ‘Run Command’ and you can see this document as Word or PDF if you choose it.


This was originally posted here.
*This post is locked for comments