


 76
76 Like
Like Share
Share
 Report
If you haven't developed a PCF control yet and want to start, here is a guide that will get you started as well as give you a useful control at the end that will allow you to convert a single line of text field on a model driven form, to a single line of text field that allows you to click a button to copy the text to the clipboard.
Everything here is based on my personal preferences for developing these controls. There are a lot of ways to accomplish the same goal, this example is just how I feel most comfortable.
- Install prerequisites:
- .Net Core https://dotnet.microsoft.com/download/dotnet-core/current
- Visual Studio Code https://code.visualstudio.com/download
- NPM https://www.npmjs.com/get-npm
- .Net Framework Developer Pack https://dotnet.microsoft.com/download/dotnet-framework/net462
- PowerApps CLI https://aka.ms/PowerAppsCLI
If you're already a seasoned developer, its likely that you have many of these installed already, once you have these up and running, its time to create a folder where you want to store your project. I found that my projects stay more organized when I create a root directory for all projects, like \PCFControls\ somewhere, and then create a folder inside named similar to what the control is, \PCFControls\CopyToClipboard.
Note: One thing that threw me for a loop for a long time is that I had been trying to keep my code in my OneDrive for business directory (the local directory c:\users\<username>\OneDrive - <company>) however the PowerApps CLI will not be able to read certain files from these directories, and pushing the control to Dynamics will fail repeatedly with errors telling you that certain files don't exist!
Next, we can fire up Visual Studio Code and choose Open Folder, navigating to the directory we just created, my example will be c:\users\mgronbec\source\repos\PCFProjects\CopyToClipboard
We also need to have a command window open or Visual Studio Command Prompt, to execute our Azure CLI commands. The first command we execute creates the template files for a PCF project. First, do a change directory to get into your PCF Directory:

Then, execute pac pcf init, to create our template files in the project directory. The syntax for this command is:
pac pcf init --namespace <specify your namespace here> --name <Name of the code component> --template <component type>
In this command its important to know that the values you enter don't need to correspond to the publisher or schema prefix that you'll want this control to have in Dynamics.
However, each css property will be prefixed by ".<namespace>/.<name> which can get long and tedious, so keep that in mind if you are creating very long drawn out namespaces and names.
When you associate this control to a field or view in Dynamics, the name your control will show is the name parameter from this command.
The two choices for the -template parameter are field, or dataset, defining whether this control replaces a field on a form or a view/subgrid/dataset.

Now follow the instructions in the command prompt and run 'npm install' to install the related node packages. If you've been watching your Visual Studio Code window you probably have seen tons of files and folders showing up in there as we run the various commands

Now we have the bare minimum needed for a PCF control, to start adding code to it we should first be familiar with the files we have:
- Inside the CopyText directory is where the code lives that we modify and add to, any new files need to be rooted in this directory
- OOB we always have a ControlManifest.Input.xml file, this is our config file, input/output parameters are defined here, as well as any additional files for styling (css) or resource string files. If you open the ControlManifest.Input.xml files there are commented out examples of many different config options.
- The node_modules directory stores the node packages that you've installed, if you're familiar with .Net development, this is kind of like adding nuget packages to your project.
- The Index.ts file is the main code file that contains the main class and methods that will be invoked by the Dynamics platform
In this example we are going to use the Office UI Fabric React npm package, so if we search npmjs.com we will land on this page: https://www.npmjs.com/package/office-ui-fabric-react which also gives you the installation command:
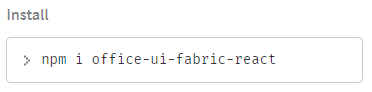
We can run this from our command prompt where we ran the pac pcf init command

This will add the package to the node-modules folder
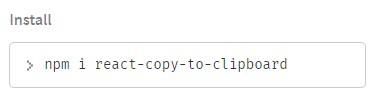
To make this sample work, we're also going to use a separate third party package react-copy-to-clipboard. https://www.npmjs.com/package/react-copy-to-clipboard
To install this module, run the command:
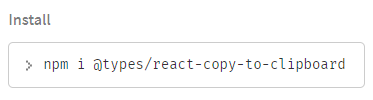
Once installed, to make it typescript compatible, we also need to install the type definitions for the module https://www.npmjs.com/package/@types/react-copy-to-clipboard
For this, we run the command:
Now lets add some code to the project to make it do stuff, first lets change the ControlManifest.Input.xml to contain a named parameter for the input field that we will bind this control to. Change this line:

To this:

Note: If you choose a name other than _inputProperty you'll also need to change references in the index.ts file later on
In the <resources> node, uncomment the sample css file line so that you have a resources node like this:
[View:https://github.com/mgronbeck30/blogPics/blob/master/1_10.png?raw=true:320:240]
Now lets actually create the CopyText.css file so that our control will have some styling similar to Dynamics' Model Driven forms. From the Visual Studio Code explorer pane, put your focus on the CopyText directory, then click New Folder and name the folder css. Now put focus on the css folder and click New File, give the file CopyText.css as a name.
Here is the code you can paste into CopyText.css, notice the namespace/name naming convention that each element uses. If you've named your project differently than mine, here is one place you'll need to change the code.
.pfe\.CopyText input[type=text].oeinput{
    margin: 0 35px 0 7px;
    width: 50%;
    height: 2.5rem;
    line-height: 2.5rem;
    padding-right: 0.5rem;
    padding-left: 0.5rem;
    border-style: solid;
    border-width: 1px;
    padding-bottom: 0px;
    font-size: 1rem;
    font-weight: 600;
    color: rgb(0,0,0);
    border-color: transparent;

    }
    .pfe\.CopyText .container{
        display: flex;
        align-items:center;
        position:relative;
    }
    .pfe\.CopyText .wrapper{
        position:relative;
    }
    .pfe\.CopyText .reactinput{
        width:100%;
    }
    .pfe\.CopyText .reactbutton{
        z-index: 2;
        top: 0;
        right: 0;
        position: absolute;

    }
Next we're going to create a new file in the CopyText directory, click the New File button in the Explorer pane of Visual Studio Code after you’ve put your focus on the CopyText directory, then name the file copy2clipboard.tsx
Here is the code that we'll use for the tsx file. This is a react typescript file containing a class that returns an html container, the container will be our control, built and styled.
The last file we need to change is our index.ts file. If you’ve chosen to name your project and namespace differently from my example, it might work best to copy each method from the sample and paste it into your index.ts file, rather than replace the whole document, this will help you preserve your class and interface naming. The index.ts class needs to create an instance of our tsx file's class, then invoke the render method of ReactDOM in order to paint our control over the PCF template. The index.ts class also needs to bind handler methods from the react class with our PCF class so that our bound parameters change as the element on the page changes.
After modifying all of the code files, build the project by executing the command: npm run build in the command window. If there are no build errors, you can test your control by running the command: npm start which will spin up a local test server to test out the control. If everything looks good and the copy icon copies the text in the control, we're ready to push the control into dynamics. To kill the local test server, execute Ctrl C in the command window (sometimes I need to do it twice)
To push the control into dynamics we only need 2 really easy commands in the command window. First, run pac auth create --url <https://yourorg.crm.dynamics.com>

Next execute a command to push the control into the Default solution in Dynamics: pac pcf push --publisher-prefix pfe
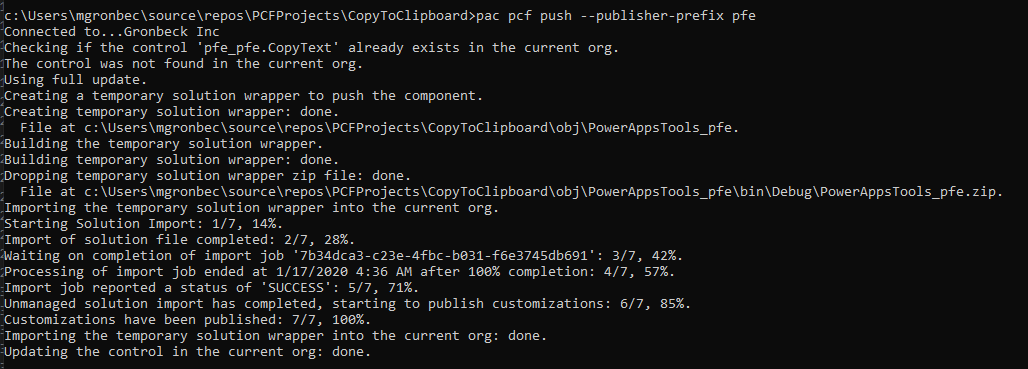
If the control is pushed successfully, you can configure it against a text field in Dynamics.
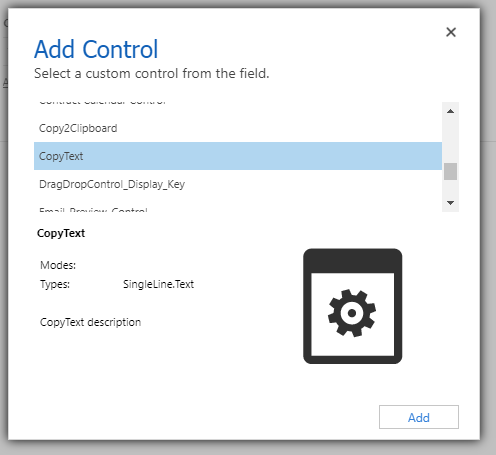
Navigate to the legacy form editor for an entity and double click the text field, then click Controls and Add Control.
Find CopyText and select it from the list; click Add
Select the radio buttons to make the CopyText control the default for all form factors:
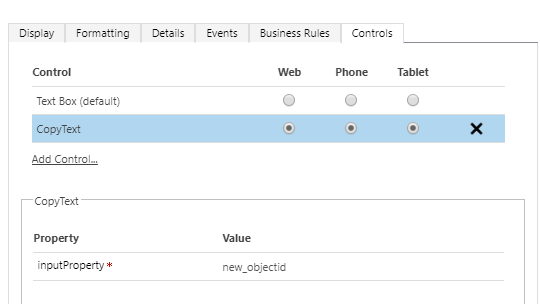
After saving and publishing the changes, open up the form and see if the change took effect.

Hope this helps you
Matt

*This post is locked for comments