Introduction
To simulate a user’s actions against a Dataverse environment, that user needs to be authenticated and authorized.
Authentication and authorization serve different functions. Before we talk about how authentication is accomplished in a test script, we need to define authentication and authorization to understand their differences.
Authentication vs. Authorization
Authentication is the process of verifying that a user is who they say they are. Authentication is a function accomplished by something you know, something you have, or something biometric.
- Username and password
- Token device
- Thumbprint or facial scan
Authorization is the process of determining the resources that a user can access, and the actions they are able to perform.
- Role Assignment
- Privileges in the assigned role
- Business unit and Team Membership
As it relates to performance testing:
- Authentication is something that will be configured in your script and occurs at runtime.
- Authorization is something that will be configured in your environment before the test is executed.
OpenID Connect
Authentication to the Power Platform follows the OpenID Connect (OIDC) protocol. OIDC is an identity layer on top of OAuth 2.0 that simplifies authentication and single sign-on with a special token called an ID token. While the blog assumes the reader has some familiarity with OpenID connect and OAuth, you don't need to be an expert at these protocols. Here are some resources to help you get started if you are not familiar with OAuth 2.0 and OIDC:
For us, this means that we will successfully achieve authentication, and acquire an ID token through a series of requests between our web browser, the Dataverse environment, and the Microsoft identity platform.
Goals
The goal for Part 2 of the blog series is to help you understand where you need to use post processors, and which values need to be extracted. We will use the post processors described in Part 1 to achieve successful authentication. I will also introduce two more JMeter terms: Thread Groups and Recording Controllers
- A Thread Group controls the number of threads (virtual users), the ramp-up period, and the number of test iterations to execute. All controllers and samplers are executed in the context of a thread group.
- Recording Controllers are containers to group and store samplers in a test.
You will be looking for the parameters below that will be returned in your HTTP sampler responses. This is not an exhaustive list of parameters. There may be additional parameters or tokens to extract depending on the scenario:
- Nonce
- State*
- Sft*
- SessionId*
- Ctx*
- Code
- Id_token
- Session_state
*denotes the parameter may be extracted more than once.
Authentication
This is not intended to be a tutorial. The steps below walk through the required extractions at a high level to get you started. These concepts apply to any tool you choose to write and execute your performance testing scripts. The example below assumes that the user is signing into a model-driven app for the first time. The recorder that generated the requests used in the screenshots below is the JMeter HTTP(S) Test Script Recorder with Firefox.
Step 1:
Authentication will be initiated by the application. This means that a user will navigate to their app first, typically through a link or a bookmark. If a token is not present, the app will redirect the browser to the identity platform.
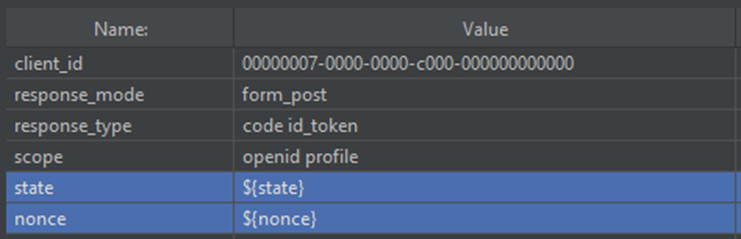
This will be represented as a GET to your organization URL that receives a 302 response. The 302 response contains a location header with a value of the identity platform URL. The URL will contain a nonce and a state in the querystring. This will be the first required extraction:
https://login.microsoftonline.com/{TenantGUID}/oauth2/authorize?client_id=00000007-0000-0000-c000-000000000000
&response_mode=form_post
&response_type=code id_token
&scope=openid profile
&state=OpenIdConnect.AuthenticationProperties1234567890ABCDEFGHIJ
&nonce=638122550952281718.EXAMPLE
&redirect_uri=https://example.crm.dynamics.com/&max_age=86400
Both values can be extracted with their own boundary extractor. Remember that you are extracting these values from a 302 redirect, so you will perform this extraction on the Response Headers. This can be tricky as the default field to check for the boundary extractor is the Body:
State:

Nonce:

These variables will be passed into the querystring of the very next request to the identity platform authorize endpoint (https://login.microsoftonline.com/{TenantGUID}/oauth2/authorize):
NOTE: In JMeter, variables are referenced by a $ and curly braces surrounding the variable name: ${variablename}
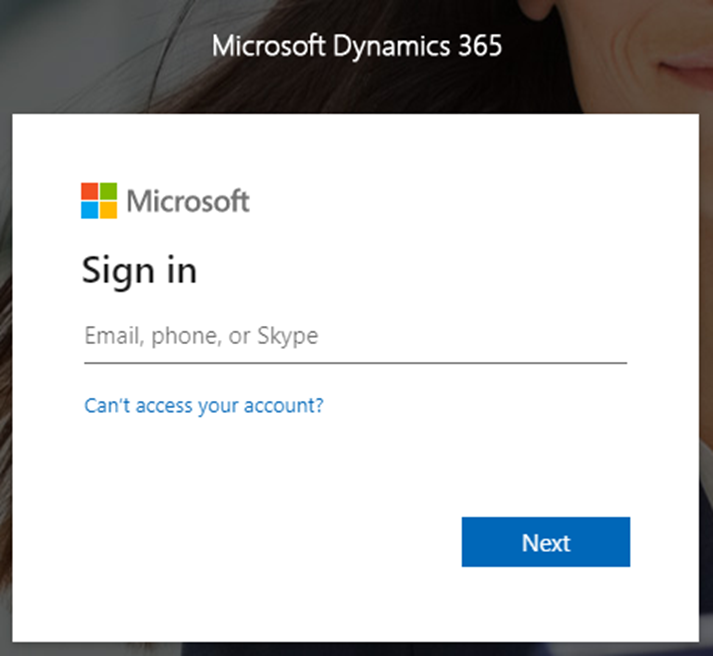
Step 2:
The browser has redirected to the authorize endpoint using the state and nonce values extracted from the redirect. This is a page that we should all be familiar with:
The response from the page contains a block of character data with the sFT, sessionId, ctx, and canary parameters required to continue the authentication process. A simple boundary extractor can be used again here:
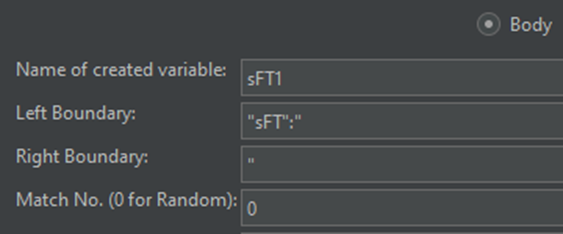
This pattern can be repeated for the sessionId, ctx, and canary parameters. Note that the left boundary on the ctx parameter will be ctx=, while the others will follow the JSON pattern shown in the screenshot above.
The values extracted from the authorize response will be subsequently passed in to the login request (https://login.microsoftonline.com/{TenantGUID}/login) along with the test users username and password.
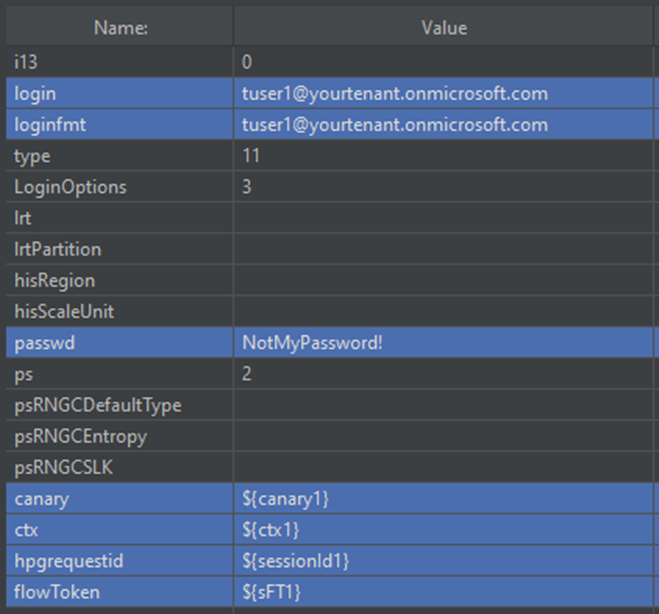
This will verify the user’s identity.
Step 3:
If the login verification is successful, the login response will contain another block of character data with new sFT and sessionId values, and a sCtx parameter. The extractions for these parameters will be the same as the extractions against the authorize response. The extracted values will be passed into the KMSI (Keep Me Signed In) page:
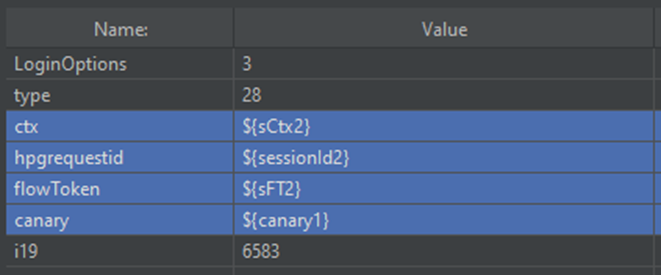
NOTE: In situations where the same parameter is extracted more than once in a test, rather than overwriting the existing variable, I like to use a numeric suffix to indicate the difference. This is to maintain both values in test situations where both values are required at the same time.
Step 4:
KMSI lets the user choose whether the user would like to resume their sessions without being prompted to sign in again.
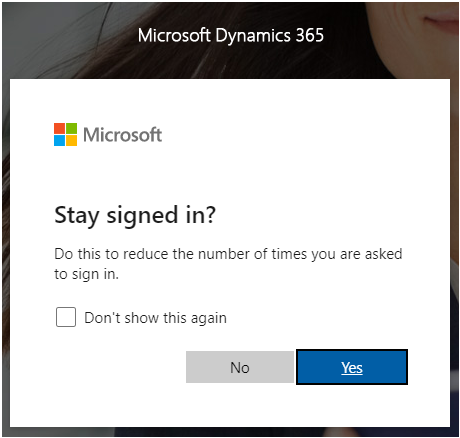
The selection made on this page doesn't matter in a test. If it is recorded in the test, it will run in every test iteration regardless of the selection.
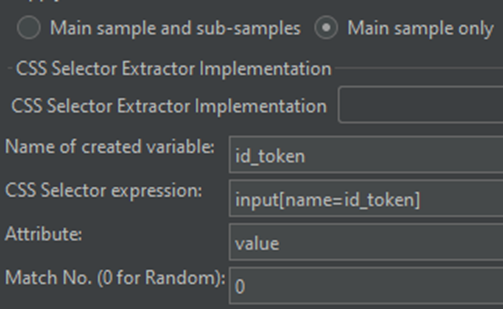
After the selection, KMSI will respond with the id_token in a hidden form, along with the code, state, and session_state parameters to be extracted and posted back to Dataverse:
Working...
At this point the user is authenticated, and parameters in the hidden form need to be extracted and passed to Dataverse. It is my preference to use the CSS selector extractor to navigate the hidden form inputs and select their values.
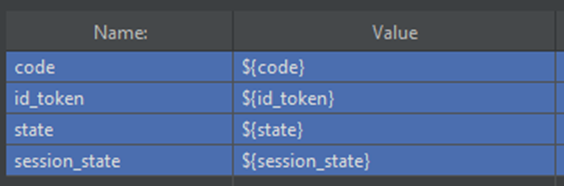
This pattern can be repeated for the code, state, and session state values. The extracted values will be referenced in the body of the POST back to Dataverse, where the authentication journey was initiated:
Conclusion:
We walked through the series of requests and extractions required to achieve successful authentication in a test script. Nearly everything after this point will depend on proper authorization configuration for the user in the environment.
Pro tips:
- Turn off follow redirects in your HTTP samplers. This could cause some false failures.
- Once you have successfully authenticated in your script, organize those HTTP samplers in a transaction controller or recording controller and reuse this controller throughout your test plans. This will simplify script creation.
- When learning about performance testing, my mentor always encouraged me to have a fiddler capture handy. This made it easy to search for, and correlate values throughout my recorded tests. This is helpful when you have a value in a request, and you need work backwards in previous responses. This is something that I still do today, and I encourage everyone to do the same.
- If you are having trouble with your extractions, add the "View Results Tree" listener to capture the HTTP request samples sent by JMeter. You can analyze responses in the results tree, and test your extractors against your responses
Coming Soon:
You are authenticated! We build on this in the next installment, and introduce some new concepts to plan and create a realistic test to execute against Dataverse.
Index:
- Part 1 - Extractions
- Part 2 - Authentication
- Part 3 - Test Concepts
- Part 4 - Analysis
- Part 5 - Azure Load Testing


