


Steps to create and use a Client Control Add-in in Microsoft Dynamics NAV

 Like
Like Share
Share
 Report
Introduction:
Microsoft Dynamics NAV control add-ins can be created using the NAV .dll assembly viz. Microsoft.Dynamics.Framework.UI.Extensibility.dll assembly. This .dll binds the NAV control add-in and the NAV environment. This control add-in has to be implemented in Visual Studio and then registered in Dynamics NAV by navigating to Control Add-ins.
Pre-Requisite:
Microsoft Dynamics NAV
Purpose:
In this article, I will be demonstrating the steps to create and use a Client control add-in in Microsoft Dynamics NAV.
Procedure:
- Open Visual Studio. Create a new C# class library project and add a reference to the Dynamics.Framework.UI.Extensibility.dllassembly. This assembly is present in the following directory: C:\Program Files (x86)\Microsoft Dynamics NAV\100\RoleTailored Client.

- In the Visual Studio project namespace, create a new interface and add code for the control add in. The code is mentioned below:
[ControlAddInExport(“NAVaddin”)]
The name ‘NAVaddin’ will be used while registering the control add-in in Dynamics NAV.
- Now you need to sign the assembly. Navigate to properties->Signing->select Sign the assembly. In the Choose a strong name key file drop down list, select ‘New’. In the Key File name enter an appropriate name and clear the ‘Protect my key file with a password’ check box.
- The next step is to generate a unique public key in Visual Studio for the project as this public key is required while registering the control add-in in Dynamics NAV.
- Navigate to Tools->External Tools.
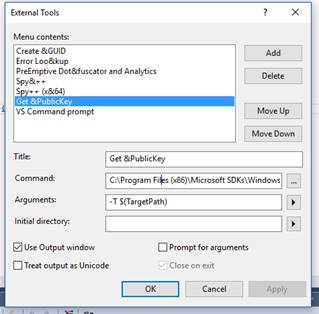
Parameters to be filled are as below:
Title: Get &PublicKey
Command: C:\Program Files (x86)\Microsoft SDKs\Windows\v8.1A\bin\NETFX 4.5.1 Tools\sn.exe
Arguments: Get &PublicKey
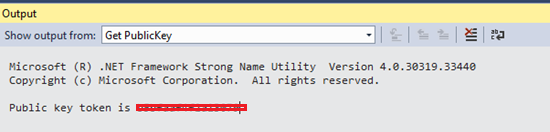
Now, ‘Get PublicKey’ will appear as an option under Tools which on clicking will generate the public key for the project.

After clicking ‘Get PublicKey’->the public key is generated and displayed as below:
- Save and Build the solution. After successful build of the project, the .dll file will be generated.

- Creating the Resource .Zip File.
You must create a single .zip file containing manifest and any of the resource files used in Visual Studio. This .zip file has to be used while registering the .dll in Dynamics NAV.

- The next step will be to copy the .dll file to two locations in Dynamics NAV as given below:
- C:\Program Files\Microsoft Dynamics NAV\100\Service\Add-ins
- C:\Program Files (x86)\Microsoft Dynamics NAV\100\RoleTailored Client\Add-ins
- Go to NAV administration and restart NAV services so that the changes are reflected.
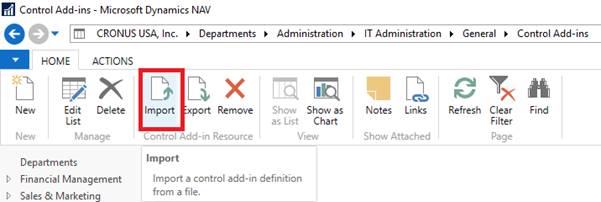
- Navigate to ‘Control Add-ins’ in NAV windows client and create a new Control add-in. Add the same control add-in name which is mentioned is step 2:

Click on ‘Import’ action to import the .zip file containing all the Visual studio resources as created in step 7.
After performing these steps, the client control add-in will be registered in Dynamics NAV and the triggers defined in Visual Studio, if any will be visible in the NAV Development environment if the Control add-in is selected in the properties of the control.
Conclusion:
Using this procedure, you can create complex functionalities in Visual Studio and use the .dll control add-in file in Dynamics NAV. I have created SMS functionality from NAV and Digital Signature functionality in NAV using the above procedure of adding a client control add-in.
The post Steps to create and use a Client Control Add-in in Microsoft Dynamics NAV appeared first on CloudFronts - Microsoft Dynamics 365 | Power BI | Azure.
This was originally posted here.
*This post is locked for comments