How to Manage 360° Ticketing from Portals
 CRMJetty
As any support staff member knows, customers raise support tickets for various queries. Many times, those queries are repetitive. This is where efficient ticket management comes into the picture. There are a number of ways to handle it. But the easiest way to handle it is to have a smart ticket management feature built into the customer portal.
Let’s explore the feature that is built into PowerApps’ Customer Self-Service portal.
Here’s how to manage 360° ticketing from the PowerApps portal:
Steps:
Step 1: Your portal users can login using their portal user credentials in PowerApps Portal.
Step 2: From the Navigation Menu, they need to navigate to My Support. The Case list view will open from where they can see their cases.
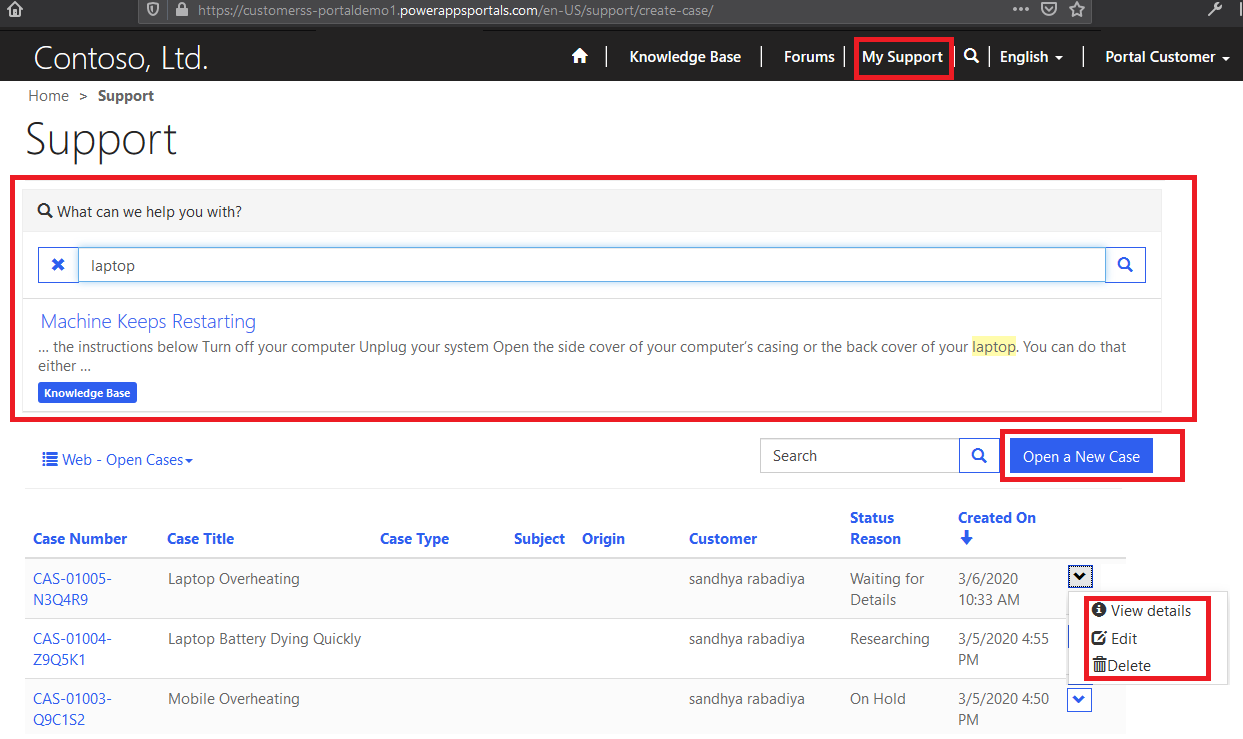
Users will search for a problem solution before generating any case, if they don’t find one, they will add a new case, edit existing case or remove case.
Step 3: To create a new case, they can click on Open a New Case.
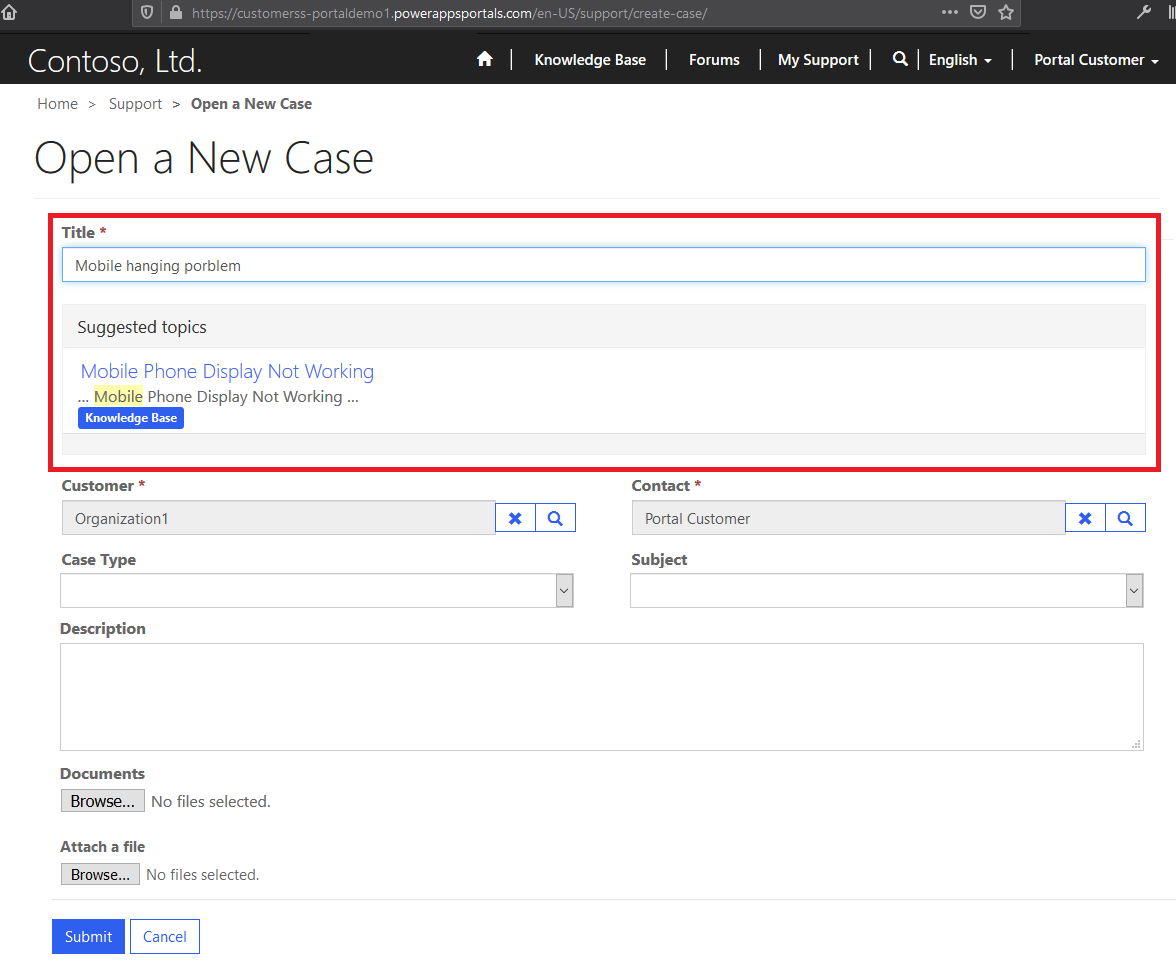
User will also get a solution as a suggestion while typing the case title.
Similarly, if you opt for a third party solution over the default portal, you can get a robust ticketing management solution.
Let’s look at the steps of how to manage the same in the Dynamics 365 WordPress customer portal:
Step 1: Your portal users can login with their portal user credentials in Customer Portal.
Step 2: They need to navigate to the case module where they will be able to see the list of records of that module. They can search a record from the list view, delete it or update it.
They can also filter the existing contacts based on account and contact selection. It will allow them to filter and get details of specific child contacts. These hierarchy settings will be based on the hierarchy that is set by admin on the Dynamics CRM side. So the parent roles will be able to see the cases of their child roles.
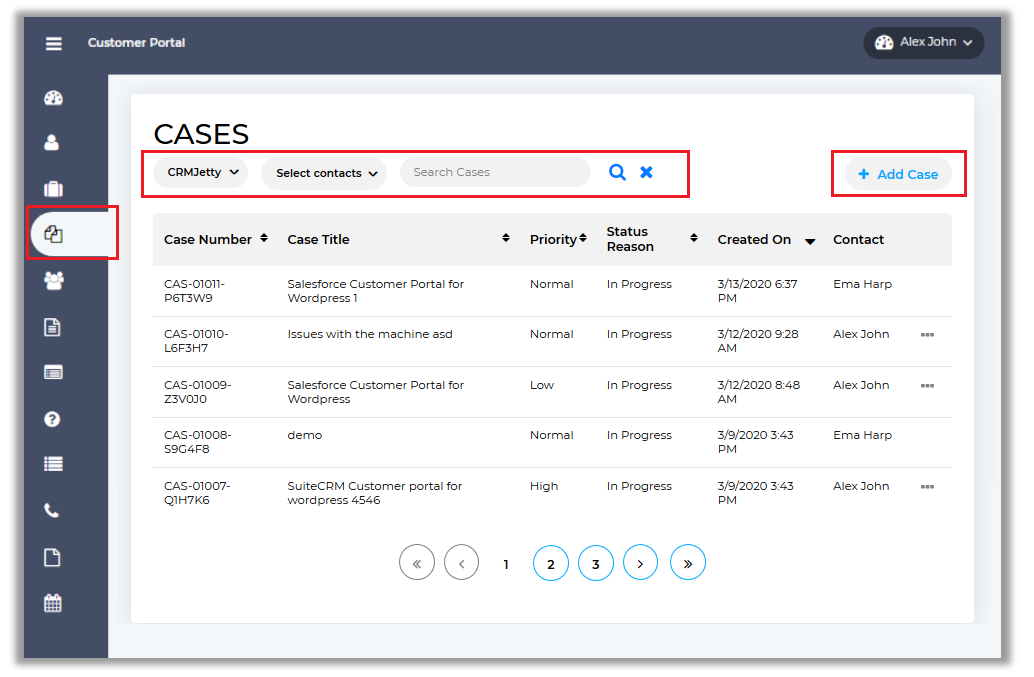
Step 3: Your users can add a new record to that module. To add a new record, they need to click on the Add Case button from the list view or from the navigation menu by clicking on the Add button.
- This Customer Portal provides Case Deflection. This feature will help portal users to get probable solutions before generating any case.
- When a portal user faces any queries or issues, they will be able to navigate to Add Case option.
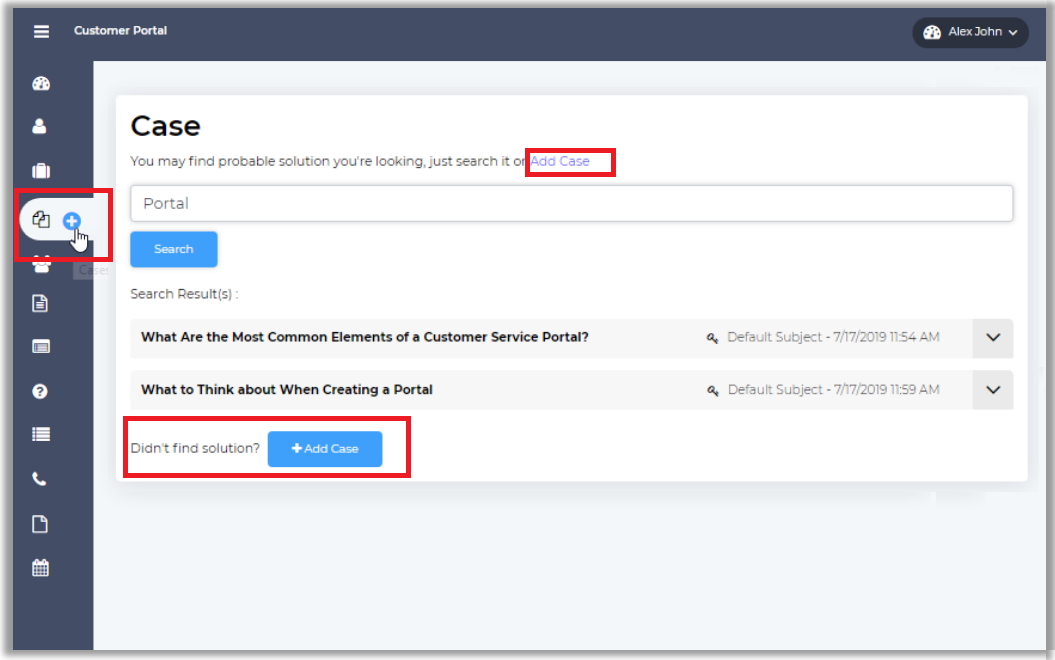
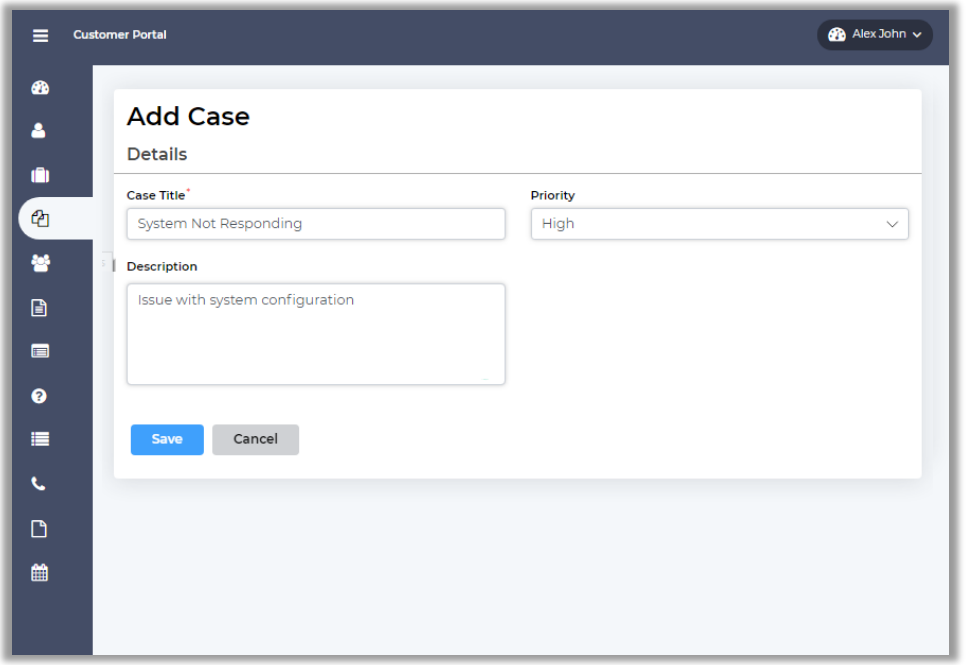
- Once they create a new case from the portal, it will get reflected in Dynamics CRM.
Step 3: By clicking on the View button from the List View, your users can view the details of a case. They can edit that case or add notes for particular cases from the detail view.
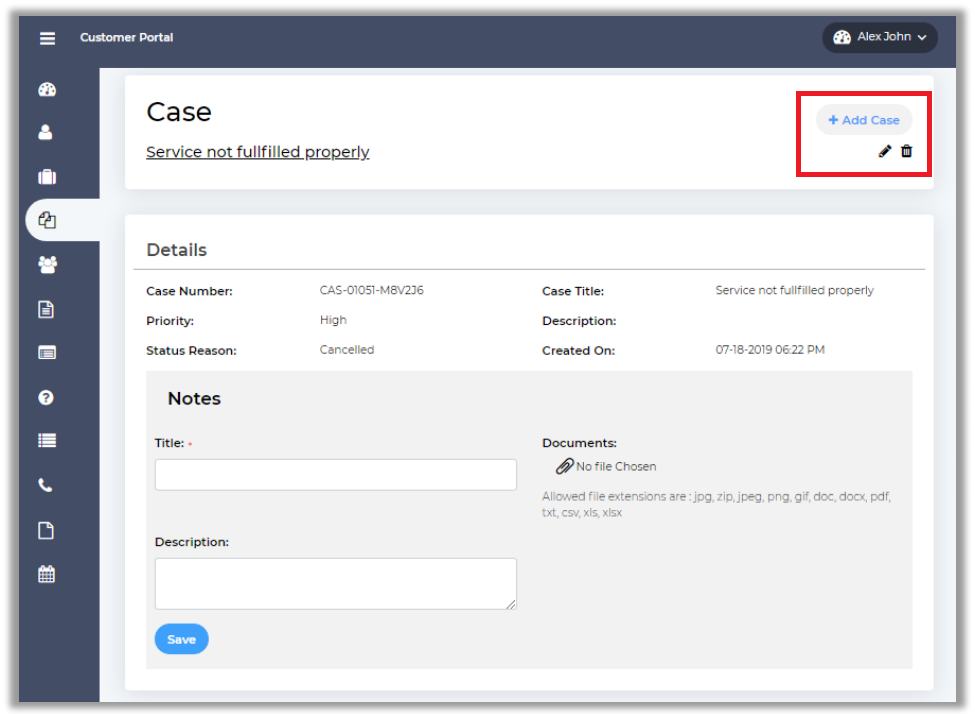
The purpose of tickets is to solve certain problems that a user is facing. But it should also be easy to do for the support staff. With features like case deflection, they can handle the issues that are new or unique instead of spending all their time on queries that already have a ready made solution. Whether you go with the default option or a third party portal solution, make sure to get one with a robust ticket management feature.
All product and company names are trademarks, registered or copyright trademarks of their respective holders. Use of them does not imply any affiliation with or endorsement by them.


 Like
Like Report
*This post is locked for comments