


 21
21 Like
Like Share
Share
 Report
Step 1: Creating an Azure service bus namespace:
You can create a ASB by simply launching from Azure Portal, and selecting the essential elements which you need, as per your business requirement.

Enter/select a resource group, give a namespace name. Select: Pricing tier = 'Premium'. Selecting 'Basic' or 'Standard' or enable the Queue option, otherwise.
Post this, additionally you can check if you need to specify anything explicitly, by clicking on 'Advanced' or else you can directly go for creating the namespace. The namespace would take some moments to deploy.
Your Namespace is now ready to be used.

Step2: create a topic:
In this, we will create a new topic, by creating on the following button from the action pane:


Click 'Create' to complete the step. The step will take a couple of moments to validate the keyed-in values and then will create the topic for you.
How to view the created Topic?

On the side pane, click on the 'Topics' and you will see the list of all the topics that have been created (selecting a different Pricing tier, other than 'premium' would have just given us 'Queues', and not 'Topics').
Here is our newly created Topic:

Click on it to view details. Click on +Subscription, to add a new subscription: Give a name = D365FO_Subscription, select 'Enable dead lettering on message expiration' and rest you can leave with default values. Click 'Create' to finish the step. This will create the Subscription and you can view it at as follows:

Click on it to view the details. Here we will create the 'Correlation' filter and this is the most interesting part of the entire story.
Step4: Creating a filter
In the following screen, click on 'Add filter':

From the following screen, select 'Correlation filter'. Select 'Label' from the dropdown and give a suitable identifier label to your message:

Click to save changes.
Like this you can create as many message label filters as possible. The idea is to 'filter' only the customer records/vendor records/pools records as per recipient's wish: not to cross listen to any unwanted data.

How this works
Reach out to Topics\D365FO >>Service bus explorer >> select a subscription >> D365FO_Subscription:


Select content-type: application/JSON. Go to the bottom >> expand: Broker properties, to set the label of desired value:
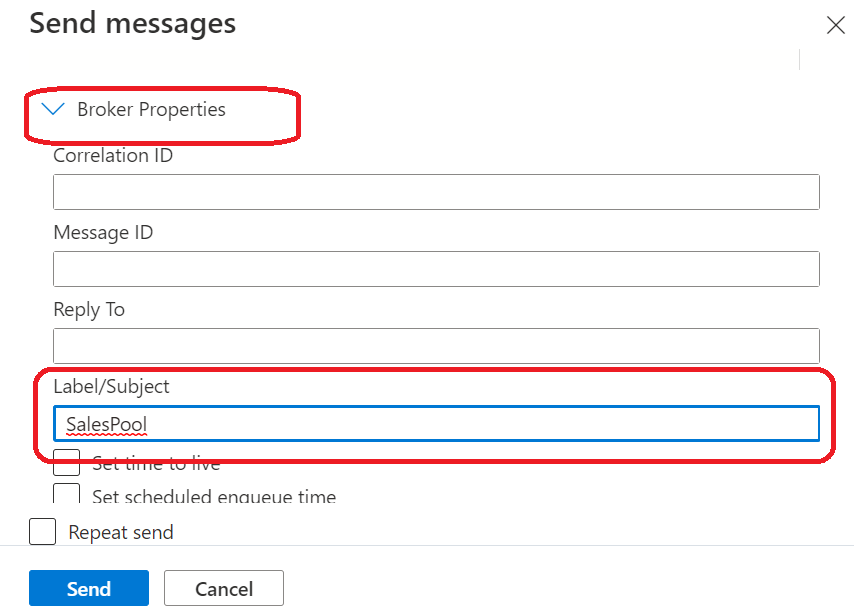

Which enables it to be used as a SalesPool type of message. Click Send. Come back to your Service bus explorer, select 'Receive message' from 'Peek mode' drop down:


Additionally, as you turned on Dead-lettering, it will expire the message if unattended after a given time, and also you can peek messages from the start ( receiving the message means it will read the message just once for you, you might not be able re-read again. Peeking can let you read any message, starting from the start).
Step 1: Creating the Azure function
In your Visual Studio (alternately you can also use Visual Studio Code) >> create new project >> in the template search for Azure function, the following screen appears:


Click on the same. The following screen opens:


Consequently your code now looks like this:


It lands successfully in D365FO as:

The console of your VS registers the message you have posted as:

*This post is locked for comments