


 3,111
3,111 Like
Like Share
Share
 Report
When using expense management, some workers need to request for cash advance before planning their business trips.
I’ve found some tutorials for AX 2012 version which explain how to setup the cash advance functionality using the Expense management module. Some tiny change have been made (the name itself of the module is no longer “Travel and Expense” but “Expense management”) in the last version:
- Travel requisition have been depreciated.
- The Enterprise Portal as we know it is no longer available since D365 for Operation is now full web.
- The return cash functionality runs differently.
Let’s review those functionalities in a full new tutorial.
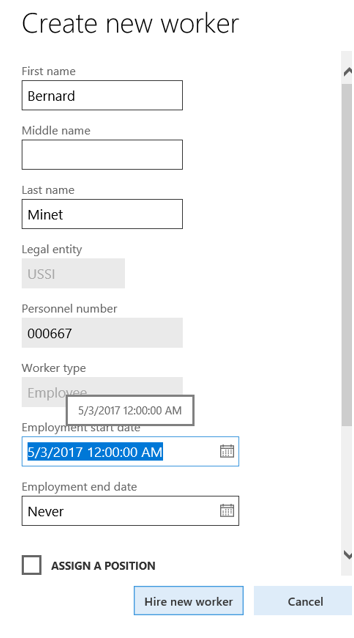
Worker creation
Like we use to do, the first thing is to create a worker for the legal entity (Human resources > Workers > Workers > New).
Then, you will need to create a “Person” supplier, and choose “Use selected record” when you will be asked by the system that your supplier exists in the global address book. It happens only if you have dial the First and Last name correctly regarding the previous setup.
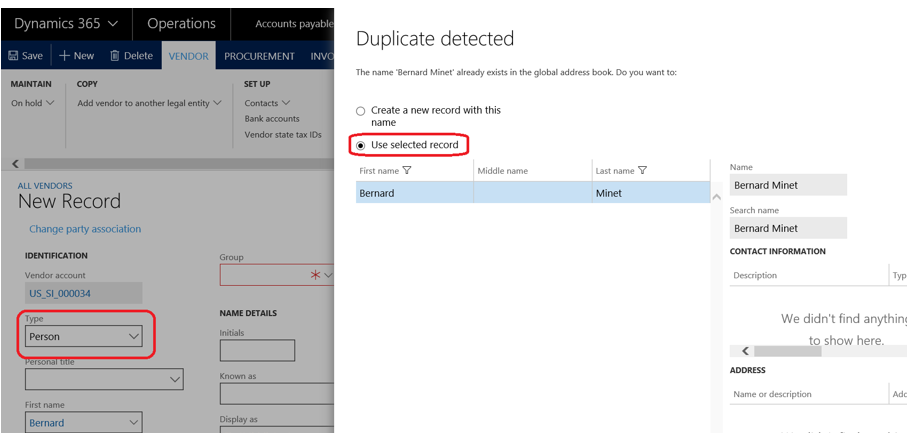
Don’t forget to choose a Group for the supplier, and dial OK.
Go back to your worker, in the Human resources module, to check the vendor account is affected in from the Expense tab > “Employee mapping and per diem rates”.
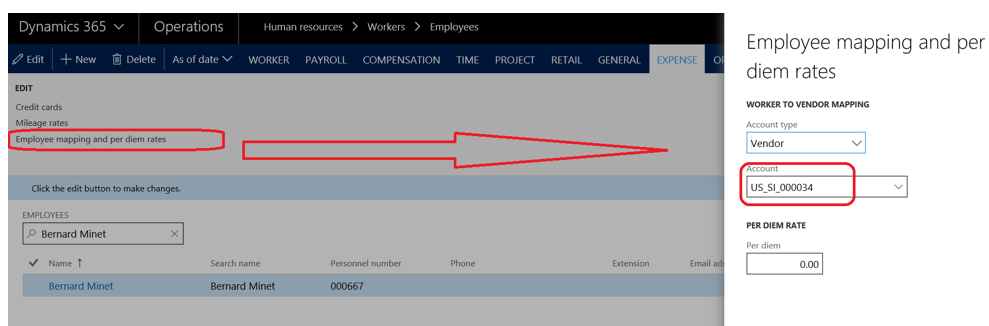
Then, assign the worker to the current user in the System Administration module.

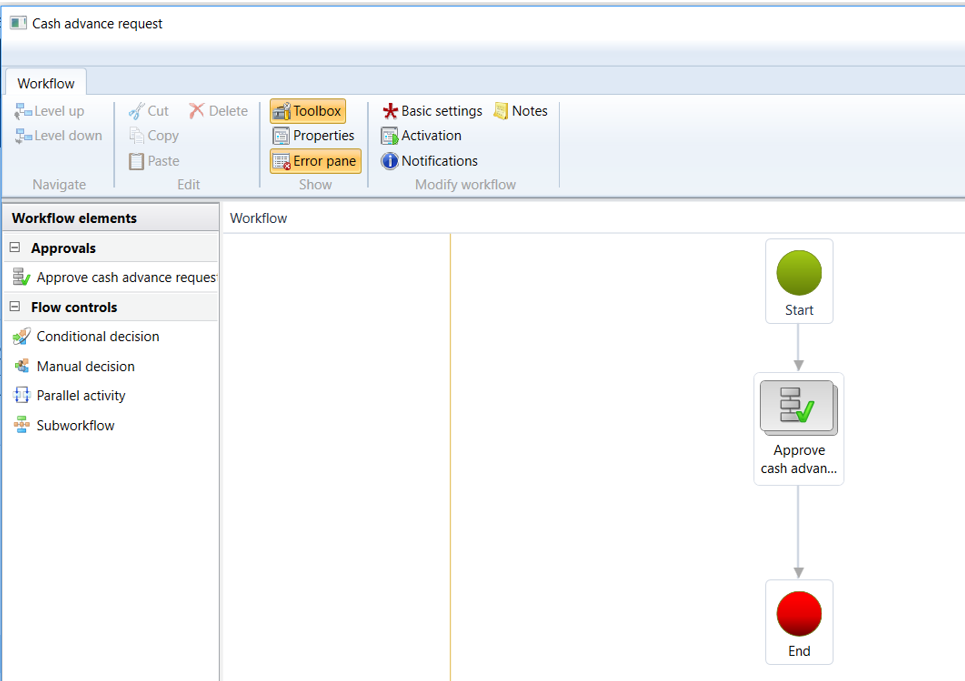
Workflow setup
You will need to setup at least 2 workflows, and a third one in option. The workflows are available in Expense management > Setup > General > Expense management workflows
Workflow 1 : “Cash advance request” is required when the worker ask his or her approver.
Workflow 2 : “Expense report” is required to allow worker to submit their expense report for approval.
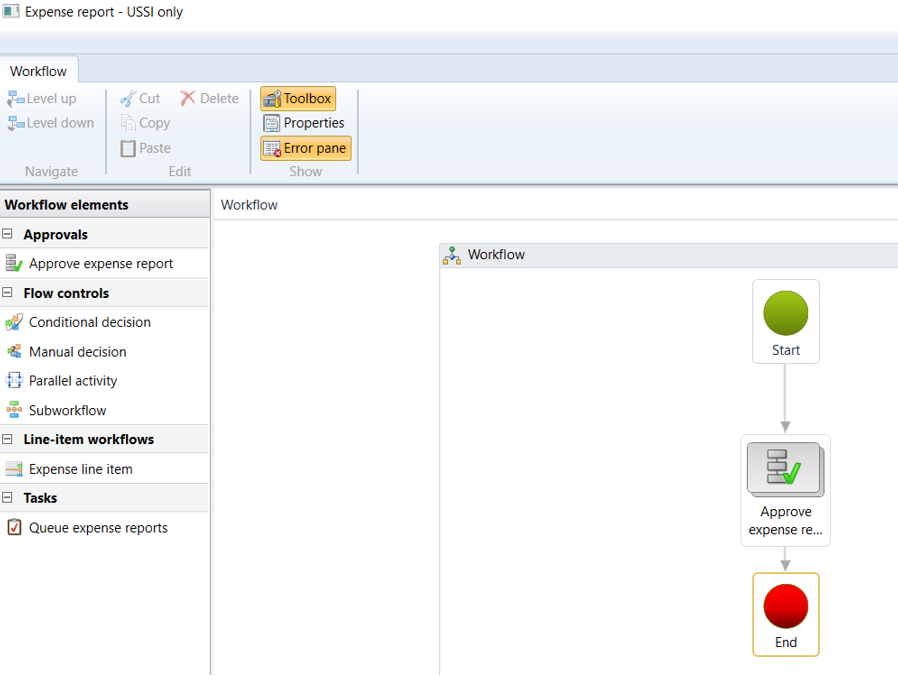
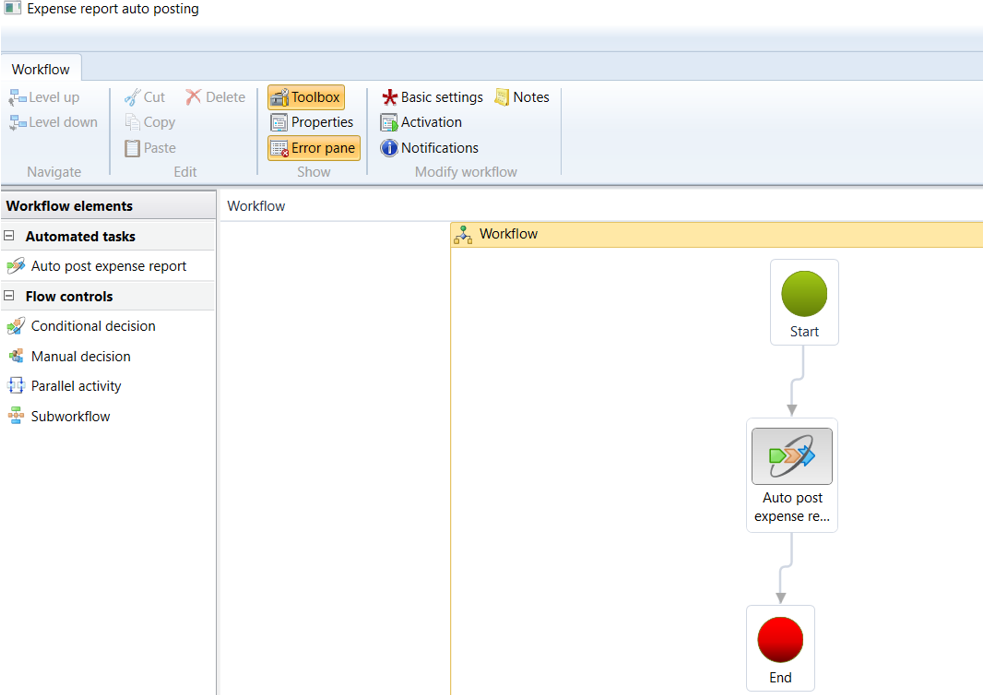
Workflow 3 : “Expense report auto posting” is recommended if you want to auto-post approved expense reports.
Expense management setup
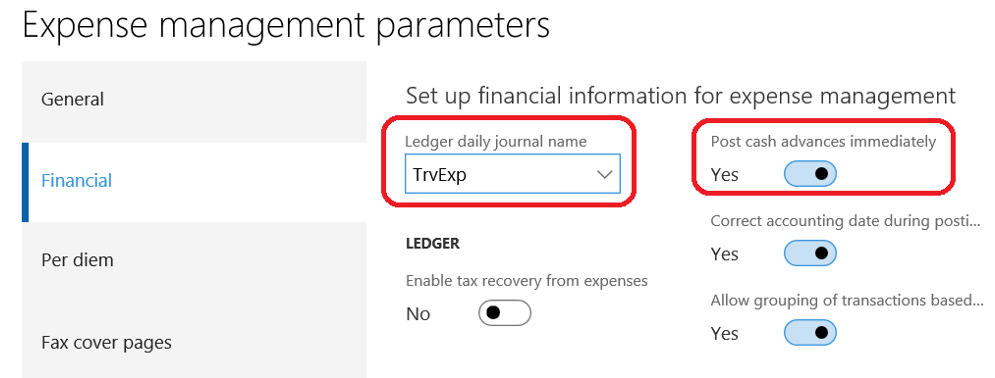
We have not done for the required setup. Go in the Expense management > Setup > General > Expense management parameters, and check you have filled the Ledger daily journal name. For posting cash advances immediately, you may enable the second option in red below.
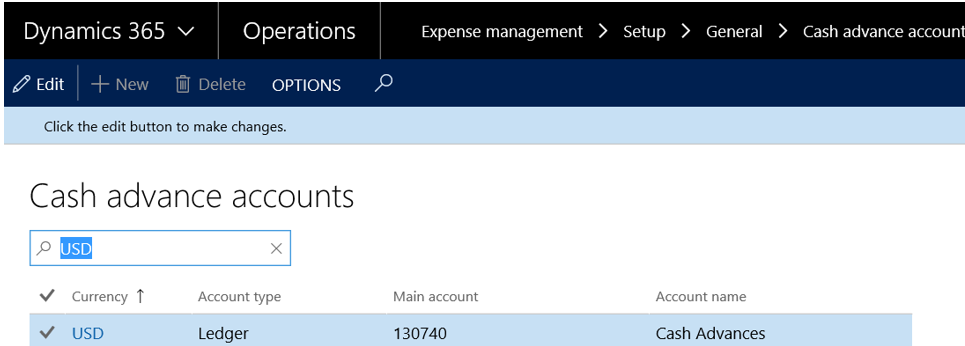
You also need to ensure the Cash Advance (Expense management > Setup > General > Cash advance accounts) accounts for the currency of the legal entity is setup.
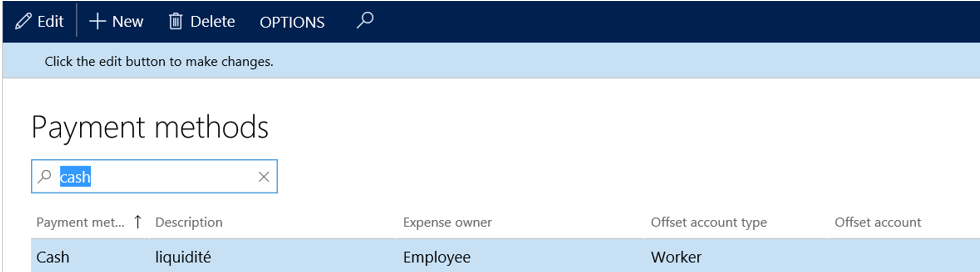
Also, a payment method is required (Expense management > Setup > General > Payment methods). Be sure to setup the “Offset account type” as “Worker”.
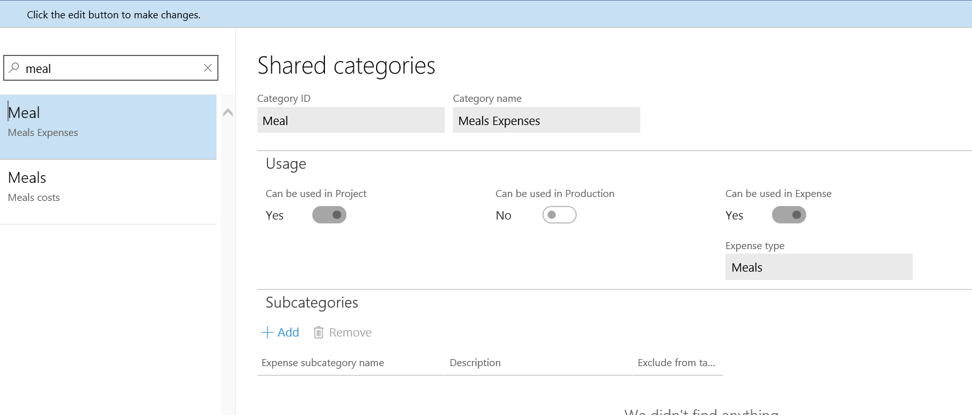
When creating an expense line on an expense report, you will need to select an expense category like Hotel, Meal, Taxis, etc.
At first, a shared category is required (Expense management > Setup > General > Shared categories).
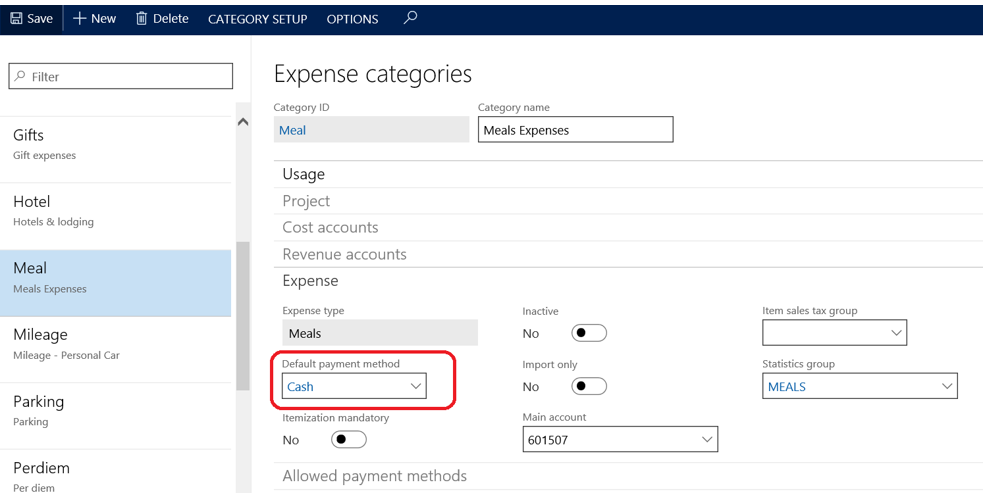
Then, you should be able to create an expense category (Expense management > Setup > General > Expense categories).
The important thing here is to setup the “Default payment method” with the payment method setup previously. You need to add it at first in the “Allowed payment methods”.
Now we’re ready to create a full cash advance scenario.
Cash advance scenario
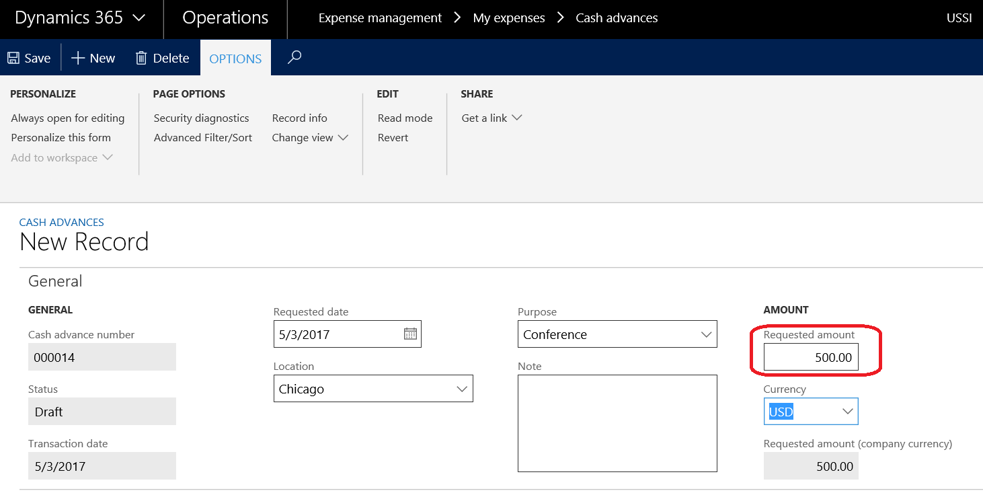
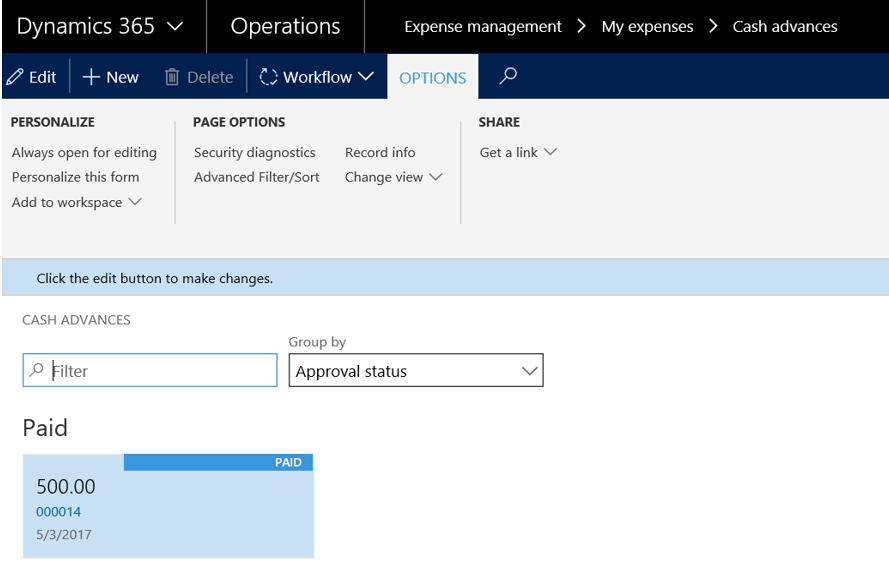
Let’s go. In the Expense management > My expenses > Cash advances, you can create a new cash advance for an amount of 500 USD for instance.
Then, submit it to the workflow.
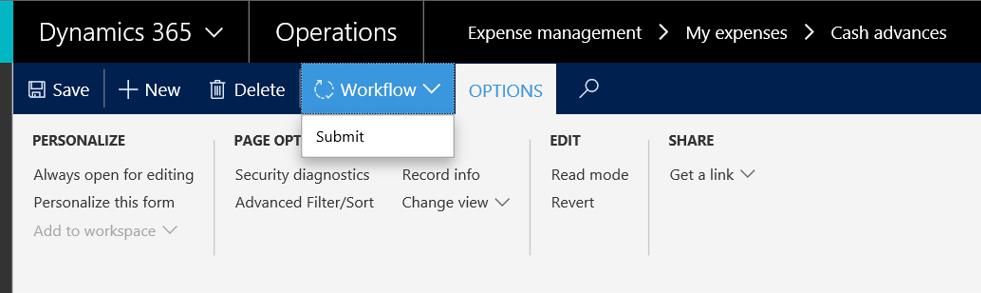
Note the cash advance is now submitted.
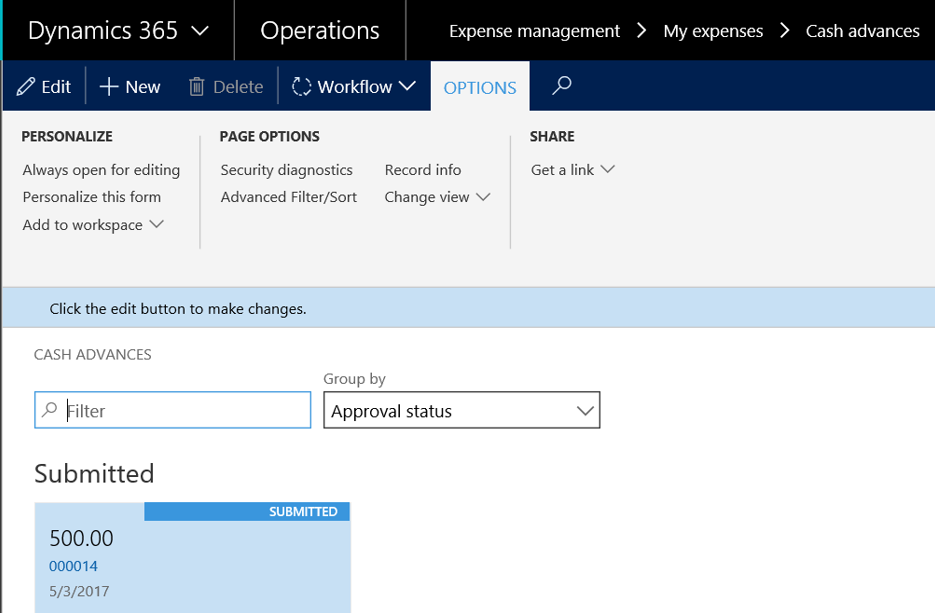
The approver (myself in that case) need to approve the request. You can find the cash advances to be approved in Expense management > Process cash advances > Cash advances for my review.
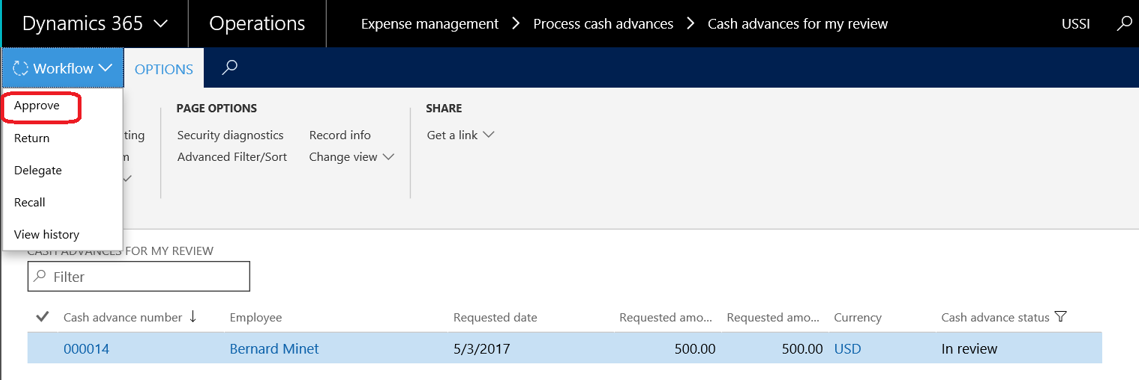
After it’s done, you will be able to “Pay and transfer” to the worker, from Expense management > Process cash advances > Approved cash advances.
![]()
An infolog is generated which indicates the ledger journal transaction (which has been autoposted if you have enable the checkbox in the global expense parameters, see previously).
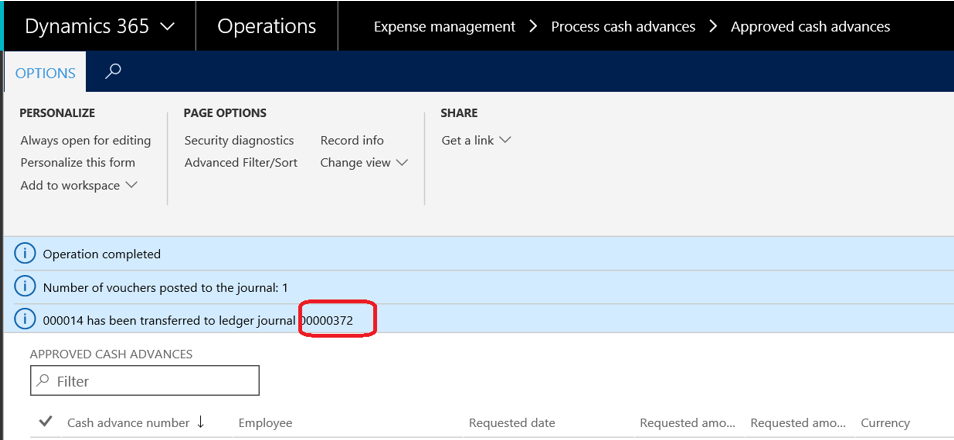
Let’s have a look on the ledger account transaction (General ledger > Journal entries > General journals) to check everything has been posted here. The cash advances account has been debited and the vendor is the offset account. You also can check in the voucher transaction (General ledger > Inquiries and reports > Voucher transactions).
![]()
And… it’s done for the cash advance flow. Let’s see how to use it when creating an expense report.
Creation of an expense report
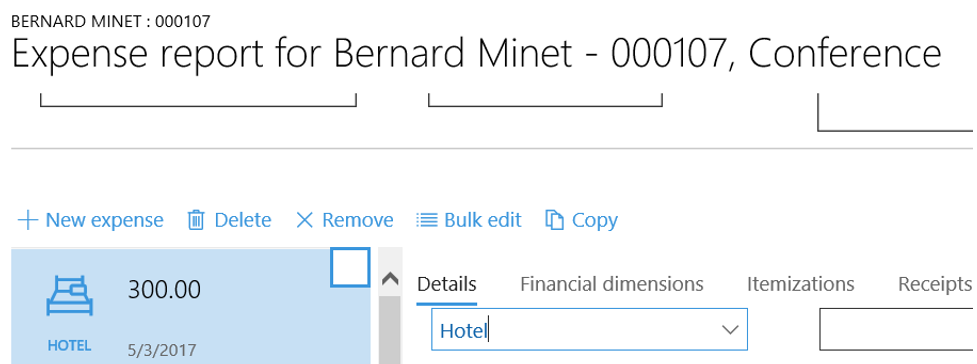
My worker Bernard Minet need now to create an expense report. Go to Expense management > My expenses > Expense report and feel free to create a new one.
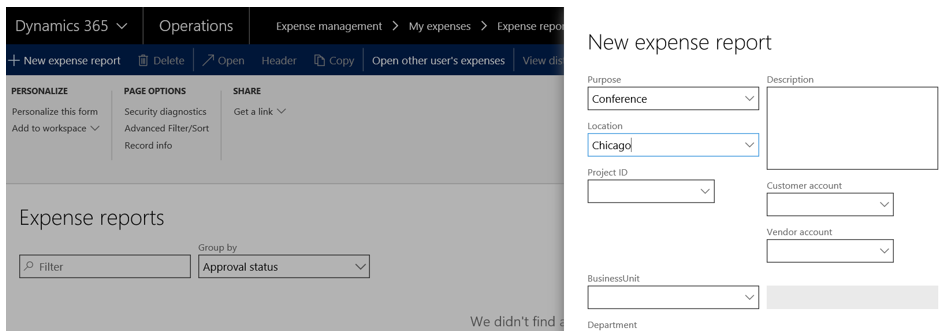
Add lines, by choosing expense categories previously setup. Pay attention, the default payment method must have an offset setup to worker as I said earlier.

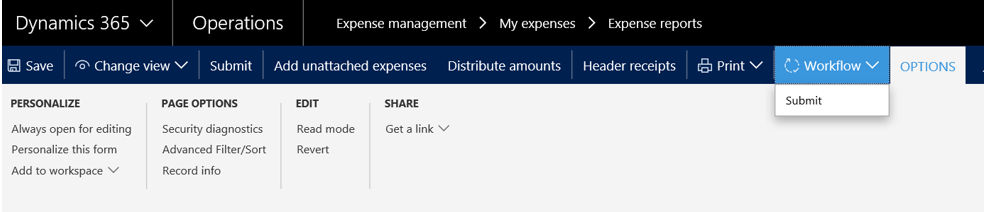
Submit the expense report to the workflow (expense report workflow).
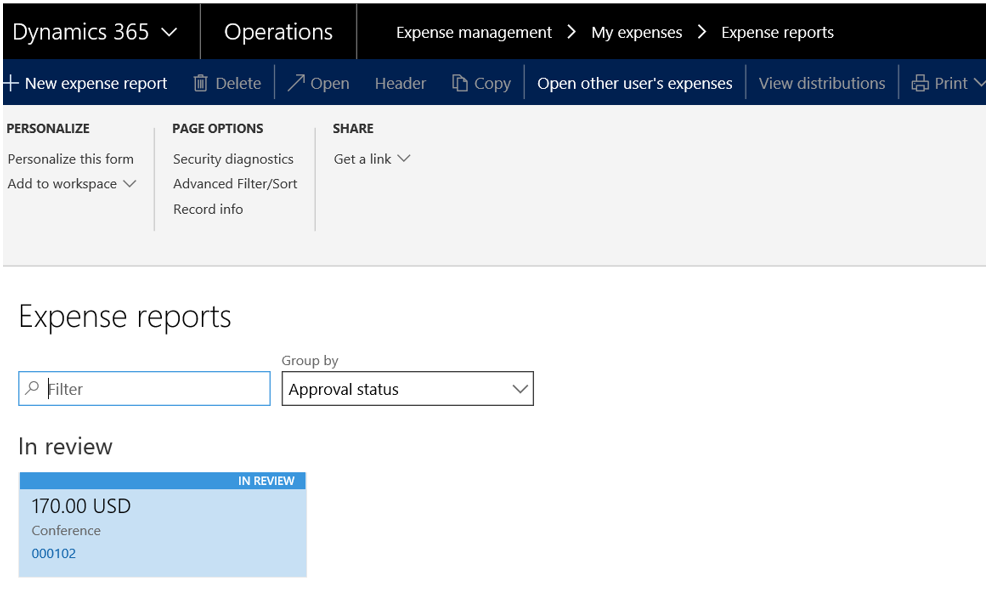
The expense report in now in review.
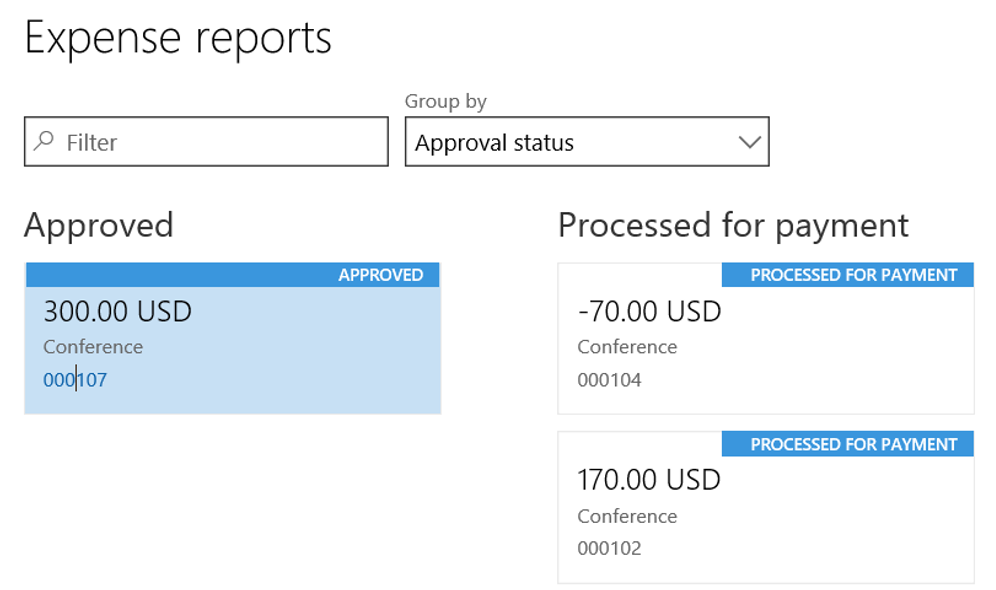
The workflow also need to be approved by the approver (myself again for this demo). Find it under Expense management > Process expense reports > Expense reports in review.

Because I’ve got an “Expense Expense report auto posting” workflow setup, the Bernard Minet expense report has been approved, and then autoposted so the status of the expense report is “Processed for payment”.

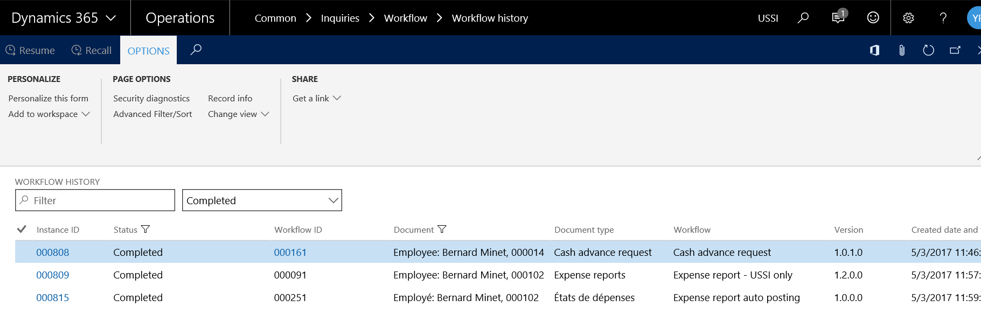
To be sure, you can check your workflow history execution under Common > Inquiries > Workflow > Workflow history. Here you’ll see the 3 workflows have been executed sequentially.
Let’s go back to the cash advance (Expense management > My expense > Cash advances).
Open it, and you will have a look on the balance, which indicates the cash advance amount minus the current expense report which has been taken into account.
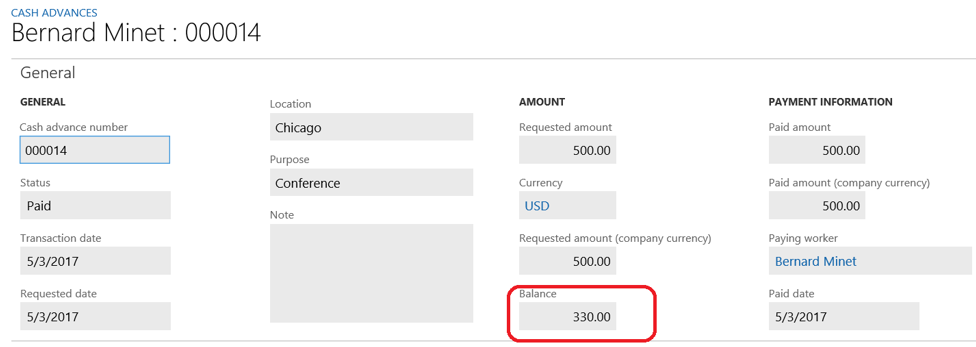
In the voucher transactions, you can check everything is also taken into account, which is here. 170 USD have been deducted from the cash advance account, with the offset split on the 2 categories used (Car rental and Hotel).
![]()
Expense flow by using manual posting
I’ve said earlier in this post the third workflow was not mandatory. Let’s inactive it to see the impact.
As we did before, we first create an expense report, add an expense categorie, a date and a cost, and then submit it to the workflow.
After approving the workflow, we notice here the status is updated to “Approved” instead of “Processed for payment”. That’s because the last workflow is not active anymore.
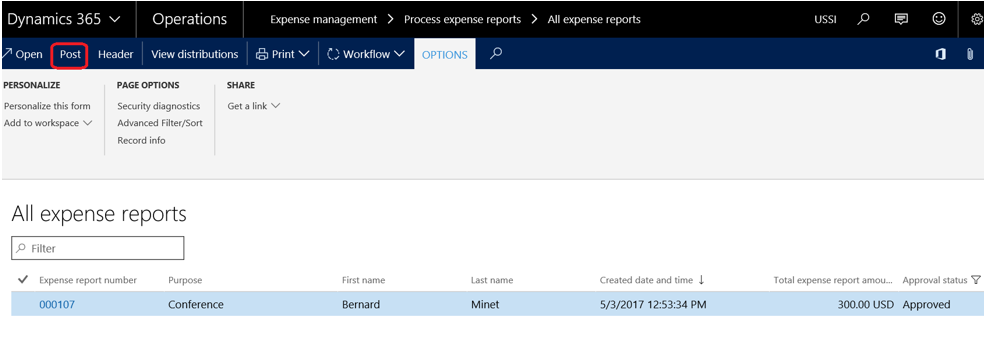
 So, go now to Expense management > Process expense reports > All expense reports. Here you can post the expense report manually : it’s mandatory if you want to generate the ledger transaction and also impact the cash advance to be deducted.
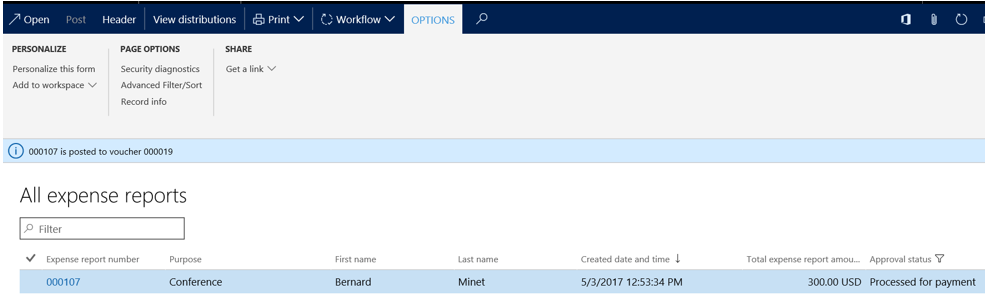
 As you can see, the expense report is now updated to the last status “Processed for payment”.
That’s all for now, but we’ll see return functionality later on.
Yohann ROLLAND
L’article Using Cash Advance functionality in the Microsoft Dynamics 365 for Operations Expense Management module est apparu en premier sur D365Tour.
*This post is locked for comments