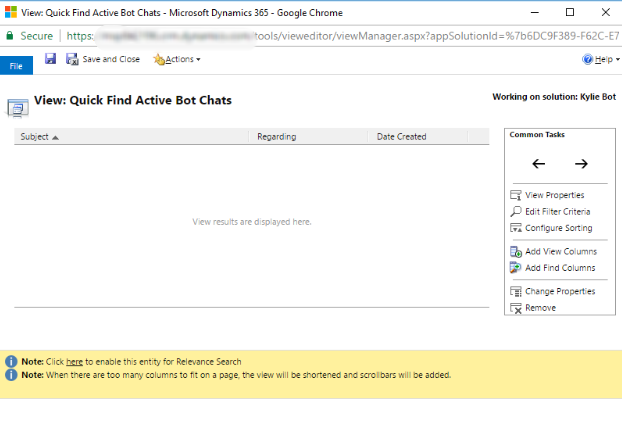
During the Kylie Bot blog post series, one of the steps was to create a custom activity entity to record all of the conversations users are having with the Bot. While customising some of the views, I came across the yellow bar at the bottom of the screen asking me if I wanted to include the entity in the Relevance Search?
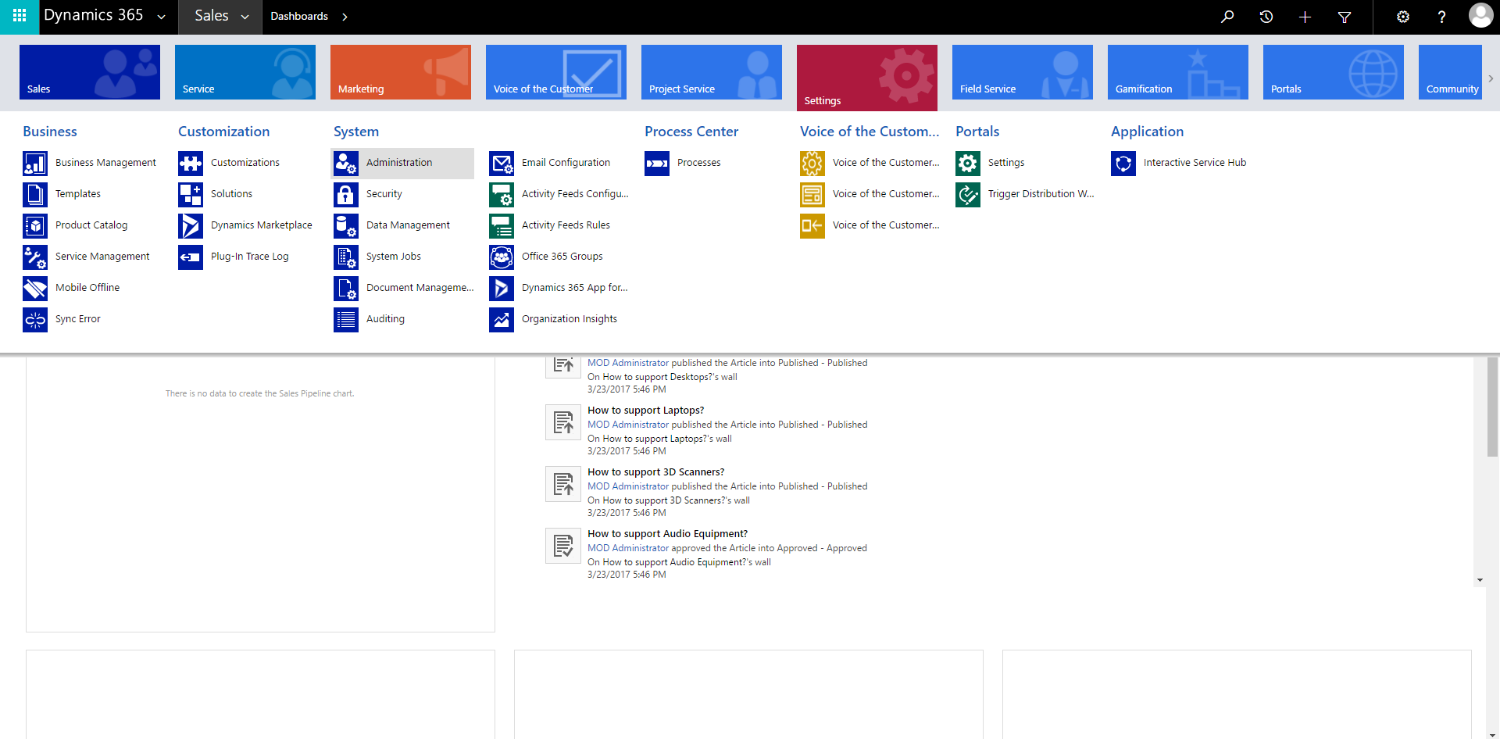
The answer is actually yes I do because I want to enable my users to search the content and related content of the entity, not just the entity itself. So let's go ahead and enable this feature. Navigate to the 'Settings' menu item and then select 'Administration' like this:
Next, click on 'System Settings' like this:
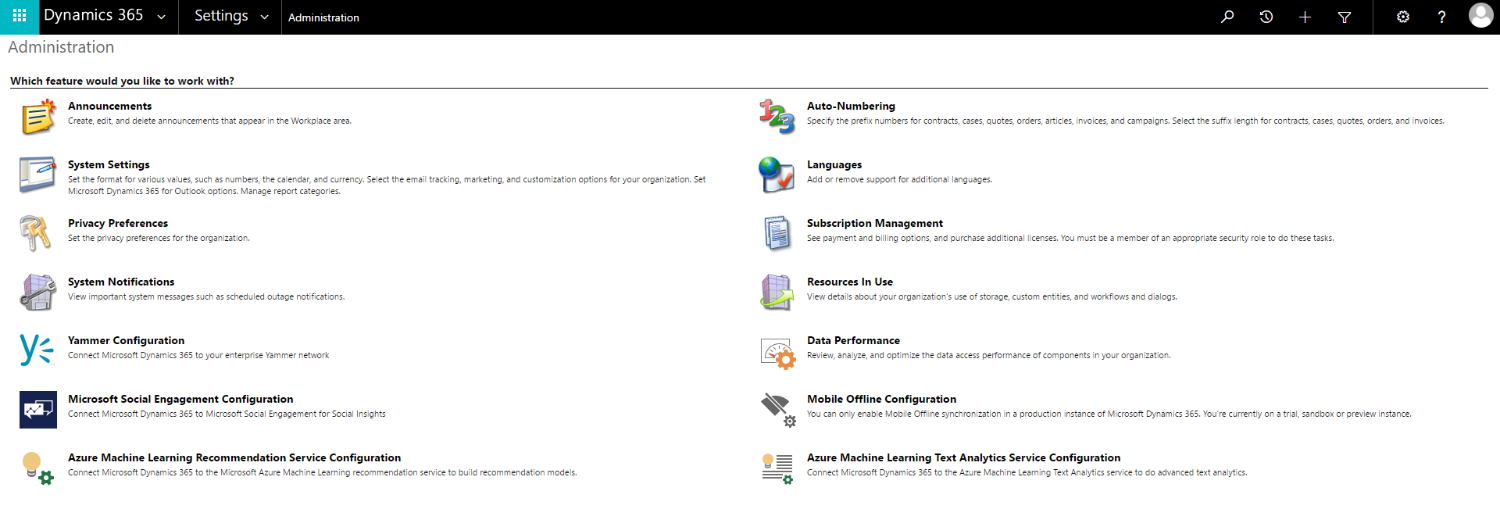
You should be presented with the following:
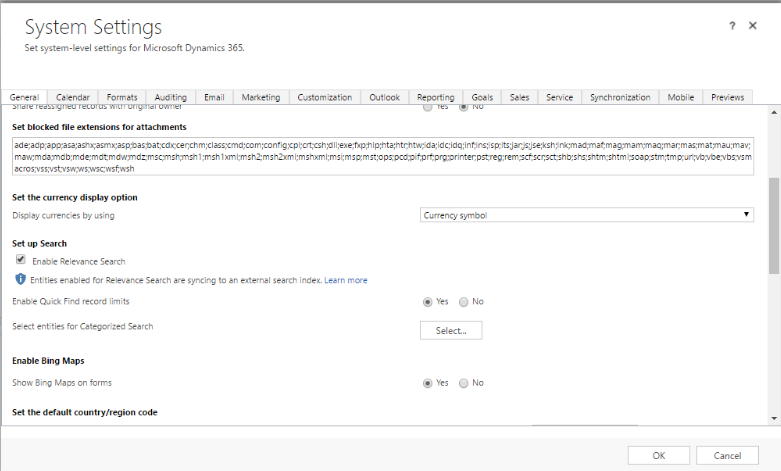
Scroll down on the 'General' tab until you find the 'Set up Search' heading after which you can check the 'Enable Relevance Search' check box. You should be prompted to confirm the following:
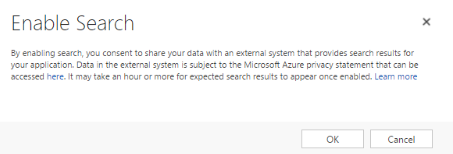
Next, click on the 'Select...' button to add the custom activity to the search. You should be presented with a screen like this:
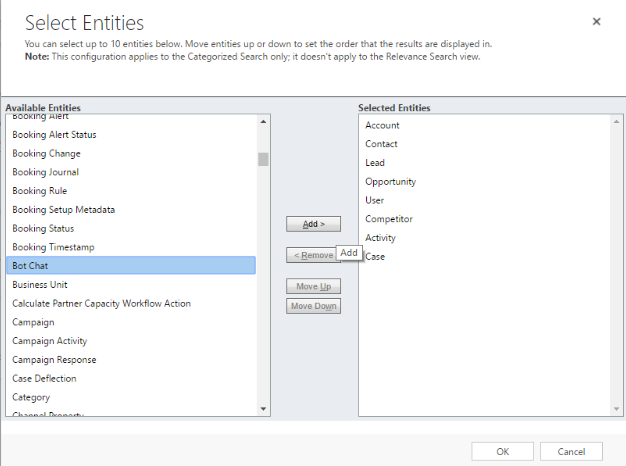
Select the entity you wish to add to the search. Note that it doesn't have to be a custom activity entity, it can be just about any entity in the system. You will also see that some entities have been pre-added for you, and you can modify and remove these as necessary. To add our custom activity entity, select the 'Bot Chat' option in the left pane and then click 'Add >' which should result in this:
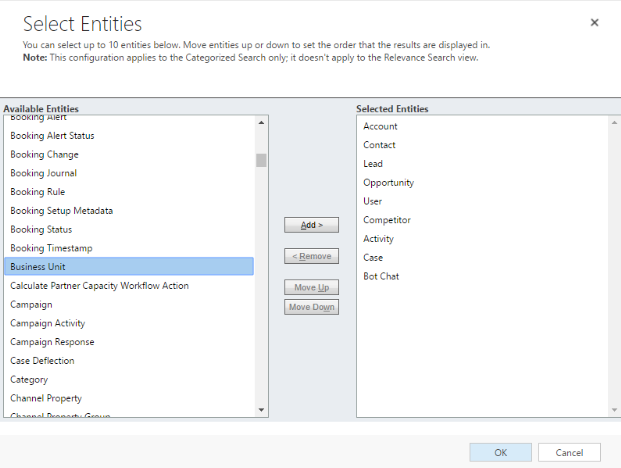
Notice that the 'Bot Chat' entity is now in the right pane and we can click on 'OK' to complete the addition. We will be returned to the System Settings screen where we can also click on the 'OK' button to confirm the update. Before we use the Relevance Search, it is a good idea to specify which attributes of the entity will be searched by the Relevance Search engine. To configure these search attributes, navigate to the 'Settings' menu item and then select 'Solutions' like this:
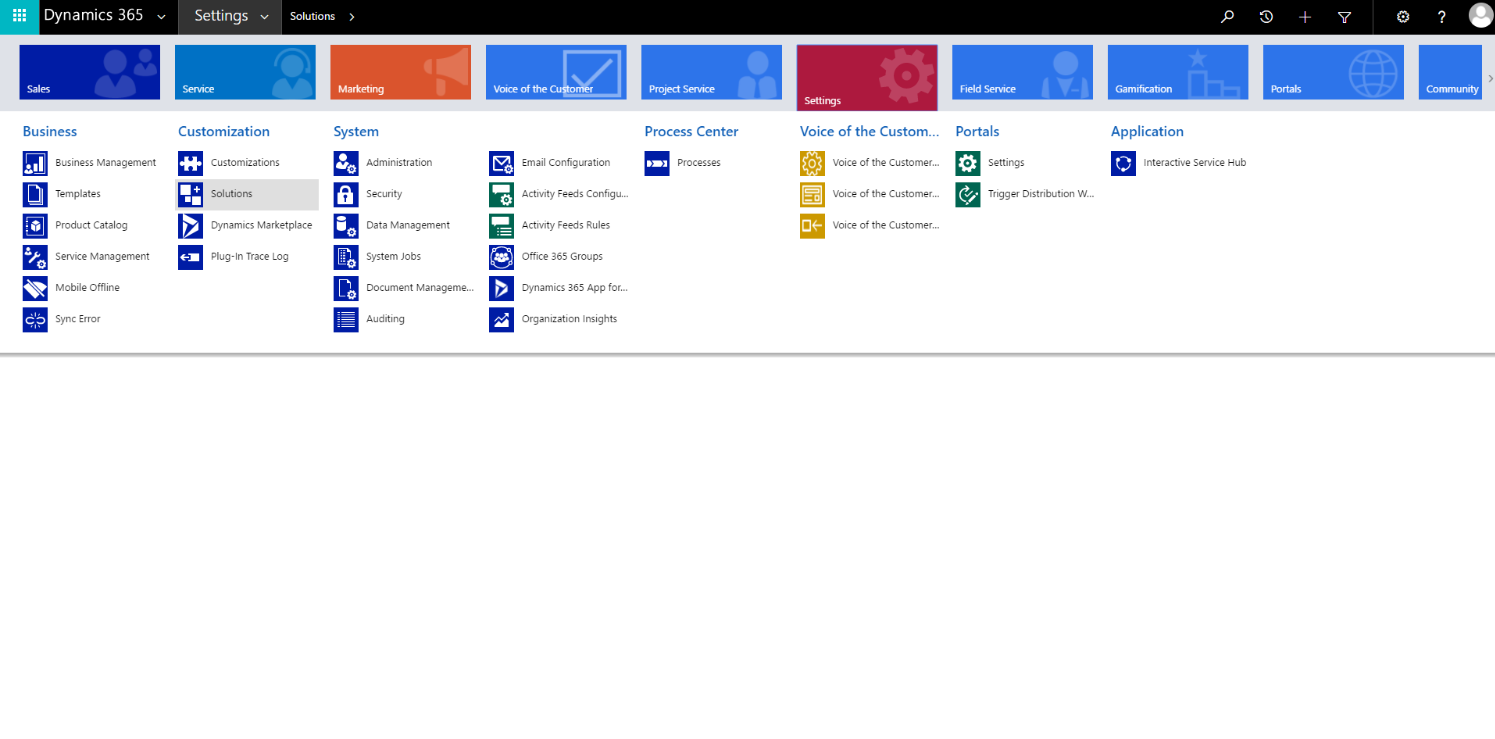
You should then see a screen like this with a list of available solutions:
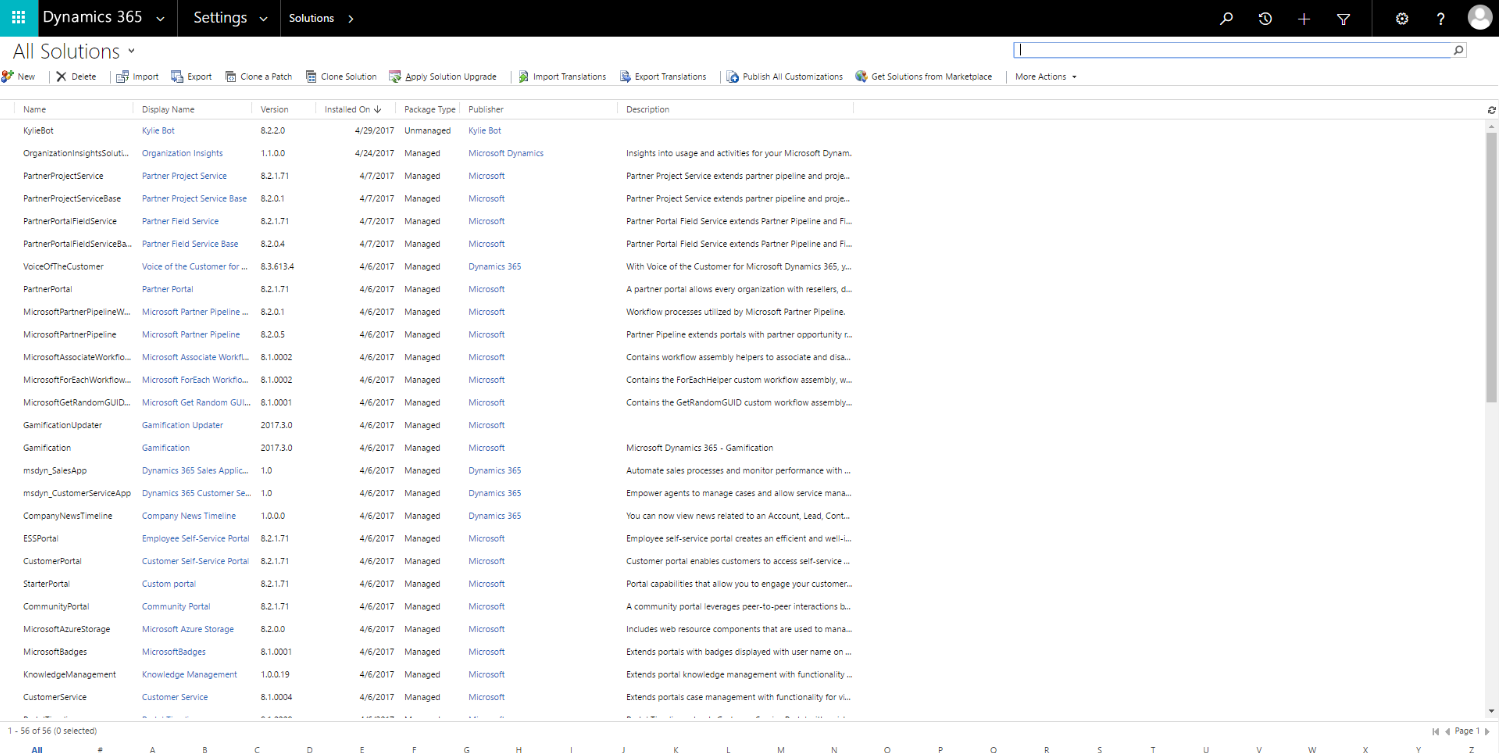
I am going to use the 'Kylie Bot' Solution from my earlier posts. If you don't already have your own Solution, I suggest you create one as described in earlier posts. Double clicking on the solution will present you with the following:
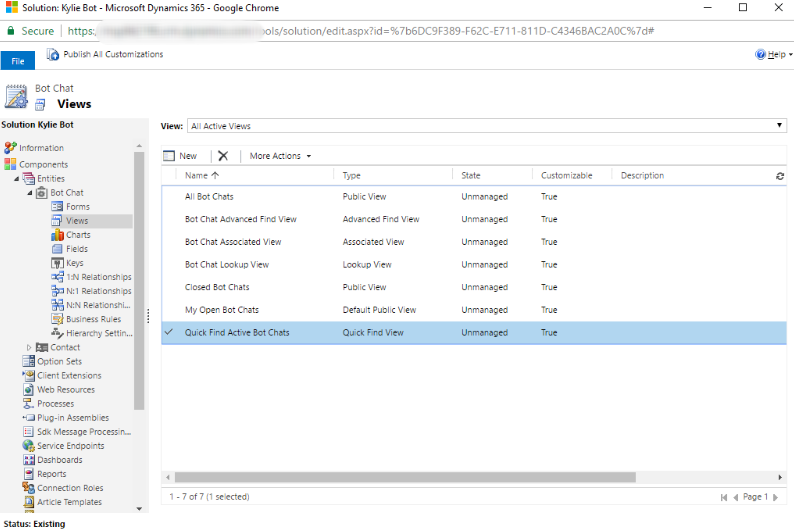
Notice that we have navigated to the 'Views' item in the left hand side navigation tree under the entity that we have just enabled for Relevance Search. Double clicking on the 'Quick Find Active Bot Chats' view (Relevance Search uses the Quick Find views) will present the properties of the view like this:
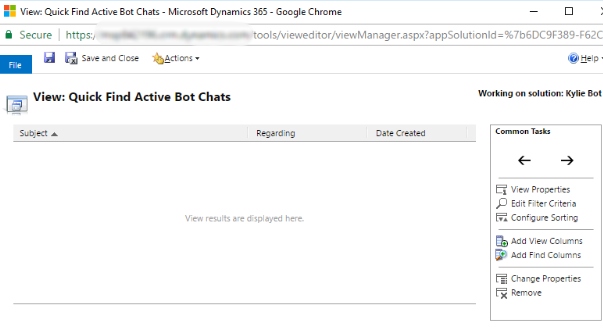
Select 'Add Find Columns' on the right hand menu to pop this screen up:
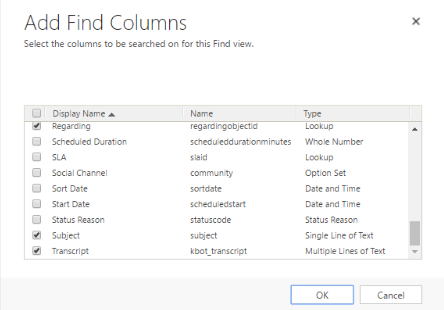
Scroll down and check the check boxes of the attributes that you wish to add. Try and avoid adding all of the attributes as this will introduce performance issues (the more attributes specified, the more data needs to be retrieved and processed). Click on 'OK' to confirm the selection. Next, you should see a yellow information bar at the bottom of the screen where you can 'Click here to enable this entity for Relevance Search'. Click on the link that says 'here':

You should then be presented with the following screen:
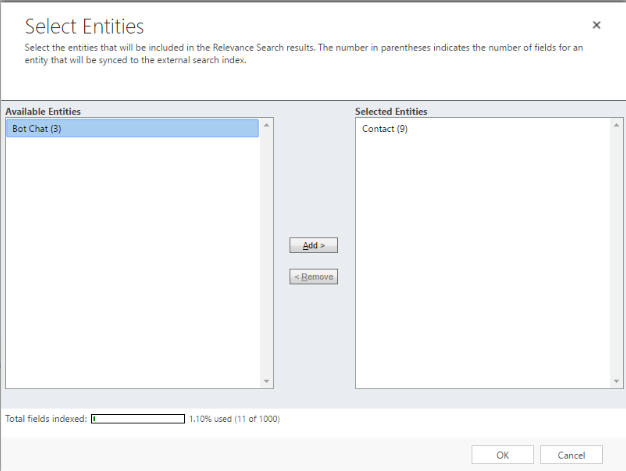
Select the 'Bot Chat' entity in the left hand pane and then click on the 'Add >' button which should result in the following:
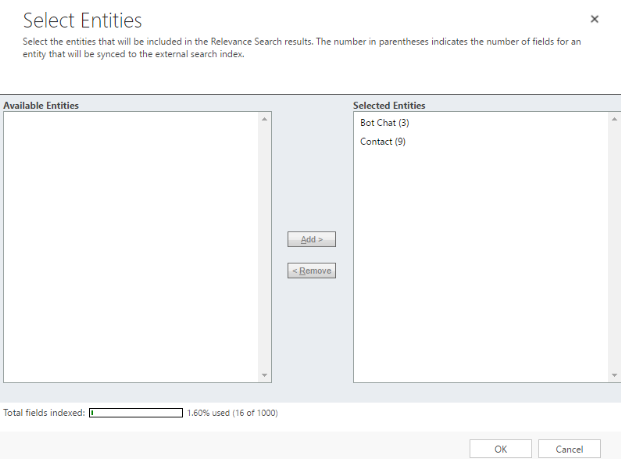
*Note that the number in brackets next to the entity represents the number of attributes that you have included in the Relevance Search. You have a maximum of 1000 attributes across the entities you enable for Relevance Search. Next, click on the 'OK' button to confirm the addition.
You will be returned to the properties of the view screen where you can select 'Save and Close' from the menu bar. After that you will be returned to the Solution screen where you will need to select 'Publish All Customizations' from the menu bar to ensure that the configurations become active.
To test the functionality, click on the Quick Search icon in the top right hand side of the screen and the type in 'bot' before hitting 'Enter' on your keyboard.

Once the search has begun, you should see the following page:
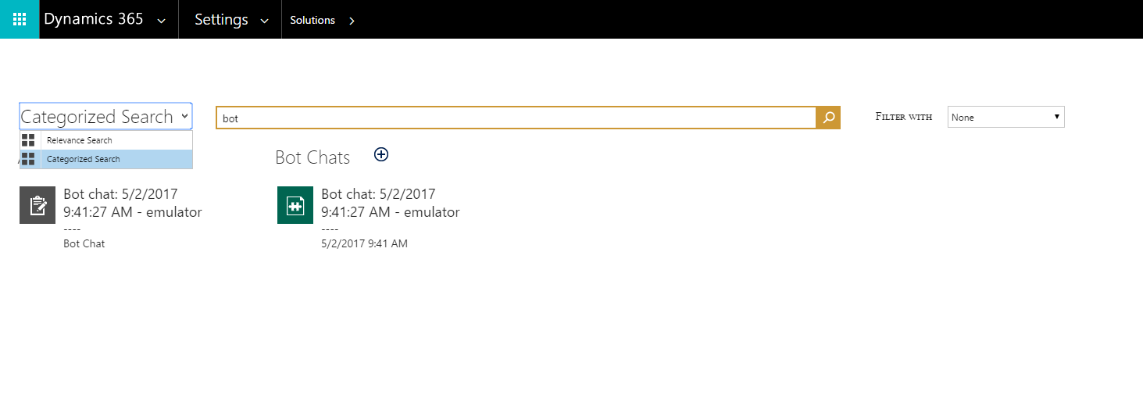
Take note that you may still be on the 'Categorized Search' option and you can switch this over to Relevance Search by selecting it from the drop down as in the image above. You should then see your Relevance Search results like this:
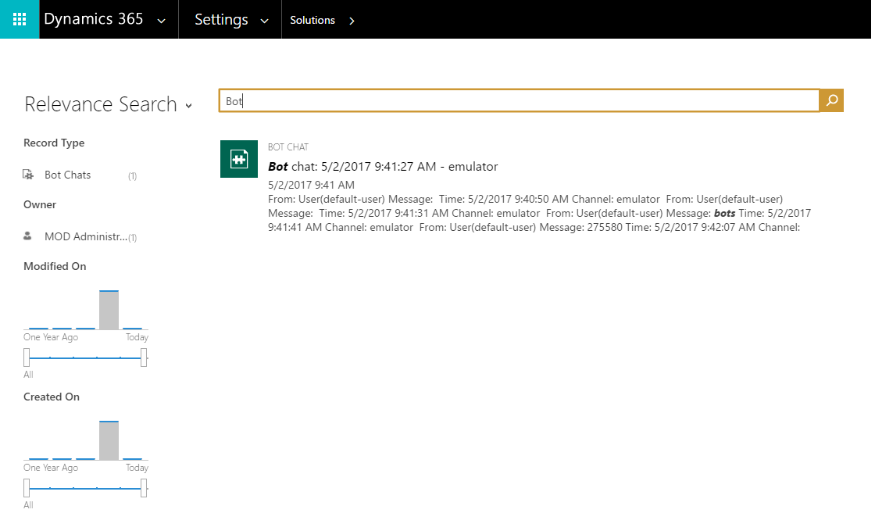
Awesome stuff, it's working! Notice that the search picks up the keyword in the name of the entity as well as in the content of one of the fields in the entity. Using this correctly can be hugely powerful and I hope you find it so!


 Like
Like Report
*This post is locked for comments