


 21
21 Like
Like Share
Share
 Report
Setting up Azure Synapse Link for D365F&O could be quite tricky, and has a lot of hurdles/precursors which you need to address in order to enbale Azure Synapse Link for D365F&O. There are a number of pre-onboarding activities you need to execute, a number of setups you need to keep handy, a number of aacounts you need to setup beforehand, before you go for setting up an Azure Synapse Link For F&O.
Don't forget to mark the following setting, from the advanced tab:
Click Review + create >> Create to complete the wizard to create the Storage account.

Click on Review + Create >> Create to conclude the worksapce creation. Please do select appropriate Region. It will take some time for completing the deployment. Once done, click on View Studio, which will take you to Synapse Analytics Studio.
Step 3: Create a Spark pool, by clicking on Manage:

Click on Apache Spark Pools >> Click on New to let the following screen be fillled up:

Fill up as shown, click on the Additional Settings >>
Please note the highlighted settings, especially Apache Spark version = 3.3 (I spent almost 3 hours pointlessly to figure out why is the Apache spark pool was not showing in my Azure Synapse link settings).
Click Review + Create >> Create and allow 3-4 minutes to get the pool be deployed and ready.

Fill up the following page as shown (do select Enable Spark pool):
Click on Next. Click on Advanced tab, to set the following frequency:
Click on Save. This will create the Link as shown here: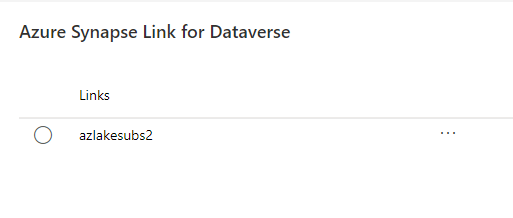
Now, the important part. There could be several issues which you might ncounter while doing this.
Click Next.
And then select Synapse Workspace:
The following article tells the steps to Azure Synapse Link enablement for D365F&O, along with the various kinds of issues which might face whilee doing so, along with their resolutions.
Step 1: Create a Datalake Storage account in Azure Portal, with the following settings:
Don't forget to mark the following setting, from the advanced tab:
Click Review + create >> Create to complete the wizard to create the Storage account.
Step 2: Create a new Azure Synapse Analytics Workspace, by filling out the following form from Azure portal:
Click on Review + Create >> Create to conclude the worksapce creation. Please do select appropriate Region. It will take some time for completing the deployment. Once done, click on View Studio, which will take you to Synapse Analytics Studio.
Step 3: Create a Spark pool, by clicking on Manage:
Click on Apache Spark Pools >> Click on New to let the following screen be fillled up:
Fill up as shown, click on the Additional Settings >>

Please note the highlighted settings, especially Apache Spark version = 3.3 (I spent almost 3 hours pointlessly to figure out why is the Apache spark pool was not showing in my Azure Synapse link settings).
Click Review + Create >> Create and allow 3-4 minutes to get the pool be deployed and ready.
Step 4: You need to come to PowerApps page (https://make.powerapps.com/) >> choose proper environment >> Click on Azure Synapse Link >> New link:
Fill up the following page as shown (do select Enable Spark pool):
Click on Next.
In the next page, you would see the D365 Finance and operations page >> for example I have selected Customers, but you can select as many number of tables as required (with some limitations, which I have discussed below).
Click on Save. This will create the Link as shown here:
Now, the important part. There could be several issues which you might ncounter while doing this.
- If you get an error while linking your environment: The app <some-GUID> is missing in your tenant: for this, what you need to do is:
Open PowerSheell >> Run as admin >> Install Azure PowerShell, using following command: Install-Module -Name Az -AllowClobber -Scope AllUsers.
Connnect to Azure by the command: Connect-AzAccount
Install the missing application: New-AzADServicePrincipal -ApplicationId '<GUID>'
- Cannot access the Storage Account: Open your Azure Storage Account >> Click on IAM >> Add role assignment and select the contributor role:
Click Next.
Select managed Identity >> select members:
And then select Synapse Workspace:
Click Select >> Close.
This will take care of most of the problems and can give you a set up of Azure Synapse link for your D365F&O account, up and running.
There are a lot of limitations as well:
- You must create a new Azure Synapse Link profile. You can't add finance and operations apps tables to existing Azure Synapse Link profiles.
- Up to 2,750 Microsoft provided finance and operations apps tables are already enabled in Azure Synapse Link with application version 10.0.38. If you have a previous version of finance and operations apps, not all required tables can be enabled by default. You can enable more tables yourself by extending table properties and enabling the change tracking feature. For more information about how to enable change tracking, see Enable row version change tracking for tables.
- You must enable change tracking for them. More information: Enable row version change tracking for tables. If you're using a cloud hosted environment (CHE), you must perform a database sync operation to reflect the changes.
- You can select a maximum of 1,000 tables in an Azure Synapse Link profile. To enable more tables, create another Azure Synapse Link profile.
- If the table selected contains data columns that are secured via AOS Authorization, those columns are ignored and the exported data doesn't contain the column. For example in a custom table named CustTable, the column TaxLicenseNum has the metadata property AOS Authorization set to Yes. This column is ignored when CustTable data is exported with Azure Synapse Link.
With that, I would also suggest to try Microsoft Fabric to extract the data from D365F&O, as Azure Synapse Link does have a set of inherent limitations.
I am taking your leave for now, see you soon with more insights on Azure Data Engineering soon.
Much love and Namaste💓💓💓
*This post is locked for comments