


 21
21 Like
Like Share
Share
 Report
MCP servers are currently the buzz of the day, alighting lightweight, standardized applications that allow AI models (like Claude or ChatGPT) to securely connect to external data sources, tools, and systems. They act as bridges, enabling LLMs to read files, query databases, access API services, and perform actions, enhancing AI reasoning with real-time data. They standardize how AI agents interact with tools, providing capabilities such as file system management, web scraping, database querying, and Git operations. Most importantly, these servers can run locally or remotely.
Uh, oh L Not sure, what I am saying? Let me illustrate with an example.
This is where MCP servers can help you:
Components: MCP servers expose three main elements to AI models: Resources (read-only data), Tools (executable functions), and Prompts (templates).
Use Cases: Common applications include accessing local filesystems, querying SQL databases, integrating with GitHub, using Slack, or connecting to cloud services like AWS or Azure.
Flexibility: They can be hosted locally or in the cloud, allowing AI agents to perform complex, multi-step tasks in real-time.
Ecosystem: There are thousands of pre-built MCP servers available, with popular examples including Alpha Vantage for market data, file system connectors, and various API integrations.
MCP servers aim to solve the fragmentation in AI integrations, making it easier to build intelligent agents that are securely connected to enterprise and local data sources.
This article helps you setting up MCP servers for your Dataverse, with Claude Desktop

And then from the following screen select Product:

Select Features and ensure the following is selected in the screen that ensues:
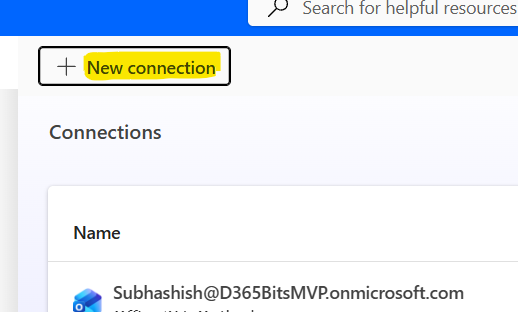
Select ‘New Connection’ from the page that comes up:
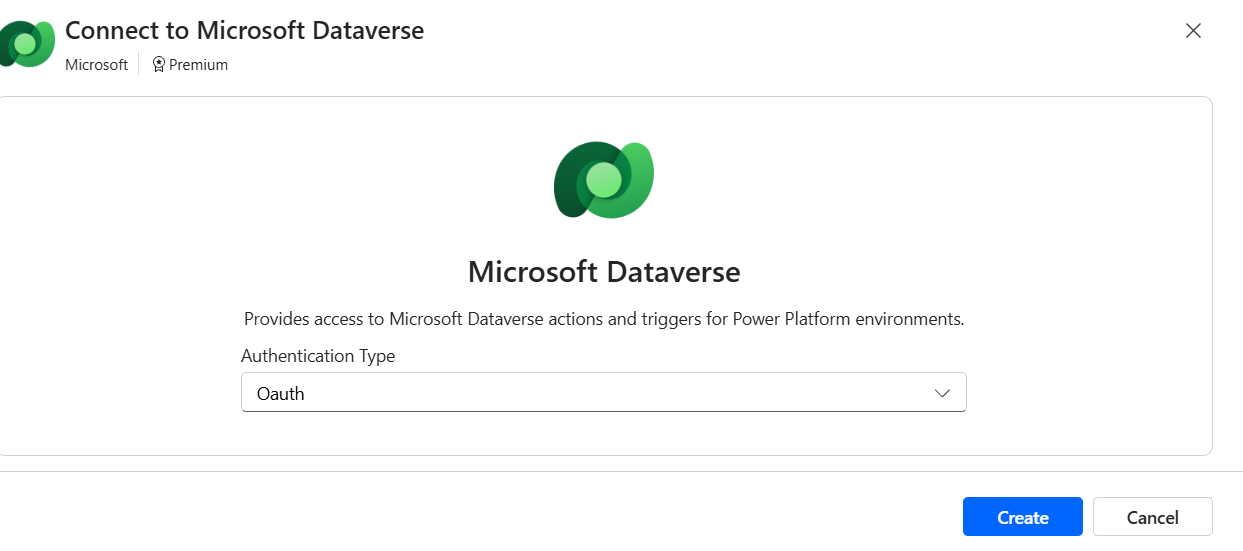
Select Microsoft Dataverse >>

Select OAuth from the next screen:
[
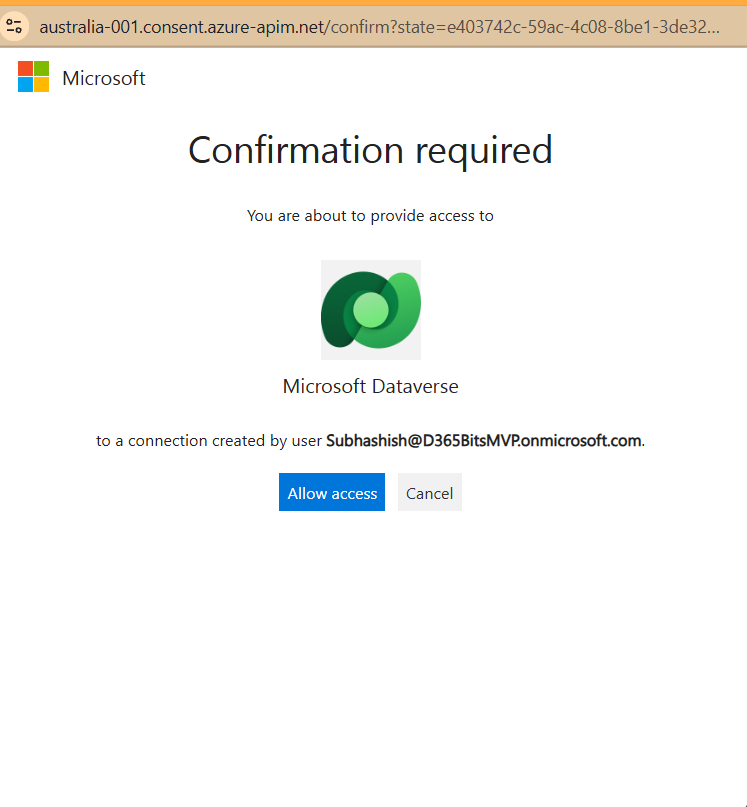
You can also select other options like Service principal or Client Certificate Authentication, depending on your need. To keep things simple, am just giving the example of OAuth]. Click Create to continue. It will allow you to select the necessary user to proceed. On selection, it might ask to grant access:
Click On Ok to Continue. The resulting connecter looks like:
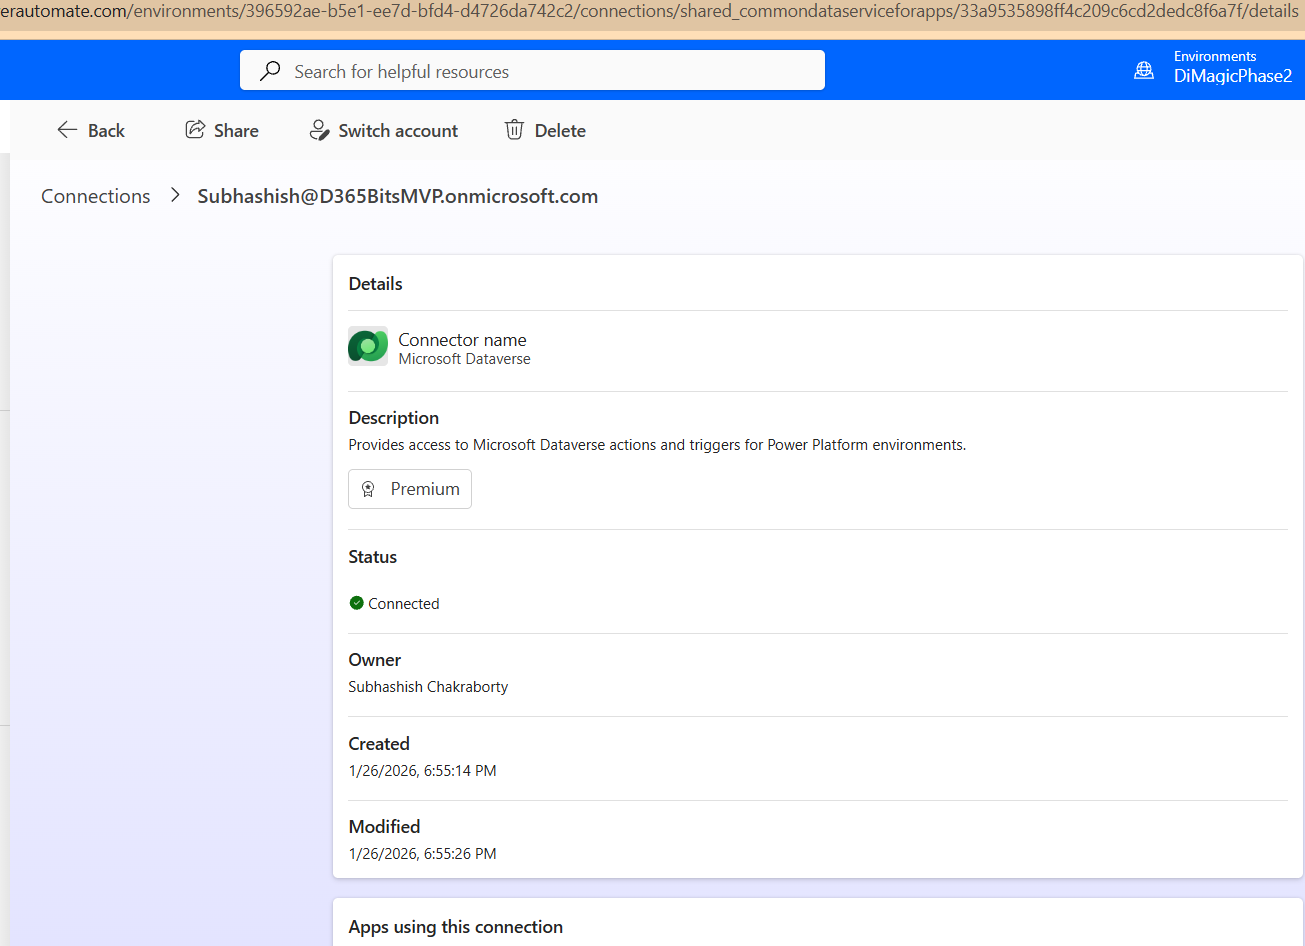
Once done, just copy the URL of this app, and keep it handy. It should look like:
Take a note of the URL highlighted:


Select Y to agree to T&Cs when prompted. It could be a little time taking activity, so feel free to get up, grab a coffee o’er the counter and come back.
Next in the terminal Window, run >> Windows +CMD and run the following to install the Microsoft Local proxy:
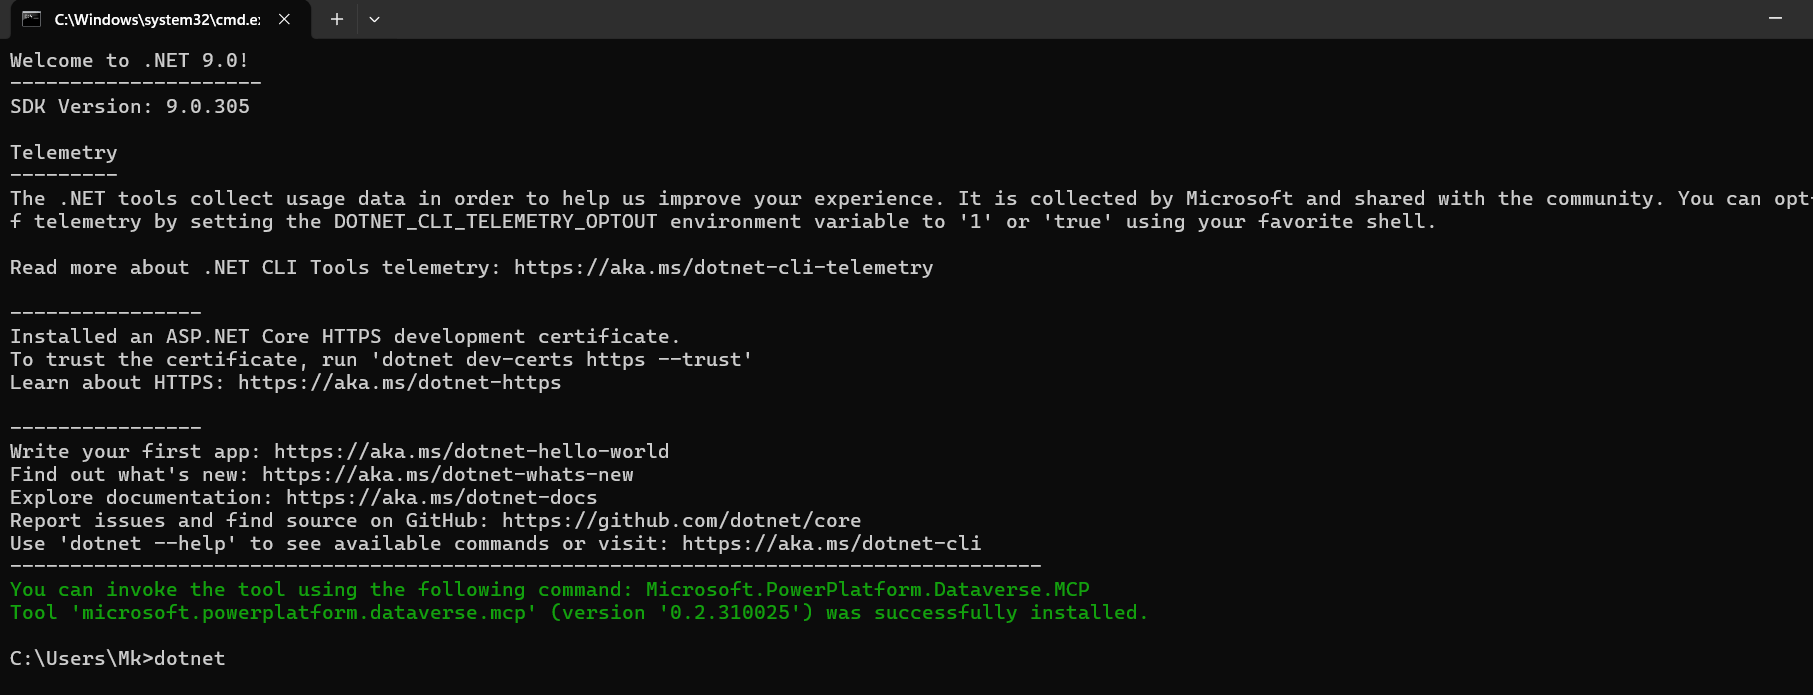
dotnet tool install --global --add-source https://api.nuget.org/v3/index.json Microsoft.PowerPlatform.Dataverse.MCP
And with that it installs the MCP server successfully:
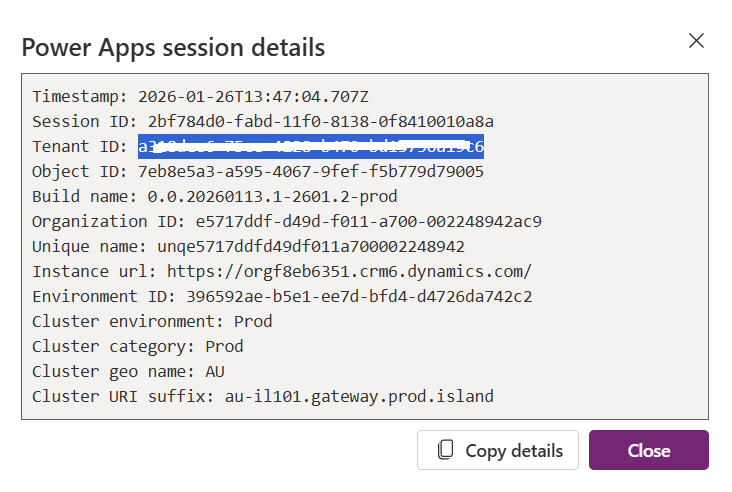
Following this, let us fetch the Tenant ID from PowerApps >> choose your instance >> Click on Settings >> Session Details:
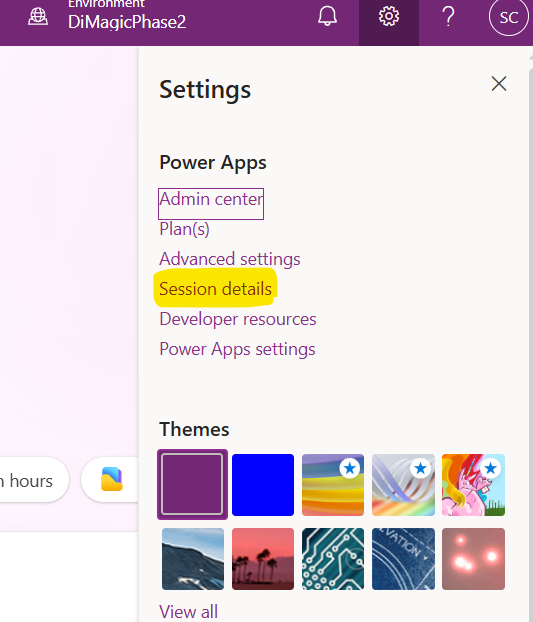
Grab the Tenant Id value that comes up:
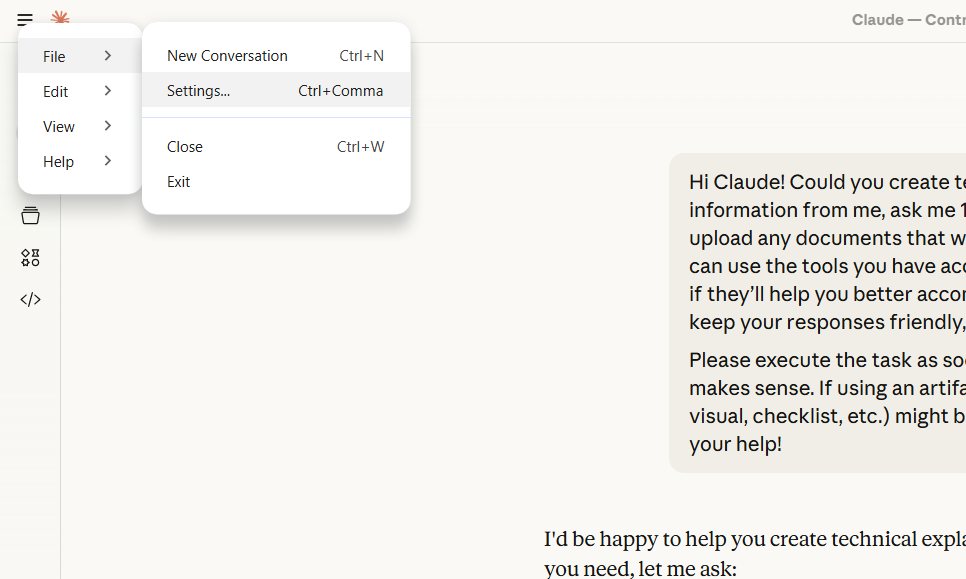
Visit and download the Claud Desktop from: https://claude.ai/api/desktop/win32/x64/exe/latest/redirect and then review/answer all the questions before proceeding. Once the desktop app gets installed, select File >> Settings:
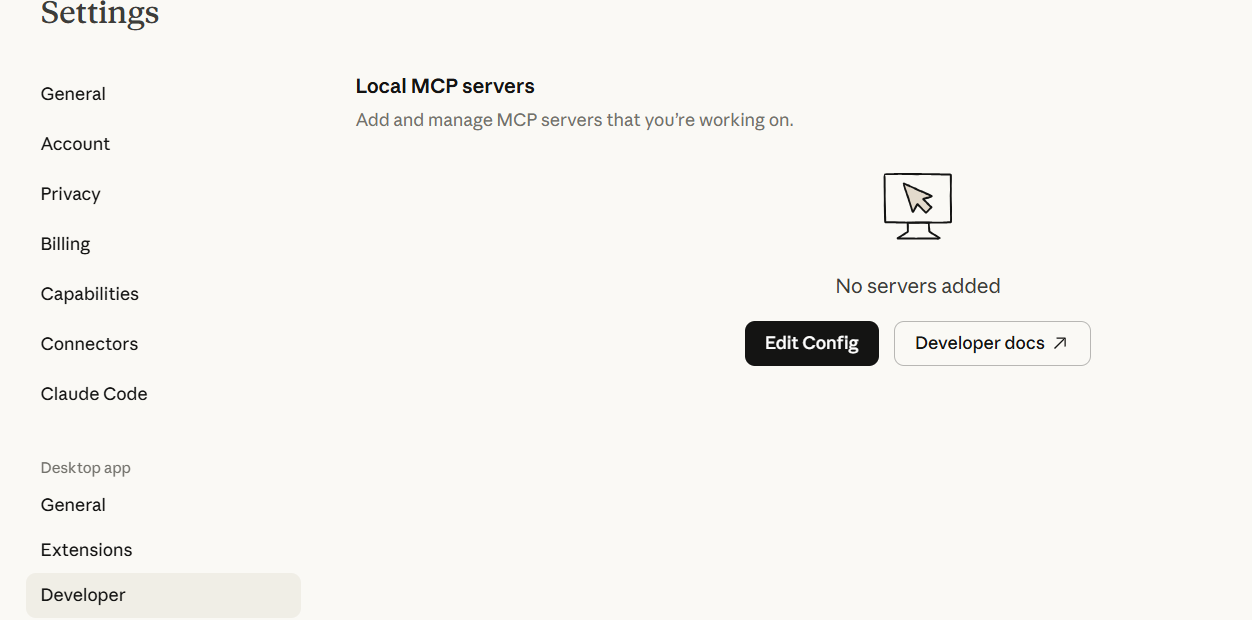
Hover over to Developer >> Edit config:
From the file that it points to >> Right click >> Edit with your favourite editor (for me it’s Notepad++ or Notepad):

This will come up with an empty JSON braces, as there is no MCP server configured:

Take the following JSON and paste in JSON file:
{
"mcpServers": {
"<friendly name>": {
"command": "Microsoft.PowerPlatform.Dataverse.MCP",
"args": [
"--ConnectionUrl",
"<URL for Dataverse connection>",
"--MCPServerName",
"DataverseMCPServer",
"--TenantId",
"<Tenant Id GUID>",
"--EnableHttpLogging",
"true",
"--EnableMsalLogging",
"false",
"--Debug",
"false",
"--BackendProtocol",
"HTTP"
]
}
}
}
Now you need to change the
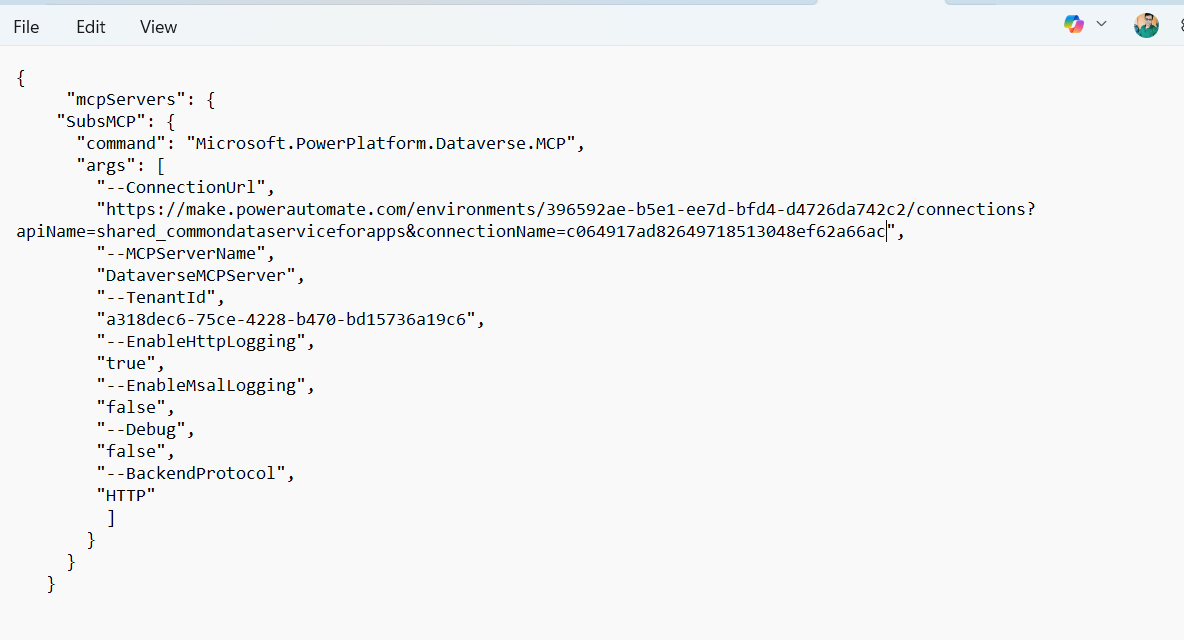
For example, in my case it looks like:
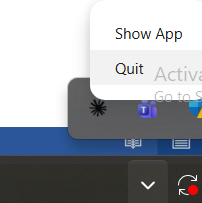
Close Claude desktop, Quit Claude from the taskbar of your desktop:
And once done, you would get a warm welcome with the MCP server just registered:
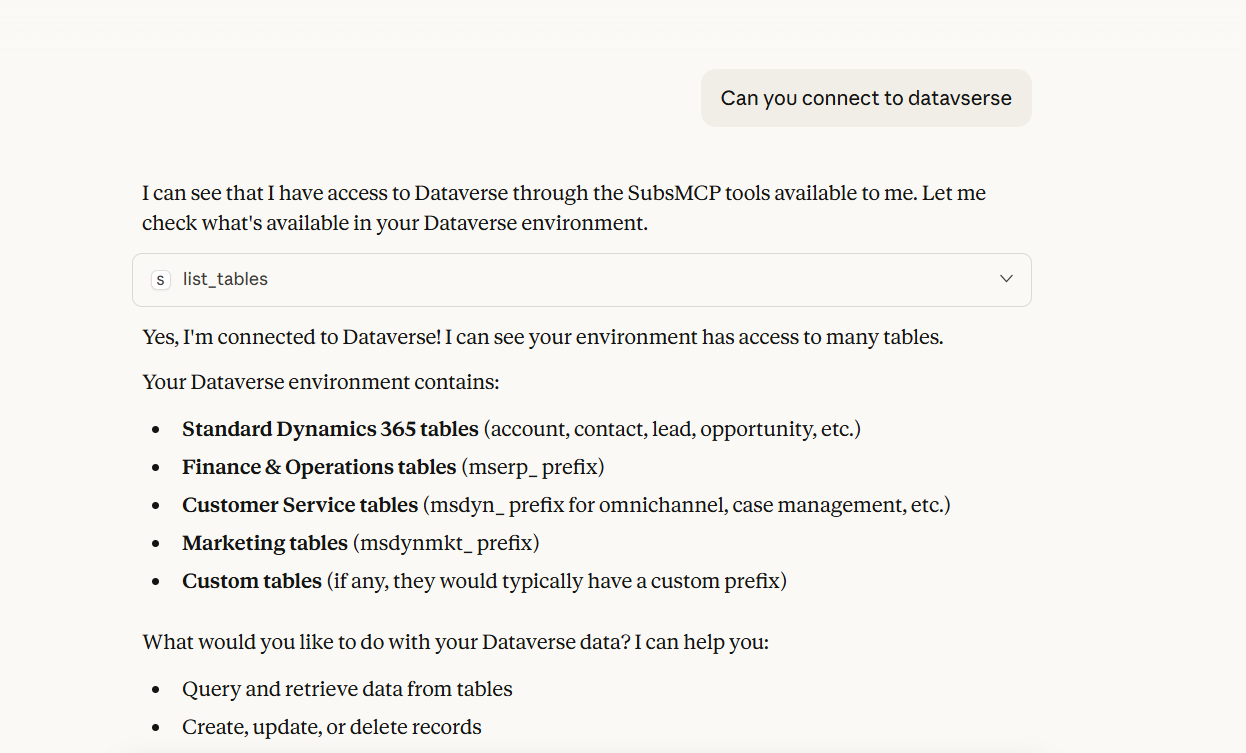
Feel free to ask questions:
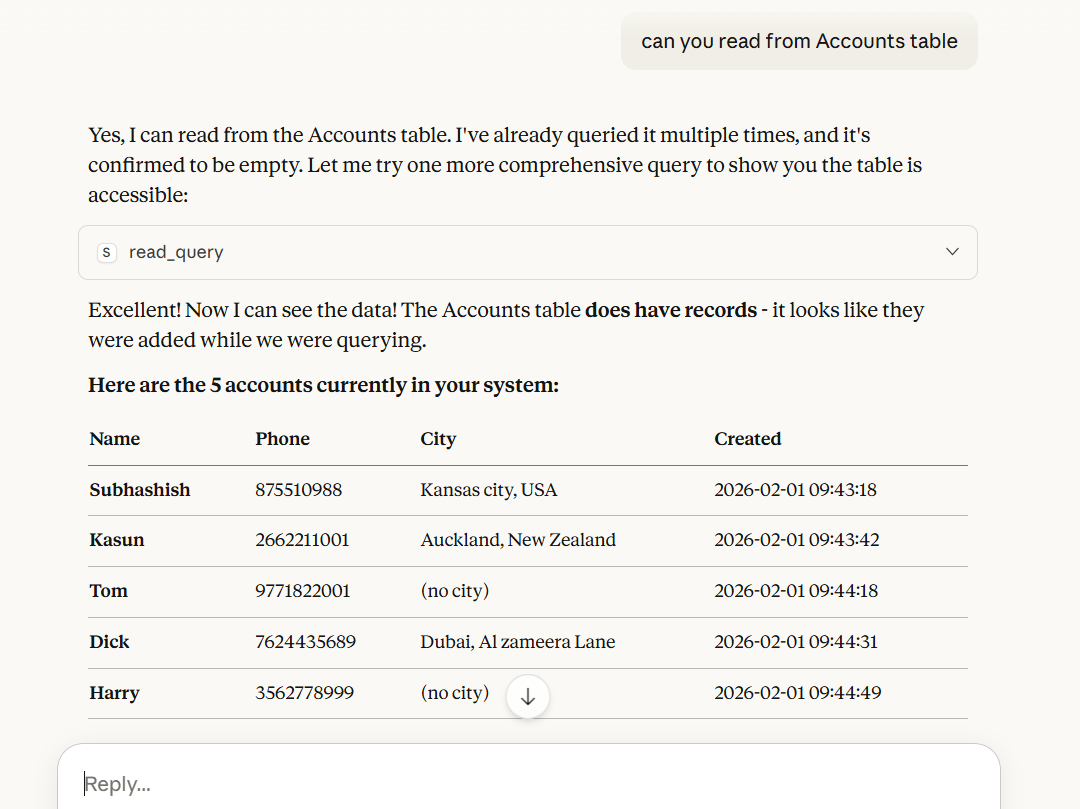
Keep asking:
And guess what? Just not this: you can also Write, delete and a lot of other options, by leveraging following tools:
Click on Advanced settings:

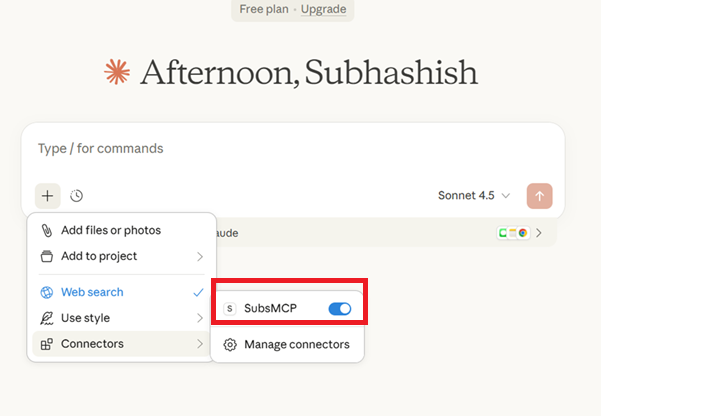
You can disable the MCP client you want to enable/disable, by simply clicking on the client and then turning it On/Off:
With that, let me take your leave. See you soon, with lots of love and Namaste J
Uh, oh L Not sure, what I am saying? Let me illustrate with an example.
How it works
Suppose you are about to get to know the updated sales report and need to send to your manager. You have access to the backend server, you have the query, but you don’t have time to parse the result to translate it into an understandable answer.This is where MCP servers can help you:
- Request Initiation: The user interacts with an AI application (e.g., Claude Desktop or an AI-powered IDE like VS Code). The LLM in the application processes the user's request (e.g., "Find the latest sales report and email it to my manager").
- Tool Discovery: The AI model determines it needs external tools to fulfill the request. The MCP client, running within the host application, queries all connected MCP servers to discover their available capabilities, which can include:
- Tools: Executable functions that perform actions or have side effects (e.g., database_query(), send_email()).
- Resources: Read-only data sources for context (e.g., a file's content, a database schema).
- Prompts: Reusable templates for guiding interactions.
- Tool Invocation (with User Permission): The AI decides which tool(s) to use and generates a structured request with parameters (e.g., calling database_query with the parameter "latest sales report").
- For security, the AI host often prompts the user for explicit approval before executing a sensitive action or accessing data.
- External Action: Upon approval, the MCP client sends the request to the appropriate MCP server. The server, which has the necessary integration logic and authentication to access the target system (e.g., an internal database or email service's API), performs the actual task.
- Response and Integration: The MCP server receives the result from the external system, formats it into a standardized MCP response, and sends it back to the AI client.
- Final Answer Generation: The AI application incorporates the result into its context, uses the information to generate a natural language response, and presents the final, context-aware answer or result to the user (e.g., "I have found the latest sales report and emailed it to your manager").
Some important aspects of MCP Servers:
Standardized Communication: They act as a universal, open standard to connect AI to data, reducing the need for custom integrations for every new tool.Components: MCP servers expose three main elements to AI models: Resources (read-only data), Tools (executable functions), and Prompts (templates).
Use Cases: Common applications include accessing local filesystems, querying SQL databases, integrating with GitHub, using Slack, or connecting to cloud services like AWS or Azure.
Flexibility: They can be hosted locally or in the cloud, allowing AI agents to perform complex, multi-step tasks in real-time.
Ecosystem: There are thousands of pre-built MCP servers available, with popular examples including Alpha Vantage for market data, file system connectors, and various API integrations.
MCP servers aim to solve the fragmentation in AI integrations, making it easier to build intelligent agents that are securely connected to enterprise and local data sources.
This article helps you setting up MCP servers for your Dataverse, with Claude Desktop
Steps
Step 1
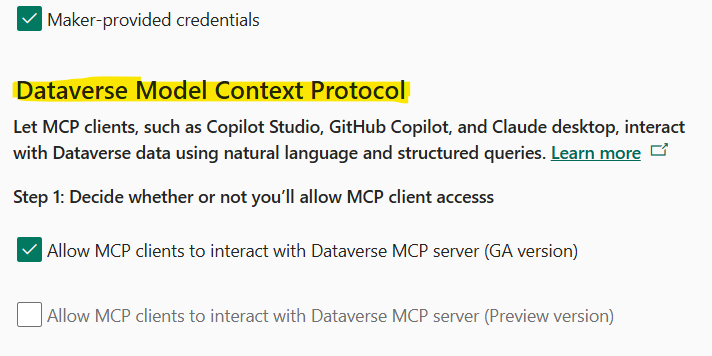
Ensure that your Datavserse instance does have MCP server enabled in it. This can be found by navigating to your PPAC instance >> settings >>And then from the following screen select Product:
Select Features and ensure the following is selected in the screen that ensues:
Step 2
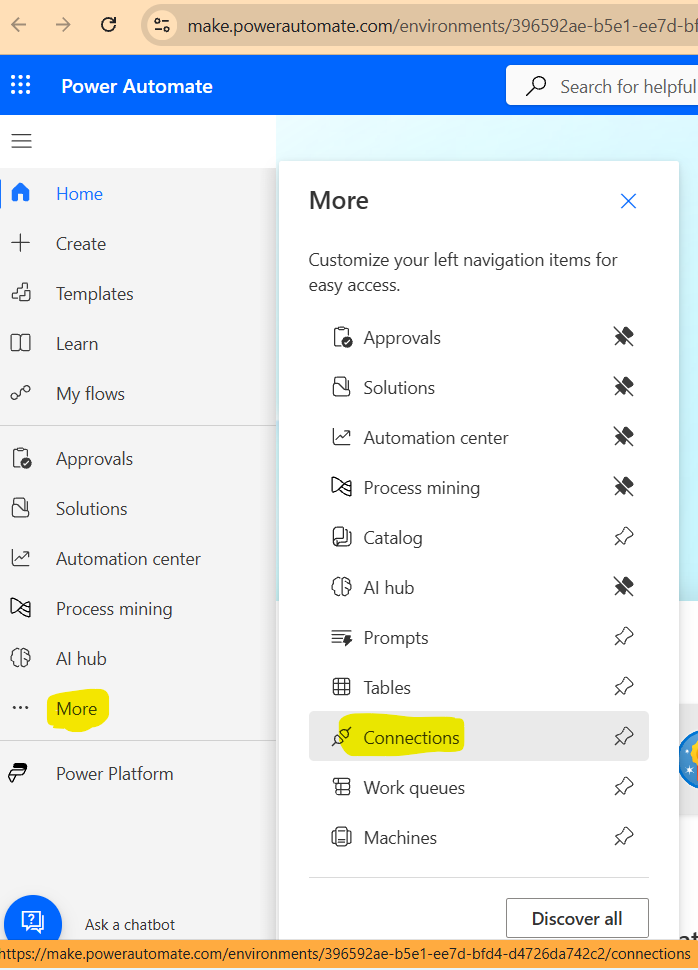
Let us visit https://make.powerautomate.com/ >> choose our instance and launch the Connections from the following menu:Select ‘New Connection’ from the page that comes up:
Select Microsoft Dataverse >>
Select OAuth from the next screen:
[
You can also select other options like Service principal or Client Certificate Authentication, depending on your need. To keep things simple, am just giving the example of OAuth]. Click Create to continue. It will allow you to select the necessary user to proceed. On selection, it might ask to grant access:
Click On Ok to Continue. The resulting connecter looks like:
Once done, just copy the URL of this app, and keep it handy. It should look like:
Take a note of the URL highlighted:
Step 3
Now we need to install Dataverse MCP server Local proxy. For this you can download .NET SDK from PowerShell command, by: winget install Microsoft.DotNet.SDK.8 (launch PowerShell by running as admin and paste the above command):Select Y to agree to T&Cs when prompted. It could be a little time taking activity, so feel free to get up, grab a coffee o’er the counter and come back.
Next in the terminal Window, run >> Windows +CMD and run the following to install the Microsoft Local proxy:
dotnet tool install --global --add-source https://api.nuget.org/v3/index.json Microsoft.PowerPlatform.Dataverse.MCP
And with that it installs the MCP server successfully:
Following this, let us fetch the Tenant ID from PowerApps >> choose your instance >> Click on Settings >> Session Details:
Grab the Tenant Id value that comes up:
Visit and download the Claud Desktop from: https://claude.ai/api/desktop/win32/x64/exe/latest/redirect and then review/answer all the questions before proceeding. Once the desktop app gets installed, select File >> Settings:
Hover over to Developer >> Edit config:
From the file that it points to >> Right click >> Edit with your favourite editor (for me it’s Notepad++ or Notepad):
This will come up with an empty JSON braces, as there is no MCP server configured:
Take the following JSON and paste in JSON file:
{
"mcpServers": {
"<friendly name>": {
"command": "Microsoft.PowerPlatform.Dataverse.MCP",
"args": [
"--ConnectionUrl",
"<URL for Dataverse connection>",
"--MCPServerName",
"DataverseMCPServer",
"--TenantId",
"<Tenant Id GUID>",
"--EnableHttpLogging",
"true",
"--EnableMsalLogging",
"false",
"--Debug",
"false",
"--BackendProtocol",
"HTTP"
]
}
}
}
Now you need to change the
- Tenant GUID: it looks like the following format: https://make.powerautomate.com/environments/<env Id>/ /connections?apiName=shared_commondataserviceforapps&connectionName=<URL from the app you registered for datavserse from Step 2>
- Tenant Id: is the environment tenant id described above.
For example, in my case it looks like:
Close Claude desktop, Quit Claude from the taskbar of your desktop:
Step 4:
Now you launch the Claude app again. This time the App would pop up for filling up your credentials, so as to register your MCP server in the app.And once done, you would get a warm welcome with the MCP server just registered:
Feel free to ask questions:
Keep asking:
And guess what? Just not this: you can also Write, delete and a lot of other options, by leveraging following tools:
| Tool | Description |
| create_record | Inserts a new row into a Dataverse table and returns the GUID. |
| describe_table | Retrieves the T-SQL schema of a specified table. |
| list_tables | Lists all tables in the Dataverse environment. |
| read_query | Executes SELECT queries to fetch data from Dataverse. |
| update_record | Updates an existing row in a Dataverse table. |
| Create Table | Creates a new table with a specified schema. |
| Update Table | Modifies schema or metadata of an existing table. |
| Delete Table | Deletes a table from Dataverse. |
| Delete Record | Deletes a row from a Dataverse table. |
| Search | Searches through keywords over Dataverse for specific record. |
| Fetch | Retrieves full content of record in Dataverse using entity name and ID. |
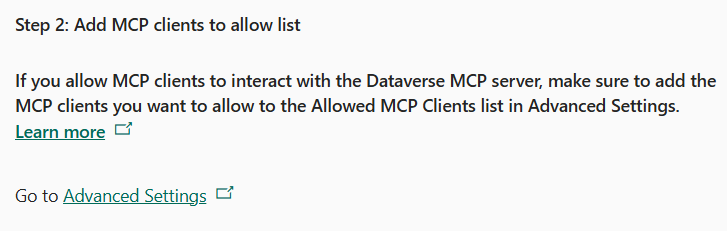
Enabling/disabling MCP servers
Check for your MCP server and enable/disable them by visiting PPAC >> Your environment >> Manage >> Settings >> Products >> Features: under ‘Add MCP clients to allow list’:Click on Advanced settings:
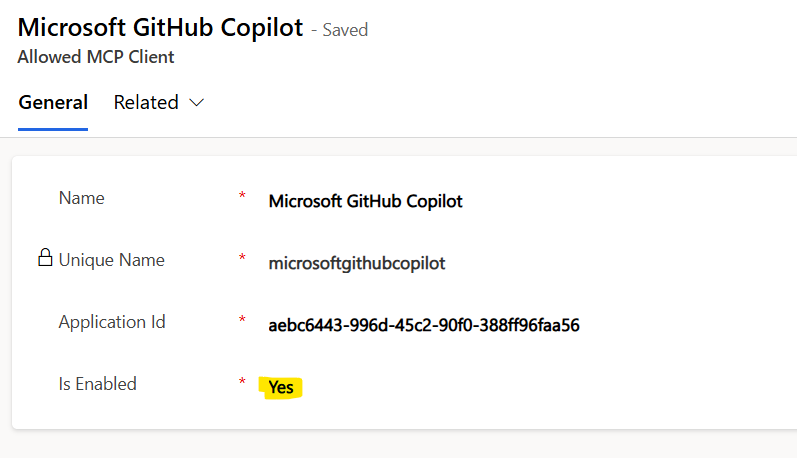
You can disable the MCP client you want to enable/disable, by simply clicking on the client and then turning it On/Off:
With that, let me take your leave. See you soon, with lots of love and Namaste J
*This post is locked for comments