


 21
21 Like
Like Share
Share
 Report
Amigos, just to appraise you, there are a lot of new features added along with introduction of MCP servers: that are not just limited to catering to user instructions and inputs, but also letting you visualizing your data and implementing timelines in your apps. This short write up is to appraise you some of the cool hacks of implementing them.
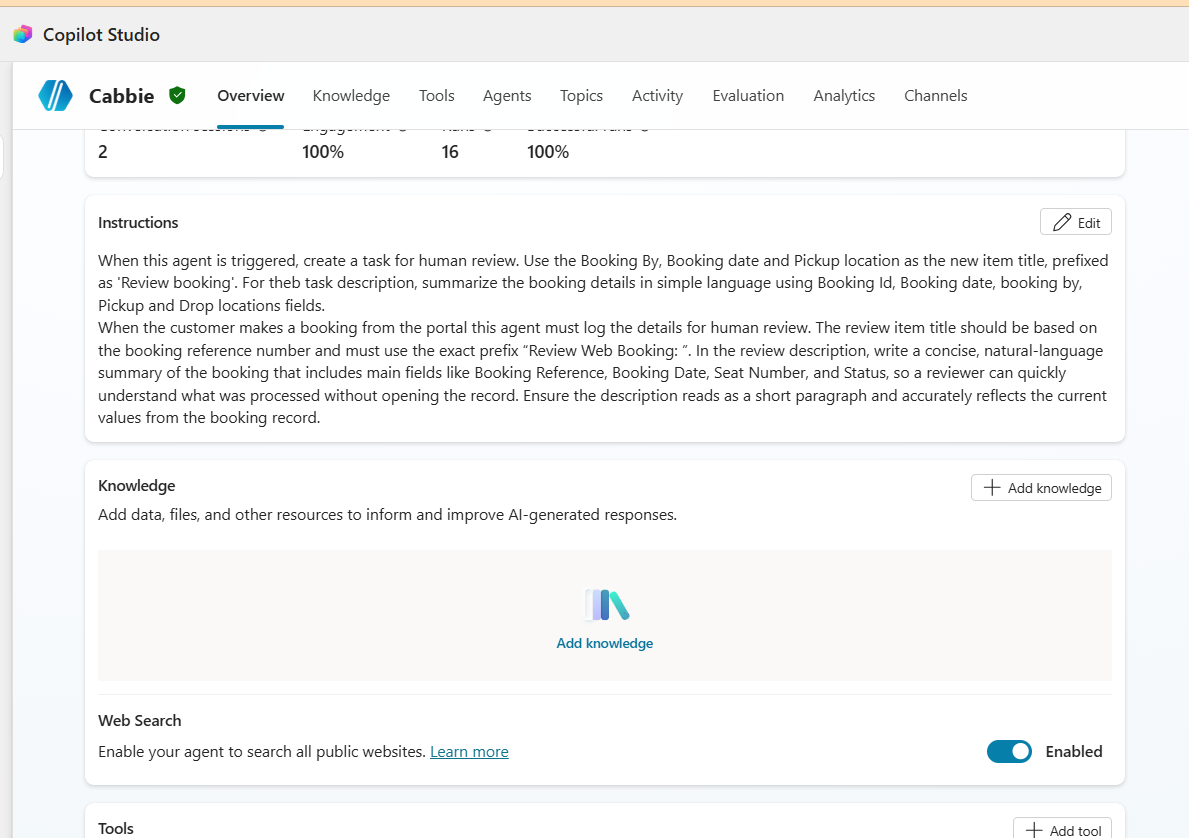
Start by going to your Agent defining your instructions:
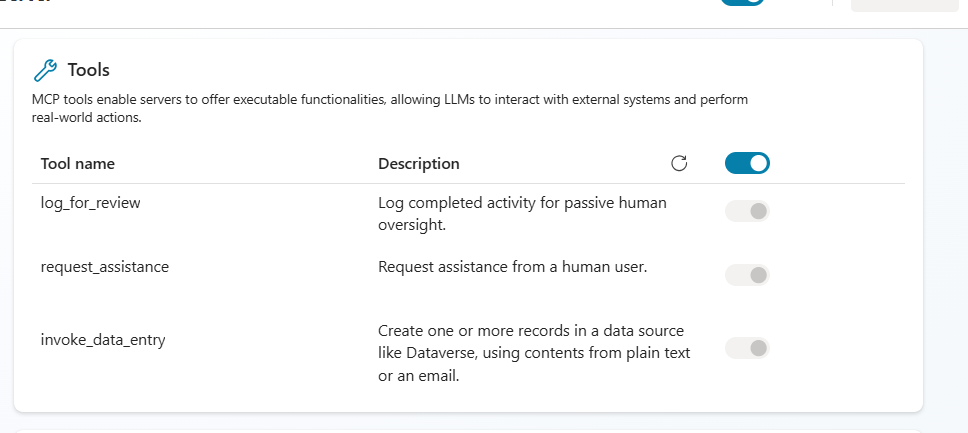
Go to tools and select MCP servers and add Power Apps MCP server >> Add and configure >> And you will get to see the following tools available:
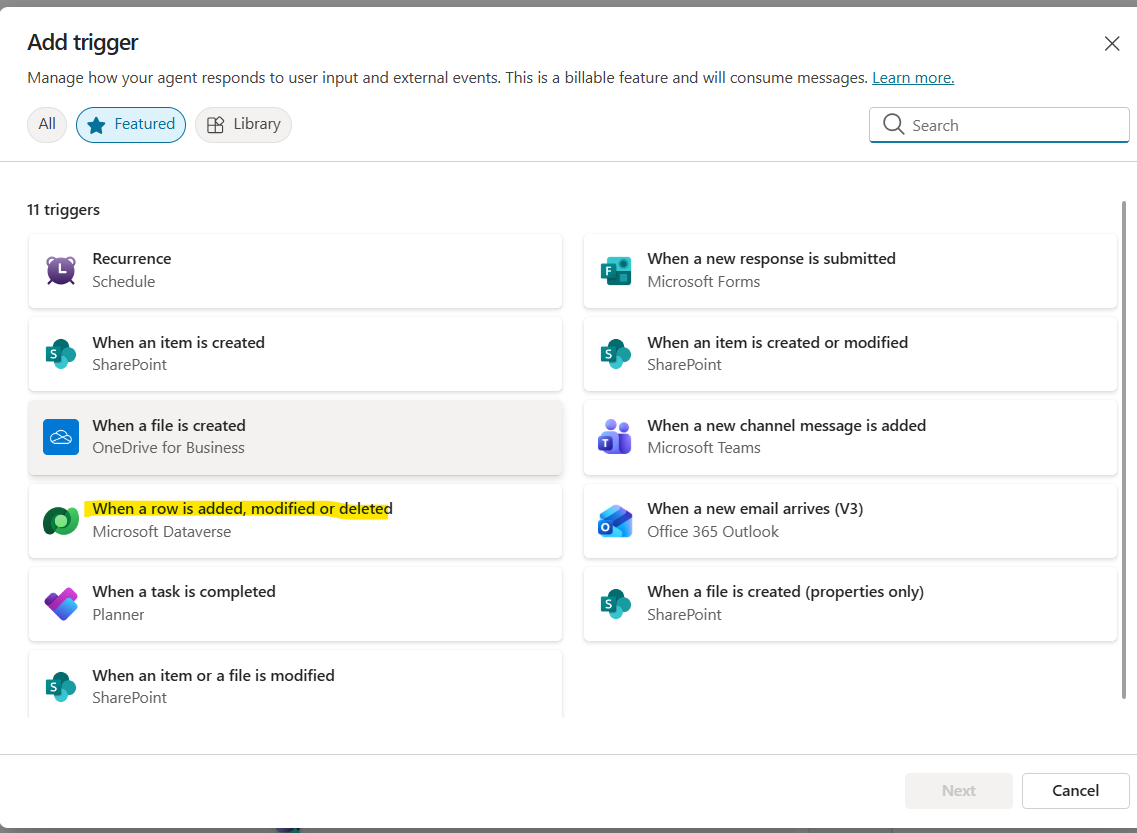
Come back to your Agent >> Triggers >> Add trigger >> select “When a row is added, modified or deleted”:
Ensure to log on to Microsoft Copilot Studio and Dataverse
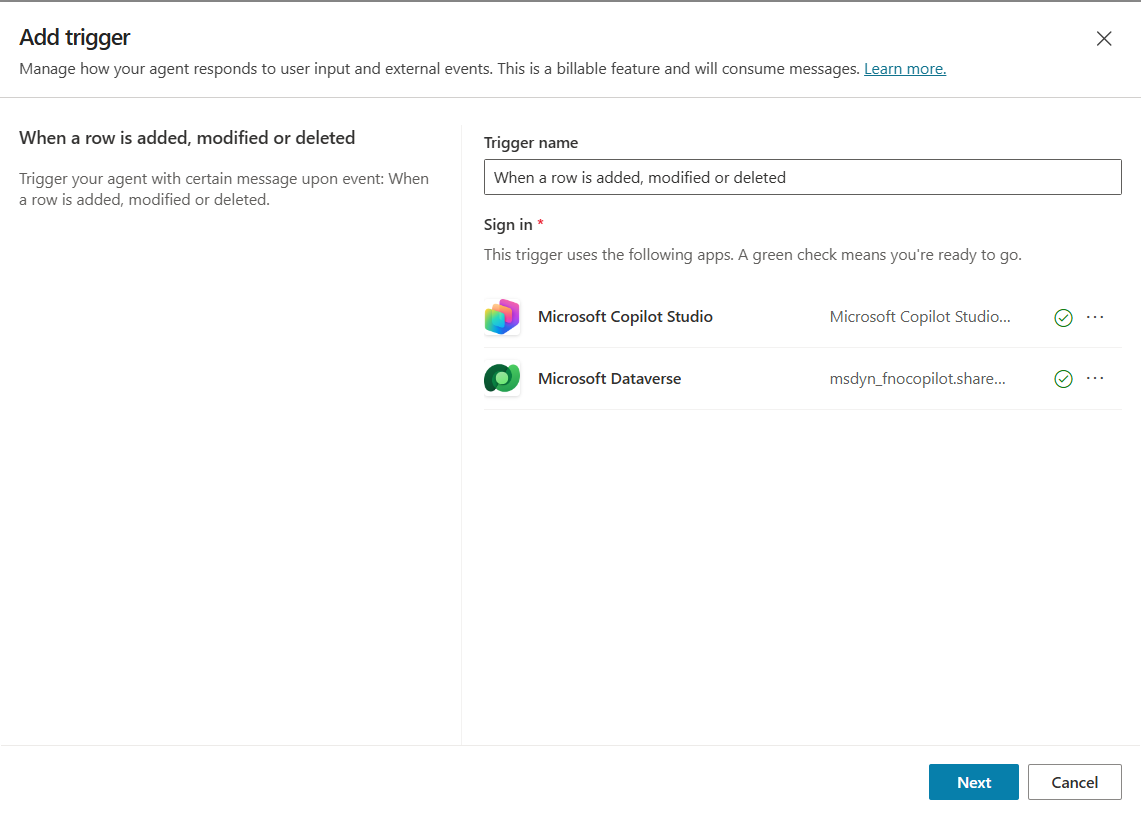
And click on Next.
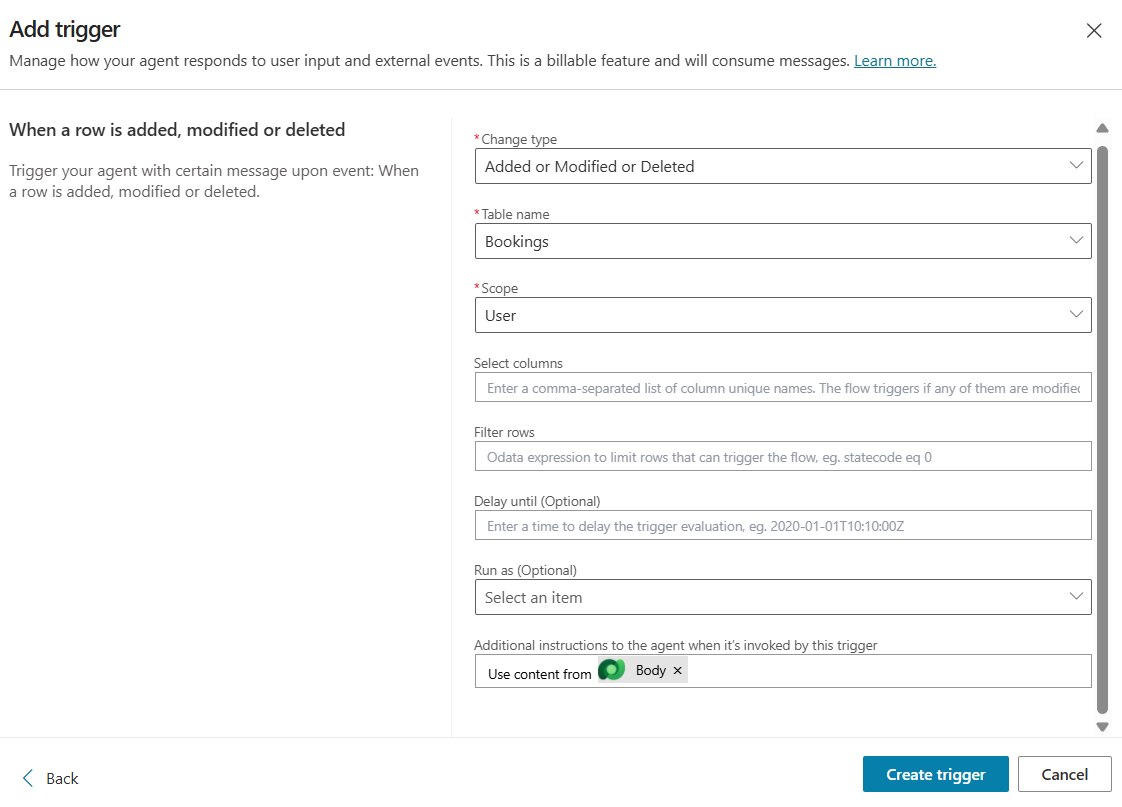
In the next screen select the Change type = Added or Modified or Deleted, Table Name = <<Table of your choice, for which you want to add your notification>>, Scope = <<Select User, which means whenever any event/activity is happening under the logged on user, the notification will come to that user>>, and Additional instructions to the agent when it’s invoked by this trigger = Use content from Body:
Click to Create the trigger.
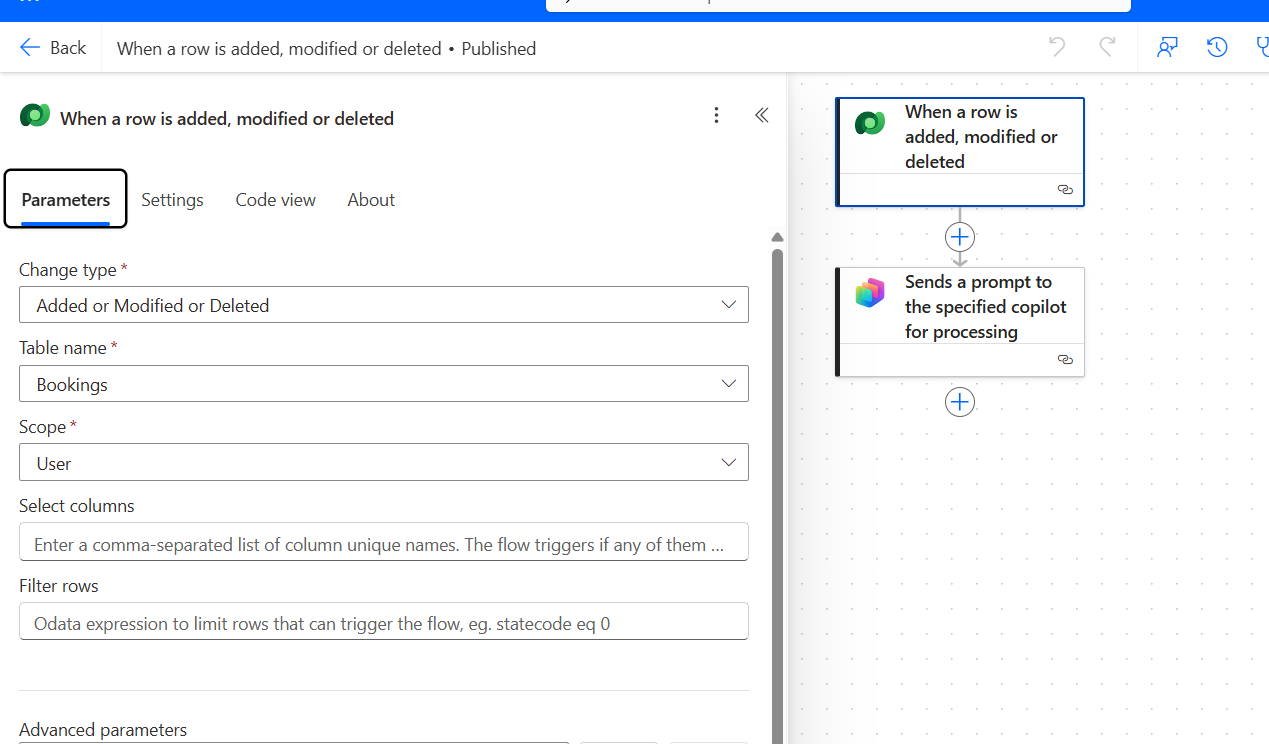
This essentially creates a flow, abiding the Dataverse table to Copilot Studio:
Come back to Agent >> Publish it. Now let us go to PowerApps >> Create a Model driven app, around the table of your choice >> and in the left hand side pane >> Click on Agents:
It will show you all the available agents for your apps:
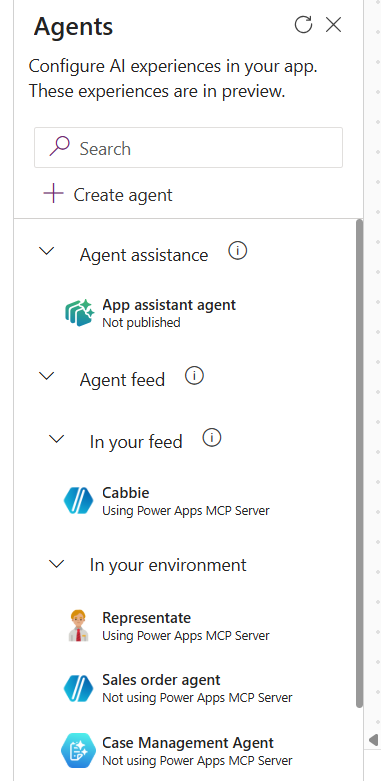
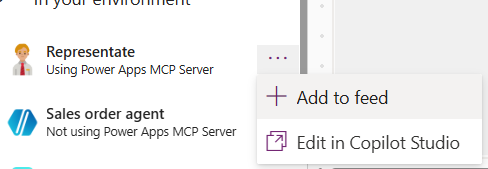
The agent which you created from Copilot Studio should be available here. Click on the three dots adjoining it to add it to the App, by clicking on Add to Feed:
It now shows up in your app. Run your app to add records to Dataverse app. You will see the feed is showing up in the Agents Feed>> Needs Attention or under Completed tab:

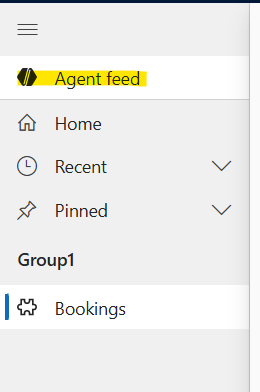
N.B.: just in case, your Agent Feed doesn’t show on the left side pane, you can get it flashed by clicking on Agent Feed link on the left side of the app:
Also, as of now, the Agent Feed is only available with Model Driven Apps, not on Canvas Apps (at least as of now).
It will uncover a magnificent visual representation of the data:
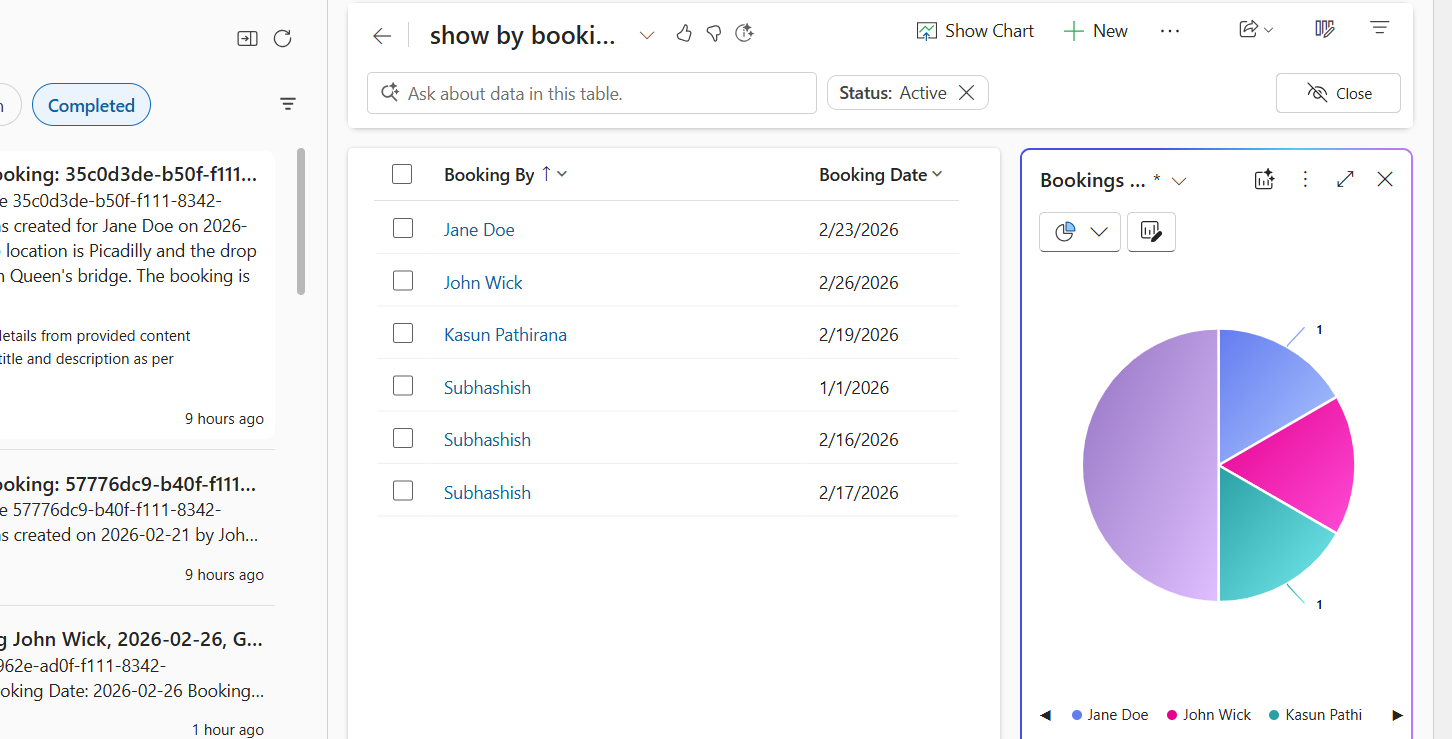
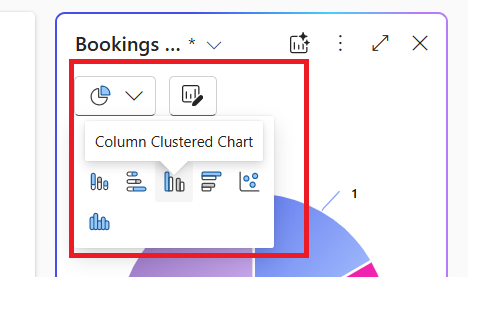
You can change the view by clicking from the drop down at the top:
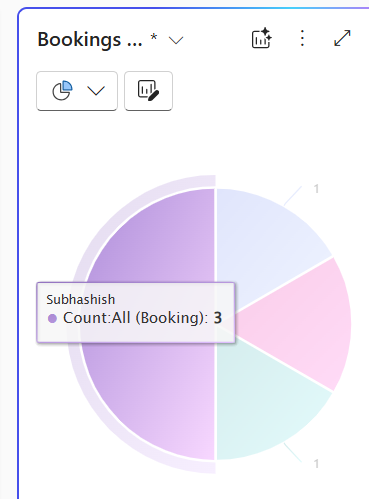
Also you can see the different points’ details, by hovering the mouse at the different parts of the visual:
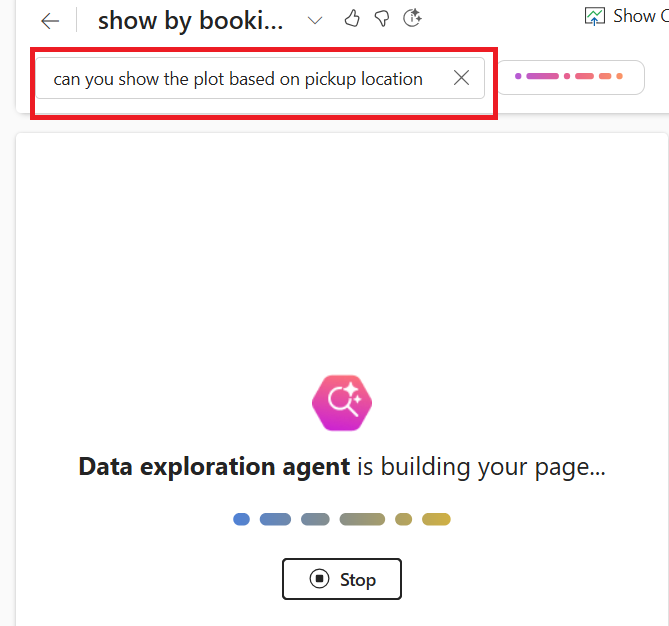
Now comes the most amazing part of the feature. You can talk to the data by writing it in the query given in the section indicated:
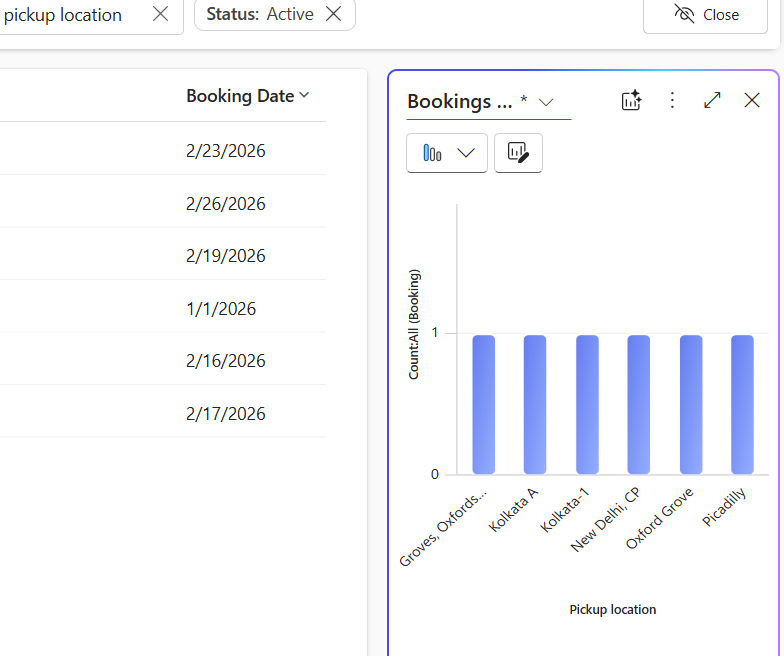
And the visual is shown as:
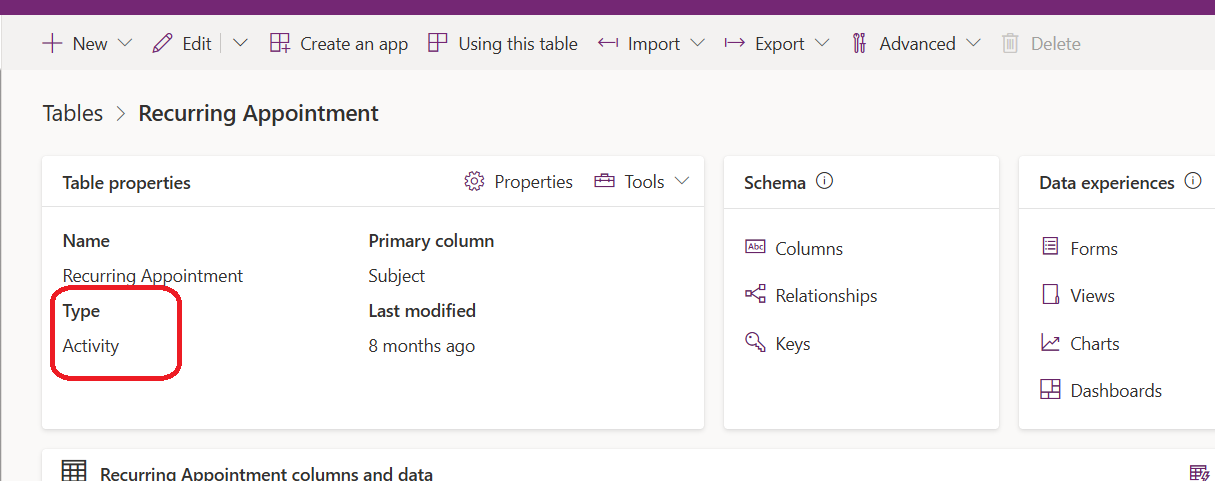
Ensure the entity in your app is actually an Activity type of table, by going into its Advanced Proprties:
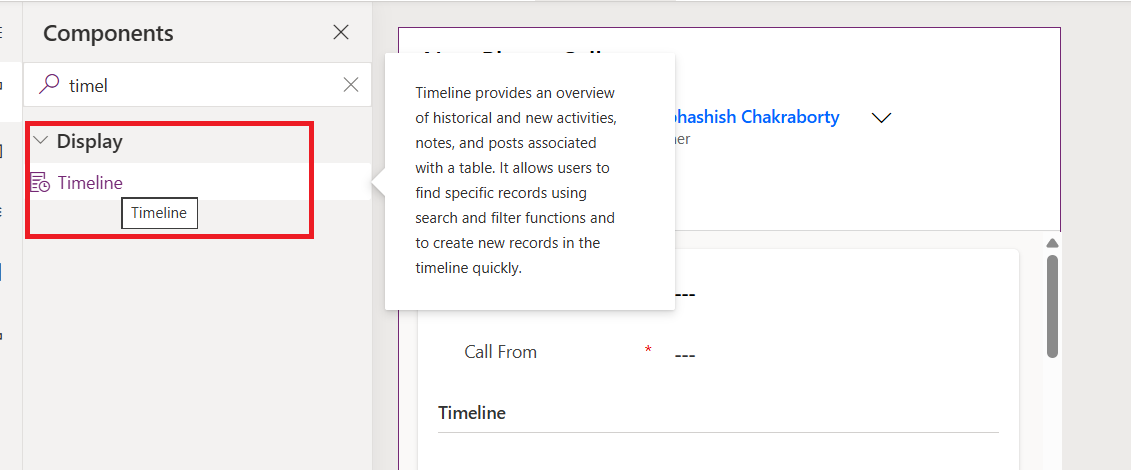
Add a timeline control in your app by dragging and dropping it from the Components tab:
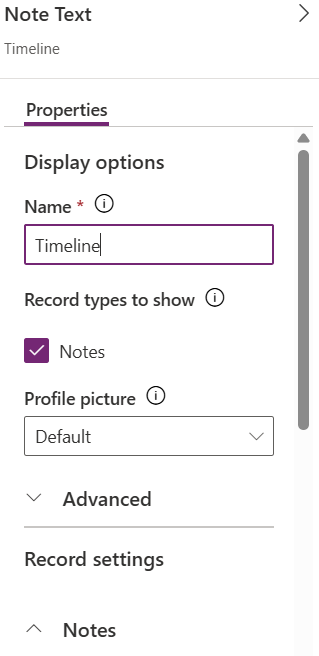
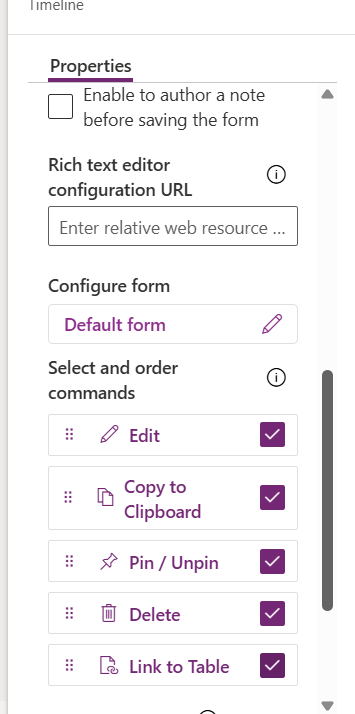
Configure the same on the right side pane, by filling up with the values of your preferences:
Setup additional settings to indicate the default behaviours of your choice:
Save the settings. You can now see the timeline when you open the form in play mode:
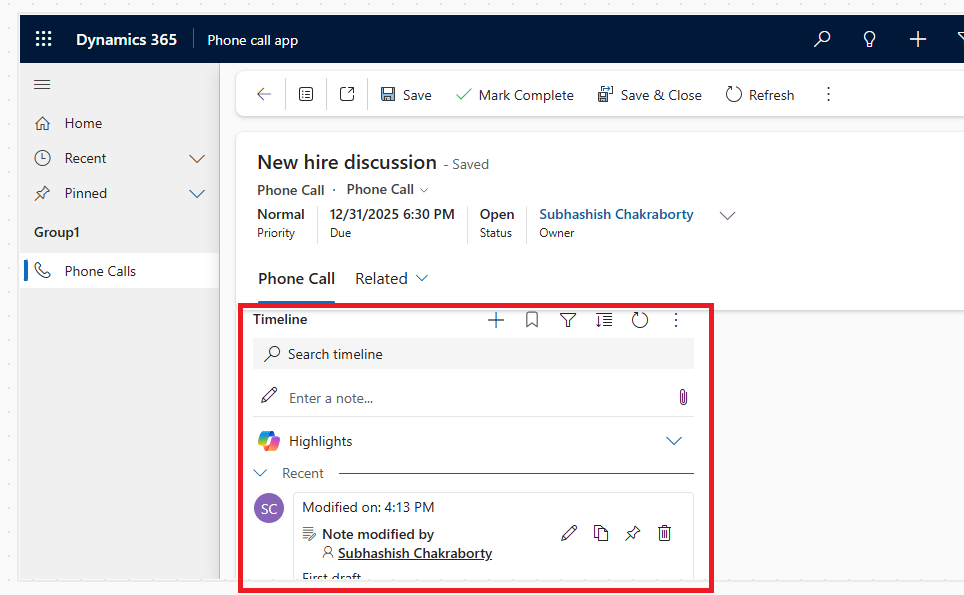
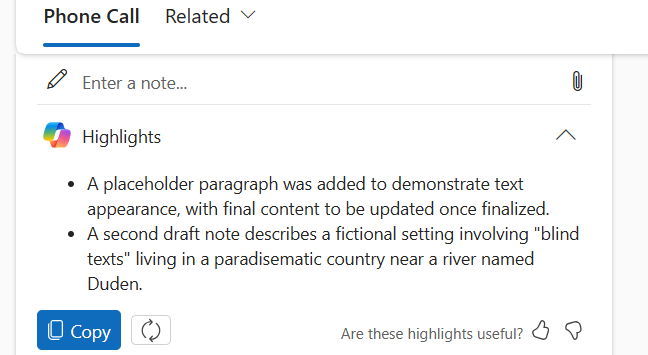
And in the placeholder, the Copilot will generate the summary for you:
With that let me conclude the discussion here. Please let me know if you face any difficulties in implementing them. Much love, like always J
Agent feeds
This is a powerful Human in the Loop capability that lets users to see if any pending notification has come, that needs attention. Whenever any record is modified in any table, if you want your user to be notified for their perusal, you need to configure this.Start by going to your Agent defining your instructions:
Go to tools and select MCP servers and add Power Apps MCP server >> Add and configure >> And you will get to see the following tools available:
Come back to your Agent >> Triggers >> Add trigger >> select “When a row is added, modified or deleted”:
Ensure to log on to Microsoft Copilot Studio and Dataverse
And click on Next.
In the next screen select the Change type = Added or Modified or Deleted, Table Name = <<Table of your choice, for which you want to add your notification>>, Scope = <<Select User, which means whenever any event/activity is happening under the logged on user, the notification will come to that user>>, and Additional instructions to the agent when it’s invoked by this trigger = Use content from Body:
Click to Create the trigger.
This essentially creates a flow, abiding the Dataverse table to Copilot Studio:
Come back to Agent >> Publish it. Now let us go to PowerApps >> Create a Model driven app, around the table of your choice >> and in the left hand side pane >> Click on Agents:
It will show you all the available agents for your apps:
The agent which you created from Copilot Studio should be available here. Click on the three dots adjoining it to add it to the App, by clicking on Add to Feed:
It now shows up in your app. Run your app to add records to Dataverse app. You will see the feed is showing up in the Agents Feed>> Needs Attention or under Completed tab:
N.B.: just in case, your Agent Feed doesn’t show on the left side pane, you can get it flashed by clicking on Agent Feed link on the left side of the app:
Also, as of now, the Agent Feed is only available with Model Driven Apps, not on Canvas Apps (at least as of now).
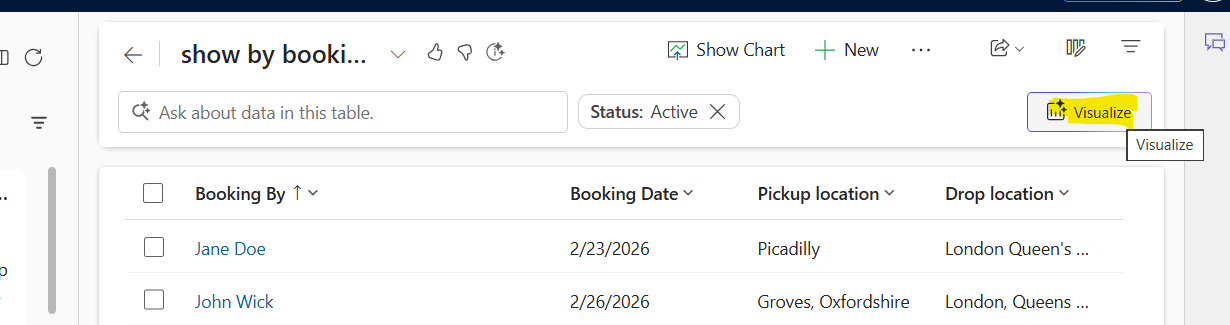
Visualize data
In your Apps, you can visualize your data, by clicking on the Toggle icon at the top right:It will uncover a magnificent visual representation of the data:
You can change the view by clicking from the drop down at the top:
Also you can see the different points’ details, by hovering the mouse at the different parts of the visual:
Now comes the most amazing part of the feature. You can talk to the data by writing it in the query given in the section indicated:
And the visual is shown as:
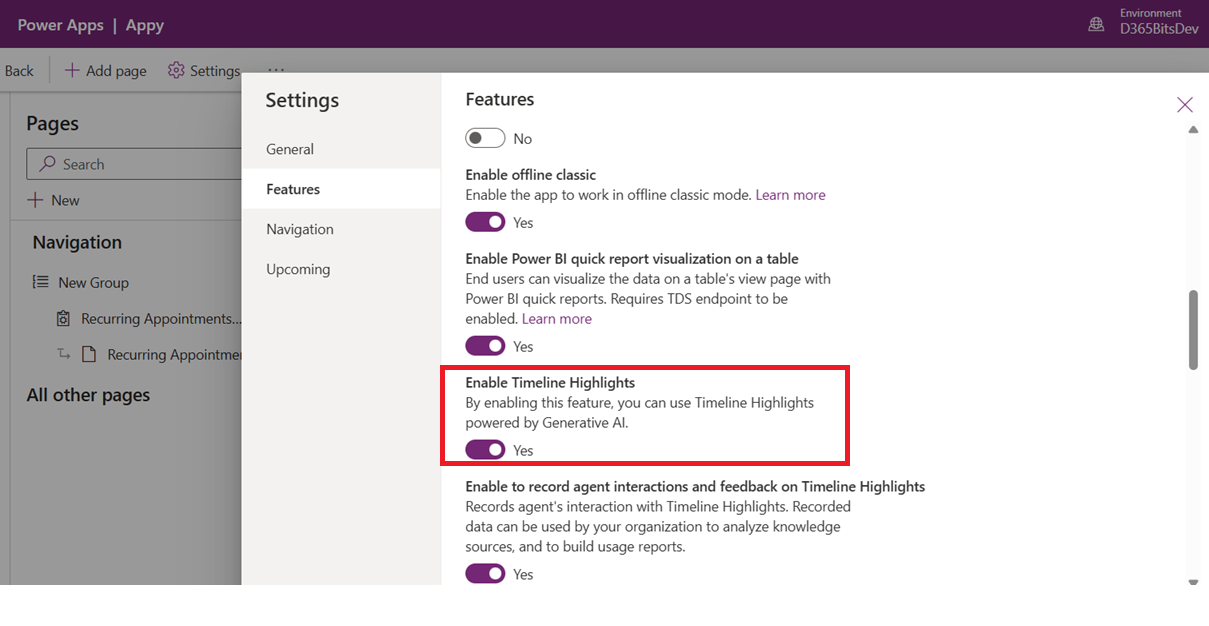
Implementing timeline in your app
You can implement Timeline in your app, by enabling the following feature from Apps >> Settings:Ensure the entity in your app is actually an Activity type of table, by going into its Advanced Proprties:
Add a timeline control in your app by dragging and dropping it from the Components tab:
Configure the same on the right side pane, by filling up with the values of your preferences:
Setup additional settings to indicate the default behaviours of your choice:
Save the settings. You can now see the timeline when you open the form in play mode:
And in the placeholder, the Copilot will generate the summary for you:
With that let me conclude the discussion here. Please let me know if you face any difficulties in implementing them. Much love, like always J
*This post is locked for comments