


 412
412 Like
Like Share
Share
 Report
Introduction:
WhatsApp with Non-Twilio Number in D365 CE is a method of integrating WhatsApp with Microsoft Dynamics 365 Customer Engagement (D365 CE) using phone numbers that are not associated with the Twilio platform. This integration allows businesses to leverage the WhatsApp Business API to send and receive messages directly from within D365 CE, enabling streamlined customer communication and enhancing customer engagement.
Prerequisites:
- Mobile number should be registered in Twilio.
- Twilio account with an appropriate subscription or a Twilio sandbox account.
- Dynamic 365 CRM CE Customer service license enabled for all system users
with security roles Omnichannel agent, upgraded Omnichannel for Customer Service.
CRM configuration set-up:
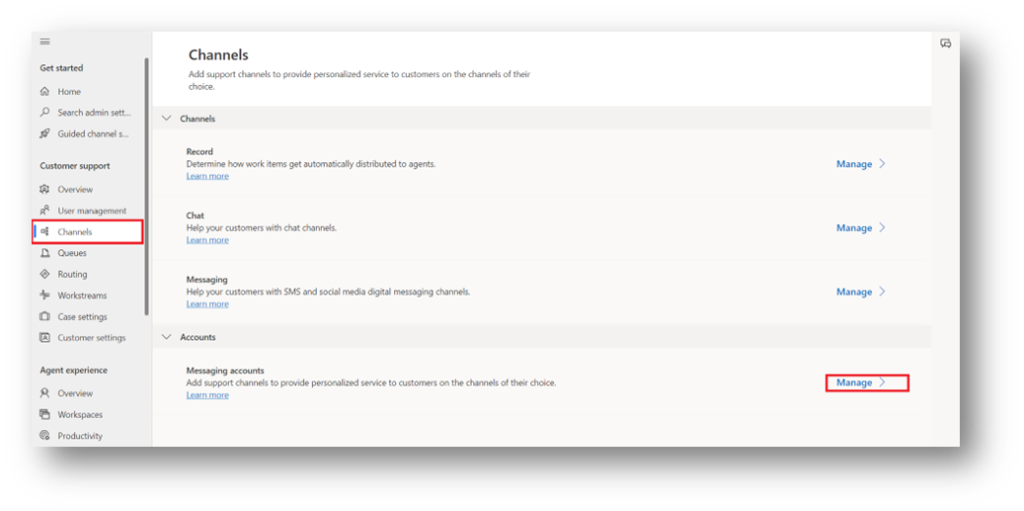
Step 1:
Navigate to the Customer Service Admin Center Application –> go to the Channels on the left navigation pane -> scroll down -> Click on Messaging accounts -> Manage.
screen will look like as shown below.
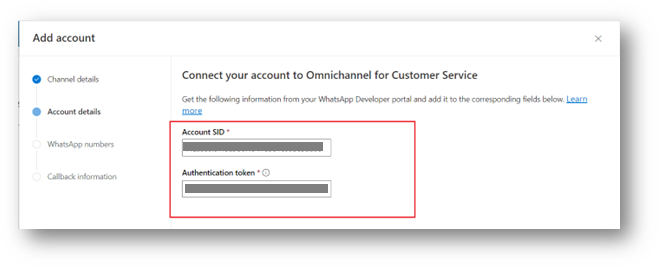
Step 2:
Added details from Twilio account,
for getting the details navigate to –> Twilio account –> General settings –> Copy the Account SID & Authentication token and paste it in the below screen –> Click on Next.
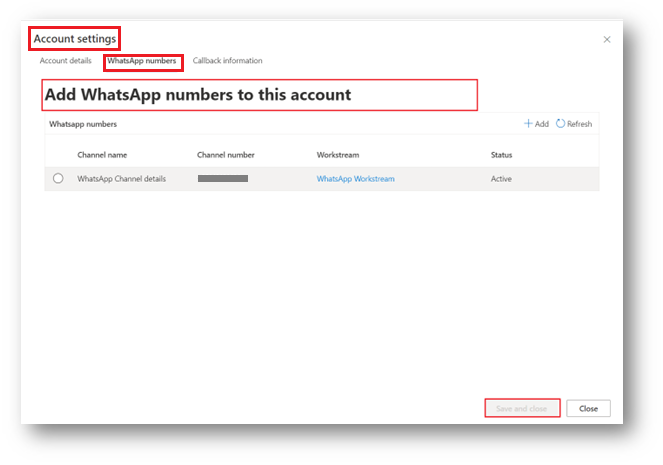
Step 3:
Added a Name for WhatsApp Number –> Add a Number –> Click on Next.
Step 4:
Added a WhatsApp number –> save & close.
Step 5:
Copy the Callback URL for future preferences & Close.
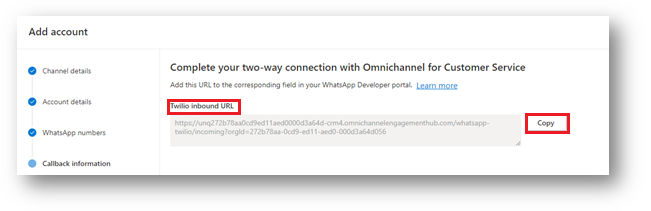
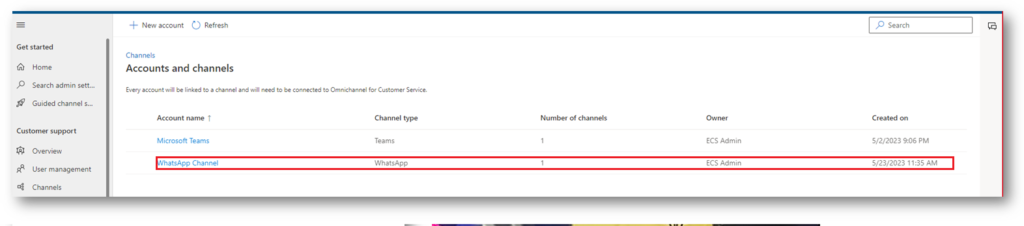
Account got created successfully, and visible in the Accounts.
Step 6:
For getting transcripts of the Live chat this toggle needs to be set to Yes.
Click on Productivity –> Transcription settings –> Turn on toggle to Yes -> Save.

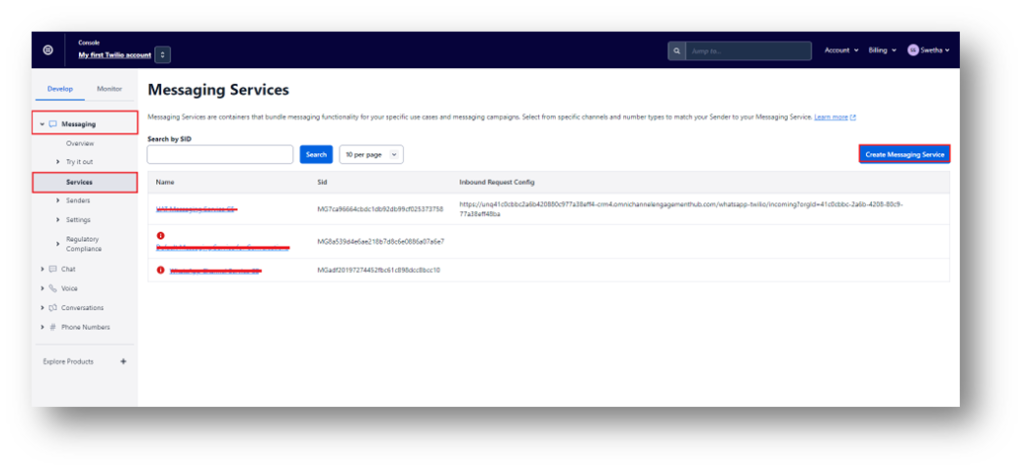
Twilio configuration steps:
Note: For Twilio WhatsApp to Dynamic CRM CE integration, creating a Service is mandatory, Have a look below for the same.
Navigate to the Twilio account –> Messaging –> Services –> Create Messaging Service.
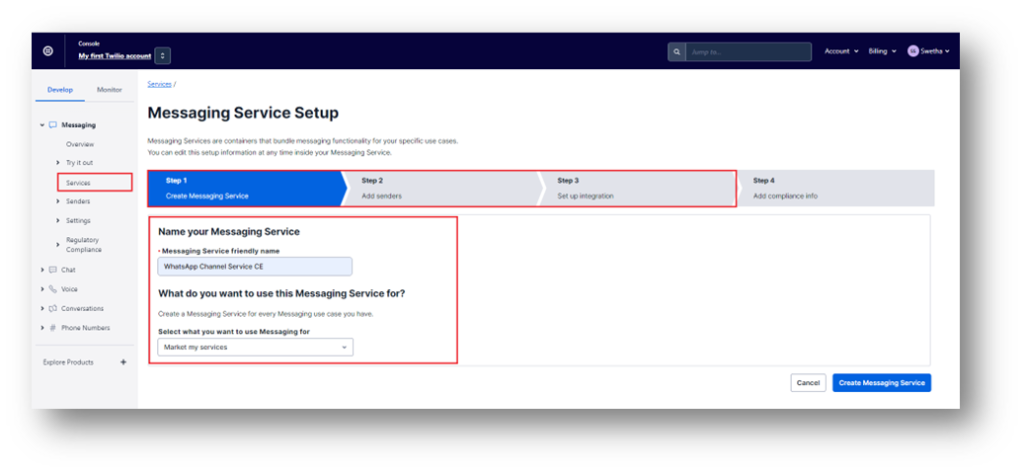
Step 1:
Create Messaging Service –> Give a name to the Service à add Market my service from the option set.
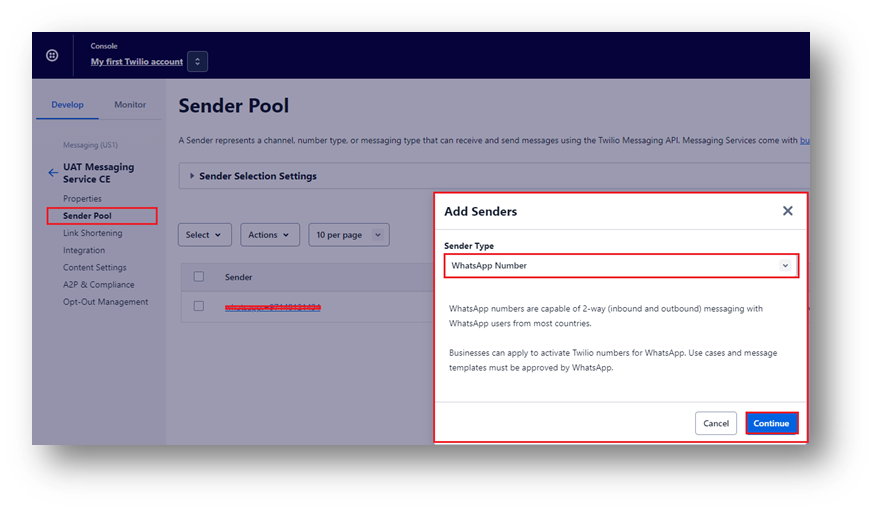
Step 2:
Click on Step 2 –> Add Senders.
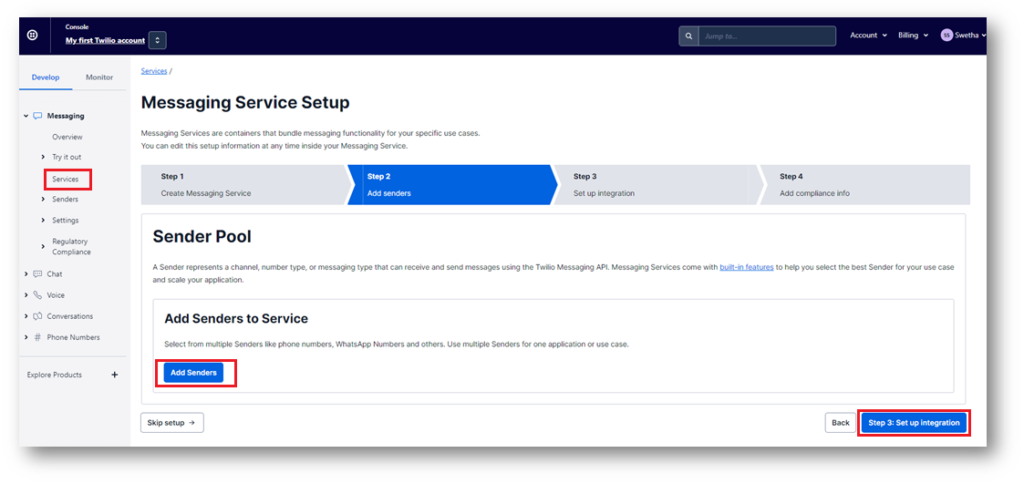
We have added sender type for WhatsApp number click on Continue.
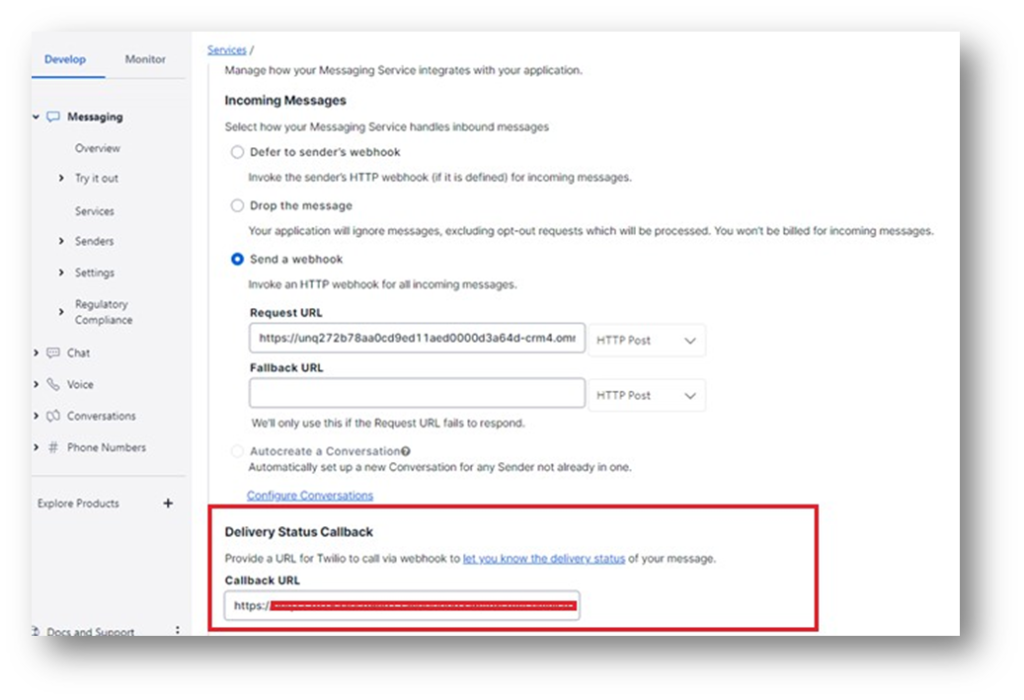
Step 3:
It will navigate to the configuration screen,
Within the Send a webhook –> Request URL –> Paste the Callback URL.
(here we have pasted the Callback URL which we have received from Messaging & Account reference of step 5).
Same URL We have pasted in Delivery Status Callback to get the status of delivered/undelivered message logs.
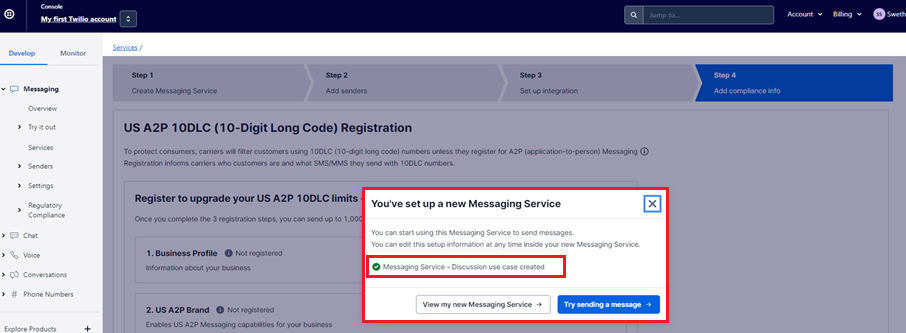
Step 4:
Skipped this step, as it is not required –> Close.
Navigate to CRM Customer Service admin center app.
Create a work stream for WhatsApp Channel:
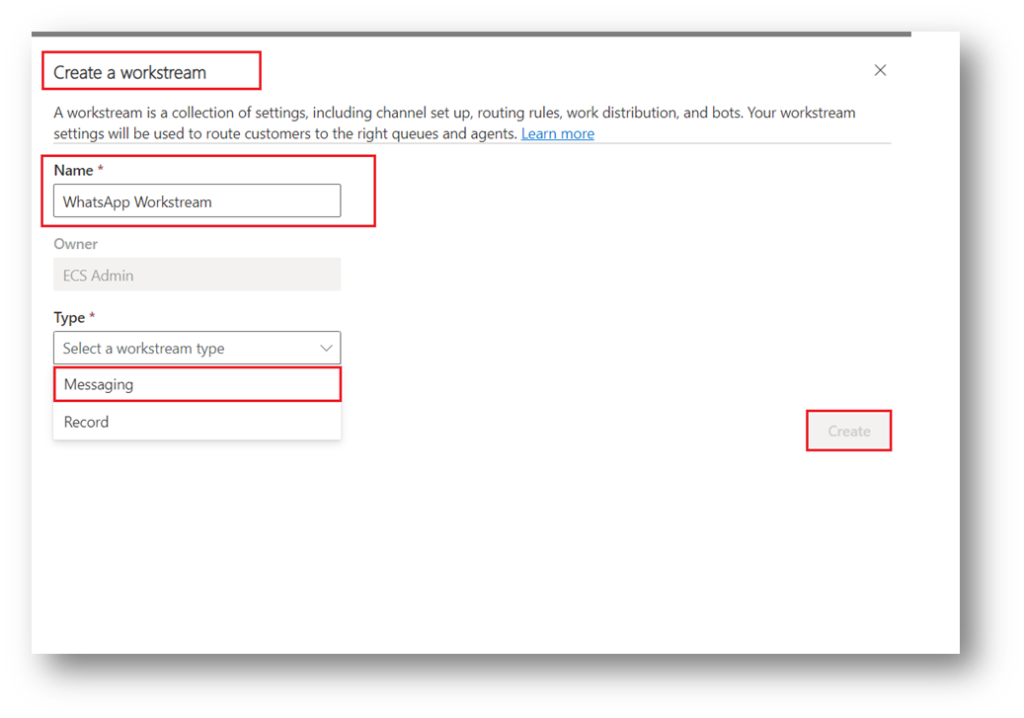
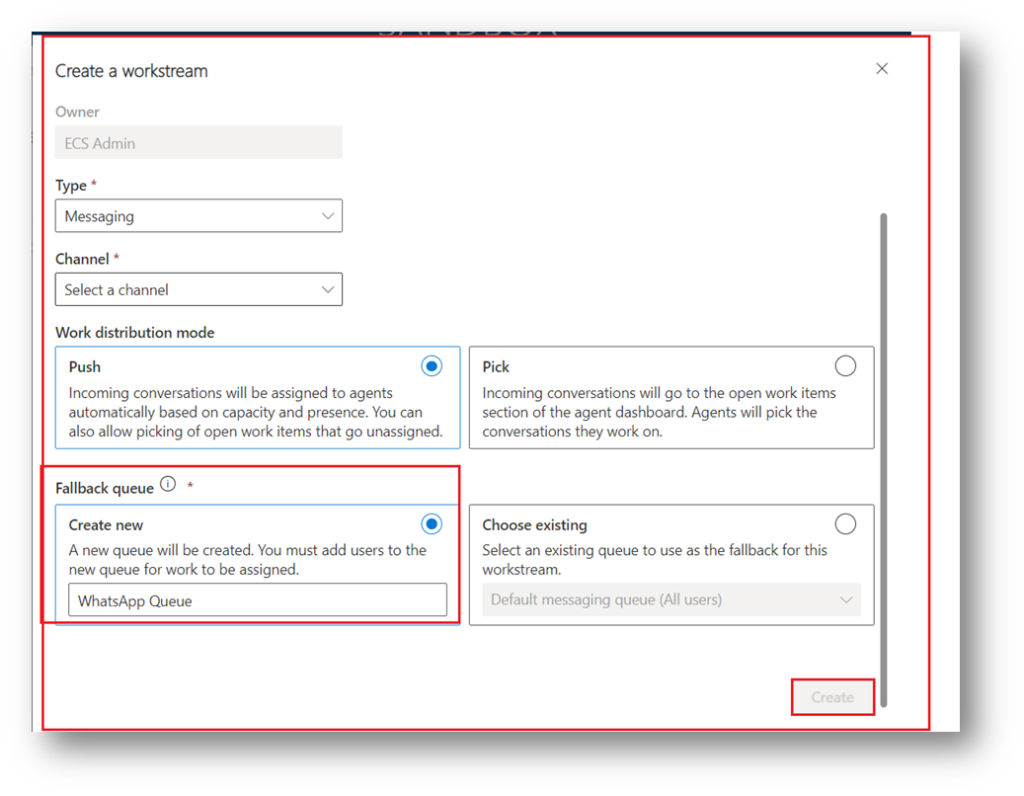
Step 1: Workstream
Created new workstream for WhatsApp.
Given name to the workstream as WhatsApp Workstream –> Type of workstream selected as a Messaging –> Create.
After creating it, it will look like below screen.
Selected Work Distribution mode as a Push –> Configured a new Fallback queue for WhatsApp work items to get segregated. –> Create.
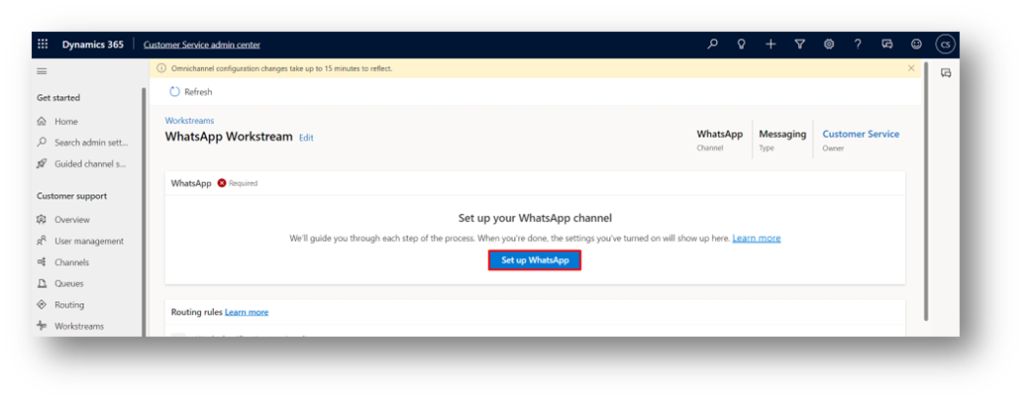
Step 2: Setup WhatsApp channel.
Navigate to the WhatsApp Workstream –> Set-up.
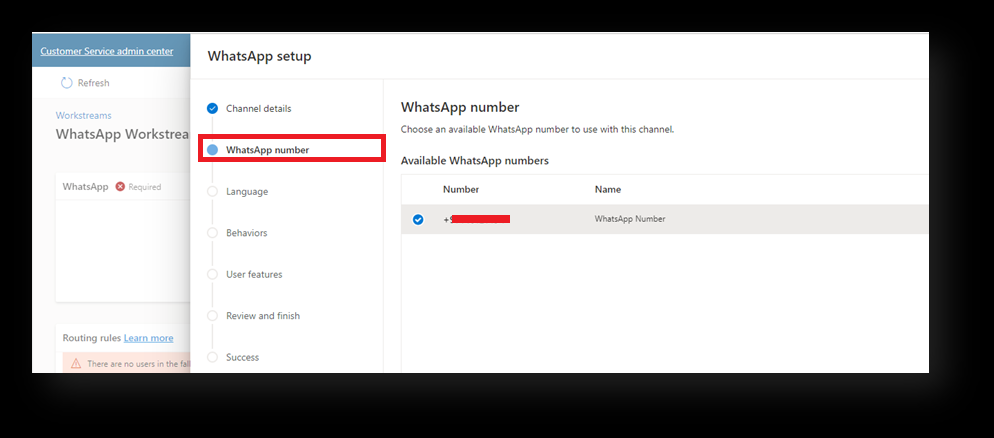
Step 3:
Channel screen will appear like this added name as a WhatsApp Channel –> Added WhatsApp Number –> Next.
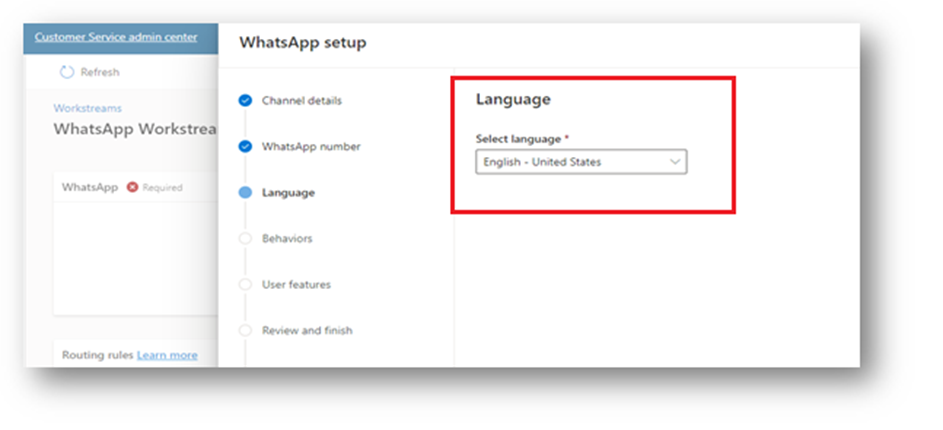
Step 4: Language setup.
Added a preferred language of Channel –> Next.
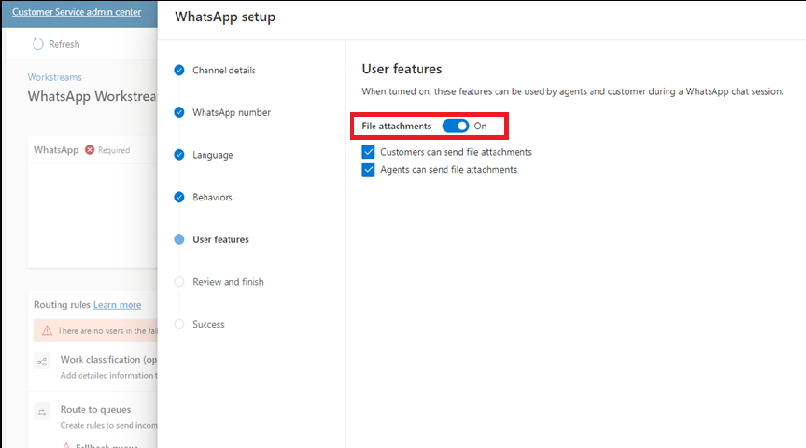
Step 5: User features setup.
User features toggle setup with Yes, for sending File attachments –> Next.
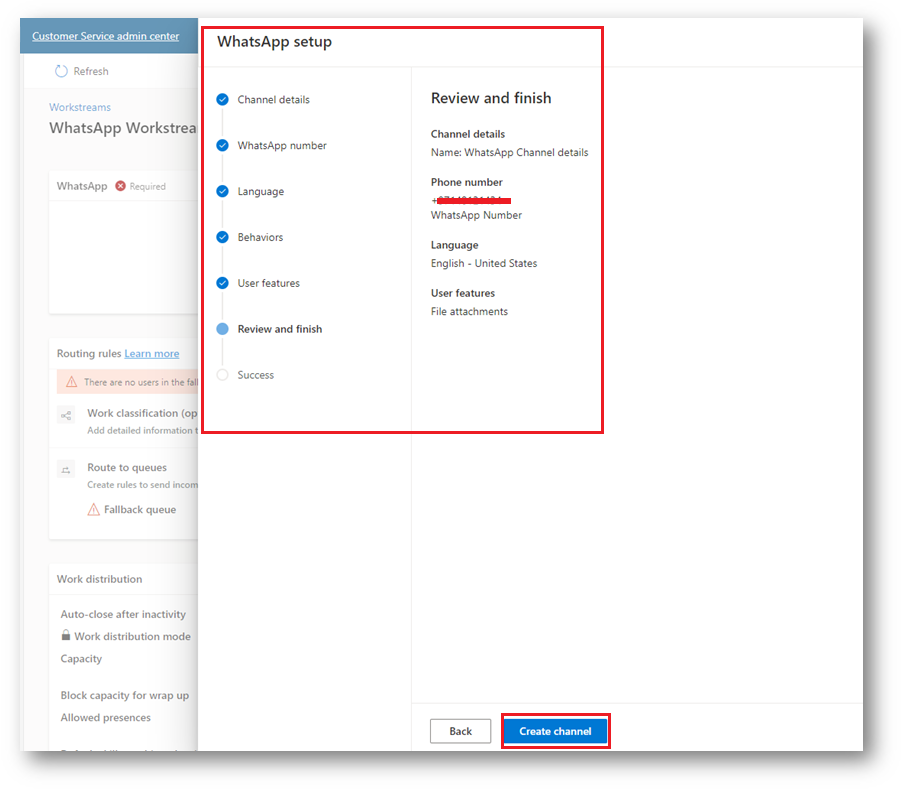
Step 6: Create a Channel.
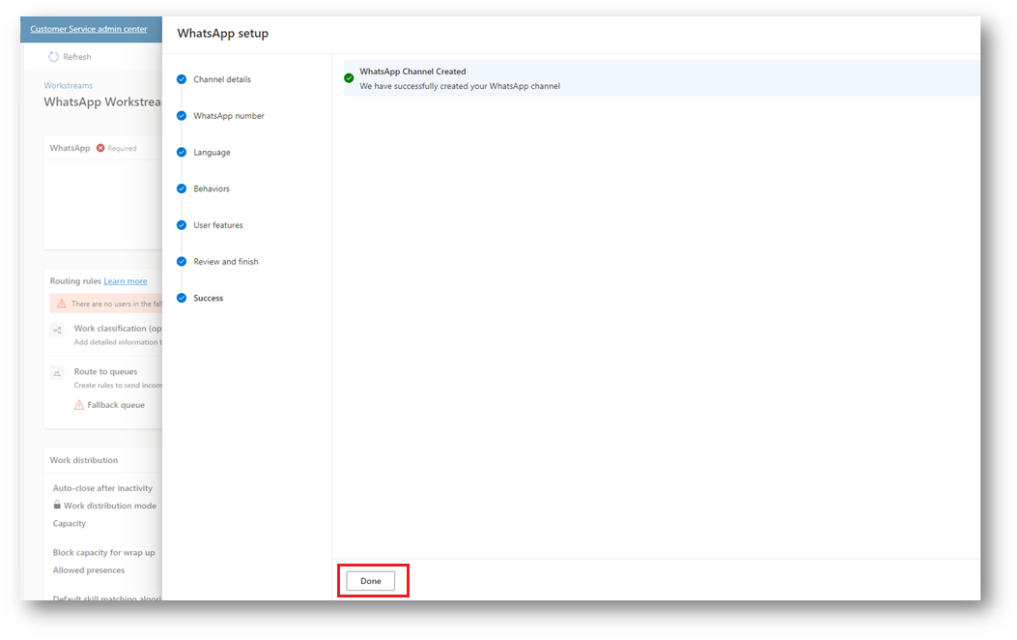
WhatsApp setup done now click on Create channel.
WhatsApp Channel creation has been done successfully!
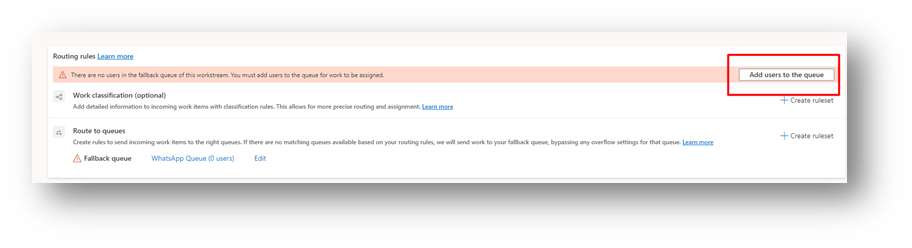
Now, Workstream looks like the below picture.
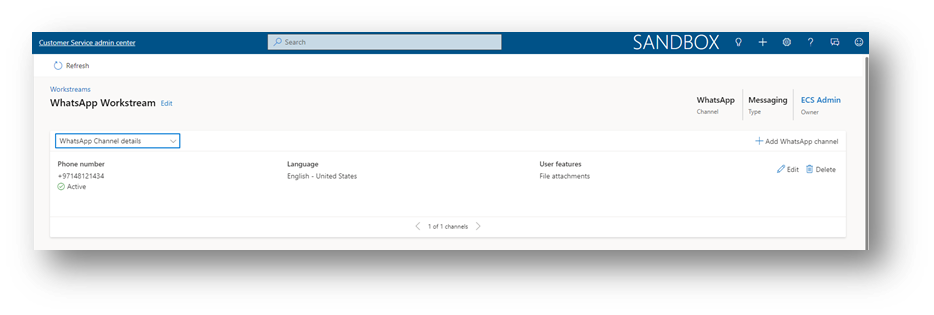
Workstream is got created without users we need to add users to the WhatsApp Queue so that work items will get associated with agents.
In Part 2, we will continue with the configuration for integrating WhatsApp with Non-Twilio Number in D365 CE.
The post WhatsApp Integration with Non-Twilio Number in D365 CE – Part-1 appeared first on Nebulaa IT Solutions.
*This post is locked for comments