


 412
412 Like
Like Share
Share
 Report
In Dynamics 365, Xrm.Navigation (Client API reference) is used to provide navigation-related methods while writing custom scripts. One of the methods called “navigateTo” is used to navigate to the specified table list, table record, HTML web resource, or custom page. More information on the Microsoft Documentation.
Syntax
Xrm.Navigation.navigateTo(pageInput,navigationOptions).then(successCallback,errorCallback);In this Blog we will focus on creating a popup dialog window which contains a custom HTML form and retrieve its data to pass it back to the parent window.
We will be using a ribbon button with javascript code which opens the popup with an html form.
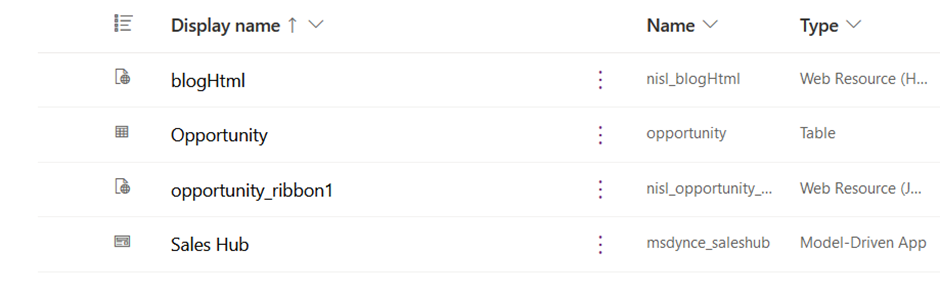
We start by creating the web resources need for the ribbon.
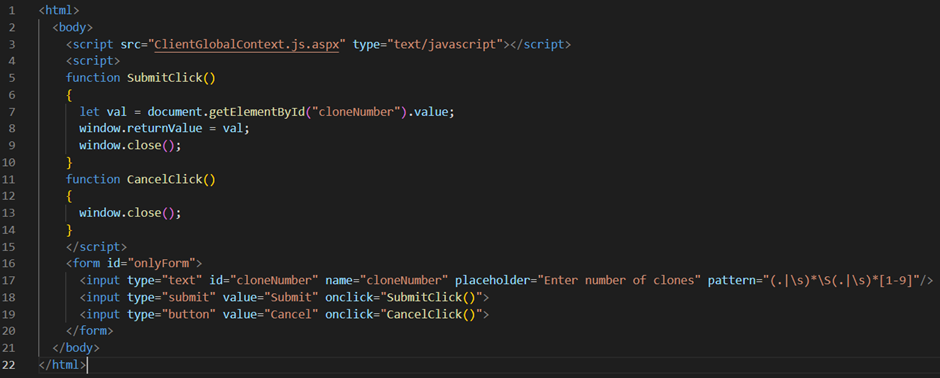
We create a simple html form with inline javascript and provide src attribute to the script as “ClientGlobalContext.js.aspx”
On the click of the submit button we run a function to get the value from the textbox field and assigning it to the window.returnValue which passes the value to the parent.
Next we have to create the script for the onclick of ribbon button.
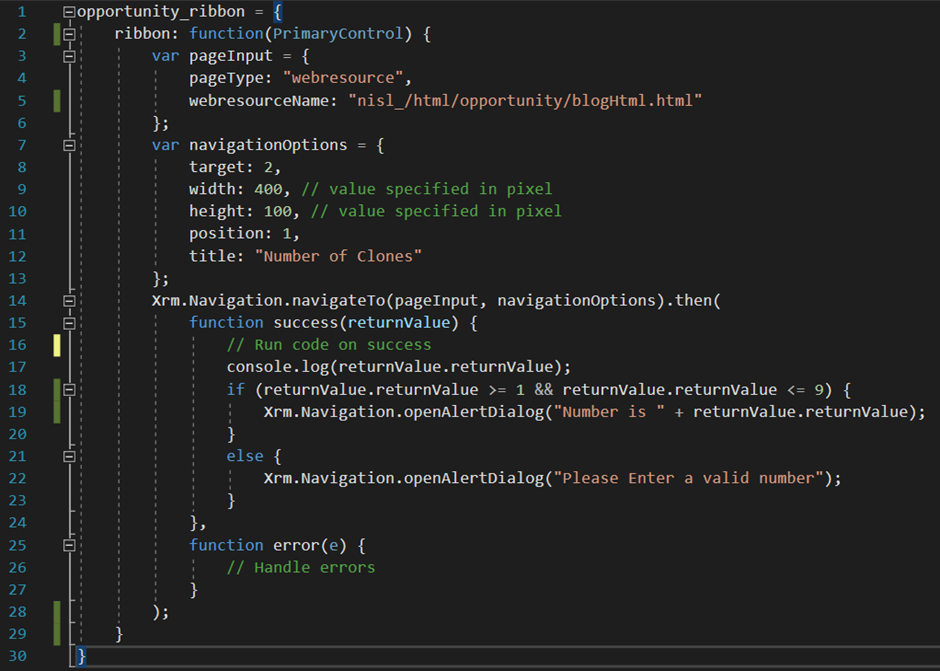
The navigateTo function takes 2 parameter: pageInput and navigationOptions. We provide those as below
var pageInput = {
pageType: "webresource",
webresourceName: "nisl_blogHtml"
};
var navigationOptions = {
target: 2,
width: 400, // value specified in pixel
height: 100, // value specified in pixel
position: 1,
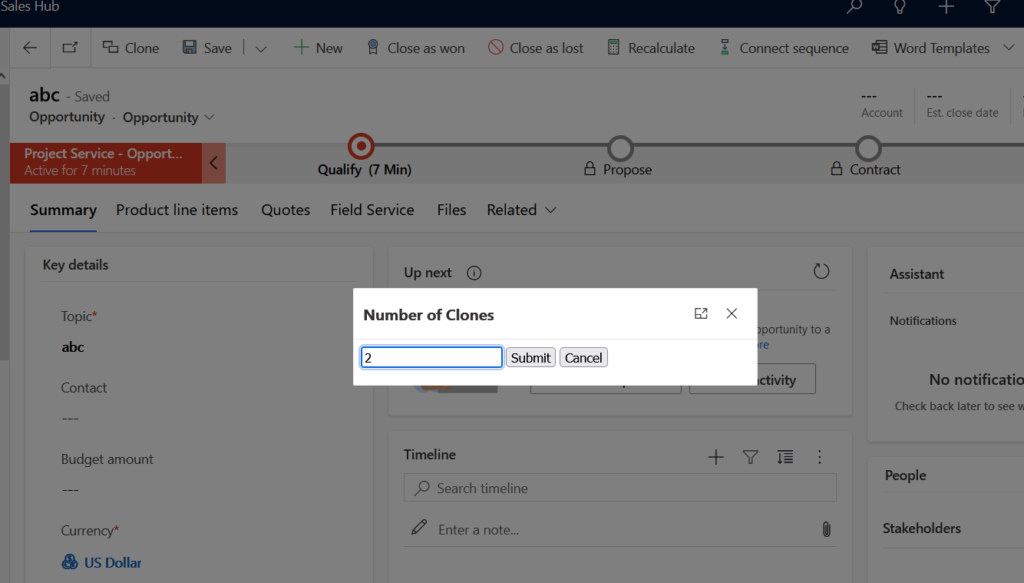
title: "Number of Clones"
};
pageInput is provides the path to the web resource in the environment.
navigationOptions displays the navigation window. Here we set the target as 2 which shows the web resource in a dialog box.
We right success code in the successCallback function which receives the returnValue from the child dialog box.
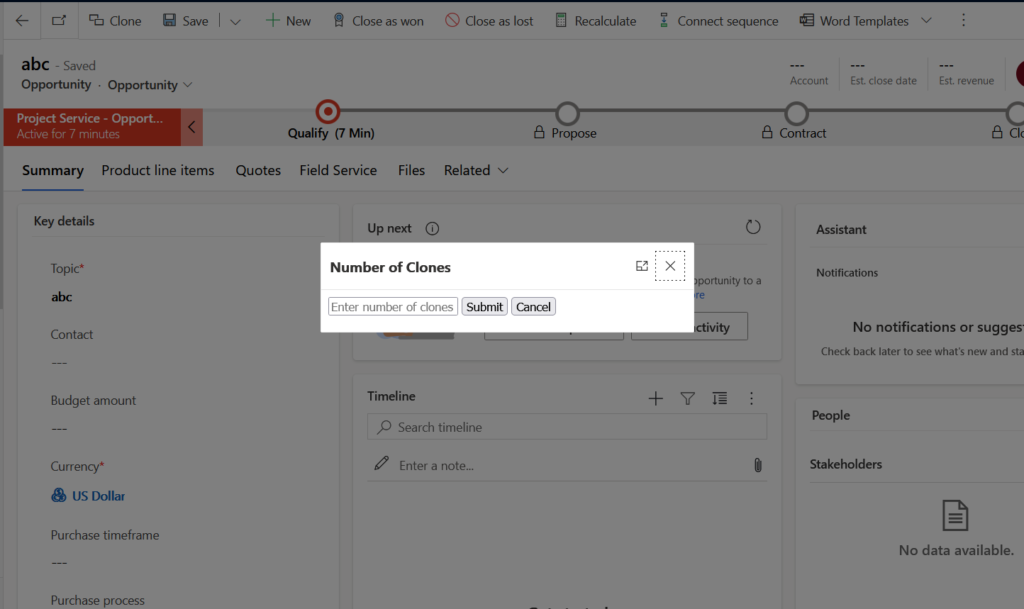
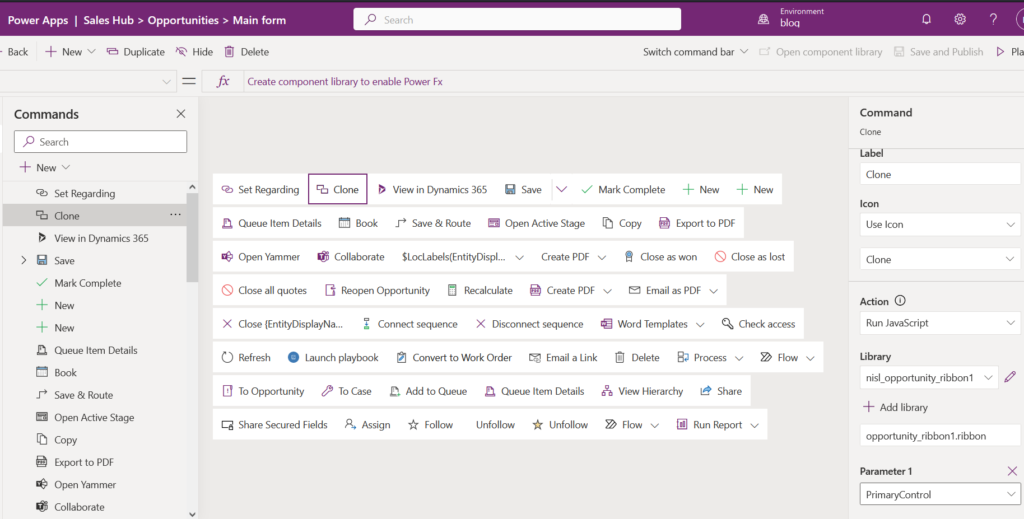
After writing web resources we upload them to our solution and setup the ribbon button by clicking edit on the model driven app and editing the command bar on the main form for the specific entity (Here Opportunity). We assign the action of the ribbon as our opportunity_ribbon1 javascript web resource and and pass the PrimaryControl parameter as well. Publish all the changes and go to an opportunity record to verify.
Clicking on the clone button opens the dialog box and after entering a number and clicking submit we display another popup with the showing the entered.
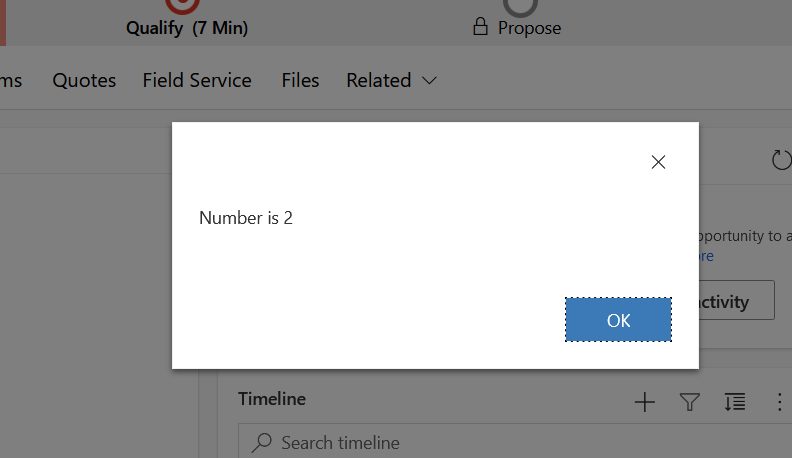
We can now further our functionality by using this value in for any fields or even passing it to an action which will run it in the backend.
Thank you for reading our blog.
The post Creating a Popup Dialog Window with Custom HTML Form in Dynamics 365 using Xrm.Navigation appeared first on Nebulaa IT Solutions.
*This post is locked for comments