


 412
412 Like
Like Share
Share
 Report
Introduction:
Dynamics 365 Marketing consists of three primary modules. Real-time marketing, Outbound marketing and event management. Segments let us create group of related contacts that can be used in customer journeys. In this blog we will be discussing about marketing segments in Real-time and Outbound Marketing.
How to create Segments using Real-time marketing?
- Go to marketing trial to start with Dynamics Marketing trial Instance.
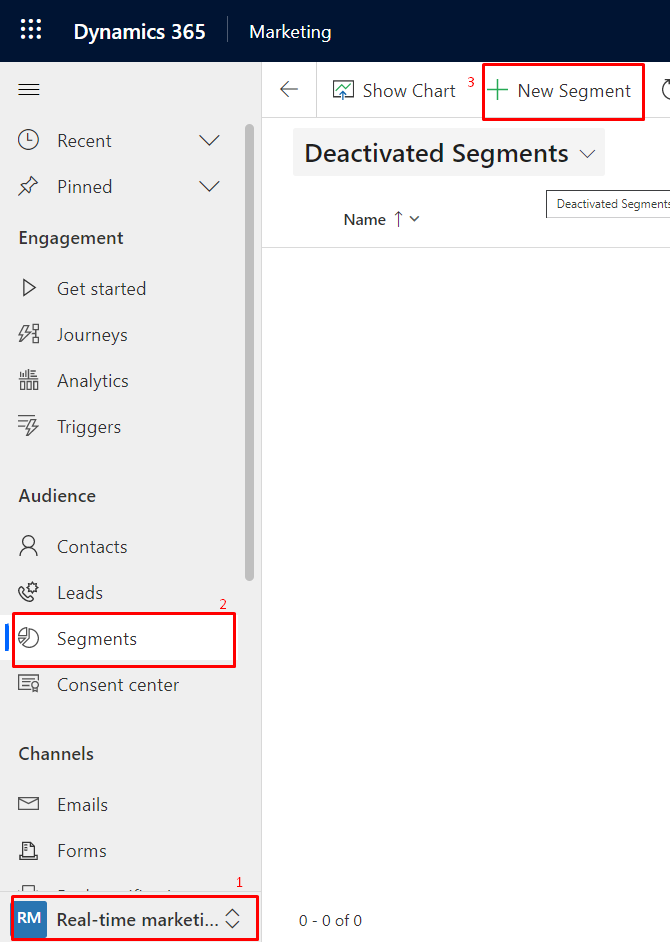
- Open Marketing App and from the change area select ‘Real-time marketing’ and then click on ‘Segments’ under Audience.
- Click on ‘+New Segment’ from the command bar as shown in the figure below.
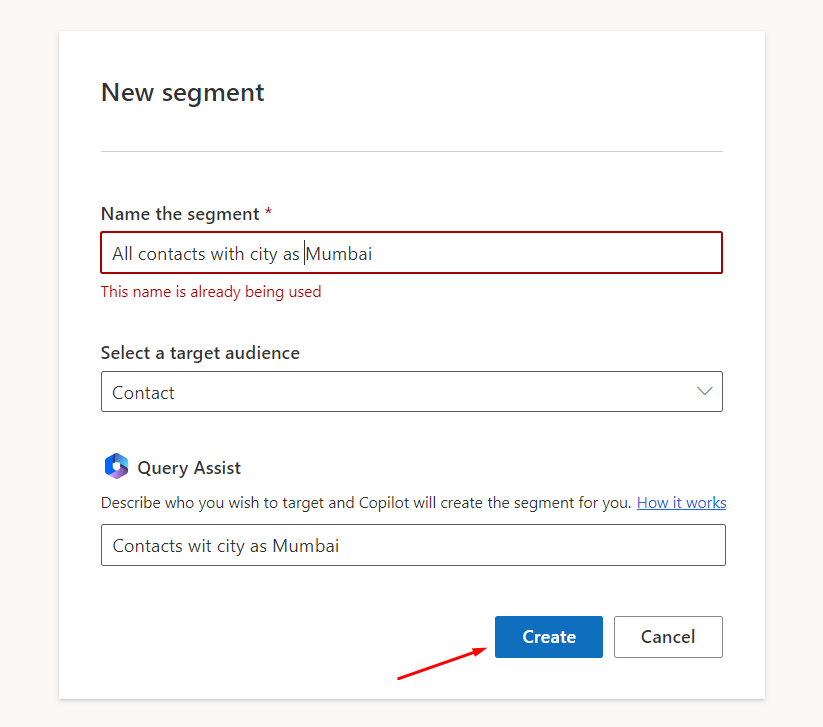
- Enter name for the segment and select target audience (Can only select Contact/Lead).
- You can either type your query or make changes in the existing queries from query Assist (Query assist will automatically create query based on the query that you have typed using Query assist). After adding the conditions click on ‘Create’. It will look like below image.
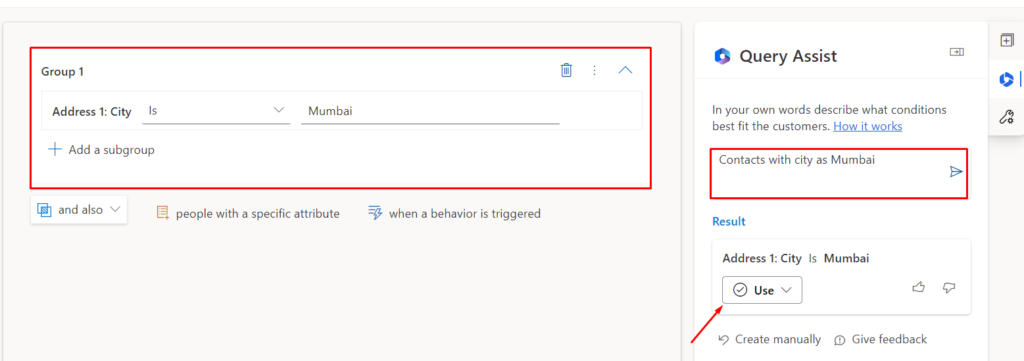
6. You can make changes in the query to update the condition that needs to be added from the right pane and then click on ‘Use’. You can see that the query condition got automatically added.
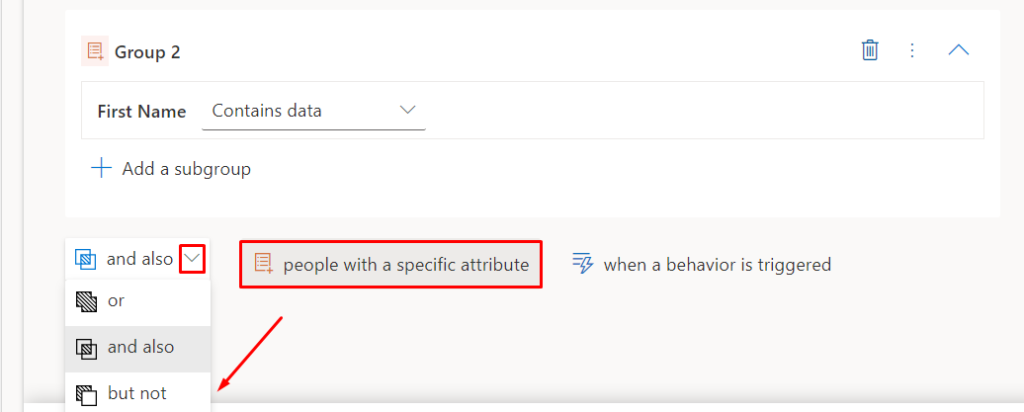
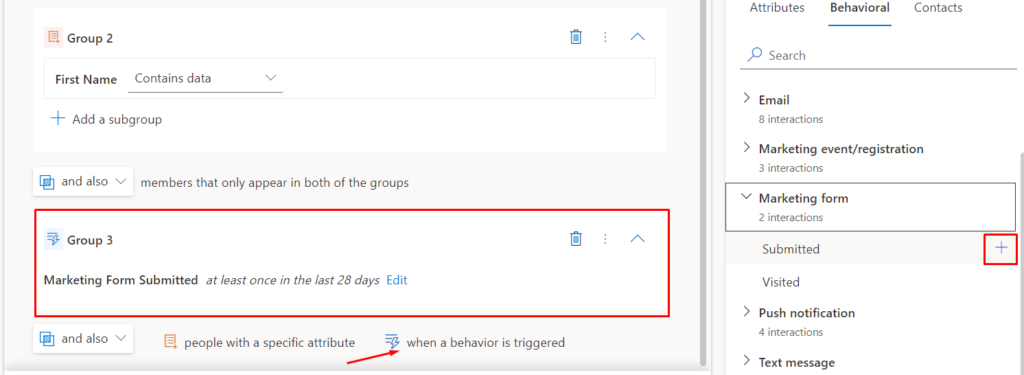
7. Click on ‘people with a specific attribute’ as shown in the figure below to add multiple groups to your query. Click on ‘and also’ to filter conditions.
8. Click on ‘when a behavior is triggered’ and add behavior condition by selecting attributes from the right-hand pane and click on + to add the attribute as shown in the figure below.
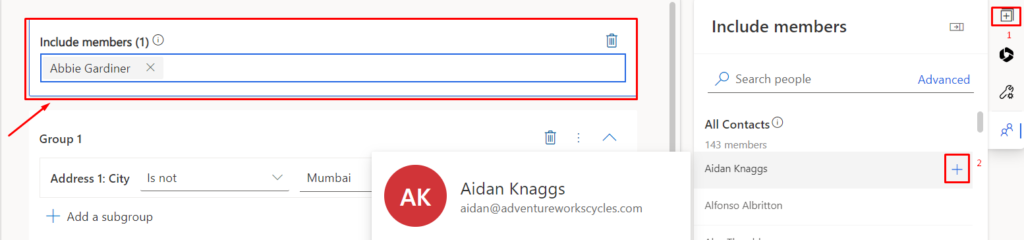
9. Click on + from the top right pane that is elements that can be added to created segment. Click on ‘Contacts’ and click on Exclusion/Inclusion group to either exclude or include contacts manually.
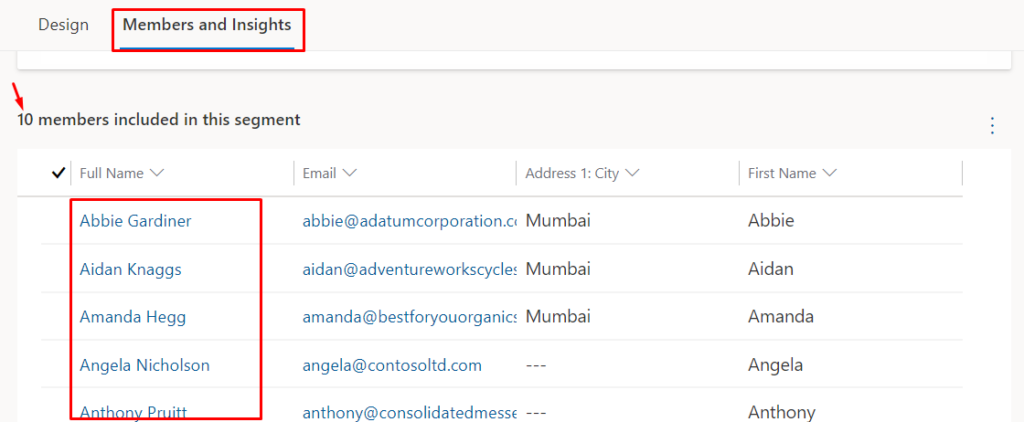
10. Now, click on ‘Save’ to save the segment and click on ‘Ready to use’ to make the segment live which can be used later in customer journeys (click on customer journey to know more about customer journey). Once the segment is ready you can click on ‘Members and Insights’ to view available members in the segment.
How to create Segments using Outbound marketing?
- Go to marketing trial to start with Dynamics Marketing trial Instance.
- Open Marketing App and from the change area select Outbound marketing and then click on Segments under Customers.
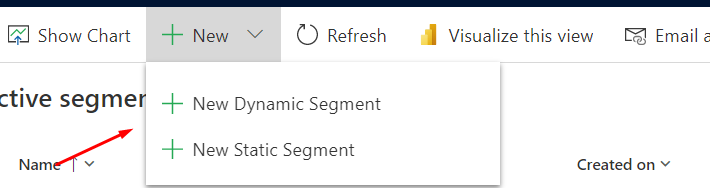
- Click on +New from the command bar. It will ask you whether to create Static/Dynamics Segment.
a. How to create Static Segment?
- From the drop-down menu click on ‘+New Static Segment’.
- Quick create of segment gets opened. Enter ‘Name’ of the segment and click on ‘Save and Close’.
- Now you can add contacts manually by clicking on +Add. If you want to add condition, click on ‘+Add by Query’ and if you want to remove members added to this segment click on ‘Remove by Query’.
- After adding your query, click on ‘Go Live’ to make segment available for other segments/customer journey’s.
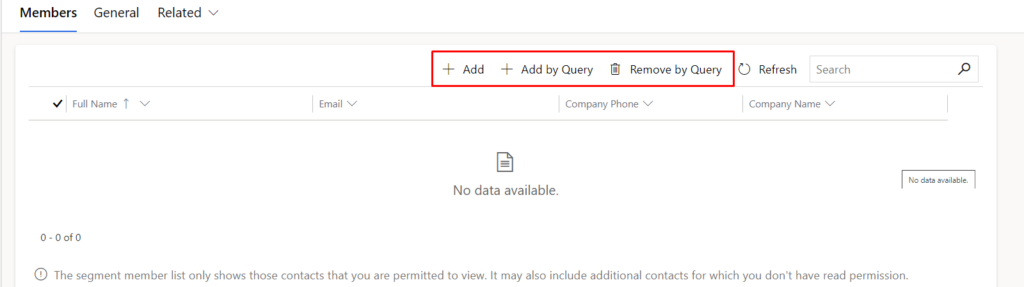
NOTE: You cannot add behavior block in static segment.
b. How to create Dynamic segment?
- From the drop-down menu click on +New Dynamic Segment.
- On click all the available segments templates available window opens up. You can either ‘Select’ or ‘Skip’.
- On click of Skip, it opens segment and now enter the name of the segment.
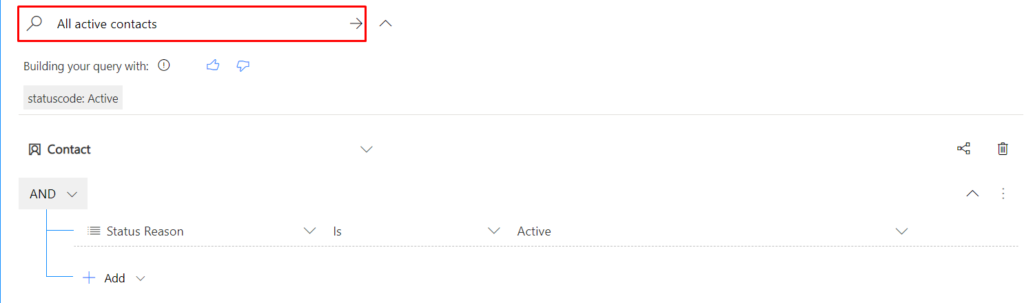
- You can add condition by clicking on ‘Add query block’ or you can add text to automatically created condition as shown in the screenshot below.
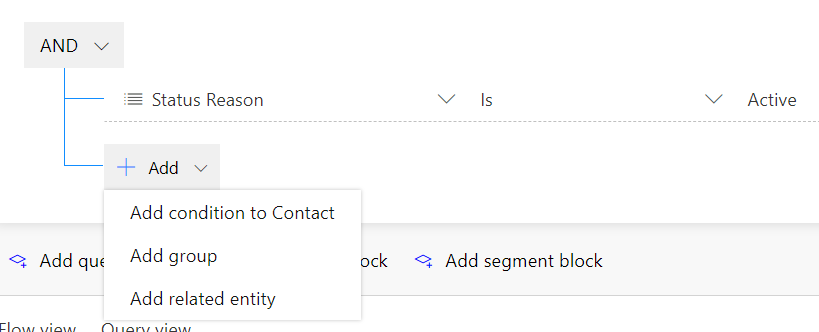
5. You can even add related entity or conditions by selecting from the available conditions.
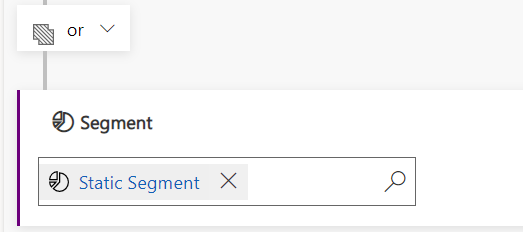
6. Segments can also be added inside other segment using and/or conditions. Segments which are in draft state will not be available only live segments can be selected inside segment block.
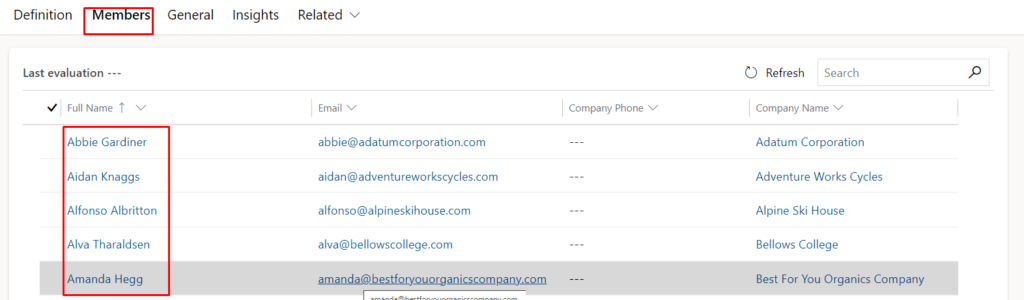
7. Click on ‘Estimate size’ to get count of estimated members when segment is in draft state. All the members can be viewed using ‘Members’ tab when segment is in live state as shown below.
NOTE:
- You can click on ‘Edit’ to edit the segment in live state.
- You can click on ‘Stop’ to make live segment to ‘Draft’. After making changes you can click on ‘Go Live’.
- Live segment conditions cannot be edited.
The post How to create Segments in Dynamics 365 Marketing appeared first on Nebulaa IT Solutions.
*This post is locked for comments