


 21
21 Like
Like Share
Share
 Report

You can then send the subscription value as along with the header, while calling your API:

Step 1: In your Azure portal >> Azure active directory >> App registration >> Register an App. Let us call it: client-app
Note down the Client Id, Tenant Id, Object Id. Create a Secret, give it some suitable time for validity. Note down its value.
Step 2: Click on the Endpoint: Copy the value of
a. OAuth 2.0 authorization endpoint (v2)
b. OAuth 2.0 token endpoint (v2)
c. OpenID Connect metadata document

Step 3: Come back to Azure active directory >> App registration >> Register an App. Let us call it: backend-app. Note down the Client Id, Tenant Id, Object Id. No need to create any secret here.
Step 4: Come back to Client-App >> click on API Permission >> Add a permission >> Come to 'My API' tab >> select backend-app >> Add permissions. Click on Grant admin consent to proceed:

Step 5: Come back to backend-App >> Click on Expose an API'. Copy the Application ID URI:

Click on Add a scope: give a name like: File.Read. Select 'Who Can consent'as Ádmins only. Give a name, a proper description, and then finally add. It will look like this now:

Step 6: Come back to Azure API >> Search for 'OAuth2.0 + OpenID Connect' >> Click on Add.
Give a name: DemoAPP.
On Client registration Page URL field: give https://localhost
Authorization grant type: Authorization Code.
Authorization endpoint URL: Give the value from Step 2.
Authorization request method: GET + POST
Token Endpoint URL: Give the value from Step 2.
Default scope: from Step 5.
Client Id and secret: get from step 1.
Authorization code grant flow: Get it from 'OpenID Connect metadata document' of step 2.
Click Save to complete.
Step 7: Come back to your API setting, and select user Authorization as 'oAuth2':

Select/enter the value of the 'OAuth2.0 + OpenID Connect'' that you obtained from Step 6. Click on Save.
Now you have enabled Oauth2 authentication to Azure API. How to implant this in your Azure API?
Come back to Global policy (you can write on global policies to govern the overall behavior of your API, not just any particular operation) >> Use the following JWT policy >>

Click on 'Developer portal' to launch your portal. The portal launches in Edit mode:
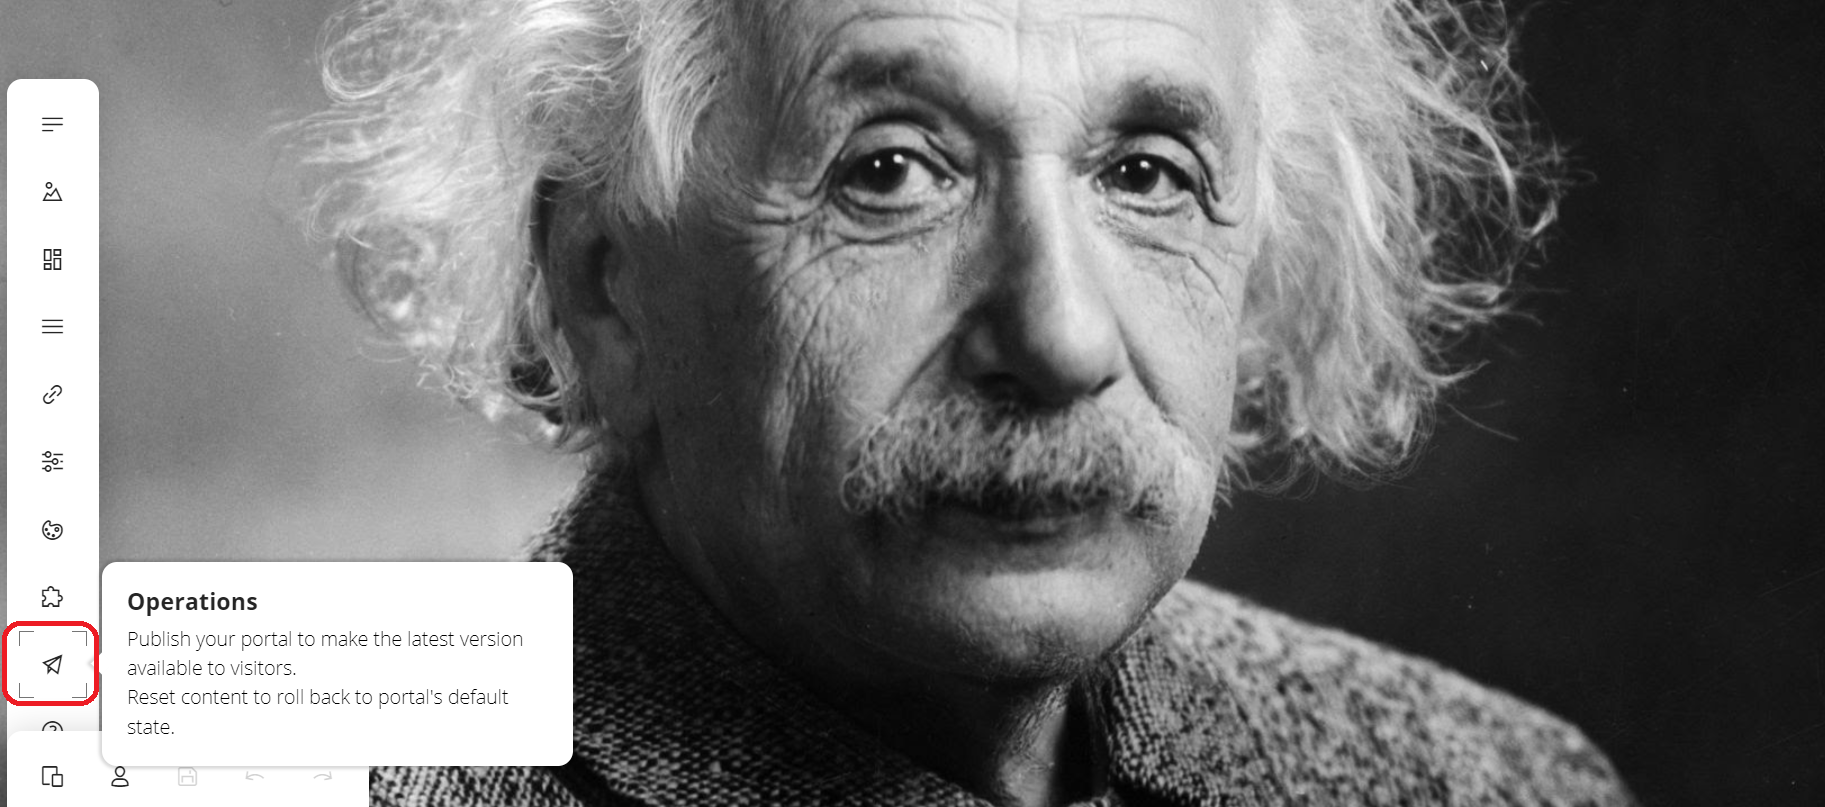
Click on Óperations icon to publish your changes.
Done?
OK....now the magic😉
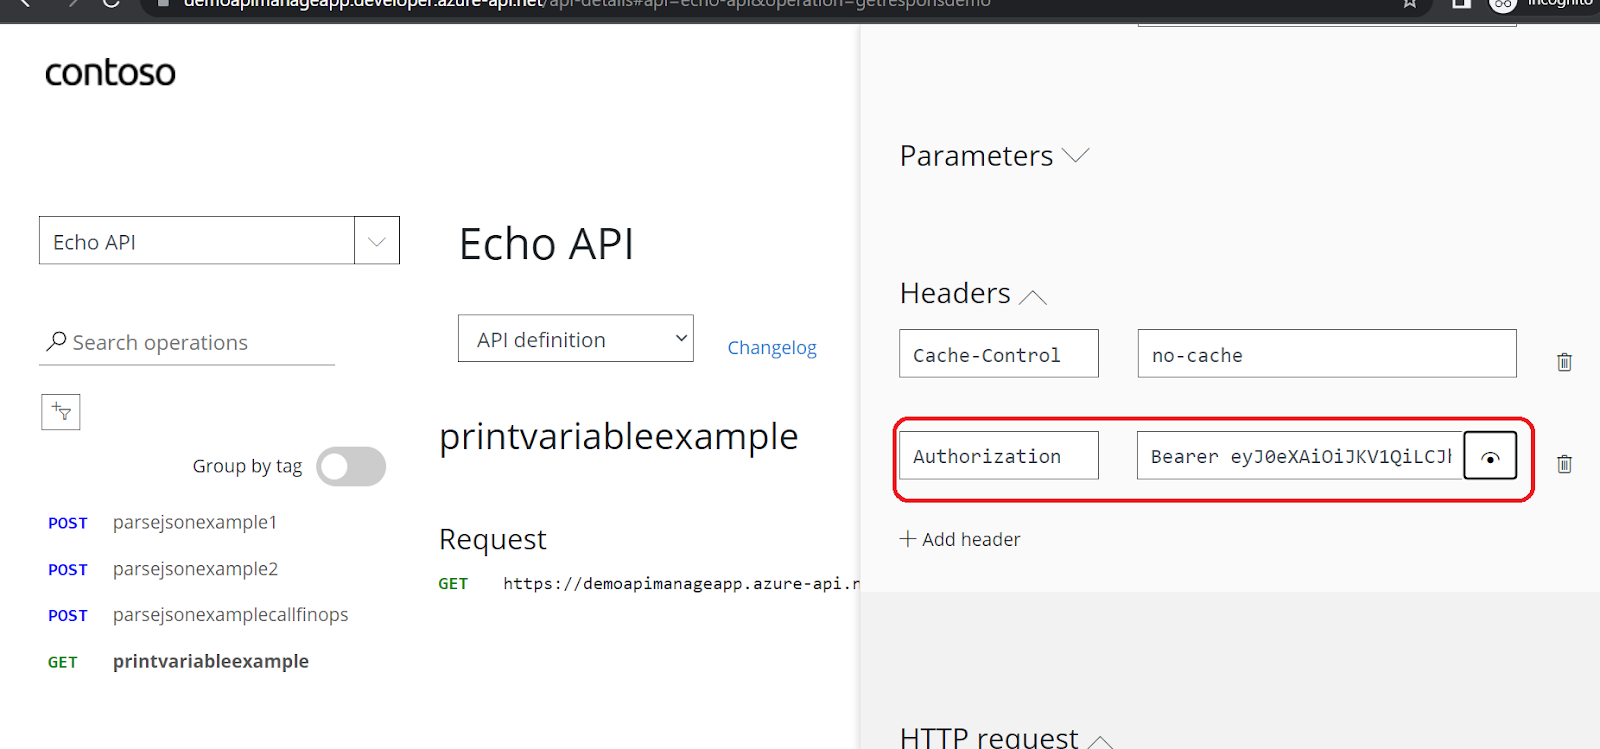
Copy the URL and paste it in an incognito mode browser. Here you can test your APIs >> Click on Éxplore APIs'.
You would be able to see Echo API (the APIs which you have created in your Azure APIm). Click on the same. It will show you all the operations, avaialble. Click on any of them >> click on Try it:

The Following screen/drop down dialog opens.

If you select: no Auth and click on Send button, you will get the error:

Select Authorization >> as Authorization_Code. Another window will pop up whereby it will ask you to key in admin credentials.
And walla!!! It has generated the bearer token for you:

Go down to bottom and click on send. It has given you the desired output:

Outh2 is indeed a very smart (and cool) way of guarding your Azure APIs.
*This post is locked for comments