


Install Viva Sales for Outlook and D365 CE.

 412
412 Like
Like Share
Share
 Report
Introduction: In this blog, we will configure Viva Sales with Outlook and D365 CE.
Prerequisites-
Microsoft 365 for enterprise or Office 365 for enterprise product license is required to use the Viva Sales app in Outlook, Viva Sales is included with Dynamics 365 Enterprise and Dynamics 365 Premium as well.
Roles Required-
To customize Viva Sales, administrators must have the System Administrator or System Customizer security role given to them. To utilize Viva Sales, a user must have either the Sales Manager or Salesperson security role given to them.
Let’s do the integration step by step:
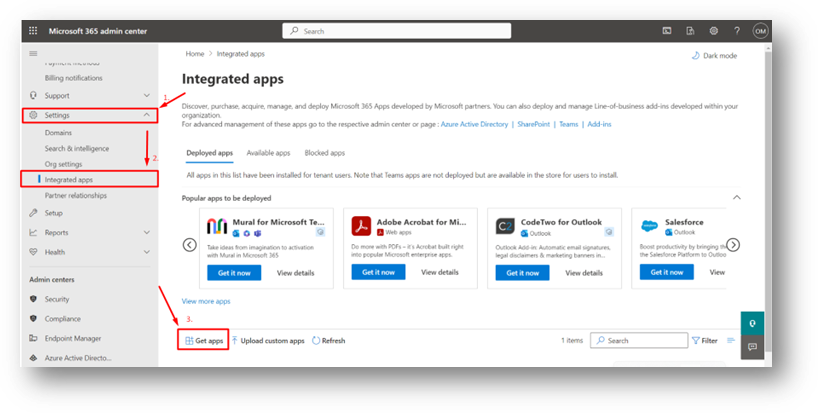
Step 1: Add the Viva Sales App from Microsoft 365 admin center.
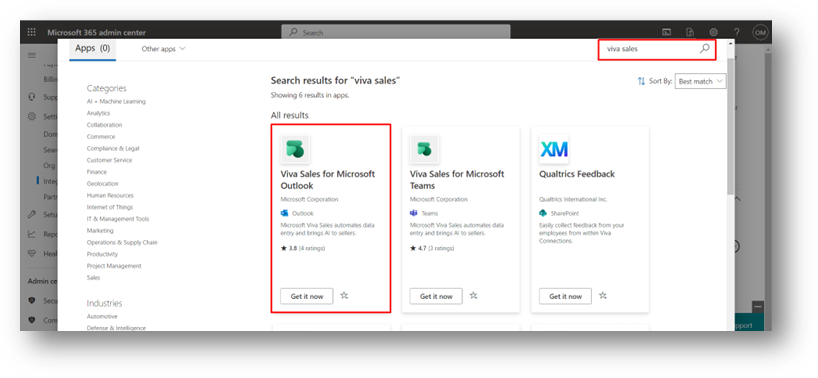
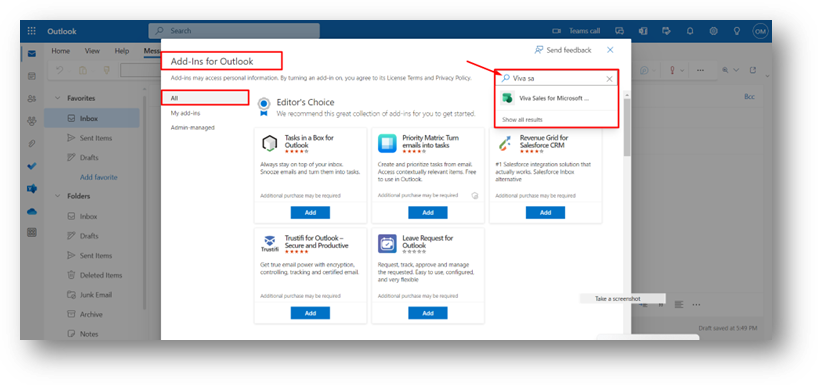
Launch the Microsoft 365 admin center, Go to the settings –> navigate to Integrated Apps–> click on Get Apps, then click on magnifying icon and search Viva Sales as shown in the below picture.
Click on Get it now, then deploy the app from Microsoft 365 admin center from the left navigation pane.
Step 2: Viva Sales App configuration for Outlook installation.
Go to the Configuration tab –> click on both checkboxes (Teams), and Viva Sales for Microsoft Outlook.
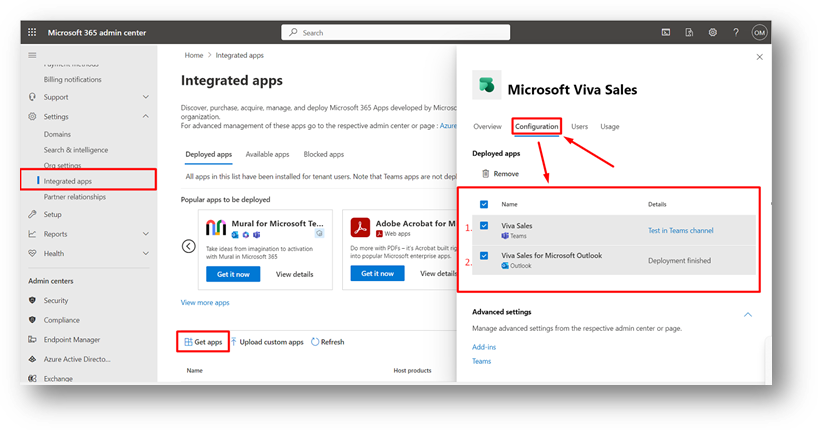
Note: The app is enabled in Teams but not installed. to install it we have to navigate to Install and pin Viva Sales in Teams.
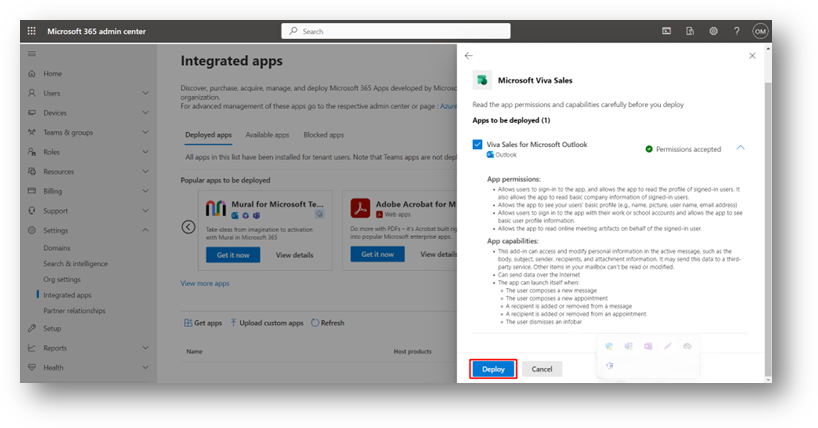
A popup will get prompted on the right-hand side, you will get navigated within the overview Click on Deploy.
Open the app it will navigate you to Outlook directly, over there we have to get an Add-in of Viva Sales for Outlook.
Open a new mail to get on the custom setting page, as shown below picture navigate to the Message section.
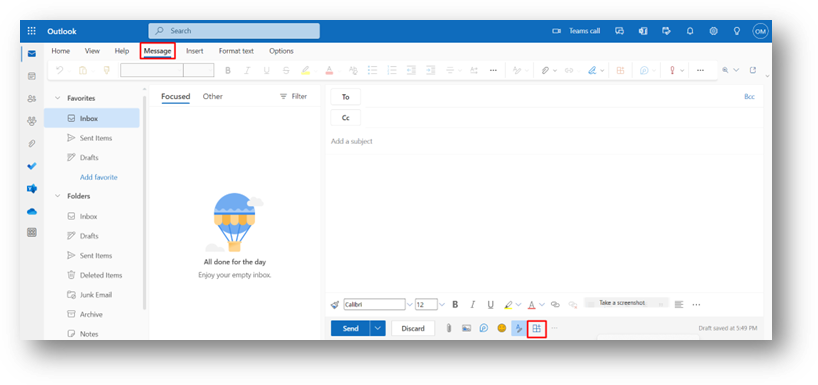
As we are already within the Draft box of the new email, navigate to the View –> View Settings, we have to Configure settings from this area, or we can configure these settings from the left-hand side pane of Outlook, have a look at the below picture,
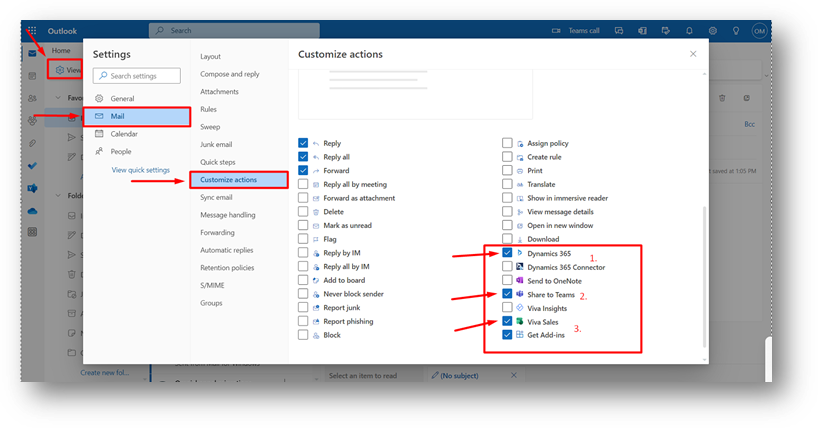
Navigate to the Mail –> Customize actions –> Click on the checkbox of Viva Sales and Dynamic 365.
Add those checked box settings,
viz:
- Dynamic 365,
- Share to Teams,
- Viva Sales.
Step3:
Now we have to Sign-up with Dynamic CRM
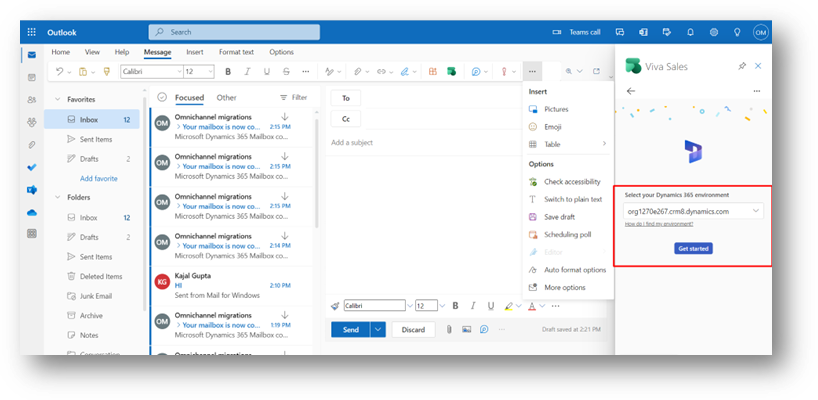
click on Sign in to Dynamic 365. Select Sign in to Dynamic 365
Select your Dynamic 365 CRM environment, sign in with your credentials, and click on Get Started.
Now, Viva Sales for Outlook has been added to the ribbon as well.
Open any email from inbox –> Click on the Viva Sales icon –> Click on the ellipse as shown in the picture –> Click on view in Dynamic 365.
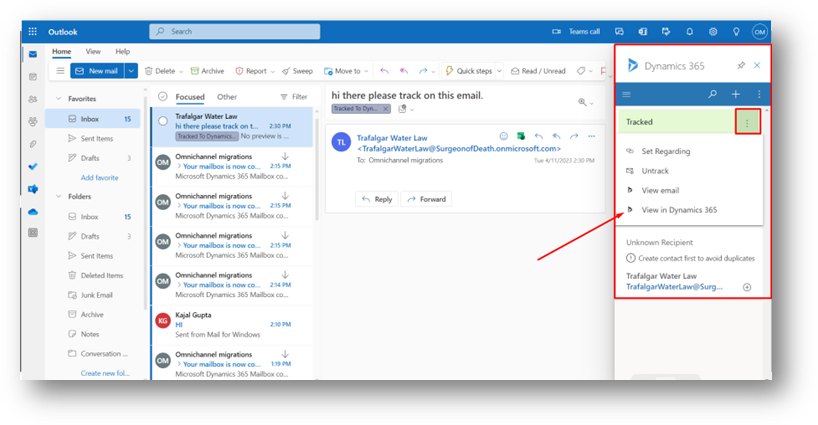
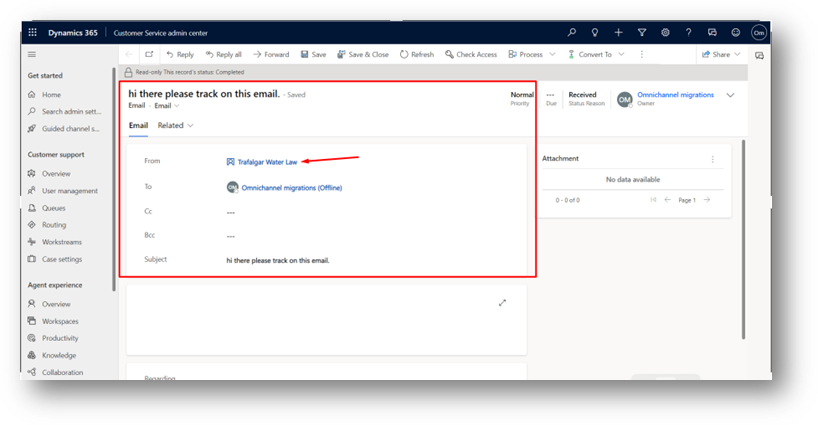
This is how the record has been created within Dynamics directly through an email from Microsoft Outlook.
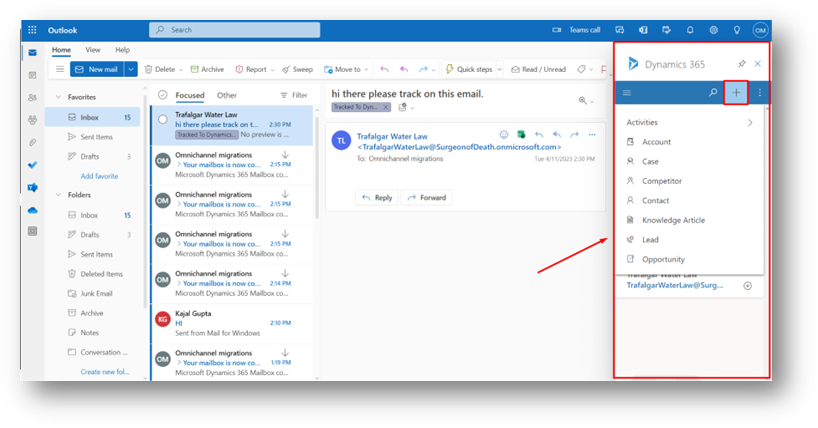
From the + Icon we can play around with different dynamic capabilities,
The right navigation pane has multiple areas it interacts with Dynamic 365 directly from an outlook.
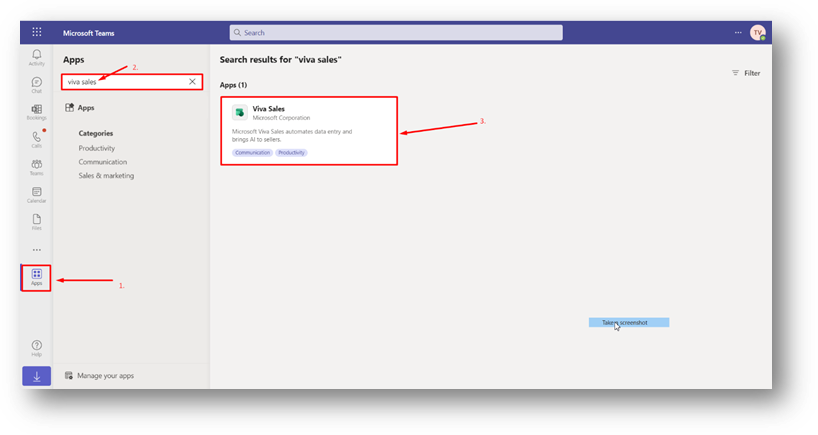
Go to Microsoft Teams –> Apps –> On the search bar Search for Viva Sales –> Open.
We can perform Dynamic 365 capabilities directly from Outlook.
- Set up this record as an account,
- Create a contact directly within dynamics from this record by clicking on Contact,
- Configure an email record as an Opportunity within Dynamics CRM,
So far, we have seen Microsoft Outlook integration functionalities with Dynamic 365 Apps.
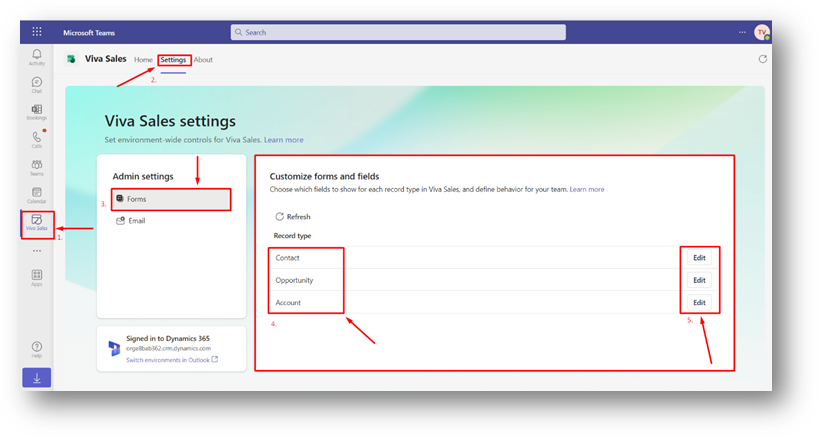
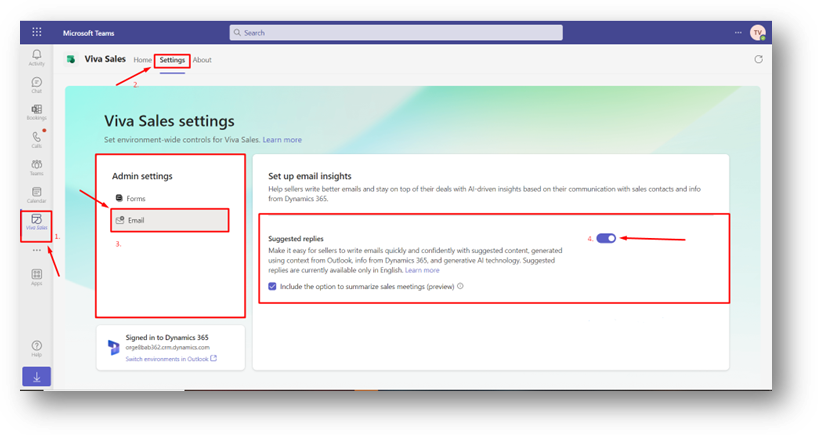
Setup for AI-generated emails:
We can configure AI- generated automatic email replies. for configuring settings, we need to open Microsoft Teams. Go to the Viva Sales app –> Open Admin settings –> Email –> Turn on the toggle of Suggested replies.
After provisioning these settings, go to Microsoft Outlook and click on the New Email
Click on a New Email to draft a new one, on the right-hand side you can see, Describe the email you want below from this section we can use keywords, we want to be drafted within an email body. For the same please do check that second box below the Describe email you want.
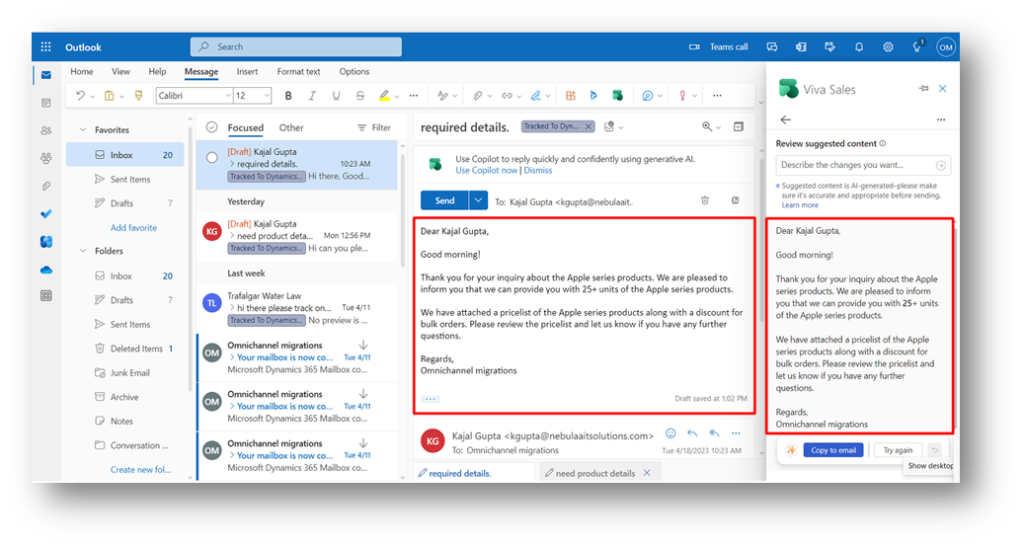
Result:
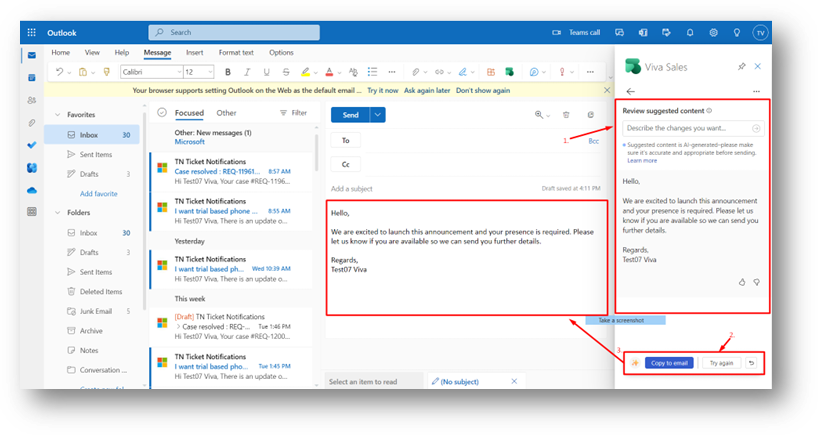
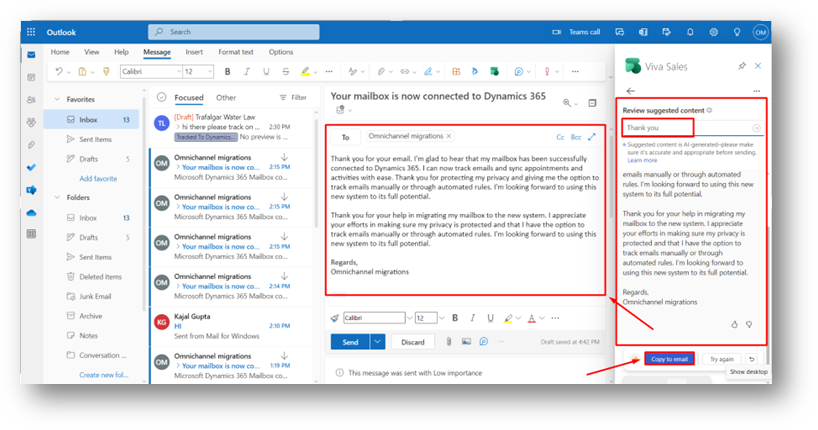
After getting the AI-Generated email draft, check the email body if that doesn’t looks good just click on Try again, it will give another drafted email content, once it looks the same as per the expectation, click on Copy to email.
We can define the email body with the required keywords to get the email drafted.
Common Scenarios: Whenever there is the situation that customer asks for details product details, we can typically build an opportunity directly from Outlook and add the relevant product to that opportunity within Dynamic CRM, which will then automatically send that customer an AI-Generated reply along with the product specifications.
Result:
The post Install Viva Sales for Outlook and D365 CE. appeared first on Nebulaa IT Solutions.
*This post is locked for comments