


Quick walkthrough of setting up a Unified Developer Environment (UDE) for D365
Views (8527)
 21
User Group Leader
21
User Group Leader
 Like
Like Share
Share
 Report
In the context of Microsoft Dynamics 365 Finance and Operations (D365FO), an UDE, or Unified Developer Experience, refers to the new development environment and tools that streamline the process of creating and deploying extensions and customizations for D365FO. It aims to simplify development by providing a consistent and unified experience across different platforms and tools, including the Power Platform.
Very briefly, a Unified Development Experience, which is used to develop and deploy customizations and extensions. Imagine the amount of cost you might save, if you have an UDE instance up and running, as contrary to have a CHE, which even if you have turned if off, could still incur a substantial cost for storage. Plus a UDE doesn’t have Azure dependencies too, which can help in cost management further.
This short write-up can help you with necessary commands and tipis that you might be needing to set up an UDE and common trouble shootings you might need to do.
Prerequisites
- Visual Studio Enterprise or Professional
- You must be having an App registration with a valid secret key in place, before you start.
- You must have an ADMIN rights in your Power portal Admin Centre and there should be substantial amount of space left in Dataverse (1-1.5 GB).
Also for the particular user whom you want to do the setup, should be given System customizer/administratior role. Once you have your instance up and running (explained below), you can get into https://make.powerapps.com >> get into the Environment created >> Advance settings >> Users >> the user whom you want to assign the role >> Manage role >> and select the below to assign:
- That SQLExpress\LocalDB in your already present in your system beforehand, as a part of VS2022 installation components:
- Your laptop must also be having good amount of space (~20 GB) left to make this configuration successful.
- Also must you check you have DGML editor installed in your VS component:
Let us begin the installation of a new instance/environment of D365. We will be using Windows PowerShell to administer it, for reasons mentioned below.
Step 1
Launch “Power shell” from Windows Start >> Run as administrator >> to start with the following command:Install-Module -Name Microsoft.PowerApps.Administration.PowerShell
This would ask you confirm necessary modules which you would be needing to proceed further.
Next define your App Id in the command prompt, which you would get from azure App registration:
$appId = “742919f1-f24e-436d-820c-4191dbe00268”
Next you need to login with your admin credential, by feeding in the following command:
New-PowerAppManagementApp -ApplicationId $appId
And then with following command creating a connect/session with power platform API
Add-PowerAppsAccount -Endpoint prod
This would open a popup, letting you feed in your User Id and password.
Next let us define a JSON variable which would contain the details of the Instance you want to spin up:
$jsonObjectUInput = @"
{
"PostProvisioningPackages":
[
{
"applicationUniqueName" : "msdyn_FinanceAndOperationsProvisioningAppAnchor",
"parameters" : "DevToolsEnabled=true|DemoDataEnabaled=true"
}
]
}
"@ | ConvertFrom-Json
The above JSON indicates a parameter: DevToolsEnabled = true, which will in fact enable the connect of VS Studio with the new installation. By feeding DemoDataEnabled= true, evidently also leads to installing demo data in the application.
Now we will start the installation:
New-AdminPowerAppEnvironment -DisplayName "Sandbox UDE DEV2" -EnvironmentSku Sandbox -Templates "D365_FinOps_Finance" -TemplateMetadata $ jsonObjectUInput -LocationName "unitedstates" -ProvisionDatabase
Where I am specifying the name of the instance I am going to spin up, its location and other associated details.
Following are the Locations that are currently supported:
unitedstates, unitedstatesfirstrelease, europe, asia, australia, india, japan, canada, unitedkingdom, southamerica, france, unitedarabemirates, germany, switzerland, norway, korea, southafrica, Sweden
Select a required template: D365_FinOps_Finance is what we are selecting; apart from these, you can also proceed with:
Step 2
Once you have the instance in place, you can find the same as under PPAC >> Environment >>
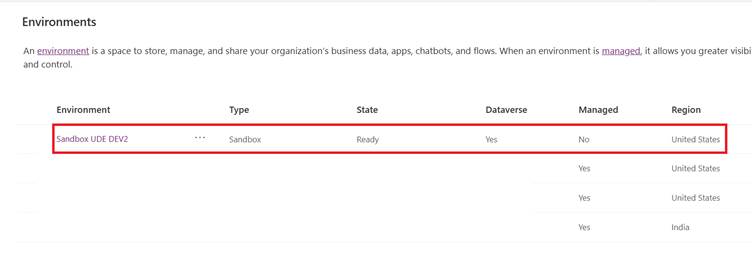
Click on the same would get you the details:
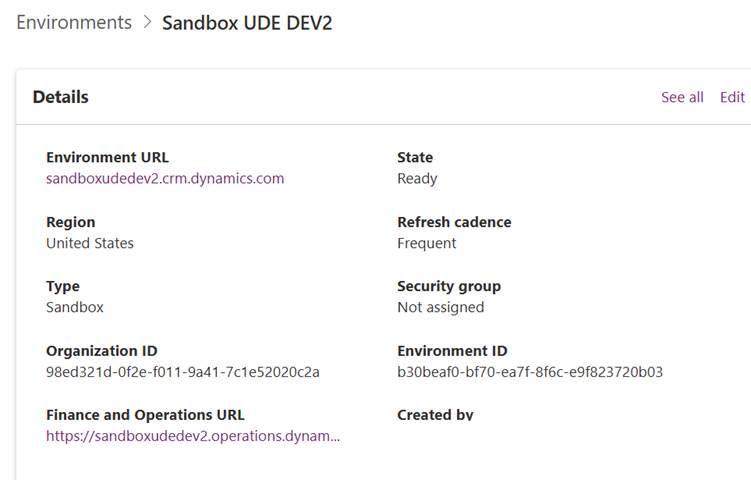
Implying a well connected environment where we have D365F&O and CE on its two ends 😊
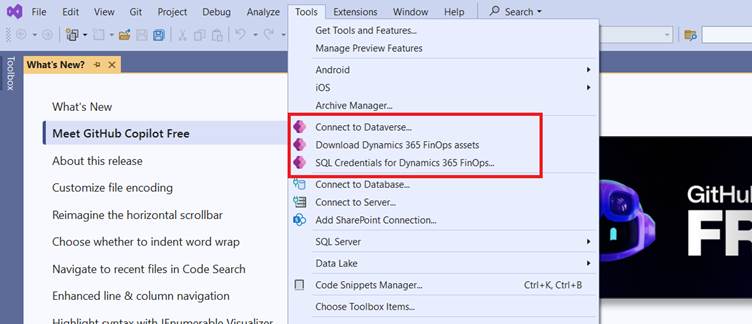
Open VS 2022 >> Ensure that you have Power Platform tools installed:

Select Install and close the Visual Studio, allowing the extension be installed through VSIX. This would result in showing up the following menu Items as Under Tools:
Click on Connect to Dataverse, and the following prompt shows up:
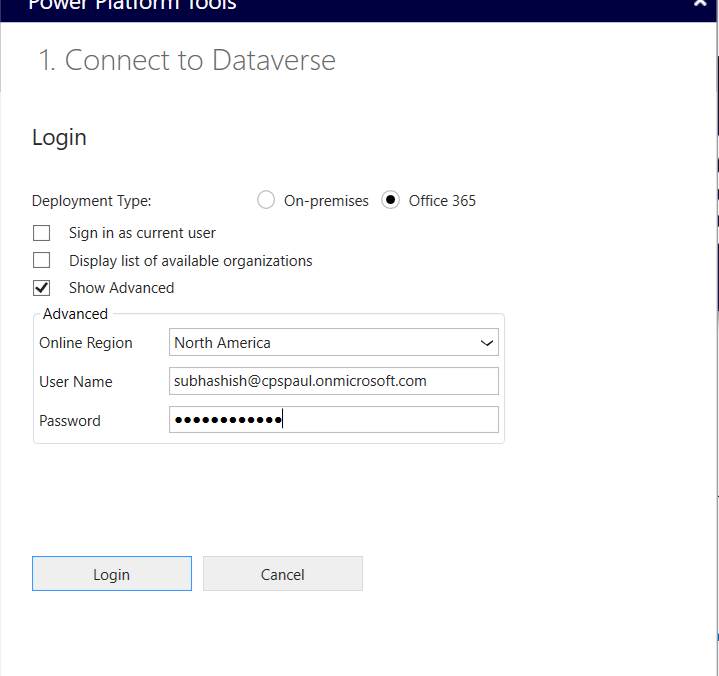
Uncheck ‘Sign in as current user’. Click Show Advanced >> Connect with your admin account and the location which you provided while installing.
Click on the same would get you the details:
Implying a well connected environment where we have D365F&O and CE on its two ends 😊
Open VS 2022 >> Ensure that you have Power Platform tools installed:
Select Install and close the Visual Studio, allowing the extension be installed through VSIX. This would result in showing up the following menu Items as Under Tools:
Click on Connect to Dataverse, and the following prompt shows up:
Uncheck ‘Sign in as current user’. Click Show Advanced >> Connect with your admin account and the location which you provided while installing.
Note: you need to check on "Display list of available organizations", should you have more than one instances to choose, from your login Id.
The following prompt will show up:

Listing the solutions what are currently are part of your Dataverse instance. Select Default to Continue.
Once this is done, you must head for “Download D365F&O assets”, which would give out a popup like this:
“Proceed with downloading the missing metadata and F&O VS Extension from the version <<version>>”, if you have not already downloaded them.
The download baggage could be found as under Local data folder:
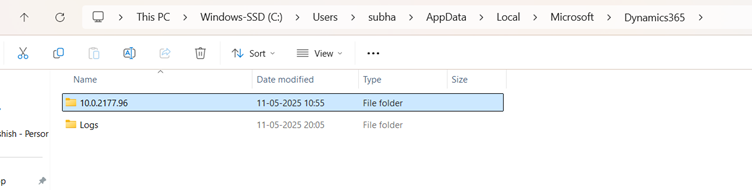
Inside which it does have the installer (VSIX) file for the D365F&O extension. After this, you7 just sit back and relax: the setting Tool >> Option >> Power Platform >> enable Auto setup for Unified development will
The following prompt will show up:
Listing the solutions what are currently are part of your Dataverse instance. Select Default to Continue.
Once this is done, you must head for “Download D365F&O assets”, which would give out a popup like this:
“Proceed with downloading the missing metadata and F&O VS Extension from the version <<version>>”, if you have not already downloaded them.
The download baggage could be found as under Local data folder:
Inside which it does have the installer (VSIX) file for the D365F&O extension. After this, you7 just sit back and relax: the setting Tool >> Option >> Power Platform >> enable Auto setup for Unified development will
- Install D365F&O extension from the VSIX
- Extract the content of the PackagesLocalDirectory from the above step, and create a folder as under >> C:\\AOSSERVICE (described below, and which you can change, per your convenience).
- Extract and restore the BAK file in your SQL express DB
At any givenb point of time, you can check what's the status of deployment and readyness, by visting View >> Output Window:
Once it’s over (typically takes 4 hours to complete) the Visual Studio reopens (if it doesn’t you manually reopen it) and you would see entire setup is complete (simply wow) and all you need to do is to check out Visual Studio extension as under:
Alternately you can launch the same from View >> Application Explorer (CTRL+E, CTRL+E) and let the following window ensue:
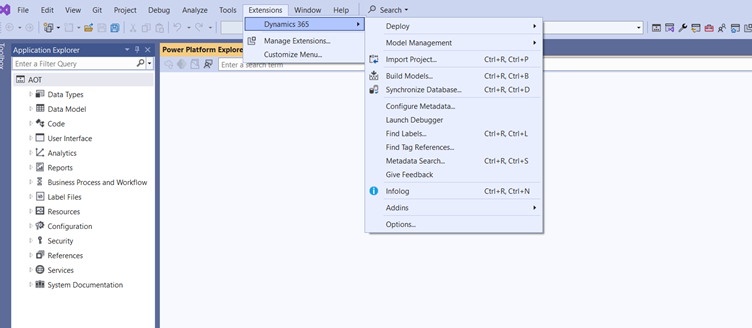
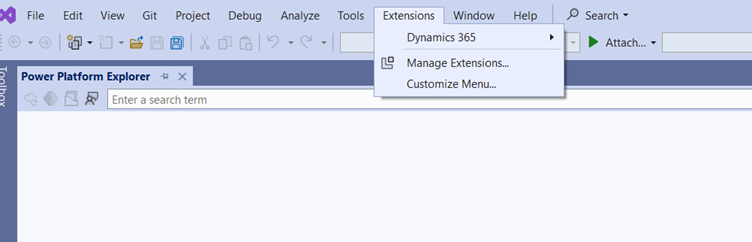
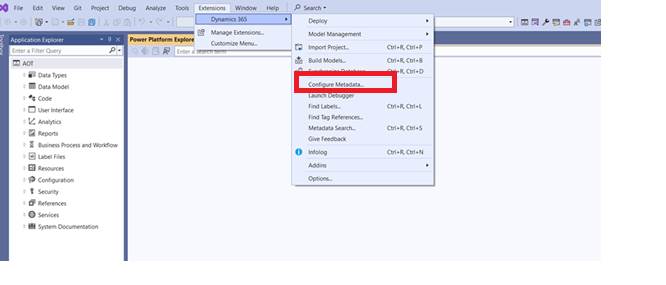
Next you need to configure the Metadata for your application by going to Extension >> Dynamics 365 >> Configure metadata:
And you here you need you setup the instance which you created and the set of the configuration points that you need to provide to Visual Studio Solution:
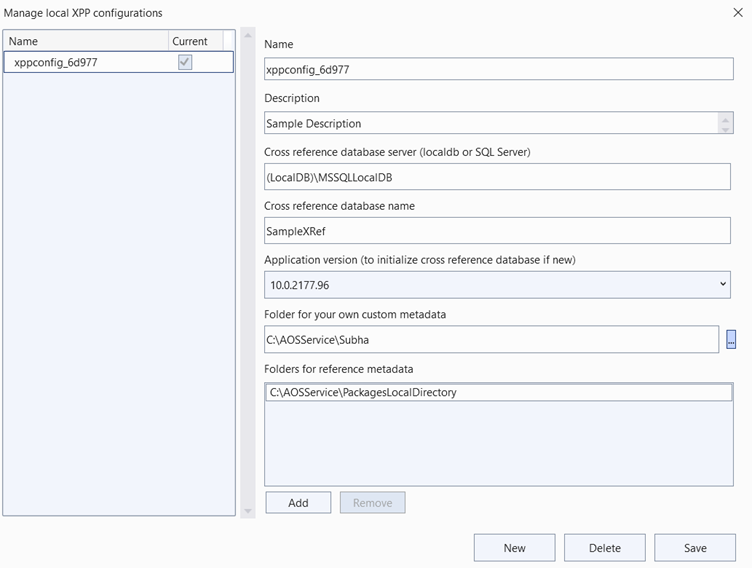
Click Save.
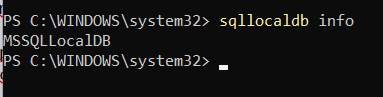
Note: You need to ensure that (LocalDB)\MSSQLLocalDB actually exists:
Also the prompt validates if you have failed provide any correct data anywhere, else it will red out the control and won’t let you save it.
And we are using the same AOSService folder where we dumped the extract of PackagesLocalDirectory Zipped file.
This should download the cross references and all AOT elements into workspace:
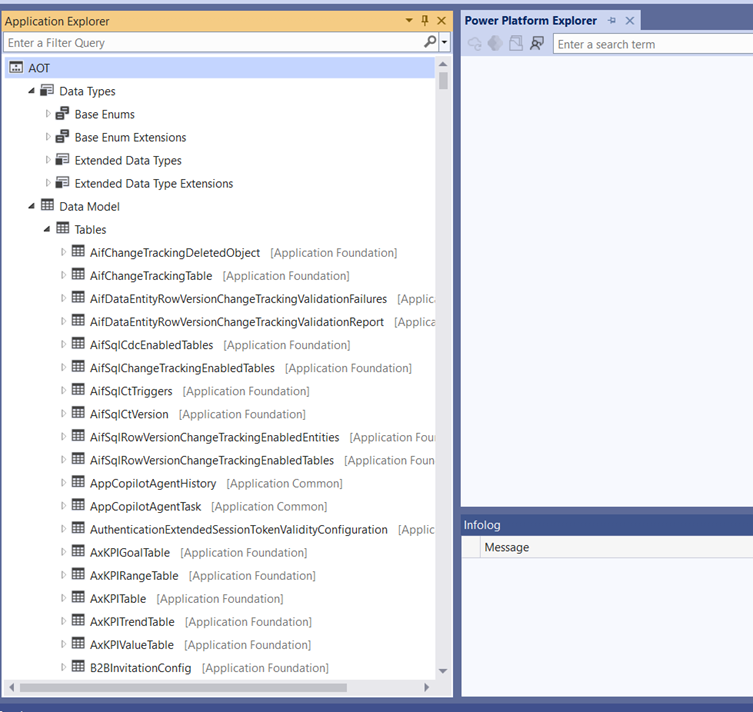
Alternately you can launch the same from View >> Application Explorer (CTRL+E, CTRL+E) and let the following window ensue:
Next you need to configure the Metadata for your application by going to Extension >> Dynamics 365 >> Configure metadata:
And you here you need you setup the instance which you created and the set of the configuration points that you need to provide to Visual Studio Solution:
Click Save.
Note: You need to ensure that (LocalDB)\MSSQLLocalDB actually exists:
Also the prompt validates if you have failed provide any correct data anywhere, else it will red out the control and won’t let you save it.
And we are using the same AOSService folder where we dumped the extract of PackagesLocalDirectory Zipped file.
This should download the cross references and all AOT elements into workspace:
You can have a look at my video blog: https://www.youtube.com/watch?v=6pYCsSCGr9g, just in case if you face with any confusion anywhere 😊
Love you all and Namaste
Love you all and Namaste
*This post is locked for comments