


 412
412 Like
Like Share
Share
 Report
Introduction:
In this blog post, we will be exploring the process of setting up live chat and chatbot. We will begin by covering the fundamentals and then move on to all the necessary steps required to configure it successfully. So, let’s get started!
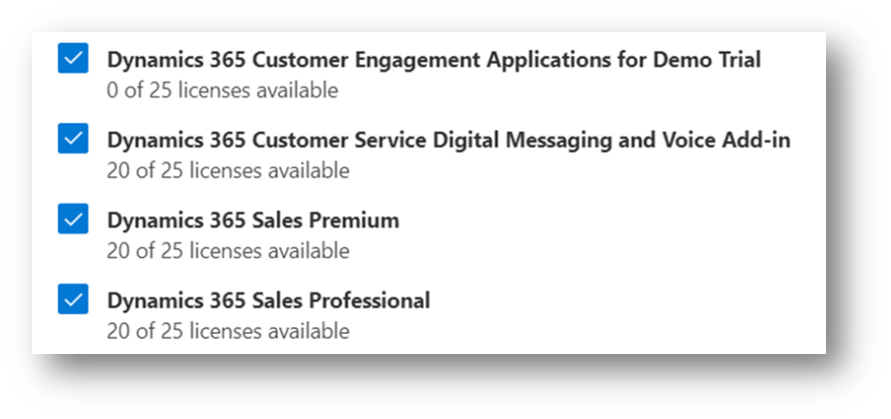
- Licenses required:
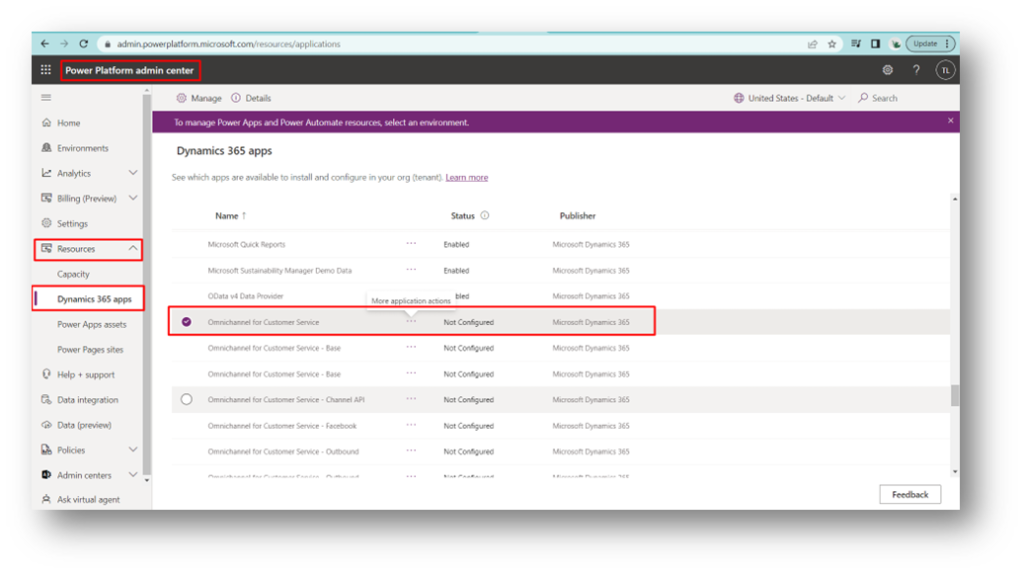
2. Manage the omnichannel:
Open Power Platform admin center > select Resources > Dynamic 365 apps > Omnichannel for customer service.
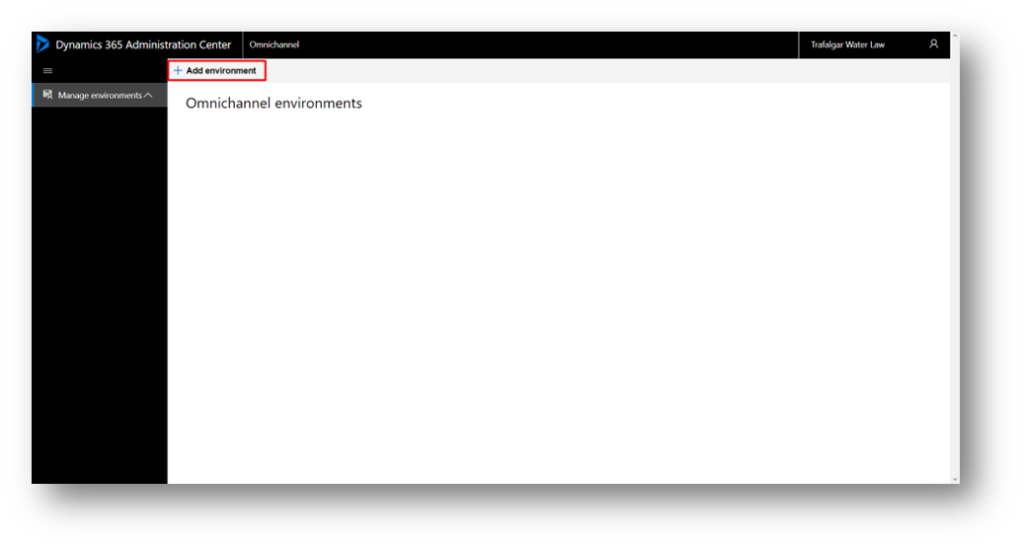
Add your environment.
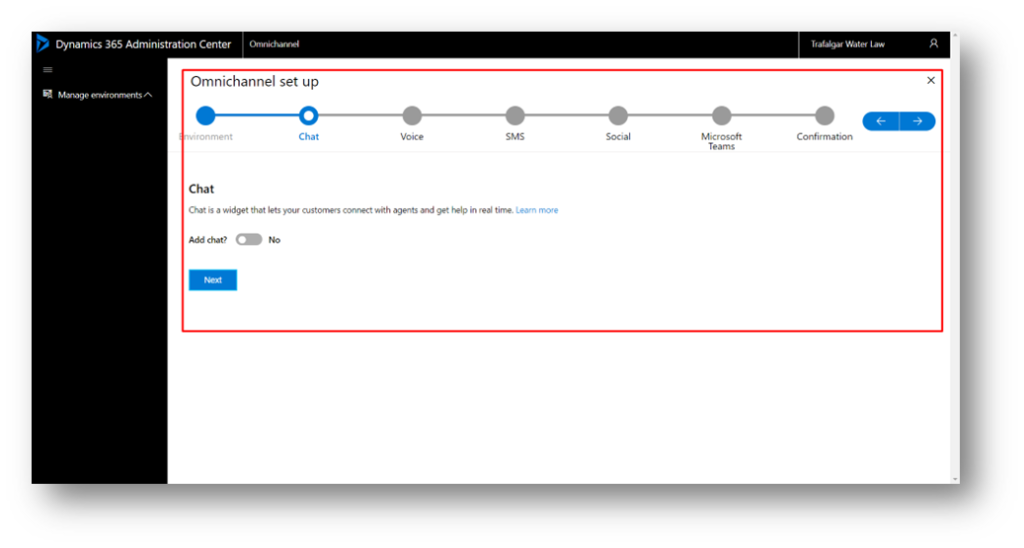
You will get the Omnichannel set up page, set the toggle to Yes.
Click on Next.
Please wait a few moments while the setup is being installed.
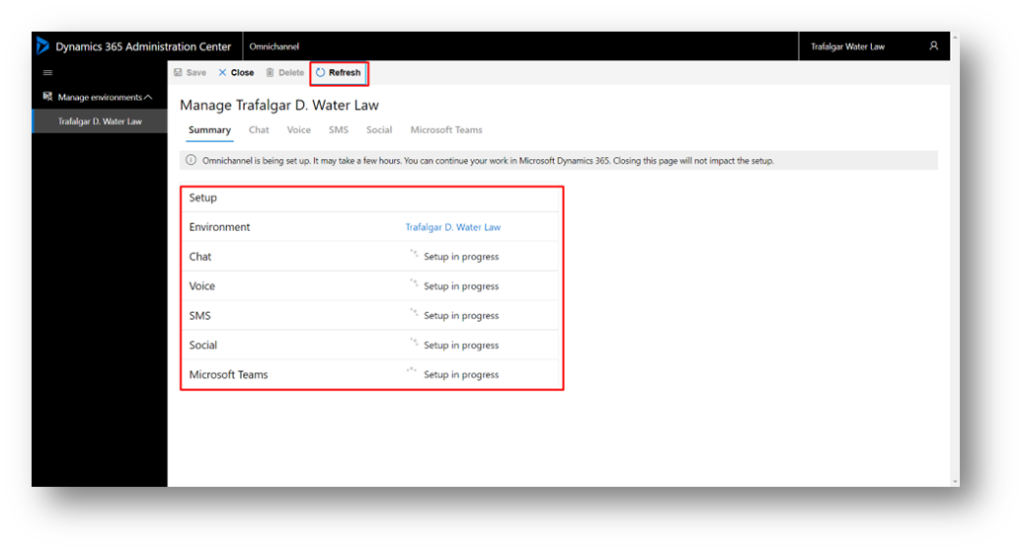
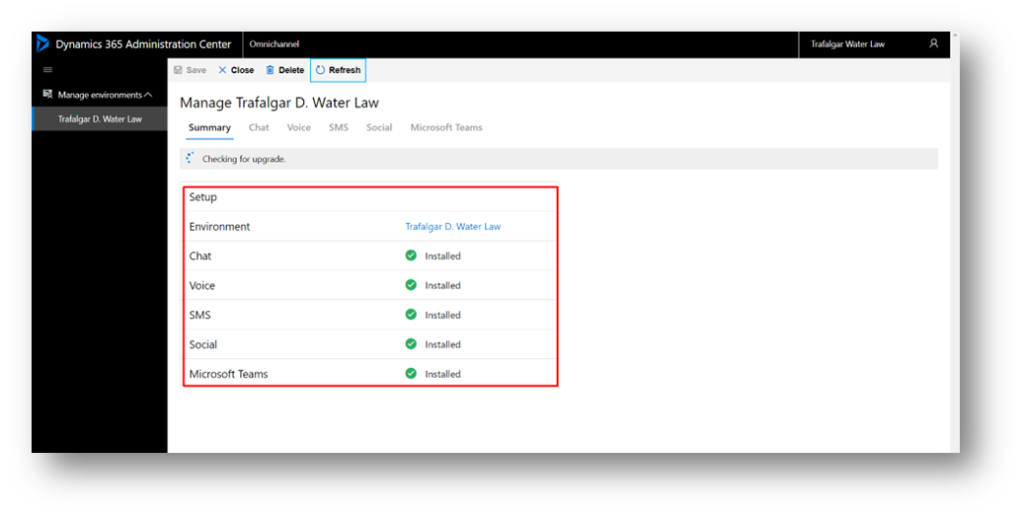
Click on Refresh to check the status of the setup.
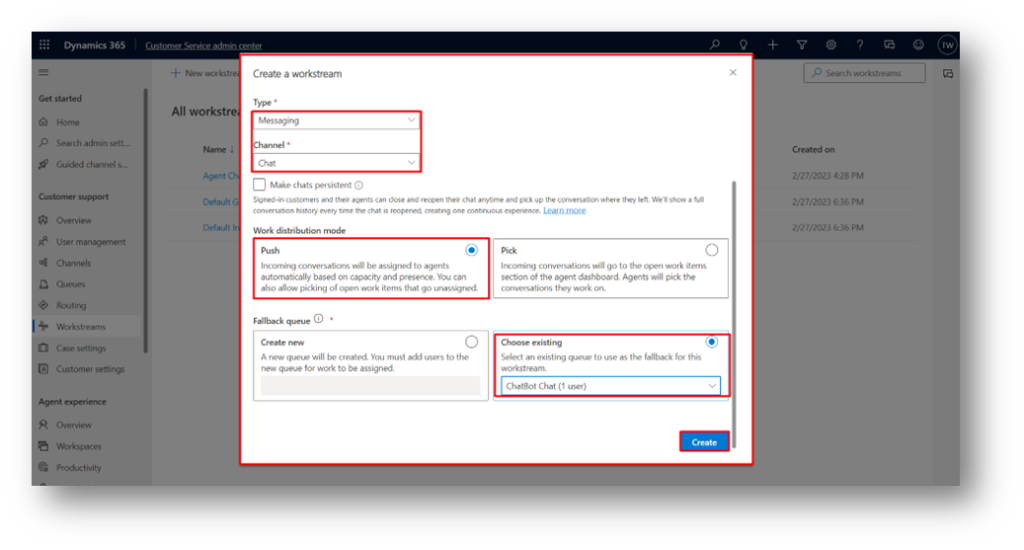
3. Create workstream:
a. Select the Workstream type as Messaging and Channel type as Chat.
b. Select the Work Distribution mode as Push.
c. Select the Fallback queue for the workstream. You can Create new or Choose existing.
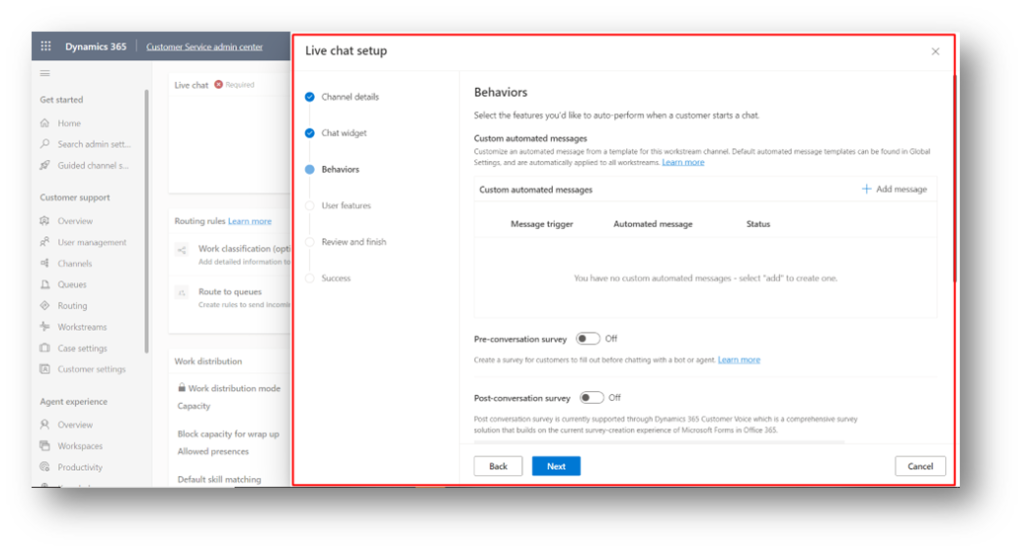
4. Create Live chat channel:
Open the Customer service admin center > workstream > add Channel.
Follow below steps:
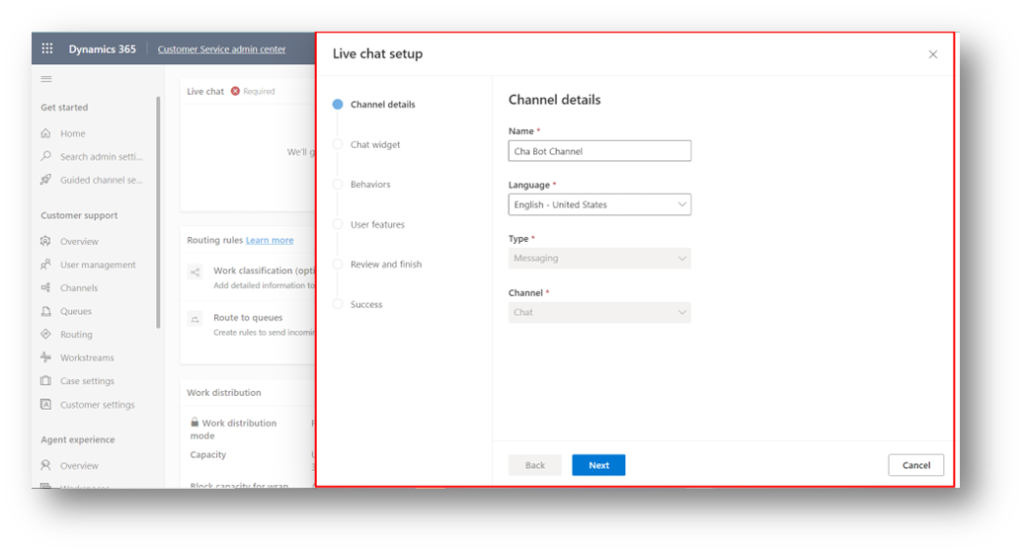
In user features turn on the Attachments , Customer notifications, Voice and Video calls options.
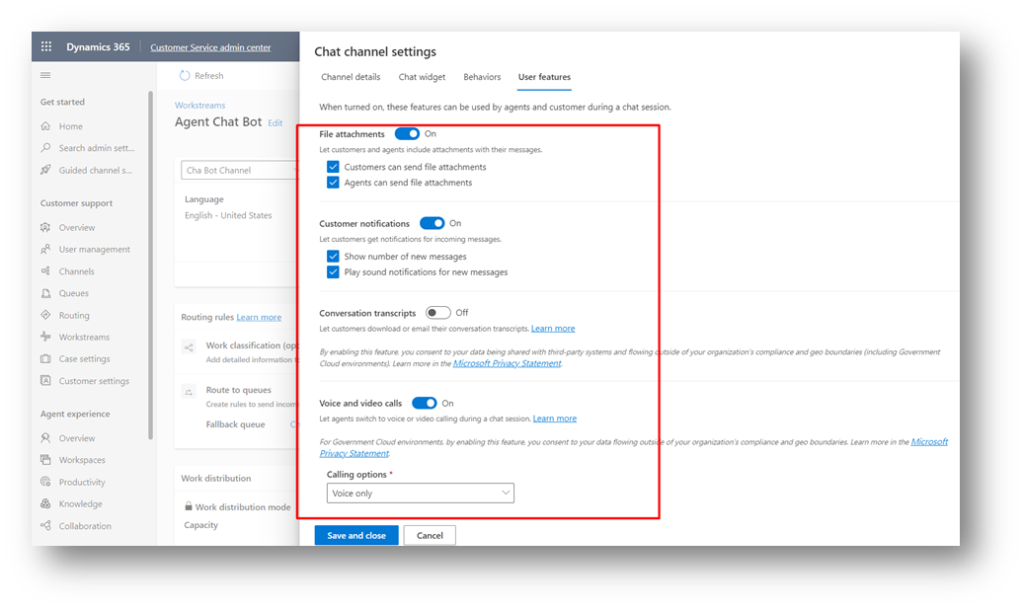
Click on Next.
Click on Create Channel.

Note: Copy this code snippet and paste it into a notepad as we will require it at the end of the configuration.
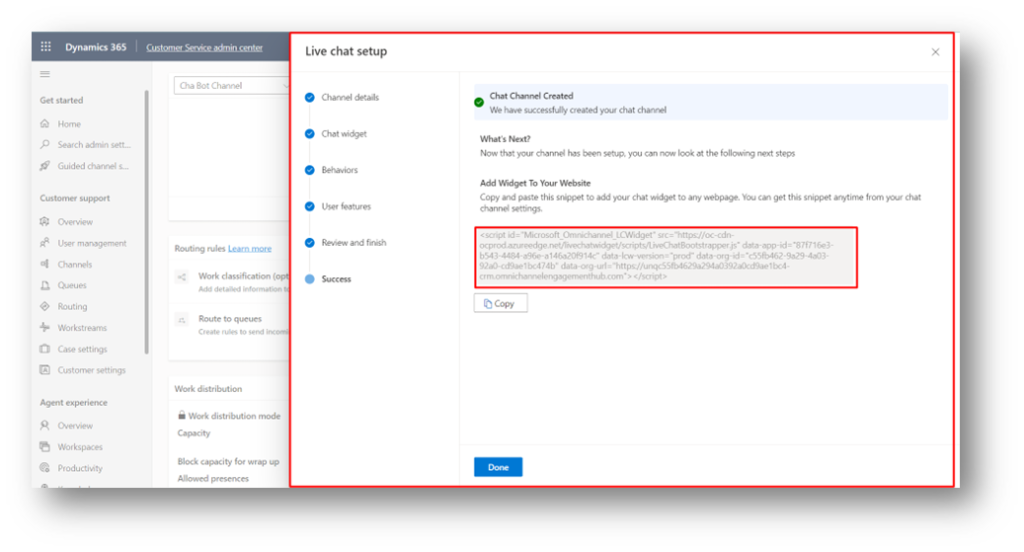
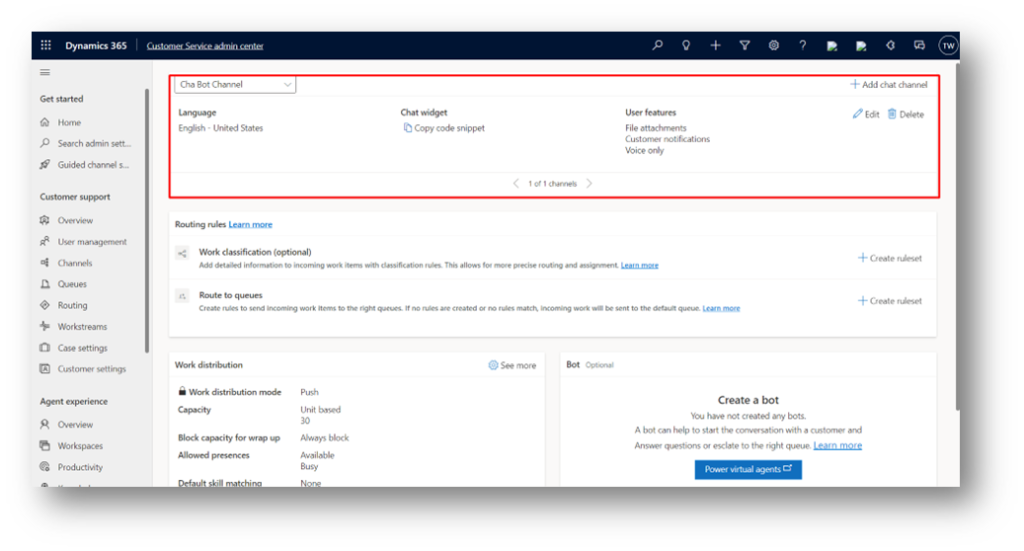
Channel is created.
5. Lets Create a Chatbot:

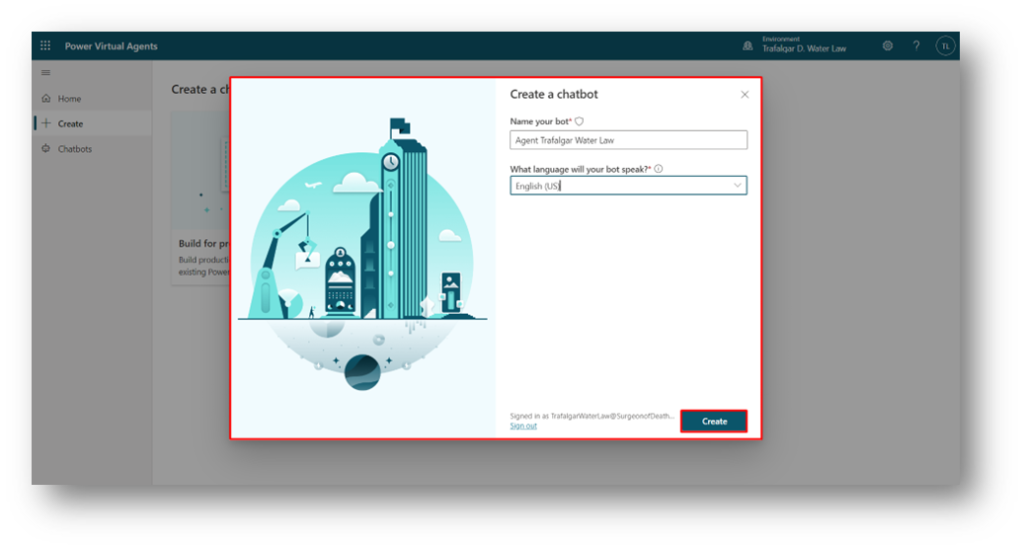
Click on “Power Virtual Agents” to be directed to the welcome page of PVA. Select your Country/Region and click on “Get Started.”

Give your chatbot a name and specify the language that the bot will speak. Then, click on “Create.”
Topics in Power Virtual Agent(PVA)
– I will be updating the Greeting topic in my example.
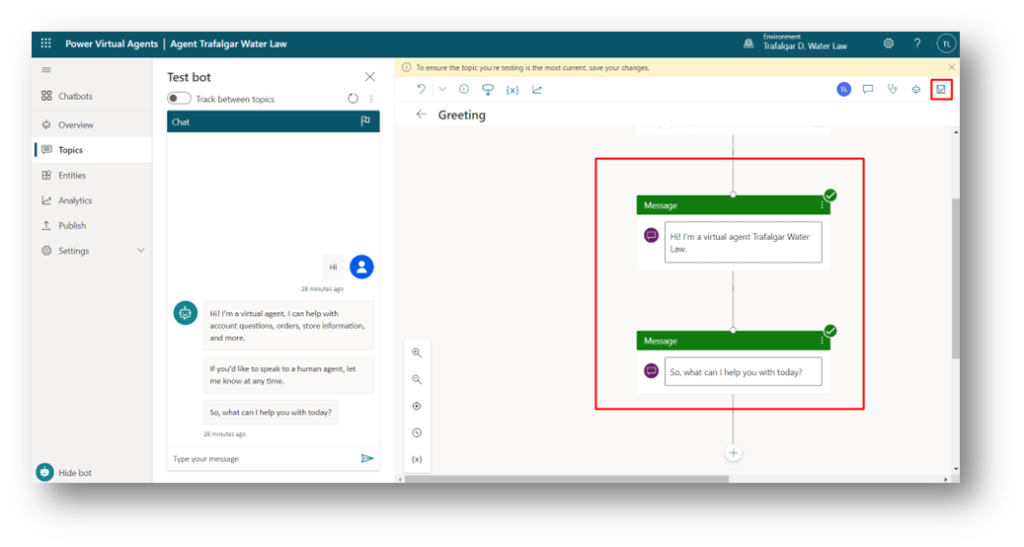
Click on the Topic > Greeting > Edit.
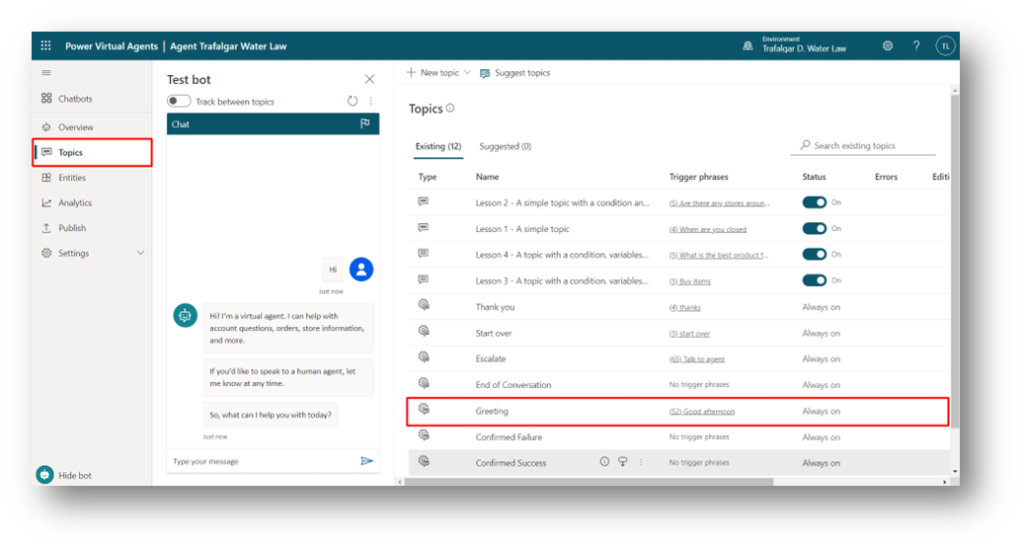
Edit the greetings for your bot.
You can also create your own topics by clicking on Topics from the left navigation pane.
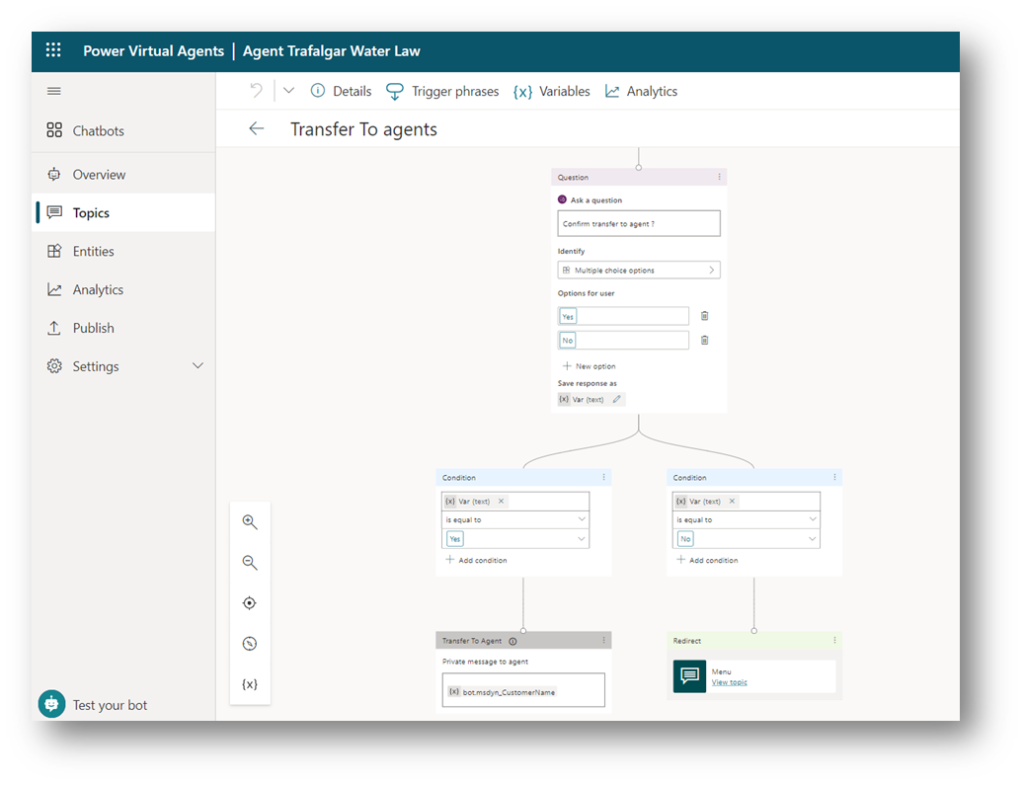
Here I have created a new topic “transfer to agent”, in this topic we are transferring chat to agent.
Publish the chatbot.
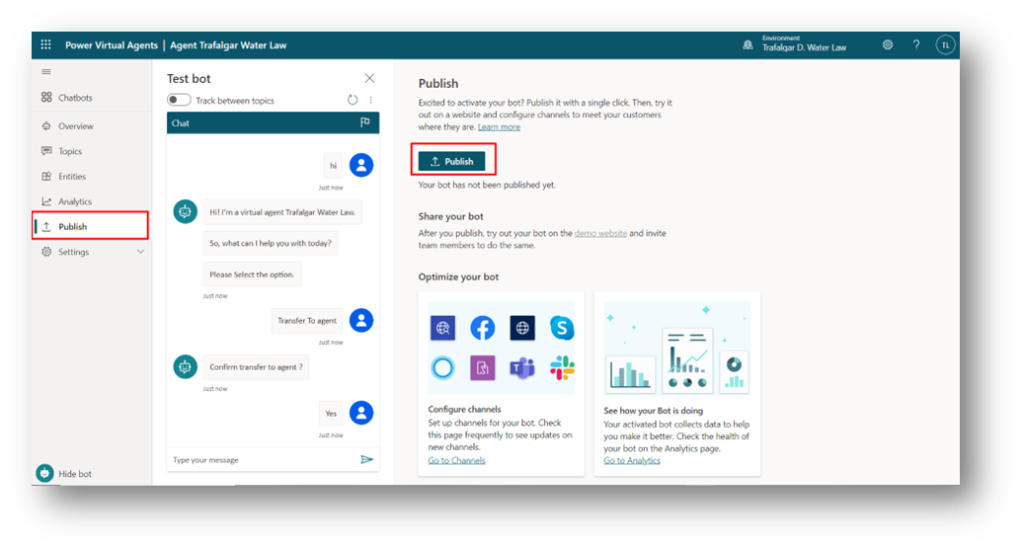
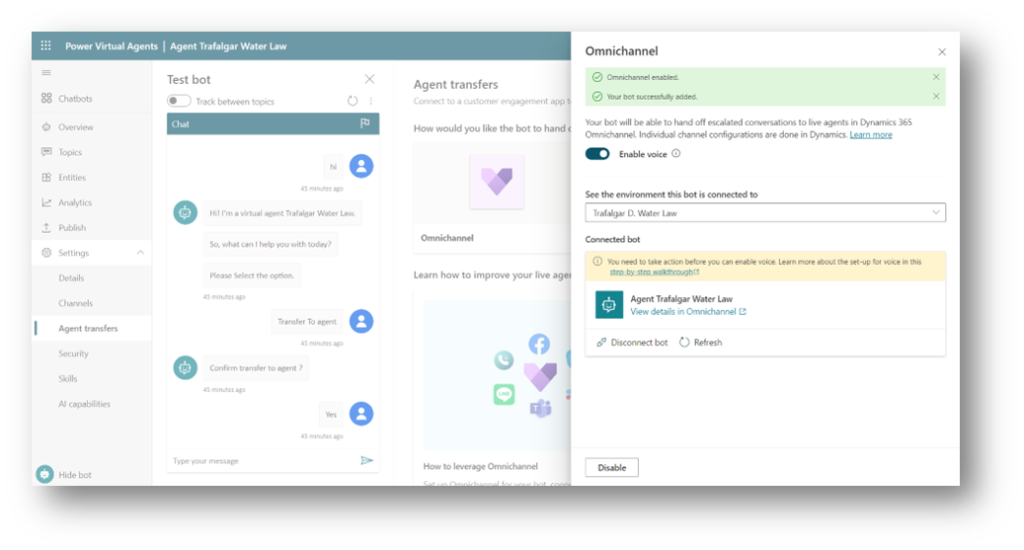
6.Configure the chat bot with the omnichannel:
Click on > Settings > Agent transfer > Omnichannel.
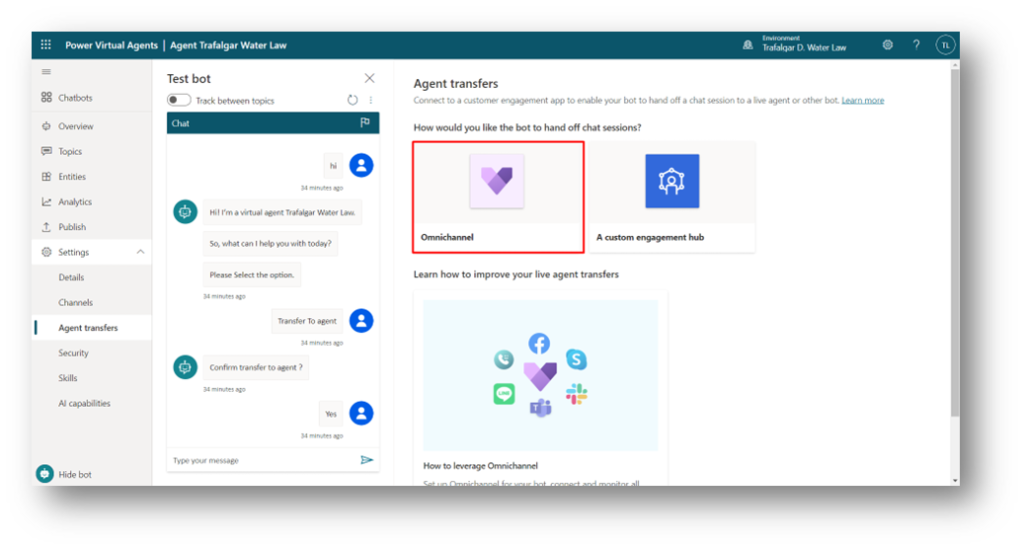
It enables Omnichannel and a panel will open in the left.
Enable Voice chat option and add the Application Id.
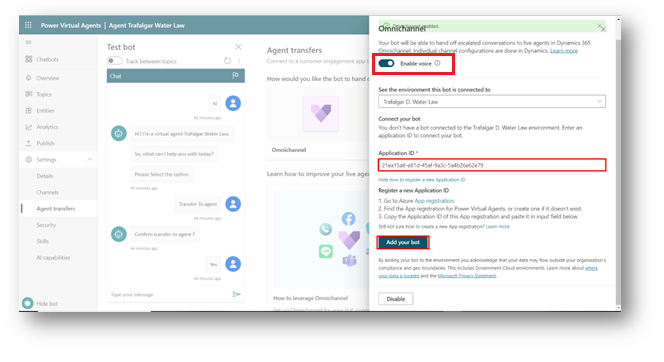
Note: To get Application Id we’ve to create and register an app in Microsoft Azure.
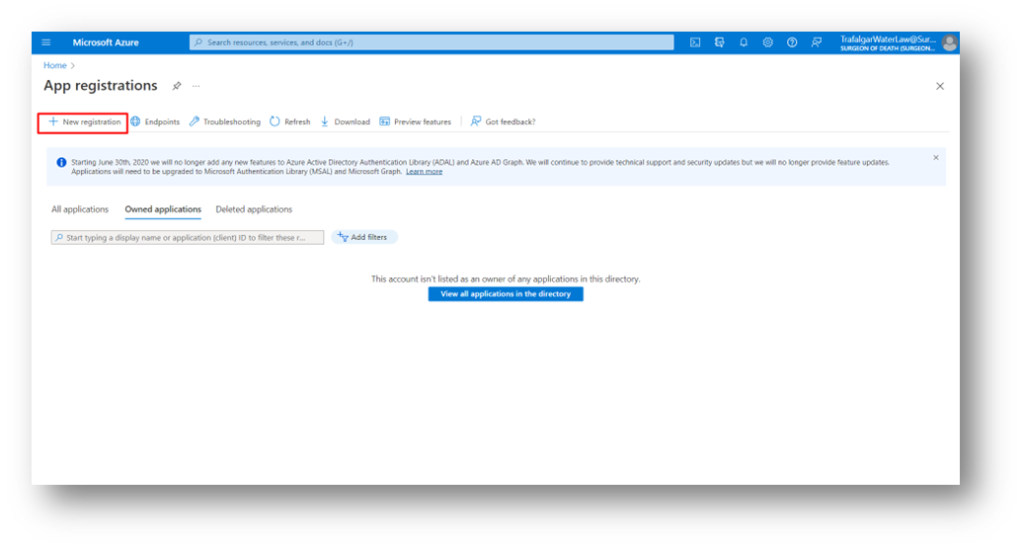
Follow below steps to register the app:
Click on “App registrations. You will be directed to Microsoft Azure.
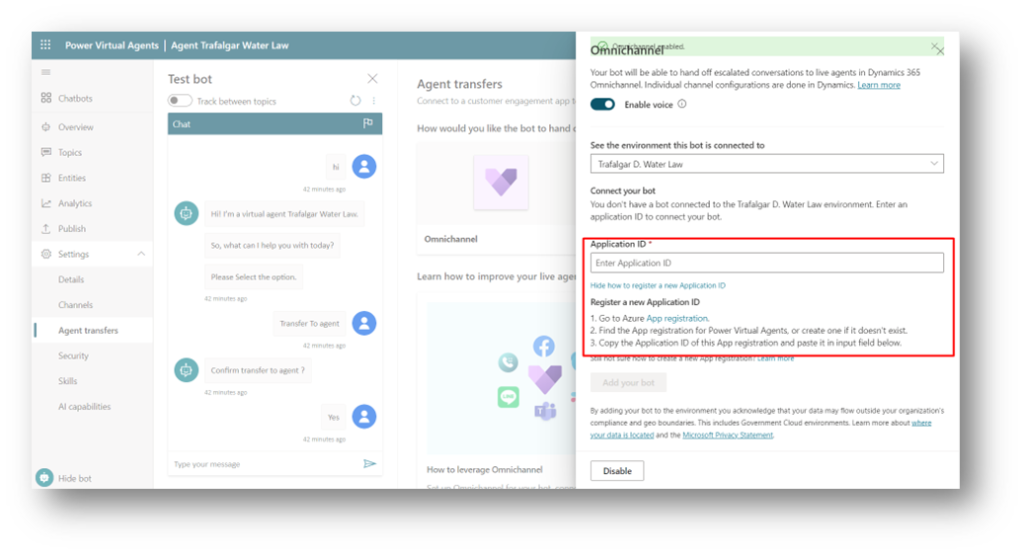
Then click on New Registration.
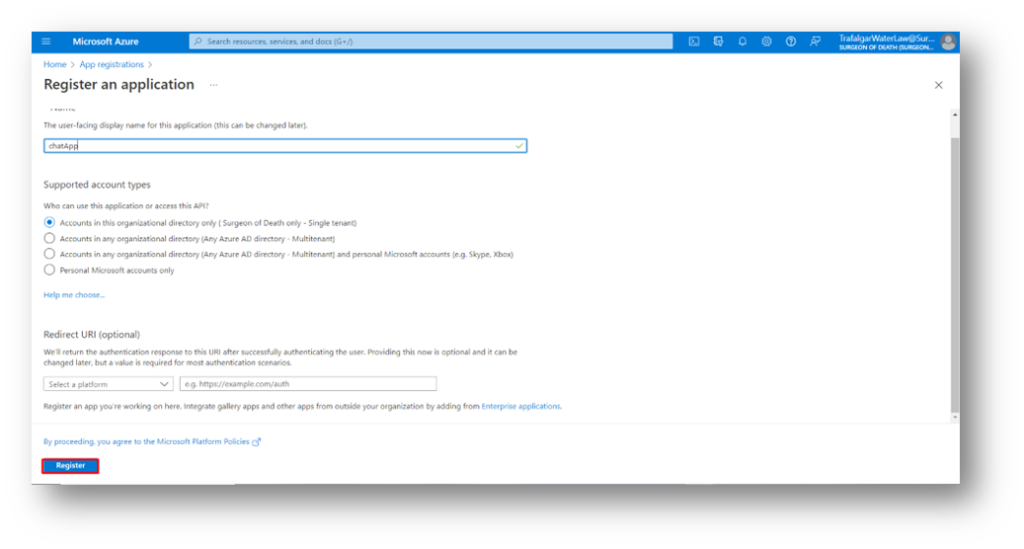
Register an application as Shown below.
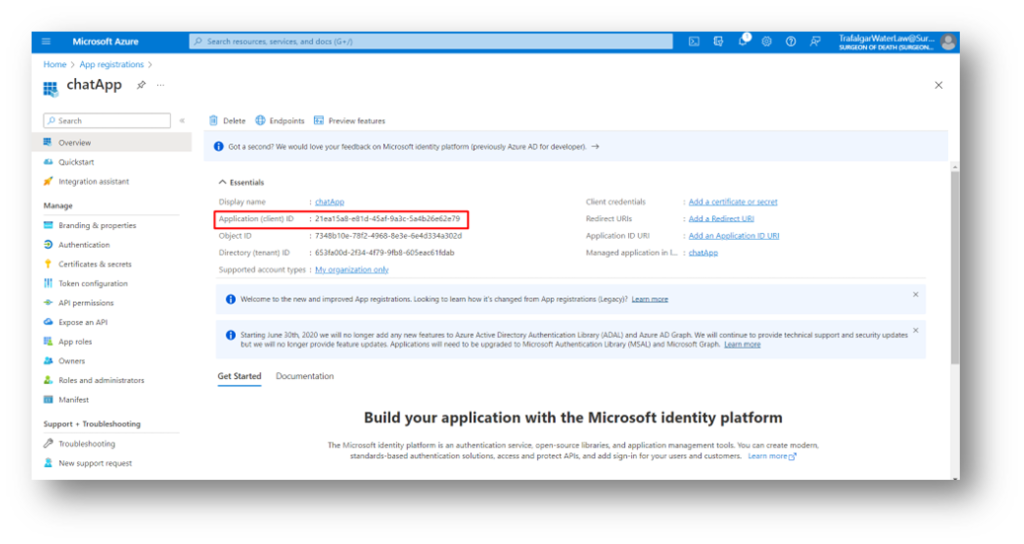
After successfully creating your application, you will be able to see the application ID as shown below.
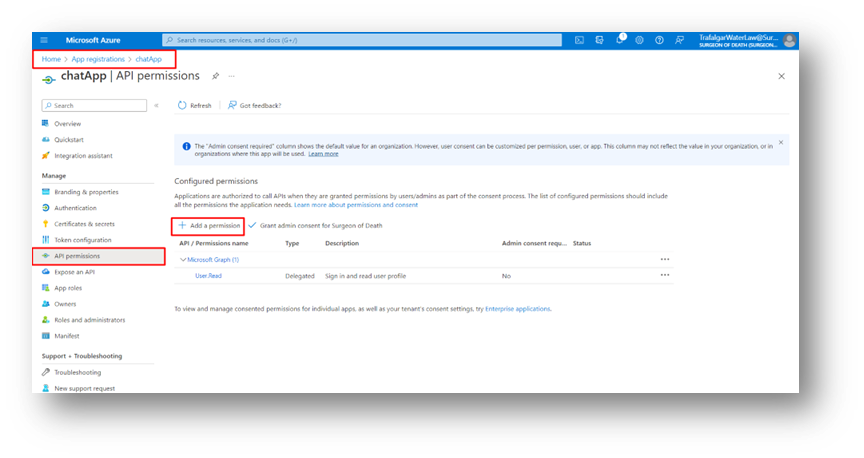
Then go to API permission, add a permission as shown below.
Select Dynamics CRM API.
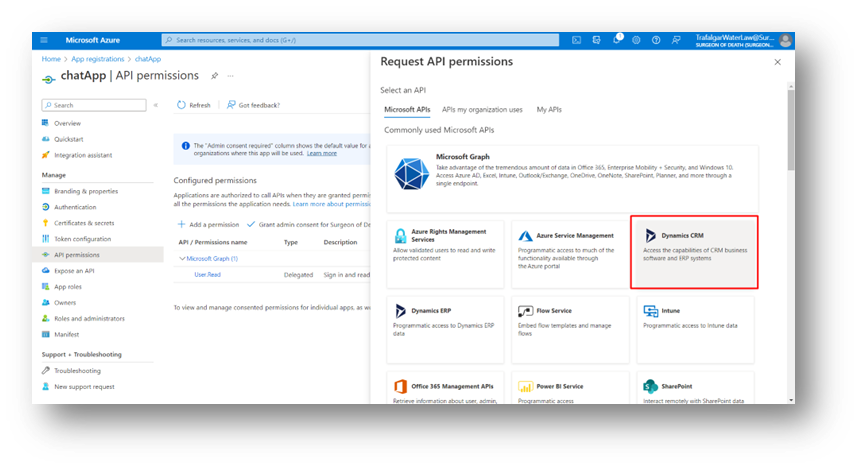
Click on Add Permission.
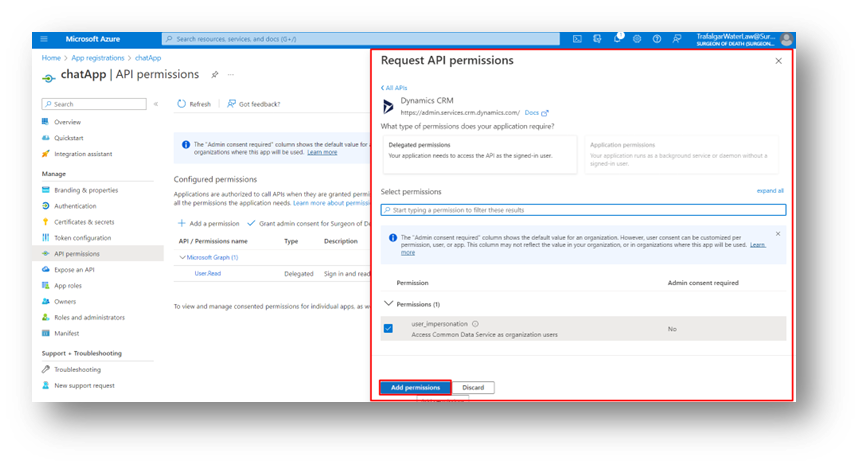
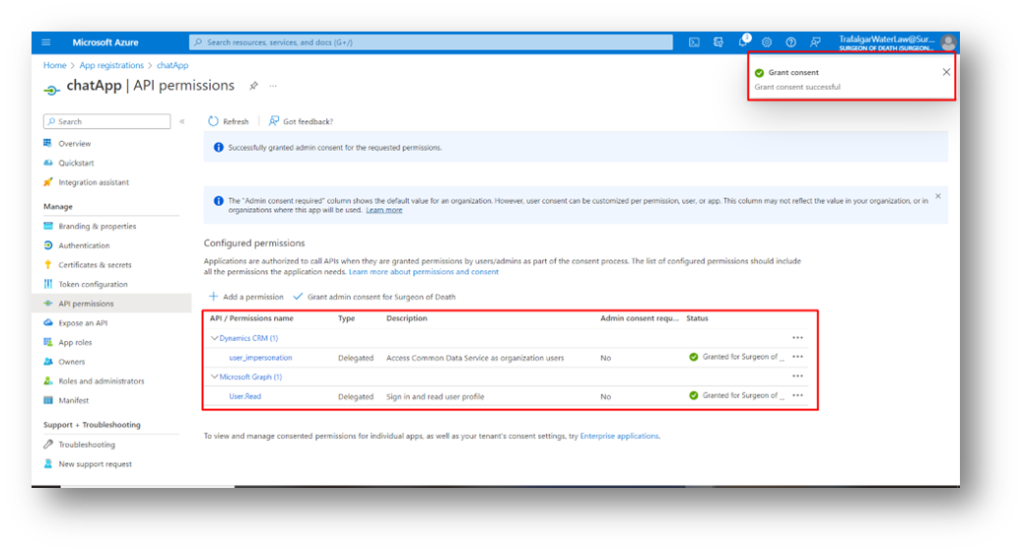
Click on the Grant admin consent.
Paste the Application ID of the newly created Azure app as shown below. Then click on Add your bot
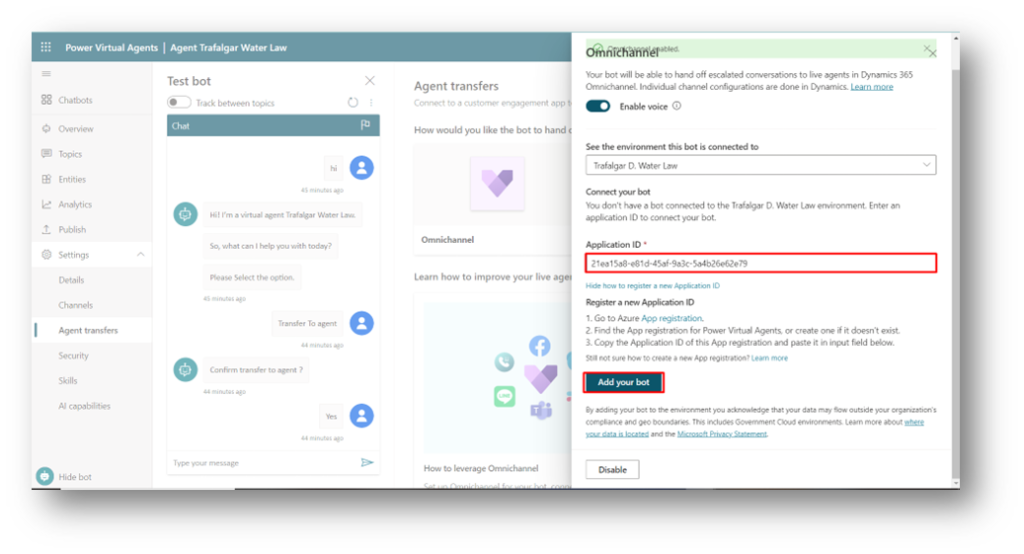
Now your chatbot is configured with omnichannel.
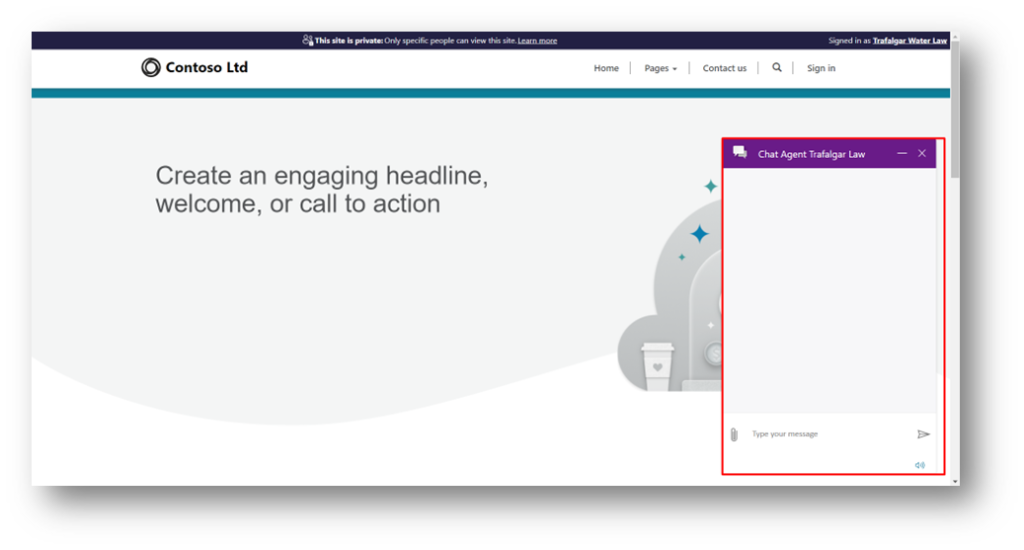
I have a portal where I want to add the Live-Chat feature. To do this, follow the steps below to add Live-Chat to your portal website.
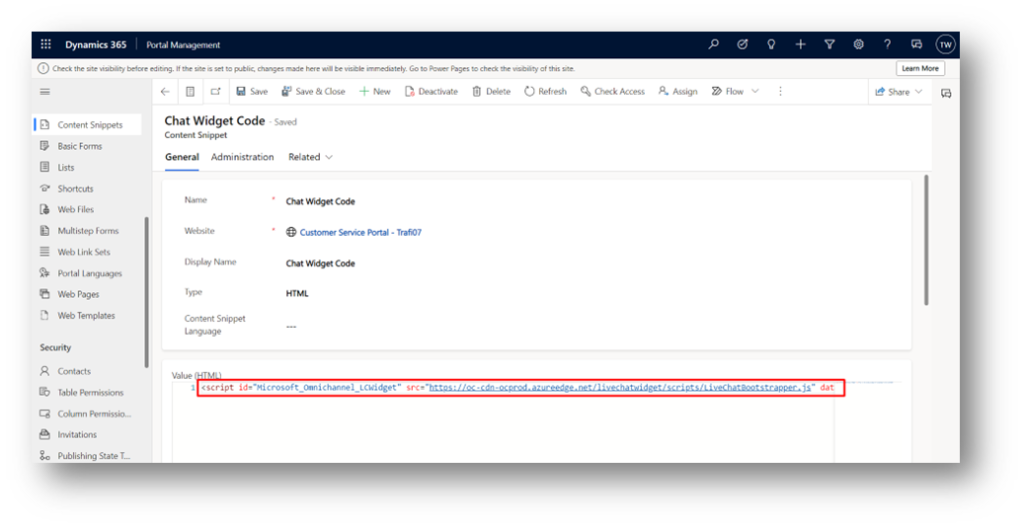
7.Add the Live Chat Bot in the portal:
Open the Portal management app > Content Snippets > Chat widget Code.

Paste the code snippet in the chat widget code content snippet that you received when creating the channel.
A bot is added to the portal.
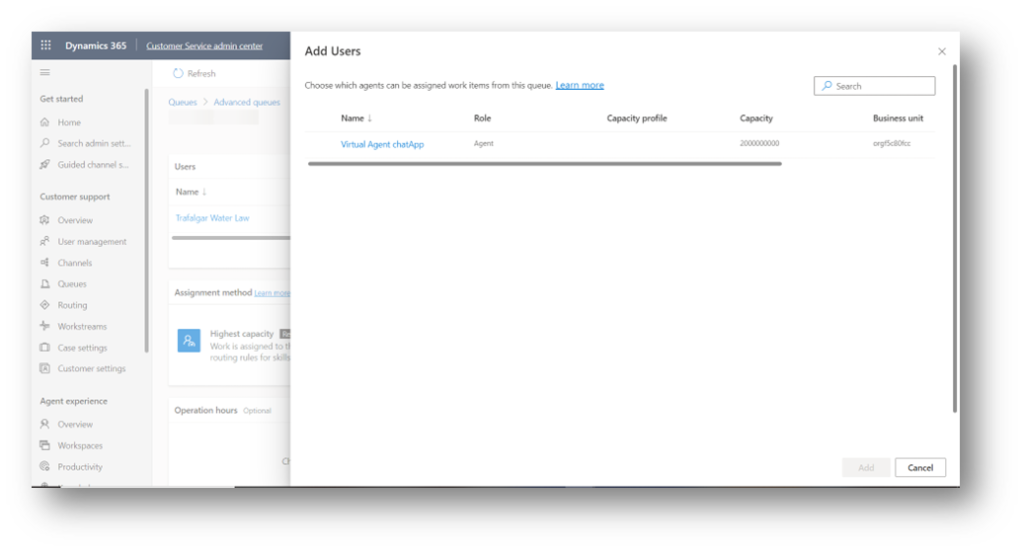
8. Add the User to a Workstream:
Workstream: A Workstream is designed to trigger specific groups of people who are responsible for attending to customer service-related tasks such as calls and chats.
To do this, we first need to add those users to our Workstream in order to allocate work to specific teams or individuals.
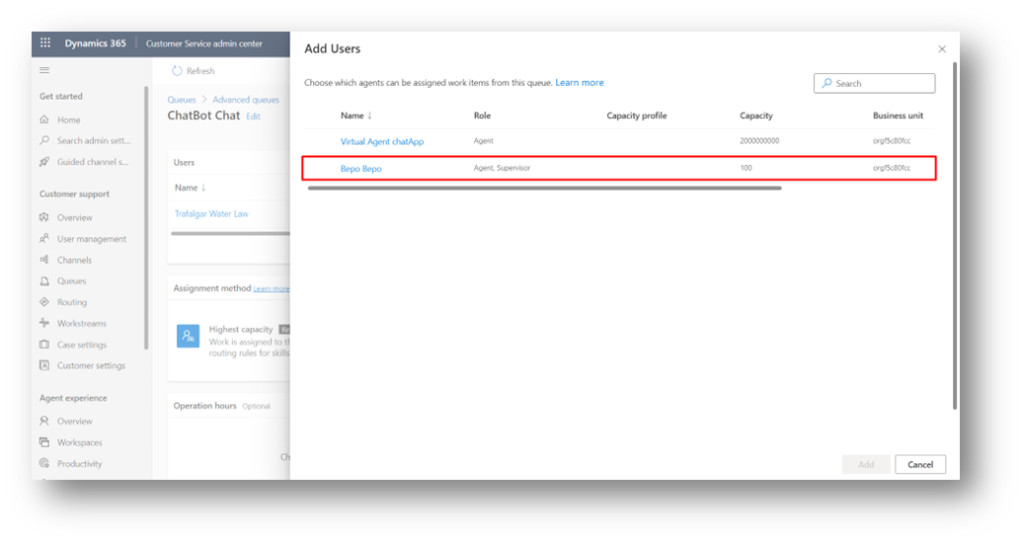
Open customer service admin center > Workstreams > Routing rules > click on Queue.
You will be directed to the Queues, where you can click on “Add users.”
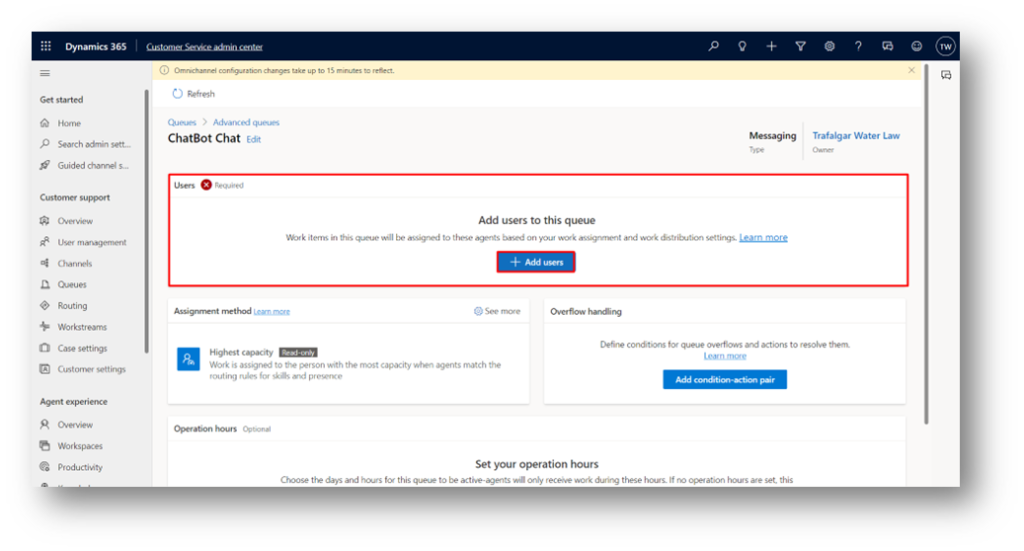
Select the user from list.
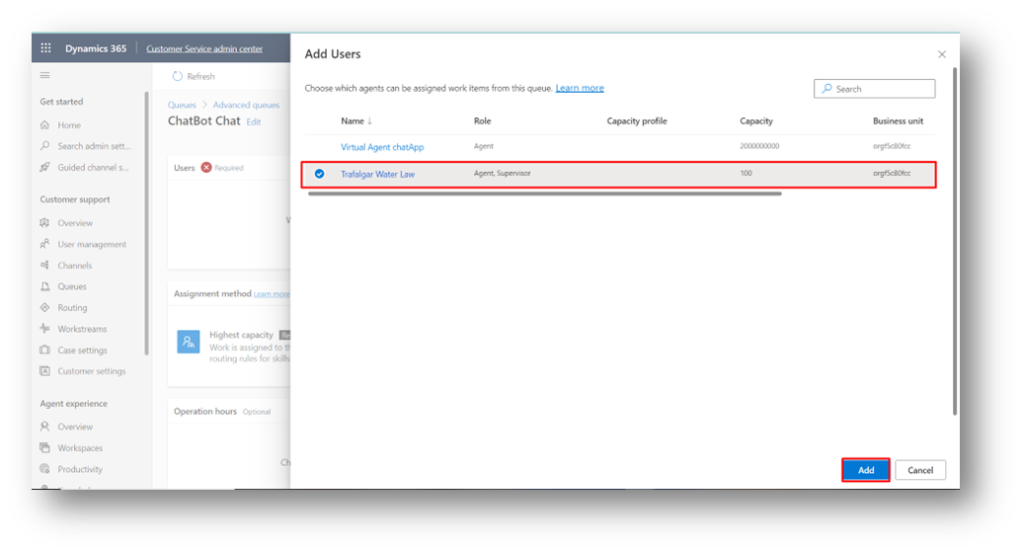
Note: if we want to add agents to the workstream, they should be added as an omnichannel user first.
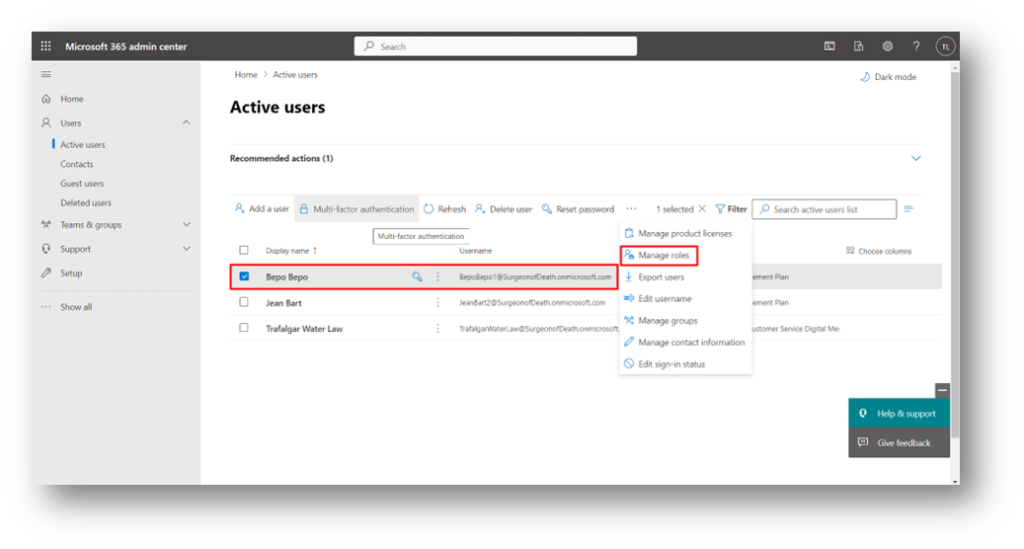
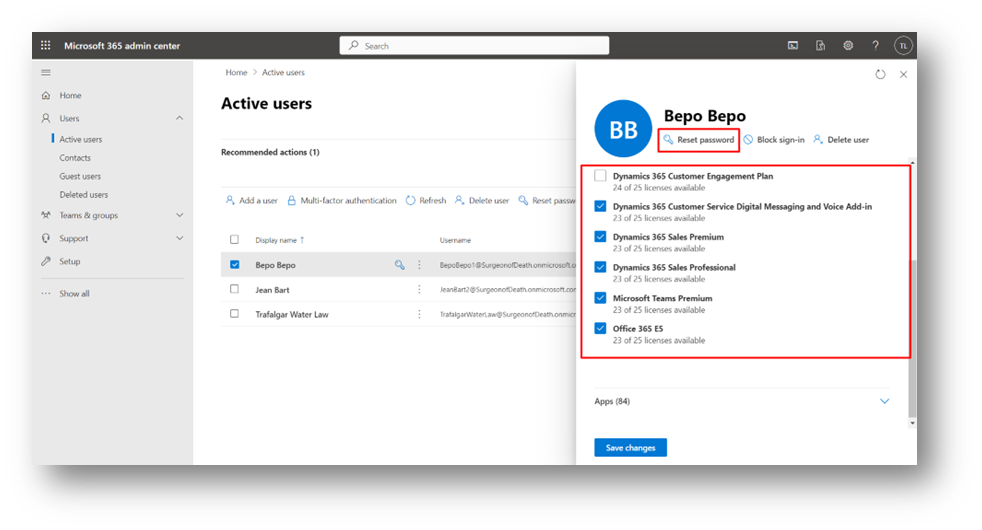
9. Add user as omnichannel user:
Open Microsoft 365 admin center > Active Users > user.
Open Microsoft admin center > Users
Select the user and click on mange roles.
Give the following access to user.
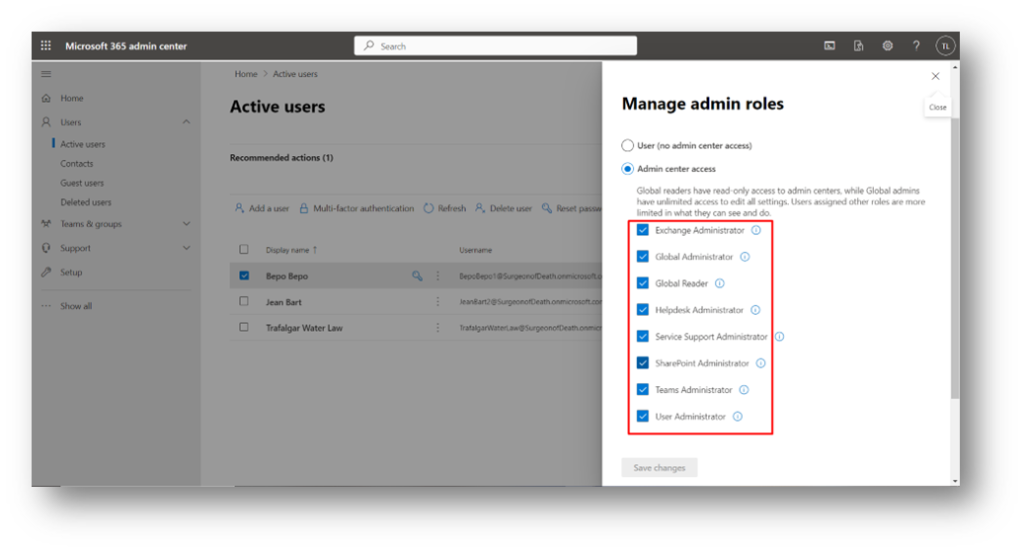
Assign license to new user , reset the password and save changes.
login to Power Apps with new user account.
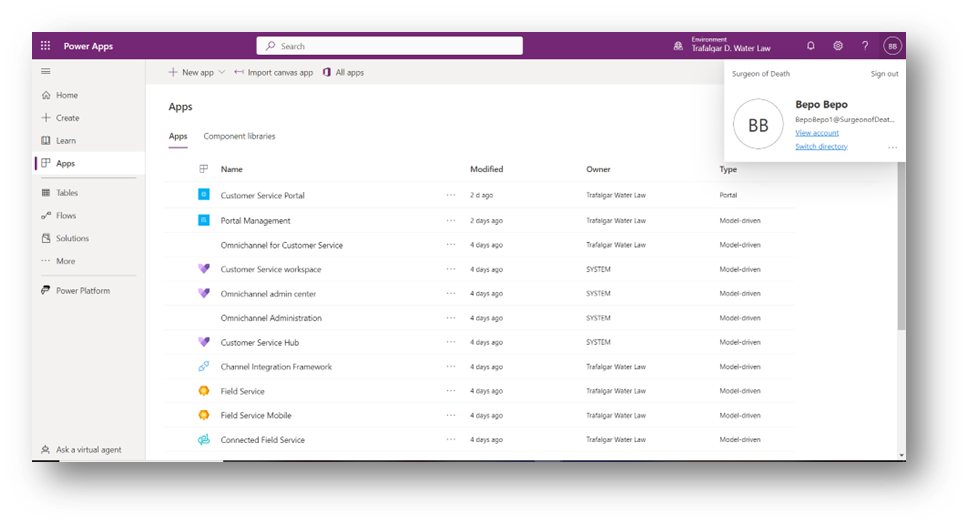
Now Open The previous (main) user.
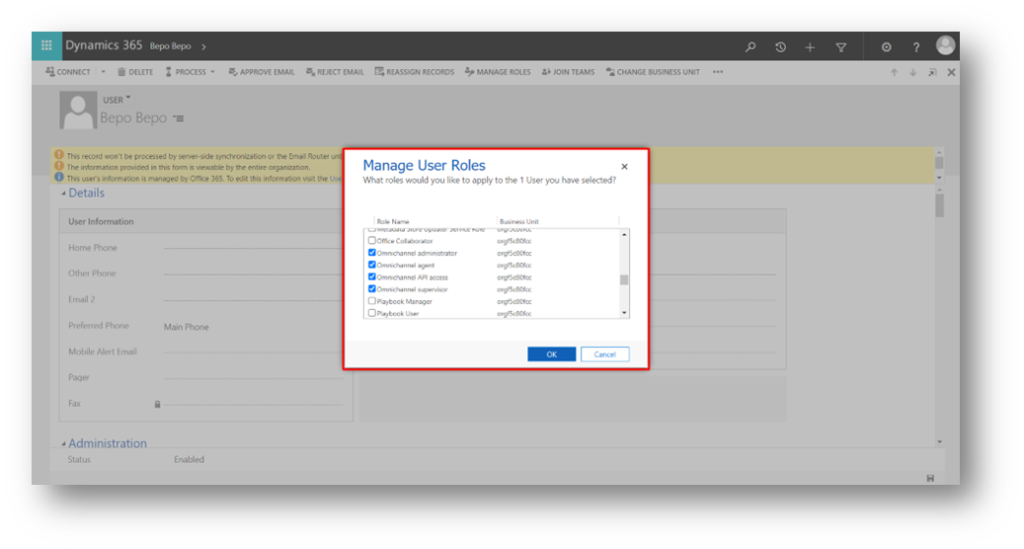
Go to the advance setting > security > User > In all project user find the New user. Open that User and remove the System admin role.
Give the following roles.
- Basic user
- Omnichannel administrator
- Omnichannel agent
- Omnichannel API access
- Omnichannel supervisor.
- System customizer
eg.
Before Configuration:
After Configuration:
Once the new user is added, they will be visible and you can add them to a queue.
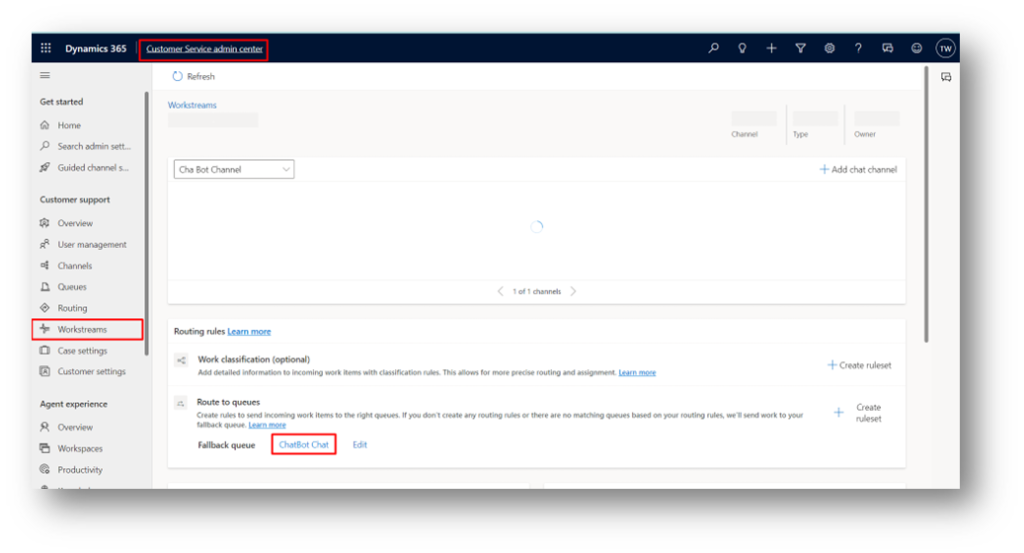
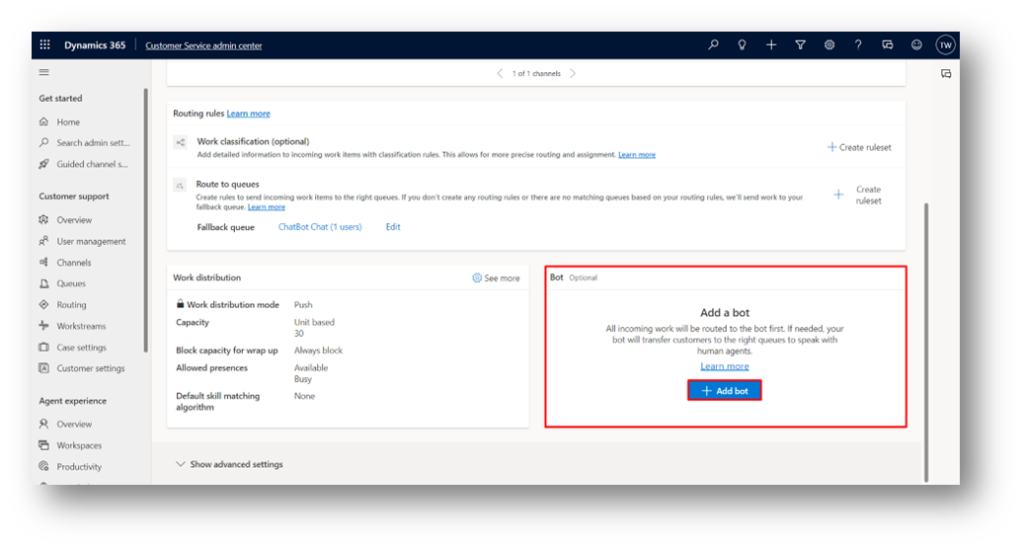
10. Add the Bot to the Channel:
We will add this bot to our Live-chat channel, so that it will work for a specific channel.
Open Customer service admin center > Workstream >Bot.
Click On Add bot.
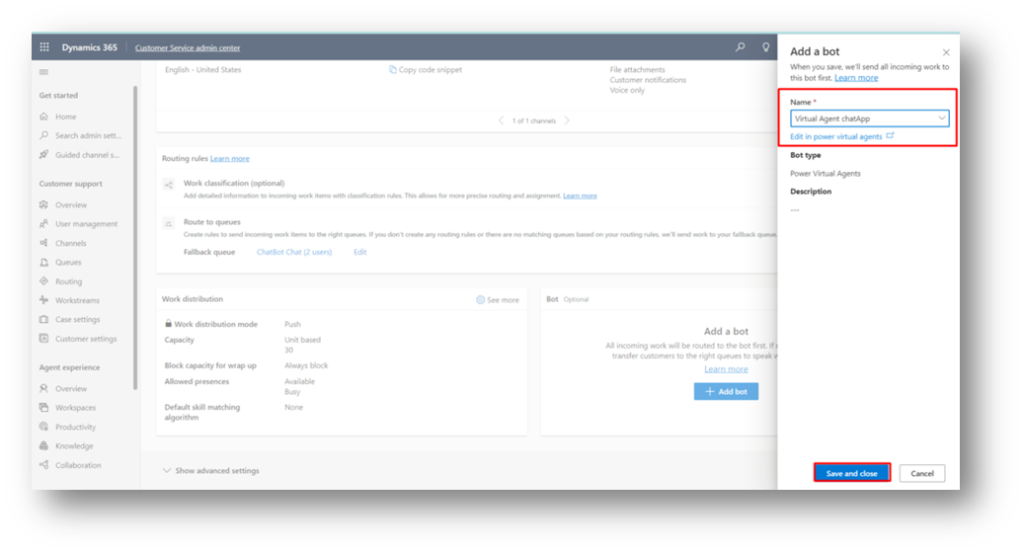
Select the bot and add a bot. Click on Save and close.
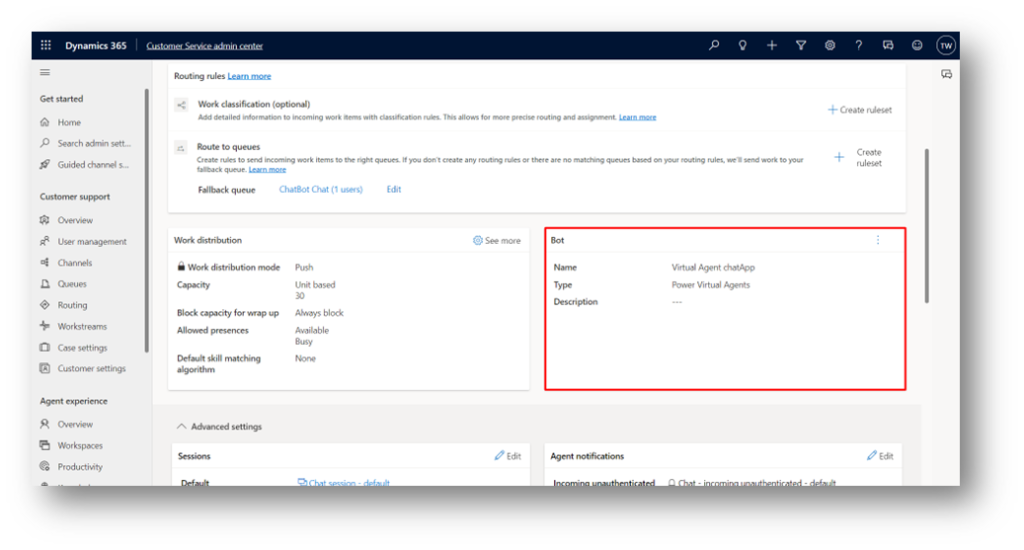
Bot added in workstream.
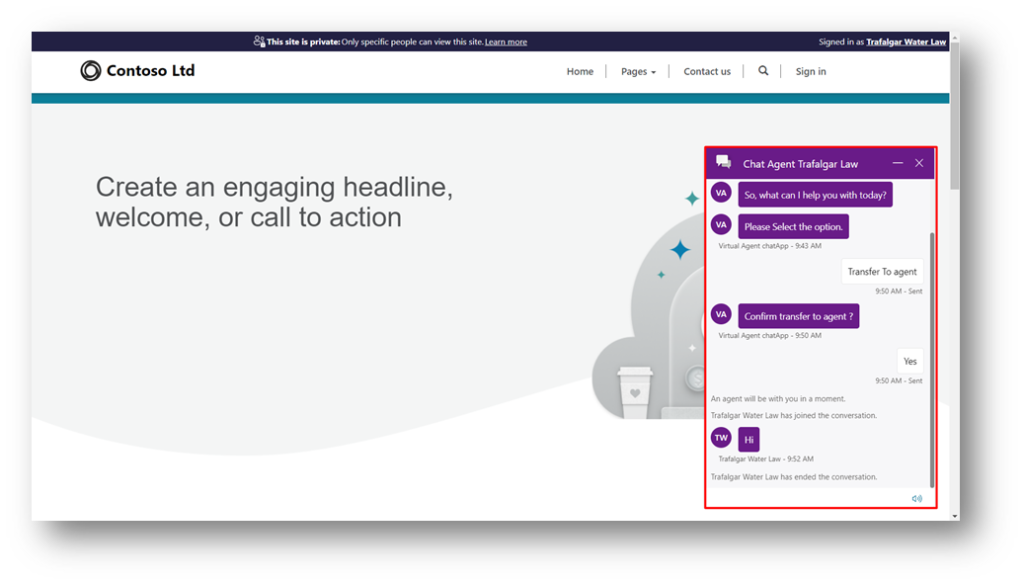
12. Demo to Transfer the Live-Chat to an agent directly:
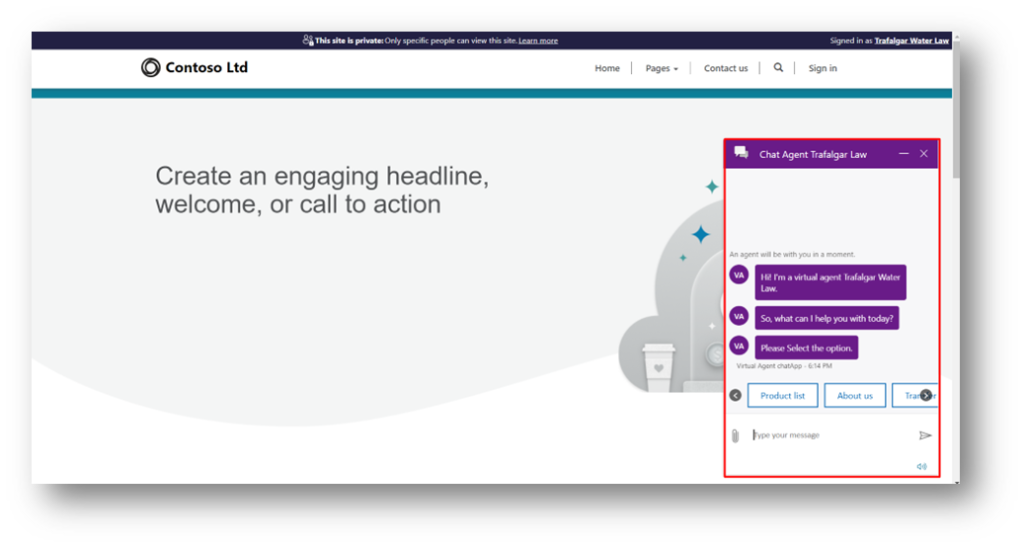
When a user initiates communication with a customer service, user sends a message to the bot, and the conversation begins with the chat bot,
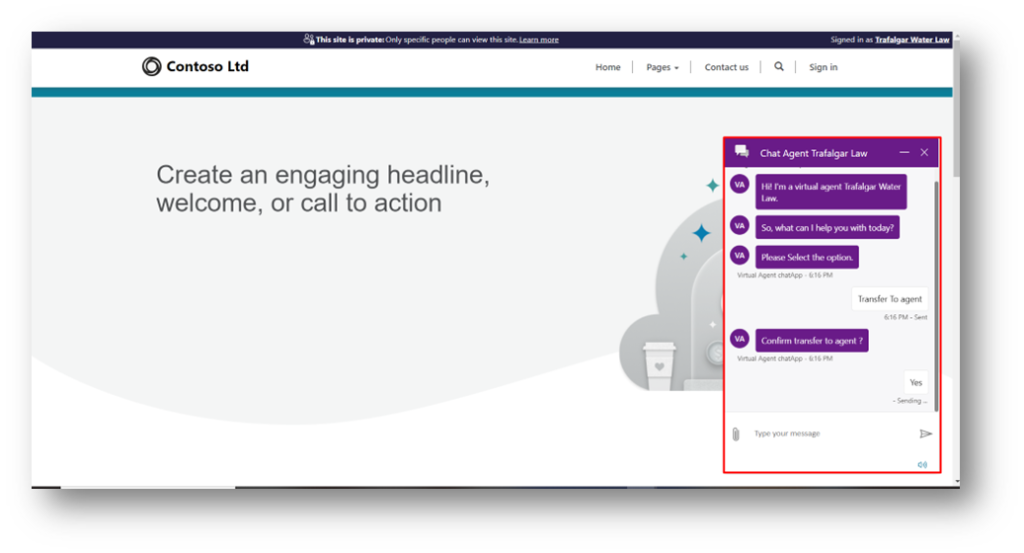
If the customer requests for agent-support, the bot will transfer the Live-chat to an agent which has been added to a workstream.
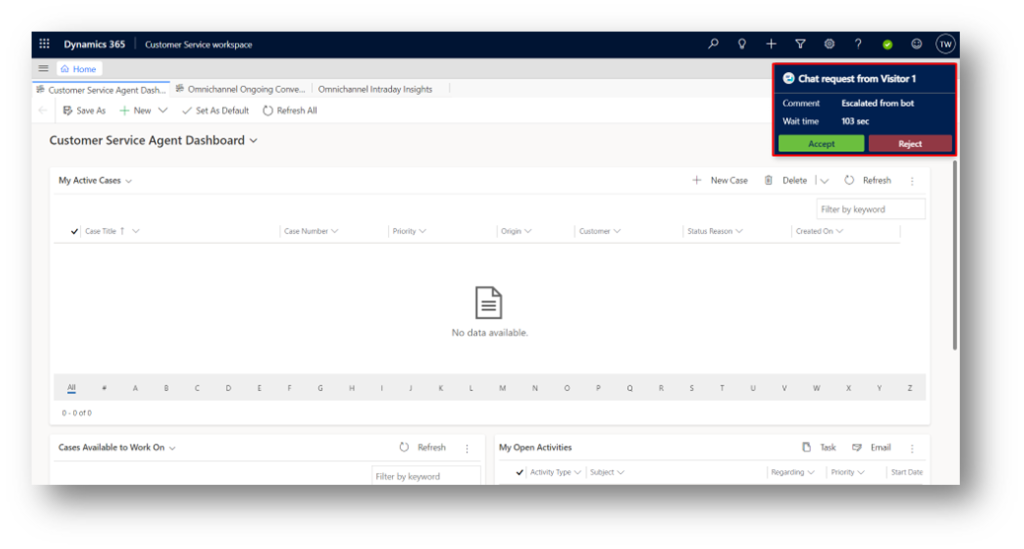
Any accessible agent in the list of agents receives the notification as displayed when the bot transfers the conversation to the agent.
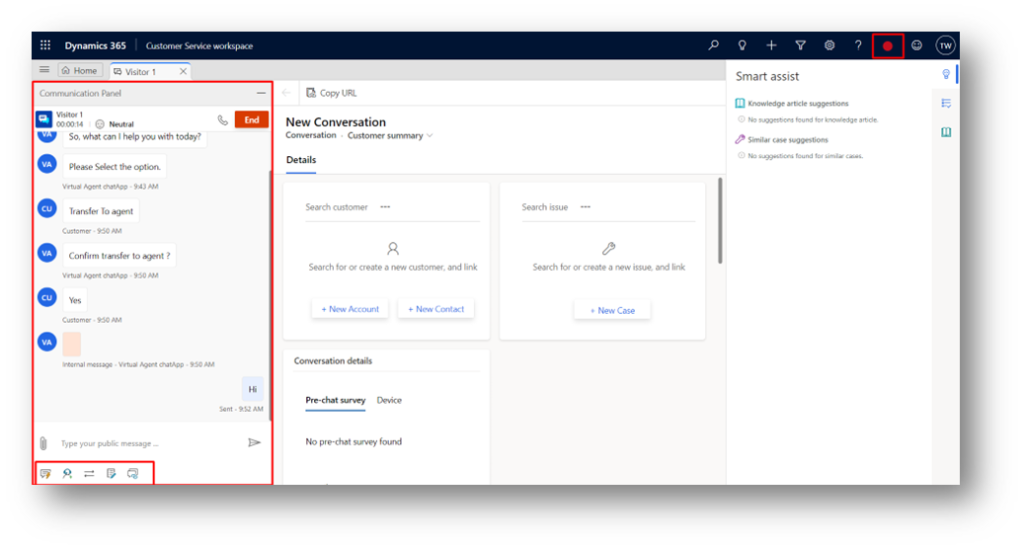
As soon as the agent starts a chat, the agent status will display as Busy, Agents have the ability to add a person’s contacts, accounts, or cases during a chat, they can transfer chats to other agents or groups as well.
Agents may communicate with customers while using the quick reply, adding notes, moving the conversation to another agent, and chatting with other agents.
I hope this blog is add-on to your knowledge keys, thank you.!
The post Configure live chat with Power Virtual Agent in D365 Customer Service. appeared first on Nebulaa IT Solutions.
*This post is locked for comments